
Android9.0 MTK 平板横屏方案修改(强制app横屏 + 开机logo/动画+关机充电横屏 + RecoveryUI 横屏)
文章较长建议先收藏再看
拆解步骤
1、app 强制横屏显示,无视 android:screenOrientation="portrait" 属性
2、屏幕触摸坐标修改为横屏
3、开机动画横屏
4、开机logo、关机充电动画横屏
5、RecoveryUI 横屏
上代码
1、app 强制横屏显示
修改 rotationForOrientationLw(), 默认返回 270
frameworks\base\services\core\java\com\android\server\policy\PhoneWindowManager.java
 @Override

    public int rotationForOrientationLw(int orientation, int lastRotation, boolean defaultDisplay) {

        ....

        synchronized (mLock) {

		...

		default:

                    // For USER, UNSPECIFIED, NOSENSOR, SENSOR and FULL_SENSOR,

                    // just return the preferred orientation we already calculated.

                    if (preferredRotation >= 0) {

                        return preferredRotation;

                    }

                    // return Surface.ROTATION_0;

                    return Surface.ROTATION_270;//cczheng add for land scap

            }

        }

  }
activity 默认强制属性为 SCREEN_ORIENTATION_LANDSCAPE
frameworks\base\services\core\java\com\android\server\wm\WindowManagerService.java
boolean updateOrientationFromAppTokensLocked(int displayId, boolean forceUpdate) {

        long ident = Binder.clearCallingIdentity();

        try {

            final DisplayContent dc = mRoot.getDisplayContent(displayId);

            // final int req = dc.getOrientation();

            int req = android.content.pm.ActivityInfo.SCREEN_ORIENTATION_LANDSCAPE;//cczheng add for land scap

            if (req != dc.getLastOrientation() || forceUpdate) {

                if (DEBUG_ORIENTATION) {

                    Slog.v(TAG, "updateOrientation: req= " + req + ", mLastOrientation= "

                        + dc.getLastOrientation(), new Throwable("updateOrientation"));

                }

                dc.setLastOrientation(req);

                //send a message to Policy indicating orientation change to take

                //action like disabling/enabling sensors etc.,

                // TODO(multi-display): Implement policy for secondary displays.

                if (dc.isDefaultDisplay) {

                    mPolicy.setCurrentOrientationLw(req);

                }

                return dc.updateRotationUnchecked(forceUpdate);

            }

            return false;

        } finally {

            Binder.restoreCallingIdentity(ident);

        }

    }
DisPlayContent 显示 mRotation 默认改为 3 (270)
frameworks\base\services\core\java\com\android\server\wm\DisplayContent.java
/**

     * Current rotation of the display.

     * Constants as per {@link android.view.Surface.Rotation}.

     *

     * @see #updateRotationUnchecked()

     */

    // private int mRotation = 0;

    private int mRotation = 3;//cczheng add for land scap
修改默认值 config_reverseDefaultRotation 为 true,翻转显示角度
frameworks\base\core\res\res\values\config.xml
<!-- If true, the direction rotation is applied to get to an application's requested

         orientation is reversed.  Normally, the model is that landscape is

         clockwise from portrait; thus on a portrait device an app requesting

         landscape will cause a clockwise rotation, and on a landscape device an

         app requesting portrait will cause a counter-clockwise rotation.  Setting

         true here reverses that logic. -->

	<!-- cczheng add for land scap -->

    <bool name="config_reverseDefaultRotation">true</bool>

	<!-- The number of degrees to rotate the display when the keyboard is open.

         A value of -1 means no change in orientation by default. -->

    <!-- cczheng add for land scap -->

    <integer name="config_lidOpenRotation">270</integer>
2、屏幕触摸坐标修改为横屏
对调 frame 的宽和高,设置方向为 270
frameworks\native\services\surfaceflinger\DisplayDevice.cpp
void DisplayDevice::setProjection(int orientation,

        const Rect& newViewport, const Rect& newFrame) {

    Rect viewport(newViewport);

    Rect frame(newFrame);

    const int w = mDisplayWidth;

    const int h = mDisplayHeight;

    Transform R;

    DisplayDevice::orientationToTransfrom(orientation, w, h, &R);

    if (!frame.isValid()) {

        // the destination frame can be invalid if it has never been set,

        // in that case we assume the whole display frame.

        //cczheng add for land scap

        // frame = Rect(w, h);

        if (w < h)

            frame = Rect(h, w);

        else

            frame = Rect(w, h);

    }

	....

}

// clang-format off

DisplayDevice::DisplayDevice(

        const sp<SurfaceFlinger>& flinger,

        DisplayType type,

        int32_t hwcId,

        bool isSecure,

        const wp<IBinder>& displayToken,

        const sp<ANativeWindow>& nativeWindow,

        const sp<DisplaySurface>& displaySurface,

        std::unique_ptr<RE::Surface> renderSurface,

        int displayWidth,

        int displayHeight,

        bool hasWideColorGamut,

        const HdrCapabilities& hdrCapabilities,

        const int32_t supportedPerFrameMetadata,

        const std::unordered_map<ColorMode, std::vector<RenderIntent>>& hwcColorModes,

        int initialPowerMode)

      .....

    mHdrCapabilities = HdrCapabilities(types, maxLuminance, maxAverageLuminance, minLuminance);

    // initialize the display orientation transform.

    // setProjection(DisplayState::eOrientationDefault, mViewport, mFrame);

    //cczheng add for land scap

    setProjection(DisplayState::eOrientation270, mViewport, mFrame);

#ifdef MTK_SF_DEBUG_SUPPORT

    mFps = FpsCounterLoader::getInstance().create();

#endif

}
frameworks\native\services\surfaceflinger\SurfaceFlinger.cpp
void SurfaceFlinger::onInitializeDisplays() {

    // reset screen orientation and use primary layer stack

    Vector<ComposerState> state;

    Vector<DisplayState> displays;

    DisplayState d;

    d.what = DisplayState::eDisplayProjectionChanged |

             DisplayState::eLayerStackChanged;

    d.token = mBuiltinDisplays[DisplayDevice::DISPLAY_PRIMARY];

    d.layerStack = 0;

    //d.orientation = DisplayState::eOrientationDefault;

    //cczheng add for land scap

    d.orientation = DisplayState::eOrientation270;

    d.frame.makeInvalid();

    d.viewport.makeInvalid();

    d.width = 0;

    d.height = 0;

    displays.add(d);

  	....

}
3、开机动画横屏
对调 createSurface() 的 w 和 h
frameworks\base\cmds\bootanimation\BootAnimation.cpp
status_t BootAnimation::readyToRun() {

    mAssets.addDefaultAssets();

    sp<IBinder> dtoken(SurfaceComposerClient::getBuiltInDisplay(

            ISurfaceComposer::eDisplayIdMain));

    DisplayInfo dinfo;

    status_t status = SurfaceComposerClient::getDisplayInfo(dtoken, &dinfo);

    if (status)

        return -1;

    // create the native surface

    /*sp<SurfaceControl> control = session()->createSurface(String8("BootAnimation"),

            dinfo.w, dinfo.h, PIXEL_FORMAT_RGB_565);*/

    //cczheng add for land scap  [S]

    sp<SurfaceControl> control;

    if(dinfo.w < dinfo.h)

        control = session()->createSurface(String8("BootAnimation"),

            dinfo.h, dinfo.w, PIXEL_FORMAT_RGB_565);

    else

        control = session()->createSurface(String8("BootAnimation"),

            dinfo.w, dinfo.h, PIXEL_FORMAT_RGB_565);

    //cczheng add for land scap  [E]

    SurfaceComposerClient::Transaction t;

    t.setLayer(control, 0x40000000)

        .apply();

	.....

}
开机动画制作替换后面补充。。。
4、开机logo、关机充电动画横屏
开机logo定义屏幕分辨率以对应资源文件夹的位置为
vendor\mediatek\proprietary\bootable\bootloader\lk\project\xxxx.mk 没有则看下面的
device\mediateksample\xxxx\ProjectConfig.mk
mk 中的 BOOT_LOGO = wxga
对应的资源文件位置在 vendor/mediatek/proprietary/bootable/bootloader/lk/dev/logo/wxga
可以看到 wxga 中都是竖屏的图片,而 wxganl 中已经是横屏的图片
则我们将 BOOT_LOGO 修改为 wxganl 即可
接下来还需要继续修改显示的角度,依旧改成 270,不然会出现花屏的现象
开机第一张图片 uboot 对应显示
vendor\mediatek\proprietary\bootable\bootloader\lk\platform\mt6765\mt_logo.c
void init_fb_screen()

{

	.....

	// in JB2.MP need to allign width and height to 32 ,but jb5.mp needn't

	phical_screen.needAllign = 1;

	phical_screen.allignWidth = ALIGN_TO(CFG_DISPLAY_WIDTH, MTK_FB_ALIGNMENT);

	/* In GB, no need to adjust 180 showing logo ,for fb driver dealing the change */

	/* but in JB, need adjust it for screen 180 roration           */

	phical_screen.need180Adjust = 0;   // need sync with chip driver

	dprintf(INFO, "[lk logo: %s %d]MTK_LCM_PHYSICAL_ROTATION = %s\n",__FUNCTION__,__LINE__, MTK_LCM_PHYSICAL_ROTATION);

	if (0 == strncmp(MTK_LCM_PHYSICAL_ROTATION, "270", 3)) {

		phical_screen.rotation = 270;

	} else if (0 == strncmp(MTK_LCM_PHYSICAL_ROTATION, "90", 2)) {

		phical_screen.rotation = 90;

	} else if (0 == strncmp(MTK_LCM_PHYSICAL_ROTATION, "180", 3) && (phical_screen.need180Adjust == 1)) {

		phical_screen.rotation = 180;

	} else {

		phical_screen.rotation = 270;//cczheng add for land scap

	}

	....
开机第二张图片 kernel 对应显示
vendor\mediatek\proprietary\external\libshowlogo\charging_animation.cpp
int anim_fb_init(void)

{

   	 .....

    phical_screen.needAllign = 1;

    phical_screen.need180Adjust = 1;

    phical_screen.fb_size = fb_size;

    if (MTK_LOG_ENABLE == 1) {

        SLOGD("[libshowlogo: %s %d]MTK_LCM_PHYSICAL_ROTATION = %s\n",__FUNCTION__,__LINE__, MTK_LCM_PHYSICAL_ROTATION);

    }

    if(0 == strncmp(MTK_LCM_PHYSICAL_ROTATION, "270", 3))

    {

        phical_screen.rotation = 270;

    } else if(0 == strncmp(MTK_LCM_PHYSICAL_ROTATION, "90", 2)){

        phical_screen.rotation = 90;

    } else if(0 == strncmp(MTK_LCM_PHYSICAL_ROTATION, "180", 3) && (phical_screen.need180Adjust == 1)){

        phical_screen.rotation = 180;

    } else {

        phical_screen.rotation = 270;//cczheng add for land scap

    }

    if (MTK_LOG_ENABLE == 1) {

        SLOGD("[libshowlogo]phical_screen: width= %d,height= %d,bits_per_pixel =%d,needAllign = %d,allignWidth=%d rotation =%d ,need180Adjust = %d\n",

                phical_screen.width, phical_screen.height,

                phical_screen.bits_per_pixel, phical_screen.needAllign,

                phical_screen.allignWidth, phical_screen.rotation, phical_screen.need180Adjust);

        SLOGD("[libshowlogo: %s %d]show old animtion= 1, running show_animationm_ver %d\n",__FUNCTION__,__LINE__, show_animationm_ver);

        SLOGD("[libshowlogo: %s %d]draw_anim_mode = 1, running mode %d\n",__FUNCTION__,__LINE__, draw_anim_mode);

    }

    return 0;

}
如果出现充电动画图片错位的现象,多数都是因为图形绘制点和屏幕尺寸不匹配导致的。可通过调整 cust_display.h 中位置参数
Android M 后:/vendor/mediatek/proprietary/external/libshowlogo/cust_display.h
Android M 前: /vendor/mediatek/proprietary/bootable/bootloader/lk/target/${PROJECT}/include/target/cust_display.h
(1 ,使用old version动画方案的调整如下设置,
define BAR_LEFT (215)
define BAR_TOP (156)
define BAR_RIGHT (265)
define BAR_BOTTOM (278)
可以用windows的画图软件打开第1点里提到的图片,根据电池边框的像素来调整。
这里坐标的参考原点是左上角,背景图片的左上角是(0,0),这四个值都是相对于左上角的坐标来确定的,因此RIGHT > LEFT,BOTTOM > TOP
小技巧:1)打开画图软件,选择 查看->缩放->自定义,将图片放到到800%
2)选择 查看->缩放->显示网格
这样就可以看到一个一个的像素
(2,使用new version动画方案调整如下设置:
#define CAPACITY_LEFT (278)

#define CAPACITY_TOP (556)

#define CAPACITY_RIGHT (441)

#define CAPACITY_BOTTOM (817)
5、RecoveryUI 横屏
参考之前写的文章 MTK Recovery 模式横屏修改(适用于6.0 + 8.1+9.0)
6、系统导航栏位置调整,横屏后 navigationBarPosition 默认在左边
作为平板项目,需要将位置改为底部,直接修改 navigationBarPosition() 返回 NAV_BAR_BOTTOM
frameworks\base\services\core\java\com\android\server\policy\PhoneWindowManager.java
@NavigationBarPosition

    private int navigationBarPosition(int displayWidth, int displayHeight, int displayRotation) {

    	//cchzneg annotaion for land scape

        /*if (mNavigationBarCanMove && displayWidth > displayHeight) {

            if (displayRotation == Surface.ROTATION_270) {

                return NAV_BAR_LEFT;

            } else {

                return NAV_BAR_RIGHT;

            }

        }*/

        return NAV_BAR_BOTTOM;

    }
这样位置是变为底部了,但是三个按钮都重叠在一起了,需要修改 SystemUI 的布局显示
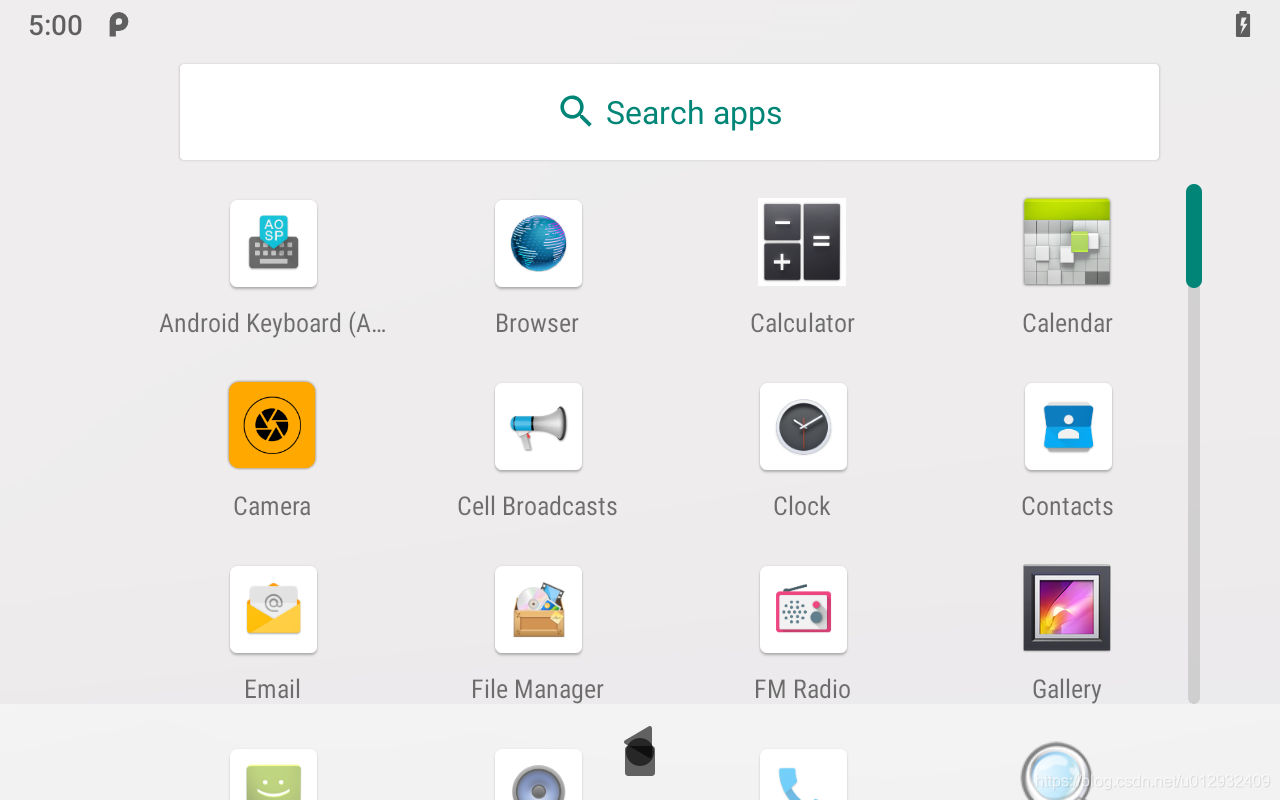
vendor\mediatek\proprietary\packages\apps\SystemUI\src\com\android\systemui\statusbar\phone\NavigationBarView.java
private void updateRotatedViews() {

        //cczheng change rot0 rot90 for landscape

        mRotatedViews[Surface.ROTATION_0] =

                mRotatedViews[Surface.ROTATION_180] = findViewById(R.id.rot90);

                // mRotatedViews[Surface.ROTATION_180] = findViewById(R.id.rot0);

        mRotatedViews[Surface.ROTATION_270] =

                mRotatedViews[Surface.ROTATION_90] = findViewById(R.id.rot0);

                // mRotatedViews[Surface.ROTATION_90] = findViewById(R.id.rot90);

        updateCurrentView();

    }
顺带再调整下 NavigationBarView 的默认高度和左边 Back 键区域太大的问题
vendor\mediatek\proprietary\packages\apps\SystemUI\src\com\android\systemui\statusbar\phone\NavigationBarInflaterView.java
private View createView(String buttonSpec, ViewGroup parent, LayoutInflater inflater) {

        View v = null;

        String button = extractButton(buttonSpec);

        if (LEFT.equals(button)) {

             //cchzheng change NAVSPACE to MENU_IME for small left back click area

            String s = Dependency.get(TunerService.class).getValue(NAV_BAR_LEFT, MENU_IME_ROTATE/*NAVSPACE*/);

            button = extractButton(s);

        } else if (RIGHT.equals(button)) {

            String s = Dependency.get(TunerService.class).getValue(NAV_BAR_RIGHT, MENU_IME_ROTATE);

            button = extractButton(s);

        }

		...
frameworks\base\core\res\res\values\dimens.xml
 <!-- Height of the bottom navigation / system bar. -->

    <!--cczheng change 48dp to 30dp-->

    <dimen name="navigation_bar_height">30dp</dimen>
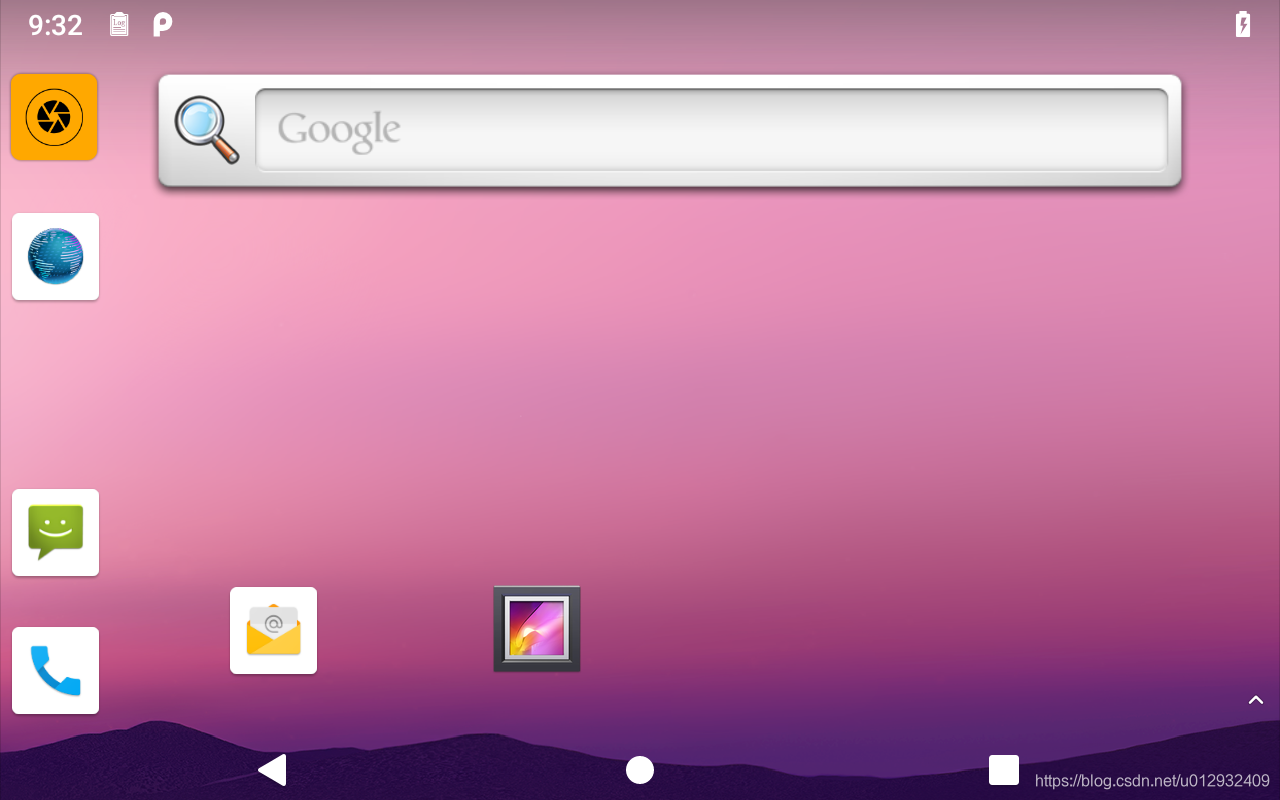
ok,这样就大功告成了,完美的横屏适配
Android9.0 MTK 平板横屏方案修改(强制app横屏 + 开机logo/动画+关机充电横屏 + RecoveryUI 横屏)的更多相关文章
- Android开机logo修改方法 【转】
本文转载自:http://blog.csdn.net/qq258711519/article/details/7766303 一体机平台开机logo修改方法 1:修改Kernel中的Logo: 若是要 ...
- apache2.2.25+tomcat7.0.47集群方案
因为公司项目在线人数的增加,随着现在硬件成本越来越低,大多数的生产环境内存大多都已经达到 16G,尤其最新的阿里云,客户的机器都是配置超高的java主机,但是Java的运行环境,内存使用有限 ,这样就 ...
- 转Centos7.0进入单用户模式修改root密码
Centos7.0进入单用户模式修改root密码 启动Centos7 ,按空格让其停留在如下界面. 按e进行编辑 在UTF-8后面输入init=/bin/sh 根据提示按ctrl+x 得如下图 输 ...
- Hadoop2.0 Namenode HA实现方案
Hadoop2.0 Namenode HA实现方案介绍及汇总 基于社区最新release的Hadoop2.2.0版本,调研了hadoop HA方面的内容.hadoop2.0主要的新特性(Hadoop2 ...
- SpUtil多样加密存储,兼容android9.0
代码地址如下:http://www.demodashi.com/demo/15058.html 前言 在android系统不断升级的过程中,Sharepreferences存储出现多中问题,其中有些是 ...
- android9.0适配HTTPS:not permitted by network security policy'
app功能接口正常,其他手机运行OK,但是在Android9.0的手机上报错 CLEARTEXT communication to 192.168.1.xx not permitted by netw ...
- Android9.0新特性曝光,你准备好了吗
Android9.0最早出现在2018年1月25日的谷歌官网上,初步代号已经确定为“Pistachio Ice Cream”(开心果冰淇淋),不过按照Google的惯例,如此长的三个单词代号,通常都只 ...
- 使用appium在android9.0真机上测试程序时报错command failed shell “ps ‘uiautomator’”的解决办法
appium目前最新的windows版本是1.4.16,在android9.0真机上测试程序时会报错:command failed shell “ps ‘uiautomator’”. 网上大多数人的解 ...
- mtk预装apk 方案公司内置预装apk
mtk预装apk 方案公司内置预装apk 韩梦飞沙 韩亚飞 313134555@qq.com yue31313 han_meng_fei_sha == MTK 预知第三方的APK 流程_yua ...
随机推荐
- Java 字符串常量存放在堆内存还是JAVA方法区?
JDK1.7 及之后版本的 JVM 已经将运行时常量池从方法区中移了出来,在 Java 堆(Heap)中开辟了一块区域存放运行时常量池. JDK1.8开始,取消了Java方法区,取而代之的是位于直接内 ...
- zookeeper 单机. 集群环境搭建
zookeeper分布式系统中面临的很多问题, 如分布式锁,统一的命名服务,配置中心,集群的管理Leader的选举等 环境准备 分布式系统中各个节点之间通信,Zookeeper保证了这个过程中 数据的 ...
- 4.1、顺序栈的实现(java实现)
1.实现源码 public class SeqStack { private final int MaxSize = 8; private int top; //栈顶 private Object s ...
- HBase的表结构
HBase以表的形式存储数据.表有行和列组成.列划分为若干个列族/列簇(column family). 如上图所示,key1,key2,key3是三条记录的唯一的row key值,column-fa ...
- crypto 的使用方法和说明
crypto 模块提供了加密功能,包含对 OpenSSL 的哈希.HMAC.加密.解密.签名.以及验证功能的一整套封装.我们这里讲crypto AES算法加密 一.使用步骤 1.引入Crypto 1. ...
- Centos7上配置nginx的负载均衡
前言 在配置nginx负载均衡前.我们需要明白几个名词的概念 注: 如果不小心忘了tomcat和nginx的启动,关闭命令,可参考写在文章最后的命令 一 重要的概念理解 1 什么是nginx呢? Ng ...
- Java后端面试经验总结分享(一)
今天下午两点的时候,我去面了一家招Java开发的公司,本人工作经验2年多一丢丢. 跟大部分公司类似,先做一份笔试题,题目都比较简单,基本都写完了.我把题目以及答案列在下面一下,给自己做一下总结的,也分 ...
- STL容器(Stack, Queue, List, Vector, Deque, Priority_Queue, Map, Pair, Set, Multiset, Multimap)
一.Stack(栈) 这个没啥好说的,就是后进先出的一个容器. 基本操作有: stack<int>q; q.push(); //入栈 q.pop(); //出栈 q.top(); //返回 ...
- Uva 232 一个换行WA 了四次
由于UVA OJ上没有Wrong anwser,搞的多花了好长时间去测试程序,之前一直以为改OJ有WA,后来网上一搜才知道没有WA,哎哎浪费了好长时间.此博客用来记录自己的粗心大意. 链接地址:htt ...
- 25 个 Linux 下最炫酷又强大的命令行神器,你用过其中哪几个呢?
本文首发于:微信公众号「运维之美」,公众号 ID:Hi-Linux. 「运维之美」是一个有情怀.有态度,专注于 Linux 运维相关技术文章分享的公众号.公众号致力于为广大运维工作者分享各类技术文章和 ...