spring学习笔记之---bean管理的注解方式
bean管理的注解方式
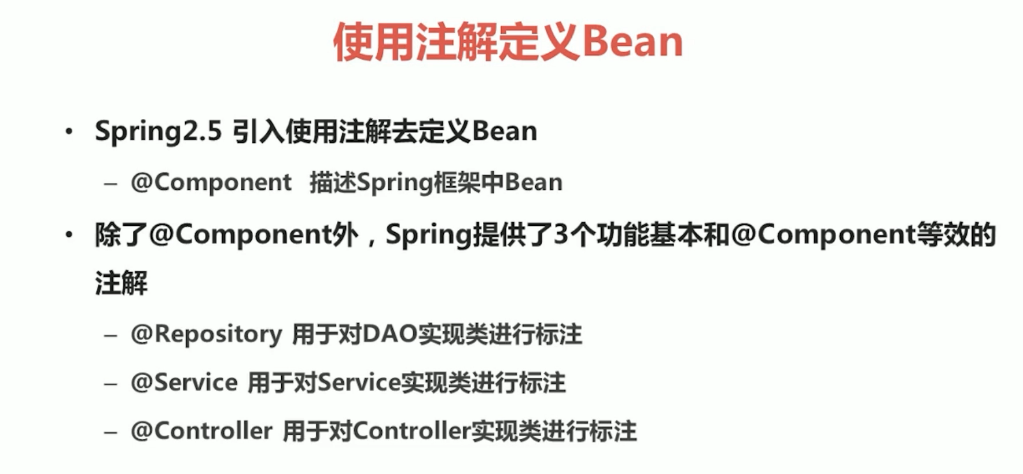
(一)使用注解定义bean
(1)常用注解
(2)实例
1.在pom.xml中进行配置
<dependencies>

  <dependency>

    <groupId>org.springframework</groupId>

    <artifactId>spring-jdbc</artifactId>

    <version>5.1.5.RELEASE</version>

  </dependency>

  <dependency>

    <groupId>org.springframework</groupId>

    <artifactId>spring-context</artifactId>

    <version>5.1.5.RELEASE</version>

  </dependency>

  <dependency>

    <groupId>org.springframework</groupId>

    <artifactId>spring-aop</artifactId>

    <version>5.1.5.RELEASE</version>

  </dependency>

  <dependency>

    <groupId>org.springframework</groupId>

    <artifactId>spring-core</artifactId>

    <version>5.1.5.RELEASE</version>

  </dependency>

  <dependency>

    <groupId>org.springframework</groupId>

    <artifactId>spring-beans</artifactId>

    <version>5.1.5.RELEASE</version>

  </dependency>

  <dependency>

    <groupId>org.springframework</groupId>

    <artifactId>spring-tx</artifactId>

    <version>5.1.5.RELEASE</version>

  </dependency>

  <dependency>

    <groupId>junit</groupId>

    <artifactId>junit</artifactId>

    <version>4.11</version>

  </dependency>

</dependencies>
2.创建一个类,在类中写一个方法,在类上加一个注解@Component
package service;

import org.junit.Test;

import org.springframework.stereotype.Component;

import sun.misc.Contended;

@Component("UserService")

public class UserService {

    public String Hello(){

        return "hello";

    }

}
3.创建一个applicationContext.xml,在里面配置包扫描
<?xml version="1.0" encoding="UTF-8"?>

<beans xmlns="http://www.springframework.org/schema/beans"

       xmlns:xsi="http://www.w3.org/2001/XMLSchema-instance"

       xmlns:context="http://www.springframework.org/schema/context" xsi:schemaLocation="

        http://www.springframework.org/schema/beans http://www.springframework.org/schema/beans/spring-beans.xsd

        http://www.springframework.org/schema/context http://www.springframework.org/schema/context/spring-context.xsd">

    <!--开启注解扫描=======================-->

    <context:component-scan base-package="service"></context:component-scan>

        </beans>
4.创建一个log4j.properties
### direct log messages to stdout ###

log4j.appender.stdout=org.apache.log4j.ConsoleAppender

log4j.appender.stdout.Target=System.err

log4j.appender.stdout.layout=org.apache.log4j.PatternLayout

log4j.appender.stdout.layout.ConversionPattern=%d{ABSOLUTE} %5p %c{1}:%L - %m%n

### direct messages to file mylog.log ###

log4j.appender.file=org.apache.log4j.FileAppender

log4j.appender.file.File=c\:mylog.log

log4j.appender.file.layout=org.apache.log4j.PatternLayout

log4j.appender.file.layout.ConversionPattern=%d{ABSOLUTE} %5p %c{1}:%L - %m%n

### set log levels - for more verbose logging change 'info' to 'debug' ###

log4j.rootLogger=info, stdout
5.创建一个测试类
package test;

import org.junit.Test;

import org.springframework.context.ApplicationContext;

import org.springframework.context.support.ClassPathXmlApplicationContext;

import service.UserService;

public class UserTest {

    @Test

    public void hellotest(){

        ApplicationContext applicationContext=new ClassPathXmlApplicationContext("applicationContext.xml");

        UserService userService=(UserService)applicationContext.getBean("UserService");

        String s=userService.Hello();

        System.out.println(s);

    }

}
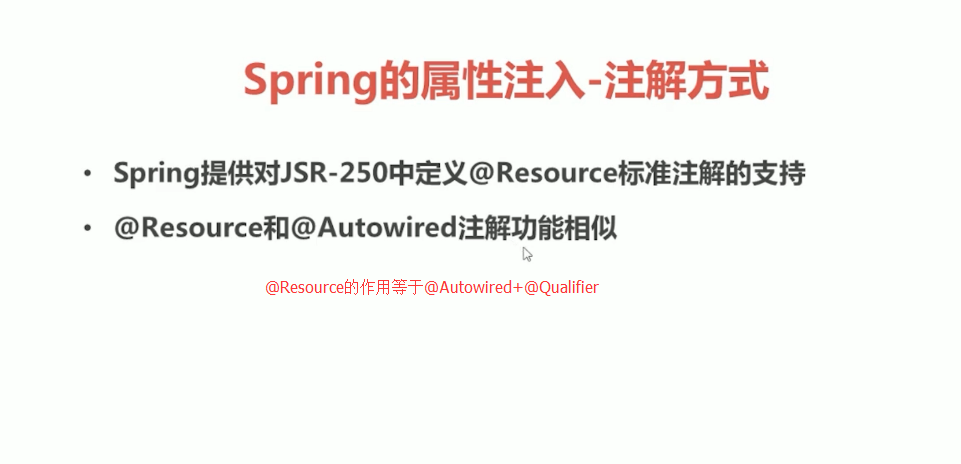
(二)属性注入的注解
(1)常用注解
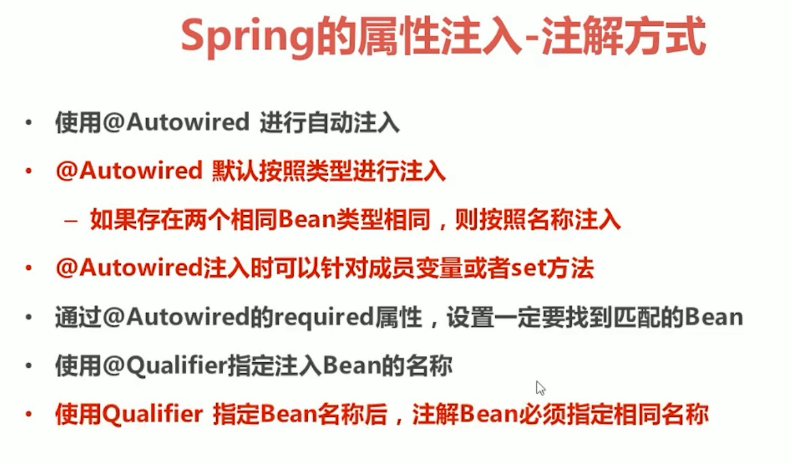
1.属性注入
package service;

import org.junit.Test;

import org.springframework.beans.factory.annotation.Value;

import org.springframework.stereotype.Component;

import sun.misc.Contended;

@Component("UserService")

public class UserService {

    @Value("小欢")

    private String name;

    public String Hello(){

        return "hello"+name;

    }

}
2.类注入
(a)UserService.java
package service;

import dao.UserDao;

import org.junit.Test;

import org.springframework.beans.factory.annotation.Value;

import org.springframework.stereotype.Component;

import sun.misc.Contended;

import javax.annotation.Resource;

@Component("UserService")

public class UserService {

    @Value("小欢")

    private String name;

    @Resource(name="UserDao")

    private UserDao userDao;

    public String Hello(){

        System.out.println("service中的hello");

        return "hello"+name;

    }

}
(b)UserDao.java
package dao;

import org.springframework.stereotype.Repository;

@Repository("UserDao")

public class UserDao {

    public void Hello(){

        System.out.println("dao 中的hello");

    }

}
(c)applicationContext.xml
<?xml version="1.0" encoding="UTF-8"?>

<beans xmlns="http://www.springframework.org/schema/beans"

       xmlns:xsi="http://www.w3.org/2001/XMLSchema-instance"

       xmlns:context="http://www.springframework.org/schema/context" xsi:schemaLocation="

        http://www.springframework.org/schema/beans http://www.springframework.org/schema/beans/spring-beans.xsd

        http://www.springframework.org/schema/context http://www.springframework.org/schema/context/spring-context.xsd">

    <!--开启注解扫描=======================-->

    <context:component-scan base-package="service,dao"></context:component-scan>

        </beans>
(d)UserTest.java
package test;

import org.junit.Test;

import org.springframework.context.ApplicationContext;

import org.springframework.context.support.ClassPathXmlApplicationContext;

import service.UserService;

public class UserTest {

    @Test

    public void hellotest(){

        ApplicationContext applicationContext=new ClassPathXmlApplicationContext("applicationContext.xml");

        UserService userService=(UserService)applicationContext.getBean("UserService");

        String s=userService.Hello();

        System.out.println(s);

    }

}
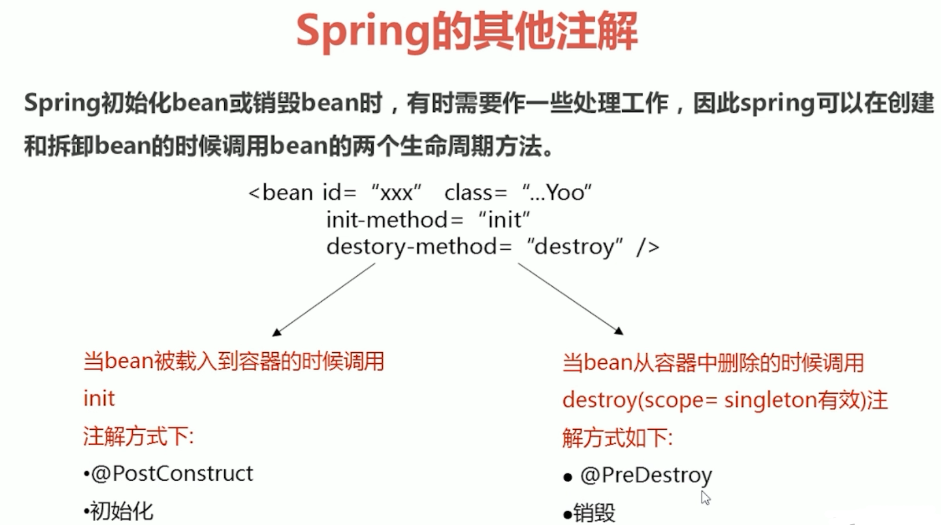
(三)其他注解
(四)xml和注解整合开发
1.UserService2.java
package service;

import dao.UserDao2;

import org.springframework.stereotype.Repository;

import javax.annotation.Resource;

public class UserService2 {

    @Resource(name="UserDao2")

    private UserDao2 userDao2;

    public void He(){

        userDao2.He();

        System.out.println("userservice2中的he");

    }

}
2.UserDao2.java
package dao;

public class UserDao2 {

    public void He(){

        System.out.println("userdao2中的he");

    }

}
3.applicationContext.xml
<?xml version="1.0" encoding="UTF-8"?>

<beans xmlns="http://www.springframework.org/schema/beans"

       xmlns:xsi="http://www.w3.org/2001/XMLSchema-instance"

       xmlns:context="http://www.springframework.org/schema/context" xsi:schemaLocation="

        http://www.springframework.org/schema/beans http://www.springframework.org/schema/beans/spring-beans.xsd

        http://www.springframework.org/schema/context http://www.springframework.org/schema/context/spring-context.xsd">

    <context:annotation-config/>

    <bean id="UserService2" class="service.UserService2"/>

    <bean id="UserDao2" class="dao.UserDao2"/>

        </beans>
4.UserTest.java
package test;

import org.junit.Test;

import org.springframework.context.ApplicationContext;

import org.springframework.context.support.ClassPathXmlApplicationContext;

import service.UserService;

import service.UserService2;

public class UserTest {

    @Test

    public void hetest(){

        ApplicationContext applicationContext=new ClassPathXmlApplicationContext("applicationContext.xml");

        UserService2 userService2=(UserService2)applicationContext.getBean("UserService2");

        userService2.He();

    }

}
spring学习笔记之---bean管理的注解方式的更多相关文章
- spring学习笔记之---bean管理
bean管理(xml) (一)spring的工厂类 FileSystemXmlApplicationContext 读取磁盘配置文件 (二)bean实例化的三种方式 (1)使用类构造器实例化(默认无参 ...
- (转)Spring的bean管理(注解方式)
http://blog.csdn.net/yerenyuan_pku/article/details/69663779 Spring的bean管理(注解方式) 注解:代码中的特殊标记,注解可以使用在类 ...
- Spring 的 Bean 管理(注解方式)
Spring 的 Bean 管理(注解方式) 1. 导入必要的 jar 包和 xml 文件 使用注解需要导入 spring-aop 的 jar 包. applicationContext.xml 文件 ...
- Spring学习笔记1——IOC: 尽量使用注解以及java代码(转)
在实战中学习Spring,本系列的最终目的是完成一个实现用户注册登录功能的项目. 预想的基本流程如下: 1.用户网站注册,填写用户名.密码.email.手机号信息,后台存入数据库后返回ok.(学习IO ...
- Spring学习笔记1——IOC: 尽量使用注解以及java代码
在实战中学习Spring,本系列的最终目的是完成一个实现用户注册登录功能的项目. 预想的基本流程如下: 1.用户网站注册,填写用户名.密码.email.手机号信息,后台存入数据库后返回ok.(学习IO ...
- Spring的bean管理(注解方式)
注解:代码中的特殊标记,注解可以使用在类.方法.属性上面,使用注解可实现一些基本的功能.注解的写法是@注解名称(属性=属性值). 使用注解创建对象 第一步,创建Web项目,引入Spring的开发包 第 ...
- Spring学习笔记(三)—— 使用注解配置spring
一.使用步骤 1.1 导包 1.2 为主配置文件引入新的命名空间(约束) 在applicationContext.xml中引入context约束 1.3 编写相关的类 public class Use ...
- (四)Spring 的 bean 管理(注解方式)
目录 前言 使用 aop 的配置文件写法 开启注解扫描 利用注解创建对象 注解方式注入属性 配置文件和注解混合使用 前言 注解可以写在 类.方法.属性 上 : 使用 注解,需要导入 aop 包: 使用 ...
- Spring学习笔记(3)——Bean的注入方式
依赖注入 依赖注入支持属性注入.构造函数注入.工厂注入. 属性注入: 属性注入即通过setXxx()方法注入Bean的属性值或依赖对象 属性注入要求Bean提供一个默认的构造函数(无参构造函数),并为 ...
随机推荐
- (2)Linux文件和目录操作命令
简单就是高效 pwd cd -/~/.. tree–a/d/f/i/L mkdir–p/v/m touch ls –l/a//i/h/F cp –r/p/d/a mv rm –f/r/i rmdir ...
- Python中的函数及函数参数的使用
函数:一个工具,随调随用 降级代码冗余 增加代码的复用性,提高开发效率,为了不成为cv战士 提高程序扩展性 函数有两个阶段:定义阶段,调用阶段. 定义时:只检查函数体内代码语法,不执行函数体内代码. ...
- SQLServer性能优化之---数据库级日记监控
上节回顾:https://www.cnblogs.com/dotnetcrazy/p/11029323.html 4.6.6.SQLServer监控 脚本示意:https://github.com/l ...
- spark入门(三)键值对操作
1 简述 Spark为包含键值对类型的RDD提供了一些专有的操作.这些RDD被称为PairRDD. 2 创建PairRDD 2.1 在sprk中,很多存储键值对的数据在读取时直接返回由其键值对数据组成 ...
- 02(b)多元无约束优化问题-最速下降法
此部分内容接02(a)多元无约束优化问题的内容! 第一类:最速下降法(Steepest descent method) \[f({{\mathbf{x}}_{k}}+\mathbf{\delta }) ...
- 大话Spark(9)-源码之TaskScheduler
上篇文章讲到DAGScheduler会把job划分为多个Stage,每个Stage中都会创建一批Task,然后把Task封装为TaskSet提交到TaskScheduler. 这里我们来一起看下Tas ...
- 5. xadmin 后台搭建
要维护他人产权,就不喽了,直接飞机 Django1.11.11使用xadmin的方法(一: 快速安装篇):https://www.jianshu.com/p/bcb74595213e Django1. ...
- signed char类型取值范围计算
在C语言程序中,给定一个类型,如何计算这个类型变量的取值范围呢?比如有一个字符型变量定义如下: signed char c: 这个字符变量c的取值范围是[-128,127],是计算出来的呢? 假设字符 ...
- 小代学Spring Boot之集成MyBatis
想要获取更多文章可以访问我的博客 - 代码无止境. 上一篇小代同学在Spring Boot项目中配置了数据源,但是通常来讲我们访问数据库都会通过一个ORM框架,很少会直接使用JDBC来执行数据库操作的 ...
- 【题解】导游-C++
Description 宁波市的中小学生们在镇海中学参加程序设计比赛之余,热情的主办方邀请同学们参观镇海中学内的各处景点,已 知镇海中学内共有n处景点.现在有n位该校的学生志愿承担导游和讲解任务.每个 ...