1.Django安装与运行
Django基本配置
Python的WEB框架有Django、Tornado、Flask 等多种,Django相较与其他WEB框架其优势为:大而全,框架本身集成了ORM、模型绑定、模板引擎、缓存、Session等诸多功能
1.安装
# windows 直接用pip进行安装

pip install django

# 生成的django文件加入到系统环境变量
2.创建并启动
创建

django-admin startproject mysite

运行

python manage.py runserver 127.0.0.1:8001

浏览器访问:
http://127.0.0.1:8001/
3.mysite目录结构
mysite    #目录

 - mysite      # 对整个程序进行配置

  - init

  - settings  # 配置文件

  - urls       # URL对应关系

  - wsgi      # 遵循WSIG规范,uwsgi + nginx

 - manage.py     # 管理Django程序:
Django业务配置
1.创建app
python manage.py startapp cmdb -->Terminal里面运行
2.app目录结构
# 目录结构

- cmdb

    - migrations  #数据库操作记录(只是修改表结构的记录)

    - init      #表示python数据包(python3中有无均可)

    - admin      #Django为我们提供的后台管理

    - apps      #配置当前app

    - models     #创建数据库表结构,写指定的类,通过命令可以创建数据库结构

    - tests      #单元测试

    - views      #写业务逻辑代码,最重要的就是这个文件了
3.templates模板
(1)在templates目录下生成要给用户显示的登录页面
<!DOCTYPE html>

<html lang="en">

<head>

    <meta charset="UTF-8">

    <title>Title</title>

    <style>

        label{

            width: 80px;

            text-align: right;

            display: inline-block;

        }

    </style>

</head>

<body>

    <form action="/login" method="post">

        <p>

            <label for="username">用户名:</label>

            <input id="username" name="user" type="text" />

        </p>

        <p>

            <label for="password">密码:</label>

            <input id="password" name="pwd" type="password" />

            <input type="submit" value="提交" />

        </p>

    </form>

</body>

</html>
login.html
(2)修改urls文件增加login路径
from django.conf.urls import url

from django.contrib import admin

from cmdb import views        #导入views模块

urlpatterns = [

    url(r'^admin/', admin.site.urls),

    url(r'^login', views.login),       #添加login.html的url,后面要加逗号

]
(3)修改view文件,对数据进行处理
from django.shortcuts import HttpResponse

from django.shortcuts import render

def login(request):

    return render(request,'login.html')

    # 上面代码等同于这个

    # f = open('templates/login.html','r',encoding='utf-8')

    # data = f.read()

    # f.close()

    # return HttpResponse(data)
(4)配置静态文件static路径
静态文件static里面是存放css和js文件的,要想显示相应的样式,必须先修改settings文件配置
# settings.py文件里增加下面内容
STATIC_URL = '/static/'
STATICFILES_DIRS = (
    os.path.join(BASE_DIR, 'static'),
)
配置完路劲后就可以用css和js文件了
Django表单交互
1.获取表单提交类型做相应处理,用户名密码输正确跳转到页面,输入错误有提示信息
<!DOCTYPE html>

<html lang="en">

<head>

    <meta charset="UTF-8">

    <title>Title</title>

    <link rel="stylesheet" href="/static/commons.css" />

    <style>

        label{

            width: 80px;

            text-align: right;

            display: inline-block;

        }

    </style>

</head>

<body>

    <form action="/login/" method="post">

        <p>

            <label for="username">用户名:</label>

            <input id="username" name="user" type="text" />

        </p>

        <p>

            <label for="password">密码:</label>

            <input id="password" name="pwd" type="password" />

            <input type="submit" value="提交" />

            <span style="color: red;">{{ error_msg }}</span>

        </p>

    </form>

</body>

</html>
login.html
from django.shortcuts import HttpResponse

from django.shortcuts import render

from django.shortcuts import redirect

def login(request):

    # request  包含了用户提交的所有信息

    # print(request.method)

    error_msg = ''

    if request.method == 'POST':

        user = request.POST.get('user', None)

        pwd = request.POST.get('pwd', None)

        if user == 'root' and pwd == '':

            # 去跳转

            return redirect('http://www.baidu.com')

        else:

            error_msg = '用户名或密码错误'

    return render(request, 'login.html', {'error_msg': error_msg})
2.模拟数据库交互
访问login界面,用户输入用户名跳转到home页面
(1)登陆页面
<!DOCTYPE html>

<html lang="en">

<head>

    <meta charset="UTF-8">

    <title>Title</title>

    <link rel="stylesheet" href="/static/commons.css" />

    <style>

        label{

            width: 80px;

            text-align: right;

            display: inline-block;

        }

    </style>

</head>

<body>

    <form action="/login/" method="post">

        <p>

            <label for="username">用户名:</label>

            <input id="username" name="user" type="text" />

        </p>

        <p>

            <label for="password">密码:</label>

            <input id="password" name="pwd" type="password" />

            <input type="submit" value="提交" />

            <span style="color: red;">{{ error_msg }}</span>

        </p>

    </form>

</body>

</html>
login.html
(2)home页面
<!DOCTYPE html>

<html lang="en">

<head>

    <meta charset="UTF-8">

    <title>Title</title>

</head>

<body style="margin: 0">

    <div style="height: 48px;background-color: #dddddd"></div>

    <div>

        <form action="/home/" method="post">

            <input type="text" name="username" placeholder="用户名" />

            <input type="text" name="email"  placeholder="邮箱"/>

            <input type="text" name="gender"  placeholder="性别"/>

            <input type="submit" value="添加" />

        </form>

    </div>

    <div>

        <table>

            {% for row in user_list %}

                <tr>

                    <td>{{ row.username }}</td>

                    <td>{{ row.gender }}</td>

                    <td>{{ row.email }}</td>

                </tr>

            {% endfor %}

        </table>

    </div>

</body>

</html>
home.html
(3)修改view文件,对输入的内容进行处理
from django.shortcuts import HttpResponse

from django.shortcuts import render

from django.shortcuts import redirect

def login(request):

    # request  包含了用户提交的所有信息

    # print(request.method)

    error_msg = ''

    if request.method == 'POST':

        user = request.POST.get('user', None)

        pwd = request.POST.get('pwd', None)

        if user == 'root' and pwd == '':

            # 去跳转

            return redirect('/home')

        else:

            error_msg = '用户名或密码错误'

    return render(request, 'login.html', {'error_msg': error_msg})

USER_LIST = [

    {'id': 1, 'username': 'derek', 'email': '', "gender": '男'},

    {'id': 2, 'username': 'jack', 'email': '', "gender": '女'},

    {"id": 3, 'username': 'tom', 'email': '', "gender": '男'},

]

def home(request):

    if request.method == "POST":

        # 获取用户提交的数据 POST请求中

        u = request.POST.get('username')

        e = request.POST.get('email')

        g = request.POST.get('gender')

        temp = {'username': u, 'email': e, "gender": g}

        USER_LIST.append(temp)

    return render(request, 'home.html', {'user_list': USER_LIST})
3.获取checkbox多个值
<!DOCTYPE html>

<html lang="en">

<head>

    <meta charset="UTF-8">

    <title>Title</title>

</head>

<body>

    <form action="/login/" method="POST" >

        <p>

            111:<input type="checkbox"  name="favor" value="11"/>

            222:<input type="checkbox" name="favor" value="22"/>

            333:<input type="checkbox" name="favor" value="33"/>

        </p>

        <input type="submit" value="提交"/>

    </form>

</body>

</html>
login
修改views.py文件对表单处理
from django.shortcuts import HttpResponse
from django.shortcuts import render
from django.shortcuts import redirect def login(request):
#checkbox 多选框
if request.method == "POST":
favor_list = request.POST.getlist("favor") #getlist获取多个值
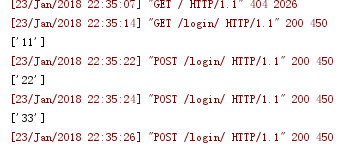
print(favor_list) #多选框获取到的是列表格式
#['11', '22', '33']
return render(request,"login.html")
elif request.method == "GET":
return render(request,"login.html")
else:
print("other")
当用户提交之后,在后台上可以获取用户提交的信息,如下图
4.上传文件file
<!DOCTYPE html>

<html lang="en">

<head>

    <meta charset="UTF-8">

    <title>Title</title>

</head>

<body>

    <form action="/login" method="POST" enctype="multipart/form-data">

        <p>

            <input type="file" name="files"/>

        </p>

        <input type="submit" value="提交"/>

    </form>

</body>

</html>
login.html
views.py
from django.shortcuts import render,HttpResponse

import os

def login(request):

    #file 上传文件

    if request.method == "POST":

        obj = request.FILES.get('files')       #用files获取文件对象

        if obj:

            print(obj, type(obj), obj.name)

            # test.jpg <class 'django.core.files.uploadedfile.InMemoryUploadedFile'> test.jpg

            import os

            file_path = os.path.join('upload', obj.name) #保存用户上传文件的路劲

            f = open(file_path, "wb")

            for item in obj.chunks():      #chunks表示所有的数据块,是个迭代器

                f.write(item)

            f.close()

        return render(request,"login.html")

    elif request.method == "GET":

        return render(request,"login.html")

    else:

        print("other")
1.Django安装与运行的更多相关文章
- Python 2/3 安装与运行环境设置
Python 2/3 安装与运行环境设置: 1.Python 软件源:https://www.python.org/ 下载Win版本 https://www.python.org/downloa ...
- windows环境下Django安装配置
--python下载 https://www.python.org/downloads/ --pip 下载 https://pypi.python.org/pypi/pip --pip 安装及路径 解 ...
- python Django 学习笔记(一)—— Django安装
注:本人python版本2.7.5 ,win7系统 安装Django https://www.djangoproject.com/download/ 官方下载Django-1.5.5.tar.gz 1 ...
- django安装配置及测试
django安装之前我们假设你已经安装了python,和mysql(不是必须的):(如果没有google一下挺简单不介绍了)下面直接介绍django的安装配置:到下面连接可以下载www.djangop ...
- Python之道1-环境搭建与pycharm的配置django安装及MySQL数据库配置
近期做那个python的开发,今天就来简单的写一下开发路线的安装及配置, 开发路线 Python3.6.1+Pycharm5.0.6+Django1.11+MySQL5.7.18 1-安装Python ...
- Django安装与开发虚拟环境搭建01
Django是一款基于python的MVT的web开发框架(m表示model,主要用于对数据库层的封装 ,v表示view,用于向用户展示结果,c表示controller,是核心,用于处理请求.获取数 ...
- (转载)Python之道1-环境搭建与pycharm的配置django安装及MySQL数据库配置
近期做那个python的开发,今天就来简单的写一下开发路线的安装及配置, 开发路线 Python3.6.1+Pycharm5.0.6+Django1.11+MySQL5.7.18 1-安装Python ...
- Django 安装配置
1-安装Python3.6.1 Python2.x 与3.x的版本在语法上稍有不同,区别在于输出语句的不同,这个可以看相关的文档. Python3.6.1,可以在Python的官网上下载:https: ...
- linux --- 2.常用命令 , python3, django安装
一.常用命令 1.常识命令 ① w 显示终端连接数 ②pwd 我在哪 ③whoami 我是谁 ④which 命令 找到命令的绝对路径 2.linux 命令行的组 ...
随机推荐
- The type 'Expression<>' is defined in an assembly that is not referenced.You must add a reference to assembly 'System.Core, Version=4.0.0.0, Culture=neutral, PublicKeyToken=b77a5c561934e089'.
在我将一个.net framework 4.0+mvc4+ef5的项目,升级到.net framework 4.6.1+mvc5+ef6之后,解决了所有的升级带来的问题,唯独在razor的cshtml ...
- os模块walk方法
1.os.walk import os for root, dirs, files in os.walk(top, topdown=False): for name in files: os.remo ...
- 我的Python笔记04
摘要: 声明:本文整理借鉴金角大王的Python之路,Day4 - Python基础4 (new版) 本节内容 迭代器&生成器 装饰器 Json & pickle 数据序列化 软件 ...
- Django---form表单提交数据到数据库(普通方法+Django的form类)
目标: ①.初始form的简单应用 ②.使用Django的form组件完成新增一个帖子 方法一:普通方法 1.前端表单代码 <div> <form class="navba ...
- Linux:从入门到放弃
[未解决] # 周五,安装ubuntu 18.04 # 周六,相继安装minit / deepin 系统. # 至今,遇到过还没有解决的问题有: # . 开机ACPI Error: # . 无论哪个L ...
- 数组中的第K个最大元素leetcode(Top K的问题)
在未排序的数组中找到第 k 个最大的元素.请注意,你需要找的是数组排序后的第 k 个最大的元素,而不是第 k 个不同的元素. 示例 1: 输入: [3,2,1,5,6,4] 和 k = 2 输出: 5 ...
- 利用kibana插件对Elasticsearch进行映射
映射(mapping) 映射是创建索引的时候,可以预先定义字段的类型以及相关属性 Elasticsearch会根据JSON源数据的基础类型去猜测你想要的字段映射.将输入的数据变成可搜索的索引项.Map ...
- 我的 FPGA 学习历程(07)—— BCD 编码:移位加 3 算法
2-10 进制码,也称为 BCD 码,它的编码方式则是通过一个 4 位二进制来表示一个 10 进制数,部分十进制对应的 BCD 码如下 十进制数 | BCD 码 13 --> 0001_0011 ...
- C语言可变参数
前段时候在实现利用redis进行的一个数据库比对的功能,稍微去分析了一下redis里面的源代码,然后发现其中的发送命令接口声明如下: void *redisCommand(redisConnect * ...
- mysql的复习
. 着重号,区分字段和关键字的符号 +号是运算的 起别名,其中的as可以省略 ifnull(expr1,expr2),expr1代表输入的字段,expr2代表如果输入的字段是null则为expr2 条 ...