caffe:自己搭建网络来训练
1.准备样本
要训练自己的样本,首先需要把样本准备好,需要准备的是训练集和测试集,caffe支持直接使用图片,当然把样本转换为leveldb或lmdb格式的话训练起来会更快一点。这里我先偷个懒,直接使用图片吧 [尴尬.jpg]
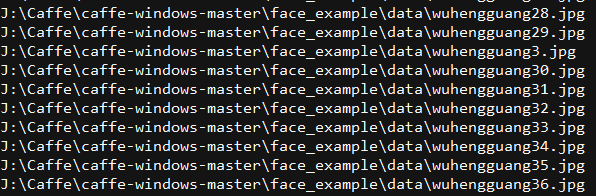
训练集和测试集是一样的,不过样本不要重叠。首先我把训练集的图片都放在一个目录,然后shift+右键选择该目录,打开cmd,使用命令 dir /s/b >train.txt ,这样就在该目录下生成了一份所有图片的列表,效果如下
然后使用查找替换功能把它修改成下面这个样子,后面的0,1,,序号是为每个类别的样本分配的标签,需要从0开始:
位置/../xx1.jpg

位置/../xx2.jpg

位置/../xx3.jpg

位置/../xx4.jpg

位置/../xx5.jpg

位置/../xx6.jpg

.....................
这里样本的准备已经差不多了,最后一步是需要生成均值文件 binaryproto,生成均值文件之前需要先将图片转换为lmdb,这里可以使用caffe自带的工具来生成(vs编译后会在bin文件夹下生成comput_image_mean.exe 和 convert_imageset.exe)
打开cmd,然后运行:
convert_imageset -shuffle -resize_height= -resize_width= J:/Caffe/train/ J:/Caffe/train/train.txt J:/Caffe/train/lmdb
使用命令生成均值文件:
compute_image_mean J:/Caffe/train/lmdb J:/Caffe/train/train.binaryproto
到这里训练集已经准备好了,然后测试集同上,最后我把它们全放在了data文件夹下,该文件夹下包含训练和测试所需的所有图片,图片列表train.txt和test.txt,均值文件train.binaryproto(我的测试也是使用这个均值文件)
2. 编写配置文件solver,我在caffe目录下的face_example目录下新建了my_solver.prototxt,编写如下:
net: "face_example/my_train.prototxt" # 网络结构文件的位置

test_iter: # 迭代次数,根据batch大小来

test_interval: # 测试间隔

base_lr:0.001 # 学习率

lr_policy: "multistep"

gamma: 0.1

stepvalue:  # 设置学习率什么时候减小

stepvalue:

stepvalue:

stepvalue:

max_iter:  # 最大迭代次数

display:  # 每训练100次显示一次

momentum: 0.9 # 设置冲量

weight_decay: 0.0005

snapshot:  # 每200次保存一个快照文件

snapshot_prefix: "face_example/face_snapshot" # 快照文件保存位置

solver_mode:GPU # 使用GPU训练
3. 编写网络定义文件,新建 my_train.prototxt ,编写如下:
name: "my_caffe_test"

layer{

    name: "data"

    type: "ImageData"

    top: "data"

    top: "label"

    include{

        phase:TRAIN

    }

    transform_param{

        mean_file:"face_example/train.binaryproto"

        scale: 0.0078125

        mirror:true

    }

    image_data_param{

        source:"face_example/data/train.txt"

        batch_size:

        shuffle:true

    }

}

layer{

    name: "data"

    type: "ImageData"

    top: "data"

    top: "label"

    include{

        phase:TEST

    }

    transform_param{

        mean_file:"face_example/train.binaryproto"

        scale: 0.0078125

        mirror:true

    }

    image_data_param{

        source:"face_example/data/test.txt"

        batch_size:

        shuffle:true

    }

}

layer{

    name: "conv1"

    type: "Convolution"

    bottom: "data"

    top: "conv1"

    param{

        lr_mult:  # 和base_lr相乘

        decay_mult:

    }

    convolution_param{

        num_output:

        kernel_size:

        stride:

        weight_filler{

            type: "xavier"

        }

        bias_filler{

            type: "constant"

            value:

        }

    }

}

layer{

    name: "relu1"

    type: "PReLU"

    bottom: "conv1"

    top: "conv1"

}

layer{

    name: "conv2"

    type: "Convolution"

    bottom: "conv1"

    top: "conv2"

    param{

        lr_mult:

        decay_mult:

    }

    convolution_param{

        num_output:

        kernel_size:

        stride:  # 步长

        weight_filler{

            type: "xavier"

        }

        bias_filler{

            type: "constant"

            value:

        }

    }

}

layer{

    name: "relu2"

    type: "PReLU"

    bottom: "conv2"

    top: "conv2"

}

layer{

    name: "pool1"

    type: "Pooling"

    bottom: "conv2"

    top: "pool1"

    pooling_param{

        pool: MAX

        kernel_size:

        stride:

    }

}

layer{

    name: "conv3"

    type: "Convolution"

    bottom: "pool1"

    top: "conv3"

    param{

        lr_mult:

        decay_mult:

    }

    convolution_param{

        num_output:

        kernel_size:

        stride:

        weight_filler{

            type: "xavier"

        }

        bias_filler{

            type: "constant"

            value:

        }

    }

}

layer{

    name: "relu3"

    type: "PReLU"

    bottom: "conv3"

    top: "conv3"

}

layer{

    name: "fc1"

    type: "InnerProduct"

    bottom: "conv3"

    top: "fc1"

    param{

        lr_mult:

        decay_mult:

    }

    inner_product_param{

        num_output:

        weight_filler{

            type: "xavier"

        }

        bias_filler{

            type: "constant"

            value:

        }

    }

}

layer{

    name: "fc2"

    type: "InnerProduct"

    bottom: "fc1"

    top: "fc2"

    param{

        lr_mult:

        decay_mult:

    }

    inner_product_param{

        num_output:

        weight_filler{

            type: "xavier"

        }

        bias_filler{

            type: "constant"

            value:

        }

    }

}

layer{

    name: "softmax_loss"

    type: "SoftmaxWithLoss"

    bottom: "fc2"

    bottom: "label"

    top: "softmax_loss"

}
4. 然后开始训练,打开cmd,输入命令:
caffe train -solver=face_example/my_solver.prototxt
caffe:自己搭建网络来训练的更多相关文章
- PyQt5+Caffe+Opencv搭建人脸识别登录界面
PyQt5+Caffe+Opencv搭建人脸识别登录界面(转载) 最近开始学习Qt,结合之前学习过的caffe一起搭建了一个人脸识别登录系统的程序,新手可能有理解不到位的情况,还请大家多多指教. 我的 ...
- Pytorch从0开始实现YOLO V3指南 part2——搭建网络结构层
本节翻译自:https://blog.paperspace.com/how-to-implement-a-yolo-v3-object-detector-from-scratch-in-pytorch ...
- Caffe fine-tuning 微调网络
转载请注明出处,楼燚(yì)航的blog,http://www.cnblogs.com/louyihang-loves-baiyan/ 目前呢,caffe,theano,torch是当下比较流行的De ...
- 孤荷凌寒自学python第八十四天搭建jTessBoxEditor来训练tesseract模块
孤荷凌寒自学python第八十四天搭建jTessBoxEditor来训练tesseract模块 (完整学习过程屏幕记录视频地址在文末) 由于本身tesseract模块针对普通的验证码图片的识别率并不高 ...
- 使用Caffe完成图像目标检测 和 caffe 全卷积网络
一.[用Python学习Caffe]2. 使用Caffe完成图像目标检测 标签: pythoncaffe深度学习目标检测ssd 2017-06-22 22:08 207人阅读 评论(0) 收藏 举报 ...
- CNN tflearn处理mnist图像识别代码解说——conv_2d参数解释,整个网络的训练,主要就是为了学那个卷积核啊。
官方参数解释: Convolution 2D tflearn.layers.conv.conv_2d (incoming, nb_filter, filter_size, strides=1, pad ...
- pytorch基础-搭建网络
搭建网络的步骤大致为以下: 1.准备数据 2. 定义网络结构model 3. 定义损失函数4. 定义优化算法 optimizer5. 训练 5.1 准备好tensor形式的输入数据和标签(可选) 5. ...
- Caffe系列1——网络文件和求解分析
1. 首先,我们先看一个完整的文件:lenet_train_test.prototxt name: "LeNet" #整个网络的名称 layer { #数据层——训练数据 name ...
- pytorch搭建网络,保存参数,恢复参数
这是看过莫凡python的学习笔记. 搭建网络,两种方式 (1)建立Sequential对象 import torch net = torch.nn.Sequential( torch.nn.Line ...
随机推荐
- 跨域问题-nginx代理
有时候我们跨域是借助了浏览器对 Access-Control-Allow-Origin 的支持.但有些浏览器是不支持的,所以这并非是最佳方案现在我们来利用nginx 通过反向代理 满足浏览器的同源策略 ...
- js的同步异步
由于js没有多线程,所以处理多任务的时候,可以用异步回调来解决.js中setTimeout.setInterval.ajax(jq中可以选择同步或异步)均会开启异步.遇到异步模块,会将其推入值任务队列 ...
- 【Q2D】 2048设计
主要组件 1: GameDirector ,负责胜利.失败.载入上次成绩等 2: Grid, 表格类,负责管理tile二维数组 3: Tile 元素类,就是界面上移动的砖块了 4: InputHelp ...
- request.getQueryString()代表的含义
在jsp做分页的时候,有时候我们想获取get请求链接中的参数保留下来. 比如客户端发送 http://localhost/test.do?a=b&c=d&e=f 通过request.g ...
- nginx和php之间是怎样通信的呢?
FastCGI原理 FastCGI是一个运用于Http Server和动态脚本语言间通信的接口,多数流行的Http Server都支持FastCGI,包括Apache.Nginx和lighttpd等. ...
- http://www.jb51.net/article/28619.htm
http://www.jb51.net/article/28619.htm js autocomplete 自动完成
- iPhone Screen FAQ
Q: Why is it a blank window after openning the app and connect mobile device? A: Please make sure th ...
- Java 面试题基础概念收集
问题:如果main方法被声明为private会怎样? 答案:能正常编译,但运行的时候会提示”main方法不是public的”. 问题:Java里的传引用和传值的区别是什么? 答案:传引用是指传递的是地 ...
- Import SQL into MySQL with a progress meter
There is nice tool called pv # On Ubuntu/Debian system $ sudo apt-get install pv # On Redhat/CentOS ...
- 【python】argparse学习(转)
点击这里成为作者 · 更新于 2018-11-14 21:00:36 argparse argparse 是 Python 内置的一个用于命令项选项与参数解析的模块,通过在程序中定义好我们需要的参数, ...