
Docker仓库搭建(Registry + Portus)
1.更新系统:
yum update -y
2. 安装docker-compos
yum -y install epel-release #pip安装包在epel源中
yum -y install python-pip
pip install -U docker-compose
3.安装git客户端
yum install -y git
4.复制Portus安装程序
git clone https://github.com/SUSE/Portus.git
5.配置Docker安装源
vi /etc/yum.repos.d/docker.repo
[dockerrepo]
name=Docker Repository
baseurl=https://yum.dockerproject.org/repo/main/centos/$releasever/
enabled=1
gpgcheck=1
gpgkey=
https://yum.dockerproject.org/gpg
6.安装docker引擎并启动
yum cleal all && yum makecache
yum install -y docker-engine
systemctl start docker.service
systemctl enable docker.service
此步如果有保存,请参考下面链接的地址:
http://www.cnblogs.com/amoyzhu/p/5261393.html
7. 安装Portus
| 1 2 3 4 5 6 7 8 9 10 11 12 13 14 15 16 17 18 19 20 21 22 23 24 25 26 27 28 29 30 31 32 33 34 35 36 37 38 39 |
./compose-setup.sh -e 192.168.0.109 #安装过程中会下载registry、mariadb、rails、ports_web等几个docker镜像 #如果网络不好可以先下载对应的几个docker镜像文件 #然后上传到portus服务器上并用docker load命令加载。 #镜像的具体版本号以实际为准。 REPOSITORY TAG IMAGE ID CREATED SIZE portus_web latest 24a654206d8b 2 days ago 1.086 GB registry 2.3.1 83139345d017 4 months ago 165.8 MB mariadb 10.0.23 93631b528e67 5 months ago 304.6 MB rails 4.2.2 99b347e4bbb4 13 months ago 884.5 MB 安装过后会给出相应的登陆信息和客户端需要的操作样例 ################### # SUCCESS # ################### Make sure port 3000 and 5000 are open on host 192.168.0.109 Open http://192.168.0.109:3000 with your browser and perform the following steps: 1. Create an admin account Perform the following actions on the docker hosts that need to interact with your registry: - Ensure the docker daemon is started with the '--insecure-registry 192.168.0.109:5000' To authenticate against your registry using the docker cli do: $ docker login -u <portus username> -p <password> -e <email> 192.168.0.109:5000 To push an image to the private registry: $ docker pull busybox |
8、打开防火墙端口
| 1 2 3 |
firewall-cmd --zone=public --add-port=3000/tcp --permanent firewall-cmd --zone=public --add-port=5000/tcp --permanent systemctl restart firewall.service |
9. Portus初始化
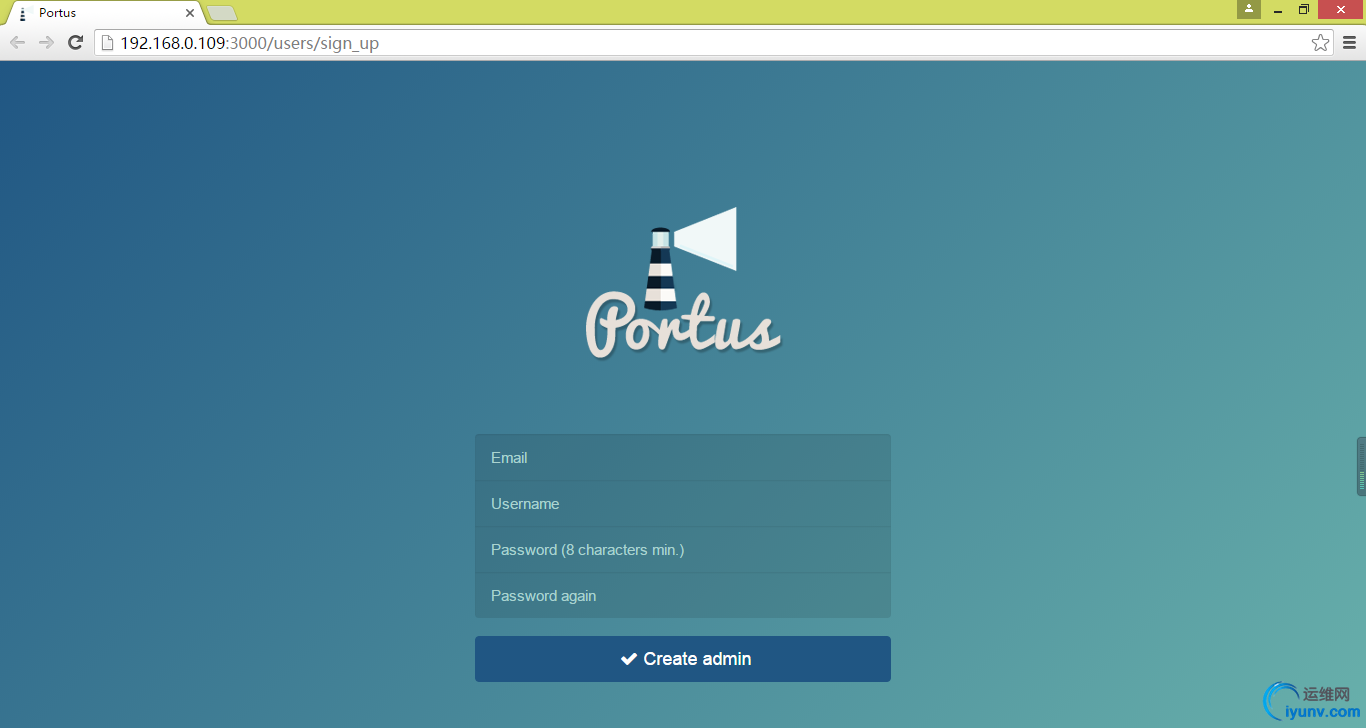
连接到本docker仓库(也可以是其他仓库,必须是registry 2.0以上版本)
<ignore_js_op>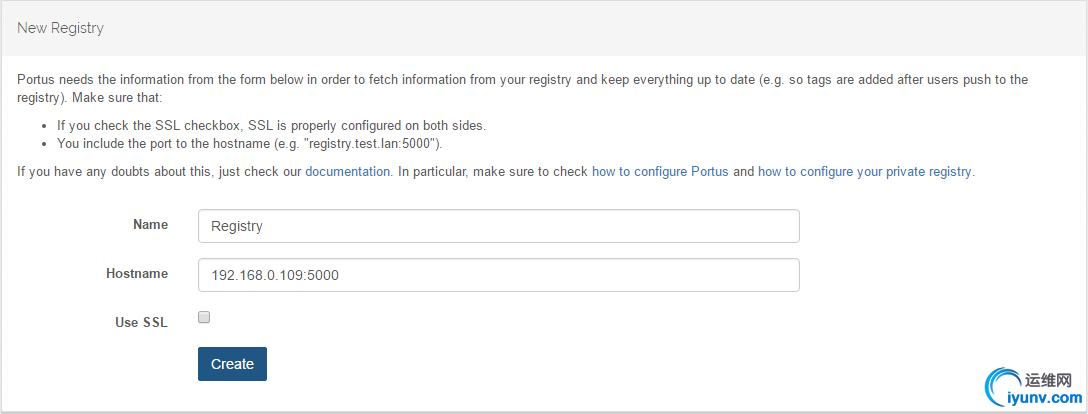
10、上传镜像测试
修改文件/lib/systemd/system/docker.service中的ExecStart增加--insecure-registry 192.168.0.109:5000并重启docker服务
| 1 2 |
systemctl daemon-reload systemctl restart docker.service |
检查docker服务
| 1 2 |
# ps -ef|grep insecure-registry root 29486 1 0 01:32 ? 00:00:00 /usr/bin/dockerd --insecure-registry 192.168.0.109:5000 |
11. 重启Portus容器:
docker start portus_db_1 portus_web_1 portus_crono_1 portus_registry_1
12.下载busybox镜像并上传到私有的仓库中(安装结束时有操作提示)
docker pull busybox
从docker官网上下载busybox镜像到本地
docker tag busybox 192.168.0.109:5000/admin/busybox
把刚下载的镜像busybox打上tag(重命名):192.168.0.109:5000/admin/busybox
docker login -u admin -p admin123 192.168.0.109:5000
登陆私有的镜像仓库
docker push 192.168.0.109:5000/admin/busybox
把本地的tag为192.168.0.109:5000/admin/busybox上传到私有仓库。
检查Portus界面的镜像信息
13.下载镜像测试
docker pull 192.168.0.109:5000/admin/busybox
Docker仓库搭建(Registry + Portus)的更多相关文章
- Docker 之registry私有仓库搭建
Docker 之registry私有仓库搭建 官方提供的私有仓库docker registry用法 https://yeasy.gitbooks.io/docker_practice/reposito ...
- 6.云原生之Docker容器Registry私有镜像仓库搭建实践
转载自:https://www.bilibili.com/read/cv15219863/?from=readlist #1.下载registry仓库并设置数据存放的目录(并生成认证账号密码) doc ...
- docker简单介绍---部署私有docker仓库Registry
1. 关于Registry 官方的Docker hub是一个用于管理公共镜像的好地方,我们可以在上面找到我们想要的镜像,也可以把我们自己的镜像推送上去.但是,有时候,我们的使用场景需要我们拥有一个私有 ...
- 为docker私有registry配置nginx反向代理
公司的Docker私有registry已经搭建好了,用官方的registry image很容易就搭建好了.现在就是要用nginx的反向代理把它放出来,以便在外网可以访问. 我的上一篇blog 讲了如何 ...
- docker 仓库搭建
阿里云服务器: 127.0.0.1(客户端) 127.0.0.2(私有服务器) 127.0.0.2作为私有仓库使用 1.下载镜像 [root@insure ~]# docker pull regist ...
- 解决: docker pull registry.access.redhat.com/rhel7/pod-infrastructure:latest
直接获取 rpm文件 wget http://mirror.centos.org/centos/7/os/x86_64/Packages/python-rhsm-certificates-1.19.1 ...
- Docker部署Registry私有镜像库
拉取镜像 docker pull registry:2.6.2 生成账号密码文件,这里采用htpasswd方式认证 docker run --rm --entrypoint htpasswd re ...
- docker私服registry管理镜像
前言 首先试想这样一个场景:当在自己的机器上(docker中)构建了mysql镜像,eureka镜像等等微服务镜像,这些镜像有可能需要放到其他的机器上docker环境中去运行,实行分布式架构部署.但如 ...
- docker 私有registry 配置
备注:此处使用linux镜像配置仓库 registry 启动步骤 https://hub.docker.com/_/registry/ docker login docker pull registr ...
随机推荐
- 关于VS2010中一打字,换行,拖控件便出现卡死的问题的解决方案
大家好,这是我第一篇博文. 最近一个月都是静静的观看,想发帖子很久了. 最近实习完刚换了份工作,入职之后啊先是装了一堆软件.然后,便出现问题,就是VS2010上码字和切换页面的时候会卡.开始的时候每次 ...
- sourceInsight使用技巧,持续更新中~~~
作为测试人员,读各种平台的工程代码时,根本不想安装各种vs或者eclipse等,于是,就找了一款代码阅读工具. sourceInsight,下载地址为官网:http://www.sourceinsig ...
- 关于Google+以及Facebook第三方登录实现的一点总结
简述 最近项目中有关于第三方登陆的需求,第三方Facebook以及Google +登录. 正好这几天把这个需求做得差不多了,收个尾,作为一个这方面之前基本从未涉及的小白,总结下开发流程以及过程中遇到的 ...
- html5之canvas练习
代码地址:github.com/peng666/blogs 在线地址:http://peng666.github.io/blogs/
- oracle数据库登录连接很慢;kettle连接oracle 报 IO 错误,socket time out 问题解决记录
问题描述: 1:oracle数据库连接登陆时突然变得很慢:sqldeveloper链接数据库很慢: 2:Kettle-spoon etl程序访问数据库,任务执行时报 :数据库连接 IO错误 :Sock ...
- 浅谈自我对git的初步认识
本学期我们新增了一门课程,那就是软件工程,不知道为什么,感觉有种莫名的高大上.哈哈!难道是这个名称太抽象了吗?这个问题我感觉到后来肯定就明白了. 第一次博客,感觉好紧张哦,嘿嘿!老师让我们谈谈对git ...
- foj 2044 1 M possible 二进制压缩
题目链接: http://acm.fzu.edu.cn/problem.php?pid=2044 题意: 给出 一大堆数,找出2个出现次数模3 为1 的两个数字 题解: 把一个数分为几位拆开统计 ...
- C#做音乐播放器时在自动下一曲中报异常的解决办法
---------------------- ASP.Net+Unity开发..Net培训.期待与您交流! ---------------------- 在利用Media Player做音乐播放器的时 ...
- 【CodeForces】【311E】Biologist
网络流/最大权闭合图 题目:http://codeforces.com/problemset/problem/311/E 嗯这是最大权闭合图中很棒的一道题了- 能够1A真是开心-也是我A掉的第一道E题 ...
- 异步JS:$.Deferred的使用
异步JS:$.Deferred的使用 原文链接:http://www.html5rocks.com/en/tutorials/async/deferred/ 当我们构建一个平稳的,响应式的HTML5应 ...