Spring Boot + MyBatis + PostgreSql
Maven构建项目
1、访问http://start.spring.io/
2、选择构建工具Maven Project、Spring Boot版本1.3.6以及一些工程基本信息,点击“Switch to the full version.”java版本选择1.7,可参考下图所示:
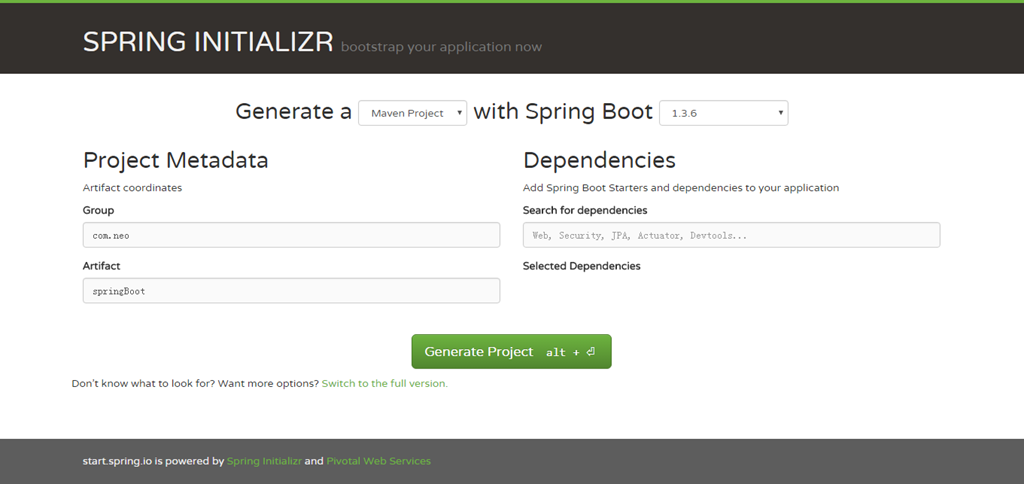
3、点击Generate Project下载项目压缩包
4、解压后,使用eclipse,Import -> Existing Maven Projects -> Next ->选择解压后的文件夹-> Finsh,OK done!
项目结构介绍

如上图所示,Spring Boot的基础结构共三个文件:
l src/main/java 程序开发以及主程序入口
l src/main/resources 配置文件
l src/test/java 测试程序
另外,spingboot建议的目录结果如下:
root package结构:com.example.myproject
com
  +- example
    +- myproject
      +- Application.java
      |
      +- domain
      |  +- Customer.java
      |  +- CustomerRepository.java
      |
      +- service
      |  +- CustomerService.java
      |
      +- controller
      |  +- CustomerController.java
      |
1、Application.java 建议放到跟目录下面,主要用于做一些框架配置
2、domain目录主要用于实体(Entity)与数据访问层(Repository)
3、service 层主要是业务类代码
4、controller 负责页面访问控制
采用默认配置可以省去很多配置,当然也可以根据自己的喜欢来进行更改
最后,启动Application main方法,至此一个java项目搭建好了!
安装PostgreSql数据库
1、pom.xml中添加支持DB的模块:
        <dependency>
            <groupId>org.mybatis.spring.boot</groupId>
            <artifactId>mybatis-spring-boot-starter</artifactId>
        </dependency>

        <dependency>
            <groupId>org.springframework.boot</groupId>
            <artifactId>spring-boot-starter-jdbc</artifactId>
        </dependency>

        <dependency>
            <groupId>org.postgresql</groupId>
            <artifactId>postgresql</artifactId>
        </dependency>
2、resources/application.properties中加入数据库配置链接
spring.datasource.driver-class-name= org.postgresql.Driver
spring.datasource.url = jdbc:postgresql://localhost:5432/
spring.datasource.username = postgres
spring.datasource.password = 123
3、编写代码
(1)ReleaseFeature.java
 package com.cetc38.cfBlog.bean;

 public class ReleaseFeature {

     private String author;
     private String date;
     private String number;
     private String content;

     public String getAuthor() {
         return author;
     }

     public void setAuthor(String author) {
         this.author = author;
     }

     public String getDate() {
         return date;
     }

     public void setDate(String date) {
         this.date = date;
     }

     public String getNumber() {
         return number;
     }

     public void setNumber(String number) {
         this.number = number;
     }

     public String getContent() {
         return content;
     }

     public void setContent(String content) {
         this.content = content;
     }
 }
(2)ReleaseFeatureService.java
package com.cetc38.cfBlog.service;

import com.cetc38.cfBlog.bean.ReleaseFeature;
import org.apache.ibatis.annotations.Mapper;
import java.util.List;

@Mapper
public interface ReleaseFeatureService {

    public List<ReleaseFeature> findAllReleaseFeature( );

}
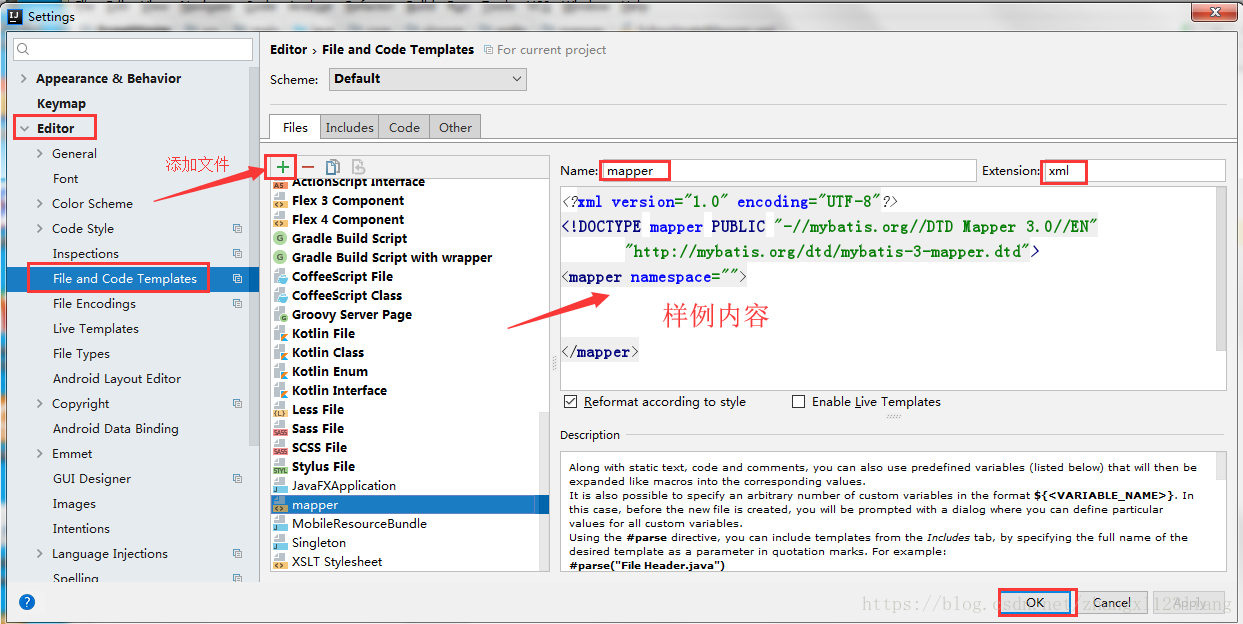
(3)添加mapper.xml文件

如上图添加完模板以后,新建mapper文件如下:
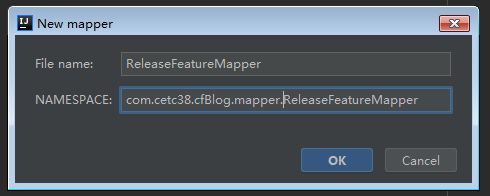
(4)ReleaseFeatureMapper.xml
 <?xml version="1.0" encoding="UTF-8" ?>
 <!DOCTYPE mapper PUBLIC "-//mybatis.org//DTD Mapper 3.0//EN" "http://mybatis.org/dtd/mybatis-3-mapper.dtd" >
 <mapper namespace="com.cetc38.cfBlog.mapper.ReleaseFeatureMapper">
     <select id="findAll" resultType="com.cetc38.cfBlog.bean.ReleaseFeature">
         select * from release_feature
     </select>
 </mapper>
(5)ReleaseFeatureServiceImpl.java
package com.cetc38.cfBlog.service.impl;

import com.cetc38.cfBlog.bean.ReleaseFeature;
import com.cetc38.cfBlog.mapper.ReleaseFeatureMapper;
import com.cetc38.cfBlog.service.ReleaseFeatureService;
import org.springframework.beans.factory.annotation.Autowired;
import org.springframework.stereotype.Service;

import java.util.List;

@Service
public class ReleaseFeatureServiceImpl implements ReleaseFeatureService {

    @Autowired
    private ReleaseFeatureMapper releaseFeatureMapper;

    public List<ReleaseFeature> findAllReleaseFeature( ) {
        List<ReleaseFeature> list = releaseFeatureMapper.findAll();
        return  list;
    }

}
(6)ReleaseFeatureController.java
package com.cetc38.cfBlog.controller;

import com.cetc38.cfBlog.bean.ReleaseFeature;
import com.cetc38.cfBlog.service.ReleaseFeatureService;
import org.springframework.beans.factory.annotation.Autowired;
import org.springframework.web.bind.annotation.RequestMapping;
import org.springframework.web.bind.annotation.RestController;

import java.util.List;

@RestController
public class ReleaseFeatureController {

    @Autowired
    private ReleaseFeatureService releaseFeatureService;

    @RequestMapping("list")
    public List<ReleaseFeature> list( ){
        List<ReleaseFeature> list = releaseFeatureService.findAllReleaseFeature();
        return list;
    }

}
4、安装Free MyBatis plugin插件,打开IDEA , file--> settings-->plugins,在页面中选择browse repositories-->输入mybatis plugin-->选择Free MyBatis plugin来安装:

5、idea项目中添加mapper.xml文件样例,点击File --->Settings --->步骤如下图
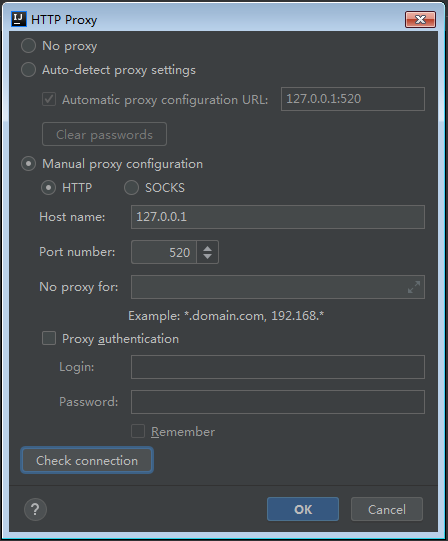
6、设置IDEA Proxy
7、解决@Mapper注解不起作用的问题
import org.apache.ibatis.annotations.Mapper;
经导入后,@Mapper注解才可以使用
            <plugin>
                <groupId>org.mybatis.generator</groupId>
                <artifactId>mybatis-generator-maven-plugin</artifactId>
                <version>1.3.7</version>
                <configuration>
                    <verbose>true</verbose>
                    <overwrite>true</overwrite>
                </configuration>
            </plugin>
在maven中配置以上插件配合以下的MyBatis依赖才起作用:
        <dependency>
            <groupId>org.mybatis</groupId>
            <artifactId>mybatis</artifactId>
            <version>3.4.5</version>
        </dependency>

        <dependency>
            <groupId>org.mybatis</groupId>
            <artifactId>mybatis-spring</artifactId>
            <version>1.3.2</version>
        </dependency>

        <dependency>
            <groupId>org.mybatis.spring.boot</groupId>
            <artifactId>mybatis-spring-boot-starter</artifactId>
            <version>1.3.2</version>
        </dependency>
引入web模块
1、pom.xml中添加支持web的模块:
<dependency>
        <groupId>org.springframework.boot</groupId>
        <artifactId>spring-boot-starter-web</artifactId>
 </dependency>
pom.xml文件中默认有两个模块:
spring-boot-starter:核心模块,包括自动配置支持、日志和YAML;
spring-boot-starter-test:测试模块,包括JUnit、Hamcrest、Mockito。
2、编写controller内容
@RestController
public class HelloWorldController {
    @RequestMapping("/hello")
    public String index() {
        return "Hello World";
    }
}
@RestController的意思就是controller里面的方法都以json格式输出,不用再写什么jackjson配置的了!
3、启动主程序,打开浏览器访问http://localhost:8080/hello,就可以看到效果了,有木有很简单!
Spring Boot + MyBatis + PostgreSql的更多相关文章
- Spring Boot 实践 :Spring Boot + MyBatis
Spring Boot 实践系列,Spring Boot + MyBatis . 目的 将 MyBatis 与 Spring Boot 应用程序一起使用来访问数据库. 本次使用的Library spr ...
- spring boot + mybatis + druid
因为在用到spring boot + mybatis的项目时候,经常发生访问接口卡,服务器项目用了几天就很卡的甚至不能访问的情况,而我们的项目和数据库都是好了,考虑到可能时数据库连接的问题,所以我打算 ...
- Spring Boot入门教程2-1、使用Spring Boot+MyBatis访问数据库(CURD)注解版
一.前言 什么是MyBatis?MyBatis是目前Java平台最为流行的ORM框架https://baike.baidu.com/item/MyBatis/2824918 本篇开发环境1.操作系统: ...
- spring boot + mybatis + druid配置实践
最近开始搭建spring boot工程,将自身实践分享出来,本文将讲述spring boot + mybatis + druid的配置方案. pom.xml需要引入mybatis 启动依赖: < ...
- spring boot+mybatis+quartz项目的搭建完整版
1. 利用spring boot提供的工具(http://start.spring.io/)自动生成一个标准的spring boot项目架构 2. 因为这里我们是搭建spring boot+mybat ...
- 快速搭建一个Spring Boot + MyBatis的开发框架
前言:Spring Boot的自动化配置确实非常强大,为了方便大家把项目迁移到Spring Boot,特意总结了一下如何快速搭建一个Spring Boot + MyBatis的简易文档,下面是简单的步 ...
- spring boot mybatis 打成可执行jar包后启动UnsatisfiedDependencyException异常
我的spring boot + mybatis项目在idea里面执行正常,但发布测试环境打成可执行jar包后就启动失败,提示错误如下: [ ERROR] [2018-08-30 17:23:48] o ...
- Spring Boot + Mybatis + Redis二级缓存开发指南
Spring Boot + Mybatis + Redis二级缓存开发指南 背景 Spring-Boot因其提供了各种开箱即用的插件,使得它成为了当今最为主流的Java Web开发框架之一.Mybat ...
- Spring Boot + Mybatis 实现动态数据源
动态数据源 在很多具体应用场景的时候,我们需要用到动态数据源的情况,比如多租户的场景,系统登录时需要根据用户信息切换到用户对应的数据库.又比如业务A要访问A数据库,业务B要访问B数据库等,都可以使用动 ...
随机推荐
- 如何用 Python 实现超级玛丽的人物行走和碰撞检测?
功能介绍 人物行走 人物的行走速度这边分成水平方向(X轴)和竖直方向(Y轴),水平方向的速度要考虑加速度和摩擦力,竖直方向的速度要考虑重力加速度. 水平方向:设定X轴向右走的速度为大于0,向左走的 ...
- numpy函数hstack,vstack,dstack简介
vstack.hstack和dstack都用于把几个小数组合并成一个大数组.它们的差别是小数组的元素在大数组中的排列顺序有所不同.把两部手机摆到一起有几种方式?水平的左右排列,垂直的上下排列,还可以把 ...
- WLC license管理
关于控制器的license,可以参考对应平台的Datasheet: Cisco 2504 WLC Cisco 3504 WLC Cisco 5508 WLC Cisco 5520 WLC Cisco ...
- plutosdr初步
关于最近新出的pluto sdr ,一款较新的sdr,可以通过破解将ad9363改成ad9361,提升频率范围,但是据说没有办法改变带宽. 可以通过补丁方式使用某款软件来进行收听fm
- Codeforces Round #620 (Div. 2) E
LCA的倍增 模板: ], depth[maxn]; int dist[maxn],head[maxn]; void add(int u,int v,int dist0){ a[tot].next=h ...
- mysql带条件的计数
在网站开发的过程中,经常会用到数据统计功能,因此条件计数查询便是不可避免的,下面介绍几种方法来解决此问题. 例(假设): mysql> select * from count_demo; +-- ...
- iOS开发常用Mac终端命令
常用命令: 1.grep -lr "prefs:root=" * cd 当某一文件夹下,在当前文件目录下搜索对应的内容(橘色字符串替换为你想要搜索的内容).可以用来搜索工程中在第三 ...
- Steam 游戏 《Sudoku Universe(数独宇宙)》——[数独基本局分析]
日期:2020.02.12 博客期:152 星期三 老师给的任务都做完了,15篇博客也都写好了,剩下的几天居然还要每天写一篇~唉~为难我 PH ,剩下的几天就把 我的数独要义分享一下吧! 1.基本局规 ...
- CentOS7安装jenkis
注意:终止运行Ctrl+c , 退回到shell命令Ctrl+d 一.先检查是否有java [root@huangyh huangyh]# rpm -qa |grep java 或 java 因为C ...
- DOC文档与DOCX文档有什么区别
doc 是 Microsoft Office 2003 里的 Word 文档,而 docx 是 Microsoft Office 2007 里的 Word 文档.高版本是向下兼容的,也就是能够打开 d ...