
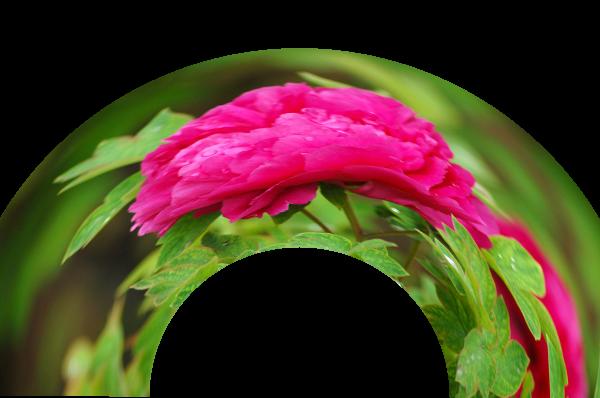
PS 滤镜— —扇形warp
    clc;

    clear all;

    close all;

    addpath('E:\PhotoShop Algortihm\Image Processing\PS Algorithm');

    I=imread('4.jpg');

    I=double(I);

    Image=I/255;

    [height, width, depth]=size(Image);

    % set the parameters

    radius = 150;  % control the radius of the inner circle

    high = 200;    % control the distance between the inner circle and outer circle

    angle = 0;

    spreadAngle=pi;

    centerX = 0.5;  % set the center of the circle, proportion of the image size

    centerY = 1.0;

    icenterX=width*centerX;

    icenterY=height*centerY;

    Image_new=Image*0;

    for i=1:height

        for j=1:width

            dx=j-icenterX;

            dy=i-icenterY;

            theta=atan2(-dy, -dx)+angle;

            r=sqrt(dy*dy+dx*dx);

            theta=mod(theta, 2*pi);

            x=width * theta/(spreadAngle+0.00001);

            y=height * (1-(r-radius)/(high+0.00001));

    % %         if (x<=1)     x=1;  end

    % %         if (x>=width)   x=width-1; end;

    % %         if (y>=height)  y=height-1; end;

    % %         if (y<1)  y=1;     end;

    % %

            if (x<=1)     continue;  end

            if (x>=width)   continue; end;

            if (y>=height)  continue; end;

            if (y<1)  continue;     end;

            x1=floor(x);

            y1=floor(y);

            p=x-x1;

            q=y-y1;

            Image_new(i,j,:)=(1-p)*(1-q)*Image(y1,x1,:)+p*(1-q)*Image(y1,x1+1,:)...

                +q*(1-p)*Image(y1+1,x1,:)+p*q*Image(y1+1,x1+1,:);

        end

    end

    imshow(Image_new)

imwrite(Image_new, 'out.jpg');参考来源:http://www.jhlabs.com/index.html
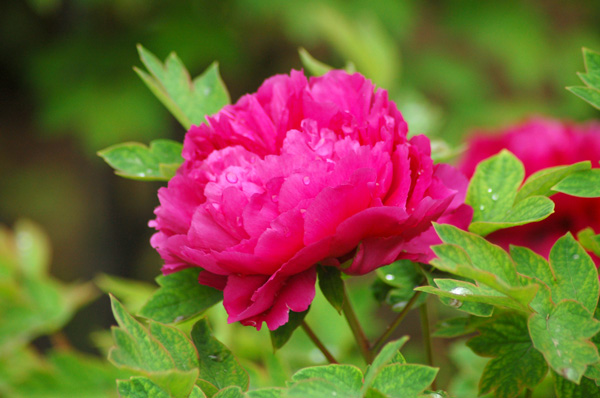
原图
效果图
PS 滤镜— —扇形warp的更多相关文章
- Python: PS 滤镜--扇形变换
本文用 Python 实现 PS 滤镜中的一种几何变换特效,称为扇形变换,将图像扭曲成一个扇形,具体的算法原理和效果图可以参考以前的博客: http://blog.csdn.net/matrix_sp ...
- OpenCV——PS 滤镜, 浮雕效果
具体的算法原理可以参考: PS 滤镜, 浮雕效果 // define head function #ifndef PS_ALGORITHM_H_INCLUDED #define PS_ALGORITH ...
- OpenCV——PS 滤镜, 曝光过度
算法原理可以参考: PS 滤镜,曝光过度 #ifndef PS_ALGORITHM_H_INCLUDED #define PS_ALGORITHM_H_INCLUDED #include <io ...
- Python: PS 滤镜--水波特效
本文用 Python 实现 PS 滤镜中的 水波特效 import numpy as np from skimage import img_as_float import matplotlib.pyp ...
- Python: PS 滤镜--旋涡特效
本文用Python 实现 PS 滤镜的旋涡特效,具体的算法原理和效果可以参考之前的博客: http://blog.csdn.net/matrix_space/article/details/42215 ...
- Python: PS 滤镜--USM 锐化
本文用 Python 实现 PS 滤镜中的 USM 锐化效果,具体的算法原理和效果可以参考之前的博客: http://blog.csdn.net/matrix_space/article/detail ...
- Python: PS 滤镜--素描
本文用 Python 实现 PS 滤镜中的素描特效,具体的算法原理和效果可以参考之前的博客: http://blog.csdn.net/matrix_space/article/details/386 ...
- Python: PS 滤镜--表面模糊
本文用 Python 实现 PS 滤镜中的表面模糊,具体的算法原理和效果可以参考之前的博客: http://blog.csdn.net/matrix_space/article/details/528 ...
- Python: PS 滤镜--旋转模糊
本文用 Python 实现 PS 滤镜中的旋转模糊,具体的算法原理和效果可以参考之前的博客: http://blog.csdn.net/matrix_space/article/details/392 ...
随机推荐
- CSS3 background属性
background: #00FF00 url(bgimage.gif) no-repeat fixed top; background 简写属性在一个声明中设置所有的背景属性. 可以设置如下属性: ...
- Android UI开发神兵利器之Icon
好的设计离不开Icon 话不多.介绍2个国外的站点,一个用来找Icon,一个用来搞页面设计 http://dryicons.com/free-icons/ http://www.webdesignsh ...
- No bean named 'cxf' is defined
1.错误描写叙述 严重:Exception starting filter CXFServlet org.springframework.beans.factory.NoSuchBea ...
- Smart Battery Specification Revision 1.1
1.SBS Specifications 2.System Management Bus (SMBus) Specification
- 网络通信数据处理 Xbytestring类
PS_Xbytestring a byte string for store low level data type 文件夹[TOC] PS_Xbytestring 文件夹TOC base info ...
- Minify把CSS和JS压缩和削减
Minify把CSS和JS压缩和削减(Minify:去掉空格回车符等),以及把多个CSS,JS文件整合到一个文件里.不要以为你的大带宽没有必要进行这类优化.使用它的理由更重要的是文件合并,而不是压缩, ...
- php正则表达式匹配img中任意属性的方法
经常和图片打交道,不得不用到一些提取图片中scr.alt.title.等的属性,这里总结给大家一些常用的,感觉还不错,比较通用! PHP正则表达式匹配img中任意属性PHP 复制代码代码如下: < ...
- 解决Oracle用户被锁定的方法
解决Oracle用户被锁定的方法 1,cmd控制台: 使用sqlplus 命令:sqlplus sys/密码@ip/orcl as sysdba; 2,先设置具体时间格式,以便查看具体时间 SQL&g ...
- Java正确获取客户端真实IP方法整理
在JSP里,获取客户端的IP地址的方法是:request.getRemoteAddr(),这种方法在大部分情况下都是有效的.但是在通过了Apache,Squid等反向代理软件就不能获取到客户端的真实I ...
- python文件读写方式
window下换行\r\n linux.unix.mac下都是\n - 以二进制的形式wb写入,同样以二进制的方式读取rb ``` f = open('file name','wb') f.write ...