树莓派进阶之路 (015) - 树莓派使用DS18B20模块测量温度
参考:http://shumeipai.nxez.com/2013/10/03/raspberry-pi-temperature-sensor-monitors.html
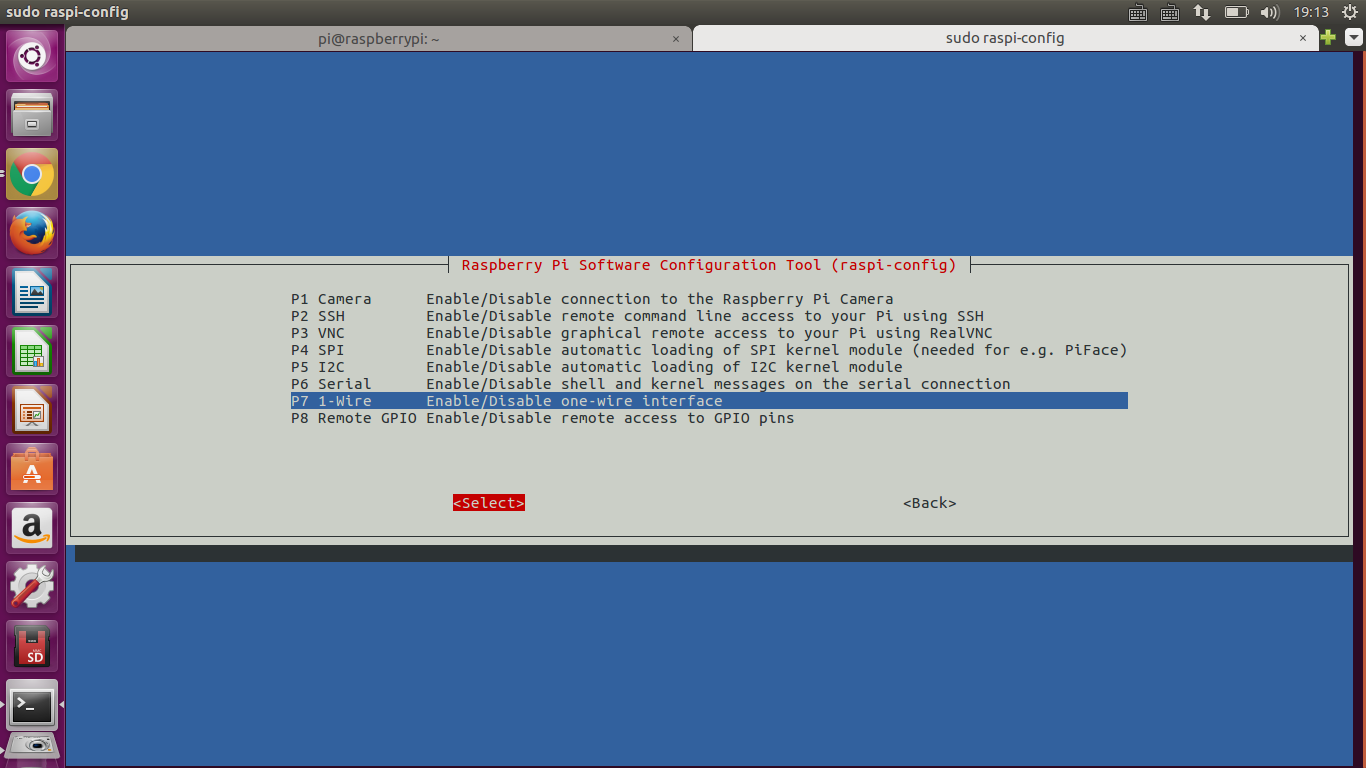
第一步,允许单总线接口
sudo raspi-config进入interfacingoptions
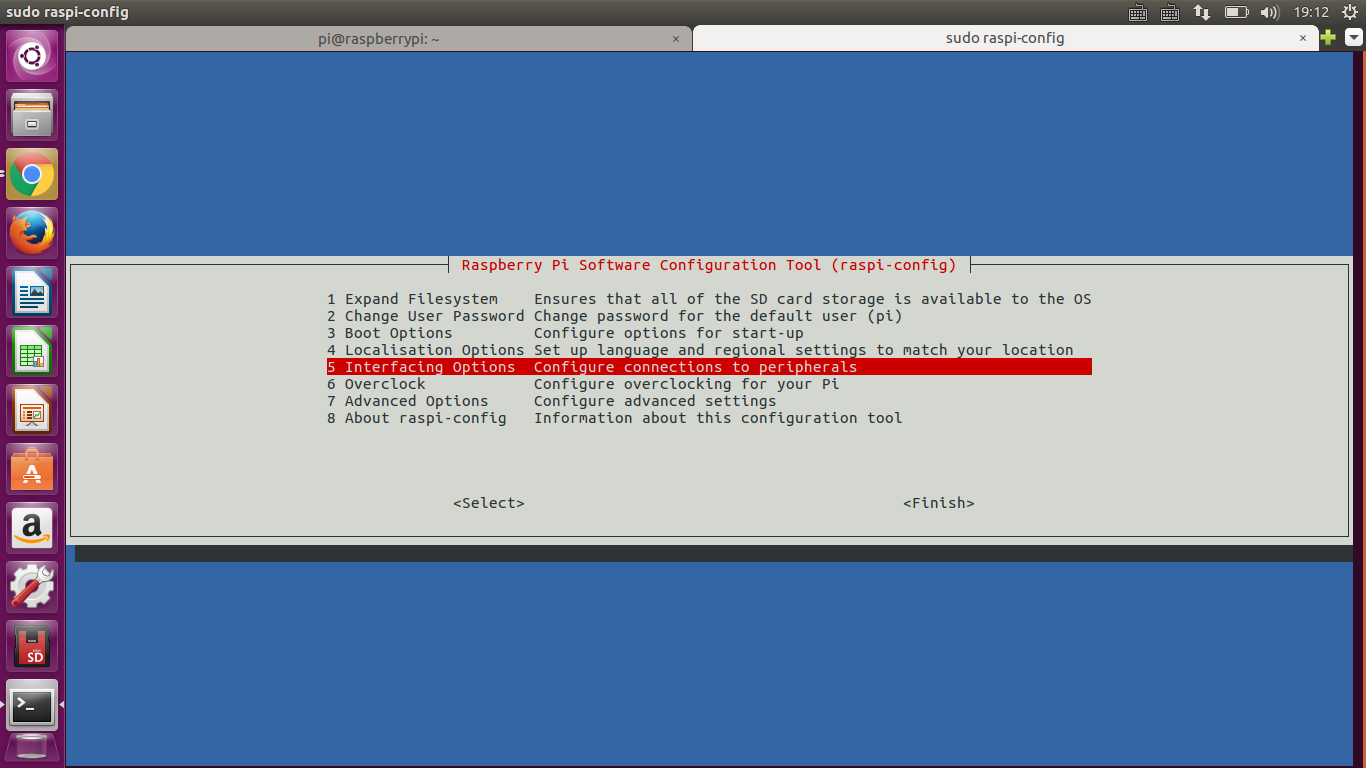
enable 1-wire interface
第二步,接线

接BCM编码为4即图上物理引脚7
第三步,升级内核
sudo apt-get update

sudo apt-get upgrade
pi@raspberrypi:~$ cd /sys/bus/w1/devices/

pi@raspberrypi:/sys/bus/w1/devices$ ls

-00000xxxxxx w1_bus_master1
第四步,查看当前温度
cd -00000xxxxxx cat w1_slave

显示:

  4b  7f ff 0c  2f : crc=2f YES

  4b  7f ff 0c  2f t=

第二行的t=20375就是当前的温度值,要换算成摄氏度,除以1000,即当前温度为20
python
 #!/usr/bin/python3

 import os,time

 device_file ='/sys/bus/w1/devices/28-031681e171ff/w1_slave'

 def read_temp_raw():

     f = open(device_file,'r')

     lines = f.readlines()

     f.close()

     return lines

 def read_temp():

     lines = read_temp_raw()

     while lines[0].strip()[-3:] != 'YES':

         time.sleep(0.2)

         lines = read_temp_raw()

     equals_pos = lines[1].find('t=')

     if equals_pos != -1:

         temp_string = lines[1][equals_pos+2:]

         temp_c = float(temp_string)/1000.0

     return temp_c

 while True:

     print('temp C = %f'%read_temp())

     time.sleep(1)
打印结果:
 pi@raspberrypi:~/myPython $ ./temp_ds18b20.py

 temp C = 20.687000

 temp C = 20.687000

 temp C = 20.687000

 temp C = 20.750000

 temp C = 20.750000

 temp C = 20.750000
C语言代码:
 #include <stdio.h>

 #include <stdlib.h>

 #include <string.h>

 #include <dirent.h>

 #include <unistd.h>

 #include <sys/types.h>

 #include <sys/stat.h>

 #include <fcntl.h>

 #include <hiredis/hiredis.h>

 int Open_send(char *base){                      //打开发送数据

     int fd, size;

     char buffer[];

         fd = open(base,O_RDONLY);

         lseek(fd,,SEEK_SET);

         size = read(fd,buffer,sizeof(buffer));

         close(fd);

         printf("temp C = %f\n",(float)atoi(buffer)/1000.0);

     return ;

 }

 int readFileList(char *basePath)                //文件查找

 {

     DIR *dir;

     struct dirent *ptr;

     char base[];

     if ((dir=opendir(basePath)) == NULL){

         perror("Open dir error...");

         exit();

     }

     while ((ptr=readdir(dir)) != NULL)

     {

         if(strcmp(ptr->d_name,".")== || strcmp(ptr->d_name,"..")==)    ///current dir OR parrent dir

             continue;

         else if(ptr->d_type == ){

             memset(base,'\0',sizeof(base));

             sprintf(base,"%s",ptr->d_name);

             if((strcmp("",base)<)&&(strcmp("",base)>)){

                 sprintf(base,"%s/%s/w1_slave",basePath,ptr->d_name);

                 //printf("%s\n",base);

                 while()

                 Open_send(base);

             }

         }

     }

     closedir(dir);

     return ;

 }

 int main(void)

 {

     DIR *dir;

     char basePath[];

     memset(basePath,'\0',sizeof(basePath));

     strcpy(basePath,"/sys/bus/w1/devices");

     readFileList(basePath);

     return ;

 }
=======================================华丽的分割线=======================================
由于根据官方的说法,在2015-02-16之后的Raspbain版本,为了防止GPIO的冲突,使用了新的dt策略,更改了原来单总线gpio的配置方法,需要在配置文件中添加gpiopin=8,配置单总线的gpio引脚。
修改配置:
sudo vim /boot/config.txt
在最后一行手动添加这个,保存并重启树莓派。
dtoverlay=w1-gpio-pullup,gpiopin=
在通过配置sudo raspi-config进入interfacingoptions配置单总线时,系统会在/boot/config.txt文件添加dtoverlay=w1-gpio-pullupz,只需要在后面通过gpiopin指定引脚。
树莓派进阶之路 (015) - 树莓派使用DS18B20模块测量温度的更多相关文章
- 树莓派进阶之路 (012) - 树莓派配置文档 config.txt 说明
原文连接:http://elinux.org/RPi_config.txt 由于树莓派并没有传统意义上的BIOS, 所以现在各种系统配置参数通常被存在”config.txt”这个文本文件中. 树莓派的 ...
- 树莓派进阶之路 (028) - 树莓派SQLite3的安装
MySQL占用内存太大,而SQLite是一款轻量级零配置数据库,非常适合在树莓派和其他嵌入式系统中使用.SQLite文档详细资料丰富,本文不会详细解释SQLite数据库操作的方方面面,只能结合具体场景 ...
- 树莓派进阶之路 (019) - 树莓派通过filezilla,samba与PC文件共享(转)
虽然我们可以很方便的通过ssh譬如putty或者vnc连接操控树莓派,但是毕竟树莓派资源没那么高,在上面编程,调试要吃力的多.所以还是想在pc上编程上传到树莓派或者最好,文件共享,可以直接读写共同的文 ...
- 树莓派进阶之路 (013) - 树莓派2/3 C语言使用PWM
我手里面的是树莓派3,系统是Raspbian官方操作系统,已经安装好了wiringPi. PWM简介:脉宽调制(PWM)是指用微处理器的数字输出来对模拟电路进行控制,是一种对模拟信号电平 ...
- 树莓派进阶之路 (010) - 树莓派raspi-config配置(转)
经过前面两步我们的树莓派已经正常的工作起来了,但是在真正用它开发之前还需要进行一些列的配置以及软件的安装,这样开发起来才会得心应手,下面我们介绍一下常用的软件和服务 1.配置选项: 树莓派第一次使用的 ...
- 树莓派进阶之路 (008) - 树莓派安装ftp服务器(转)
vsftpd是开源的轻量级的常用ftp服务器. 1,安装vsftpd服务器 (约400KB) sudo apt-get install vsftpd 2,启动ftp服务 sudo serv ...
- 树莓派进阶之路 (006) - 树莓派安装wiringPi
安装git-core sudo apt-get install git-core 下载winringPi库 git clone git://git.drogon.net/wiringPi 编译和安装库 ...
- 树莓派进阶之路 (009) - 树莓派ftp脚本(原创)
FTP.sh #!/bin/sh cd echo "彻底卸载原有的ftp" sudo apt-get remove --purge vsftpd #(--purge 选项表示彻底删 ...
- 树莓派进阶之路 (005) - 树莓派Zsh安装脚本(原创)
zsh.sh #!/bin/bash cd #安装zsh sudo apt-get install zsh #查看zsh cat /etc/shells #更改zsh chsh -s /bin/zsh ...
随机推荐
- Global Web Index发布社交网络现状调查,Snapchat增速领跑移动端所有App,四分之一Facebook用户年龄在45岁以上【转载+整理】
原文地址 有次上班做公交,期间听到一个老太太说:"我加你微信啊--",还有一次去看老中医,并交换了电话,可当我回去后发现这个大夫竟然加了我微信--这些都令我有点吃惊,连60.70岁 ...
- 渗透测试工具SPARTA介绍
0x01 sparta安装 kali系统默认安装了sparta 需要基础环境: git clone https://github.com/secforce/sparta.git apt-get ins ...
- jQuery 操作 radio、select、checkbox
<script type="text/javascript"> $(function () { 一.radio 1.获取选中值,三种方法都可以: $('input:ra ...
- javascrip与C#高级语言的程序设计
javascript特点:解释型的.基于对象的脚本语言一.简单性:变量类型是采用弱类型,并未使用严格的数据类型.二.动态性:基于事件驱动三.跨平台性:依赖于浏览器本身,与操作环境无关.四.安全性:不允 ...
- Oracle 定时任务使用
1:首先创建存储过程 create or replace procedure pro_rqsl_hmd is rsCursor sys_refcursor; rqslid ); nsrsbh ); h ...
- flume杀掉重启
Flume在启动的过程中加了一个钩子处理线程,用kill -3或者kill杀掉Flume进程,这样能通知钩子线程去关闭这些tmp文件 直接kill-9 会永久保留hdfs上的tmp后缀文件
- Tomcat访问日志浅析 (转)
来自:http://blog.chinaunix.net/uid-20691565-id-3938220.html Tomcat的访问日志是靠org.apache.catalina.valves.Ac ...
- sqlite3获取所有表信息
SELECT * FROM sqlite_master
- Webwork【03】核心类 ServletDispatcher 的初始化
1. Webwork 与 Xwork 搭建环境需要的的jar 为:webwork-core-1.0.jar,xwork-1.0.jar,搭建webwork 需要xwork 的jar呢?原因是这样的,W ...
- emplace_back() 和 push_back 的区别(转)
在引入右值引用,转移构造函数,转移复制运算符之前,通常使用push_back()向容器中加入一个右值元素(临时对象)的时候,首先会调用构造函数构造这个临时对象,然后需要调用拷贝构造函数将这个临时对象放 ...