Spring 梳理-跨重定向请求传递数据-Flash
Spring MVC Flash Attribute 的讲解与使用示例
1.
Spring MVC 3.1版本加了一个很有用的特性,Flash属性,它能解决一个长久以来缺少解决的问题,一个POST/Redirect/GET模式问题。
正常的MVC Web应用程序在每次提交都会POST数据到服务器。一个正常的Controller (被注解 @Controller标记)从请求获取数据和处理它 (保存或更新数据库)。一旦操作成功,用户就会被带到(forward)一个操作成功的页面。传统上来说,这样的POST/Forward/GET模式,有时候会导致多次提交问题. 例如用户按F5刷新页面,这时同样的数据会再提交一次。
为了解决这问题, POST/Redirect/GET 模式被用在MVC应用程序上. 一旦用户表单被提交成功, 我们重定向(Redirect)请求到另一个成功页面。这样能够令浏览器创建新的GET请求和加载新页面。这样用户按下F5,是直接GET请求而不是再提交一次表单。

|
|
|
虽然这一方法看起来很完美,并且解决了表单多次提交的问题,但是它又引入了一个获取请求参数和属性的难题. 通常当我们生成一次http重定向请求的时候,被存储到请求数据会丢失,使得下一次GET请求不可能访问到这次请求中的一些有用的信息. Flash attributes 的到来就是为了处理这一情况. Flash attributes 为一个请求存储意图为另外一个请求所使用的属性提供了一条途径. Flash attributes 在对请求的重定向生效之前被临时存储(通常是在session)中,并且在重定向之后被立即移除.
为了这样做, Flash 特性使用了两个集合. FlashMap 被用来管理 flash attributes 而 FlashMapManager 则被用来存储,获取和管理 FlashMap 实体. 对于每一次请求一个 “input” flash map 会被创建,来存储来自任何之前请求的 flash attribute 还有一个 “output” flash map 会被创建,来存储任何我们存储在这个请求中的,之后的请求参数. |
|

使用要想在你的 Spring MVC 应用中使用 Flash attribute,要用 3.1 版本或以上。并且要在 spring-servlet.xml 文件中加入 mvc:annotation-driven。
这些都完成之后,Flash attribute 就会自动设为“开启”,以供使用了。只需在你的 Spring controller 方法中加入RedirectAttributes redirectAttributes。
addFlashAttribute 方法会自动向 output flash map 中添加给定的参数,并将它传递给后续的请求。 我们来看看一个使用 Flash attribute 来完成 POST/Redirect/GET 并传递一些信息的完整实例吧。 Flash Attribute 实例下面的应用向用户显示一个表单。当用户填完数据,并提交表单之后,页面会重定向到另一个显示成功信息的页面。在这个重定向的新页面中,会显示用户刚才输入的信息。 |
|
第1步: 需要的 JAR 和项目结构如果你用 Maven 来做依赖管理,用下面的 dependencies 来添加 Spring 3.1 MVC 的支持。
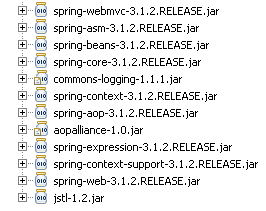
或者,你可以下载以下 JAR 文件,然后把它们放在 /WEB-INF/lib 文件夹下。
第2步: Spring 配置要为 web 项目添加 Spring 支持,需要在 web.xml 中添加 DispatcherServlet 。 web.xml
然后,spring-servlet 使用 mvc:annotation-driven 来支持 mvc ,并且会扫描项目中的 context:component-scan 标签。 spring-servlet.xml
第3步: Spring Controller – RedirectAttributesController 的代码使用 Customer.java 对象作为 bean 来保存客户信息。 Customer.java
CustomerController 类有3个方法。showForm 方法对应 URL /form ,用来显示 Add New Customer 表单。addCustomer 方法对应 URL /addcustomer ,用来处理 POST 请求。 CustomerController.java
注意我们在 addCustomer 方法中是如何使用 redirectAttributes 参数来添加 flash attribute 的。并且,我们是用 addFlashAttribute 方法来设置新的参数为 flash attribute。 |
|
第4步: View 层
add customer.JSP 文件显示一个 Add New Customer(添加新客户)表单。 add_customer.jsp
|
1
2
3
4
5
6
7
8
9
10
11
12
13
14
15
16
17
18
19
20
21
22
23
24
25
26
27
28
29
30
|
<%@taglib uri="http://www.springframework.org/tags/form" prefix="form"%><html><body> <h1>Add New Customer</h1> <form:form action="addcustomer.html" method="post" commandName="customer"> <table> <tr> <td><form:label path="firstname">Firstname</form:label></td> <td><form:input path="firstname" /> </td> </tr> <tr> <td><form:label path="lastname">Lastname</form:label></td> <td><form:input path="lastname" /> </td> </tr> <tr> <td><form:label path="age">Age</form:label></td> <td><form:input path="age" /> </td> </tr> <tr> <td><form:label path="email">Email</form:label> <td><form:input path="email" /> </td> </tr> <tr> <td colspan="2"><input type="submit" value="Add Customer" /> </td> </tr> </table> </form:form></body></html> |
show_customer.jsp 简单地显示客户的名和姓,以及用 flash attributes 设置的成功信息。
show_customer.jsp
|
1
2
3
4
5
6
7
|
<%@taglib uri="http://www.springframework.org/tags/form" prefix="form"%><html><body><h1>${message}</h1> ${customer.lastname}, ${customer.firstname} added successfully..</body></html> |
Demo:
执行这个 web 项目即可。 URL: http://localhost:8080/SpringMVC_Flash_Attribute_Maven_example/form.html 

转 : https://www.cnblogs.com/sharpest/p/6151239.html
Spring 梳理-跨重定向请求传递数据-Flash的更多相关文章
- Spring之跨重定向请求传递数据
摘要 在开发场景中,大部分数据都是使用请求转发(forward)进行传递,而使用重定向(redirect)传递数据可能比较少. 那么问题来了:请求中的数据生命周期存活时间只在一个请求转发(reques ...
- Spring 跨重定向请求传递数据
在处理完POST请求后, 通常来讲一个最佳实践就是执行一下重定向.除了其他的一些因素外,这样做能够防止用户点击浏览器的刷新按钮或后退箭头时,客户端重新执行危险的POST请求. 在控制器方法返回的视图名 ...
- SpringMVC跨重定向请求传递数据
(1)使用URL模板以路径变量和查询参数的形式传递数据(一些简单的数据) @GetMapping("/home/index") public String index(Model ...
- Jquery跨域请求php数据(jsonp)
Jquery跨域请求php数据 我们一般用到ajax的时候是在同服务器下,一般情况下不会跨域,但有时候需要调用其他域名或ip下的数据的时候,遇到跨域请求数据的时候. 今天在工作中碰到javascrip ...
- jQuery使用ajax跨域请求获取数据
jQuery使用ajax跨域请求获取数据 跨域是我在日常面试中经常会问到的问题,这词在前端界出现的频率不低,主要原因还是由于安全限制(同源策略, 即JavaScript或Cookie只能访问同域下的 ...
- 本地主机作服务器解决AJAX跨域请求访问数据的方法
近几天学到ajax,想测试一下ajax样例,由于之前在阿里租用的服务器过期了,于是想着让本地主机既做服务器又做客户端,只是简单地测试,应该还行. 于是,下载了xampp,下载网址http://www. ...
- AJAX跨域请求json数据的实现方法
这篇文章介绍了AJAX跨域请求json数据的实现方法,有需要的朋友可以参考一下 我们都知道,AJAX的一大限制是不允许跨域请求. 不过通过使用JSONP来实现.JSONP是一种通过脚本标记注入的方式, ...
- 关于ajax跨域请求API数据的一些问题
一般来说我们使用jquery的ajax来跨域请求API数据的时候每次请求,就只能请求一组数据,而且当我们再次点击发送ajax请求的时候,新请求的数据会覆盖掉原来的数据,那么如何每次在请求的数据的时候, ...
- Spring系列 SpringMVC的请求与数据响应
Spring系列 SpringMVC的请求与数据响应 SpringMVC的数据响应 数据响应的方式 y以下案例均部署在Tomcat上,使用浏览器来访问一个简单的success.jsp页面来实现 Suc ...
随机推荐
- Shiro的几个关键类
Shiro在于Spring集成中,需要配置SecurityManager,Realm,ShiroFilterFactoryBean这三个类.在Web环境中SecurityManager一般配置Defa ...
- 骑士精神(IDA*)
题目描述 输入格式 第一行有一个正整数T(T<=10),表示一共有N组数据.接下来有T个5×5的矩阵,0表示白色骑士,1表示黑色骑士,*表示空位.两组数据之间没有空行. 输出格式 对于每组数据都 ...
- hdu-6621 K-th Closest Distance
题目链接 K-th Closest Distance Problem Description You have an array: a1, a2, , an and you must answer ...
- POJ-2387 Til the Cows Come Home ( 最短路 )
题目链接: http://poj.org/problem?id=2387 Description Bessie is out in the field and wants to get back to ...
- vim命令的三种模式
对于vim这个命令来讲是有三种模式的,分别是:正常模式,编辑模式以及命令模式.接下来就写一个demo作为演示 前期准备,先在本地准备一个文档,我这里就写了一个大家耳熟能详的例子,如下: 然后用rz命令 ...
- List集合的排序
最近在写需求时,将某张表中的短信信息拿出,sql写完后,取出来后的结构是List<Map>,在进行到某一步时需要将这个List<Map>进行逆序排序, 当时第一想法便是写一个f ...
- js中鼠标点击、移动和光标移动的事件触发
事件有三要素:事件源.事件数据.事件处理程序 事件冒泡:当元素嵌套的时候,内部元素激发某个事件后,默认情况下外部元素相应的事件也会跟着依次触发 可以加return false;是阻止默认操作 oncl ...
- Python网络爬虫实战(一)快速入门
本系列从零开始阐述如何编写Python网络爬虫,以及网络爬虫中容易遇到的问题,比如具有反爬,加密的网站,还有爬虫拿不到数据,以及登录验证等问题,会伴随大量网站的爬虫实战来进行. 我们编写网络爬虫最主要 ...
- Spring Boot初识
今天准备开一个新系列springboot,springboot结束后会更新springcloud,想要学会springcloud先学springboot吧.以后springboot和hadoop轮流更 ...
- [翻译] .NET Core 3.0 RC 1 发布
原文: Announcing .NET Core 3.0 Release Candidate 1 今天,我们宣布推出 .NET Core 3.0 Release Candidate 1.就像 Prev ...