Spring Cloud Alibaba | Nacos服务注册与发现
Spring Cloud Alibaba | Nacos服务注册与发现
Springboot: 2.1.6.RELEASE
SpringCloud: Greenwich.SR1
如无特殊说明,本系列文章全采用以上版本
上一篇《Spring Cloud Alibaba | Nacos服务中心初探》我们聊了什么是Nacos以及Nacos如何搭建,这一篇我们接着聊Nacos如何简单使用。
首先,Nacos是一个服务注册和服务发现的注册中心,在Spring Cloud中,可以替代Eureka的功能,我们先聊一下Nacos如何和Spring Cloud集成做一个注册中心。
整体流程为:
- 先启动注册中心Nacos
- 启动服务的提供者将提供服务,并将服务注册到注册中心Nacos上
- 启动服务的消费者,在Nacos中找到服务并完成消费
1. 服务提供者
新建一个producer的项目,项目依赖如下:
1.1 pom.xml项目依赖
<?xml version="1.0" encoding="UTF-8"?>

<project xmlns="http://maven.apache.org/POM/4.0.0" xmlns:xsi="http://www.w3.org/2001/XMLSchema-instance"

	xsi:schemaLocation="http://maven.apache.org/POM/4.0.0 http://maven.apache.org/xsd/maven-4.0.0.xsd">

	<modelVersion>4.0.0</modelVersion>

	<parent>

		<groupId>org.springframework.boot</groupId>

		<artifactId>spring-boot-starter-parent</artifactId>

		<version>2.1.6.RELEASE</version>

		<relativePath/> <!-- lookup parent from repository -->

	</parent>

	<groupId>com.springcloud</groupId>

	<artifactId>producer</artifactId>

	<version>0.0.1-SNAPSHOT</version>

	<name>producer</name>

	<description>Demo project for Spring Boot</description>

	<properties>

		<java.version>1.8</java.version>

	</properties>

	<dependencies>

		<dependency>

			<groupId>org.springframework.boot</groupId>

			<artifactId>spring-boot-starter-web</artifactId>

		</dependency>

		<dependency>

			<groupId>org.springframework.cloud</groupId>

			<artifactId>spring-cloud-starter-alibaba-nacos-discovery</artifactId>

			<version>0.9.0.RELEASE</version>

		</dependency>

		<dependency>

			<groupId>org.springframework.boot</groupId>

			<artifactId>spring-boot-starter-test</artifactId>

			<scope>test</scope>

		</dependency>

	</dependencies>

	<build>

		<plugins>

			<plugin>

				<groupId>org.springframework.boot</groupId>

				<artifactId>spring-boot-maven-plugin</artifactId>

			</plugin>

		</plugins>

	</build>

</project>
增加Nacos的服务发现的依赖:spring-cloud-starter-alibaba-nacos-discovery,根据版本SpringCloud和SpringBoot的版本,这里我们使用0.9.0.RELEASE版本。其他版本使用请看上一篇《Spring Cloud Alibaba | Nacos服务中心初探》。
1.2 配置文件application.yml
server:

  port: 9000

spring:

  application:

    name: spring-cloud-nacos-producer

  cloud:

    nacos:

      discovery:

        server-addr: localhost:8848
1.3 启动类ProducerApplication.java
package com.springcloud.producer;

import org.springframework.boot.SpringApplication;

import org.springframework.boot.autoconfigure.SpringBootApplication;

import org.springframework.cloud.client.discovery.EnableDiscoveryClient;

@SpringBootApplication

@EnableDiscoveryClient

public class ProducerApplication {

	public static void main(String[] args) {

		SpringApplication.run(ProducerApplication.class, args);

	}

}
@EnableDiscoveryClient 注册服务至Nacos。
1.4 controller
package com.springcloud.producer.controller;

import org.springframework.web.bind.annotation.RequestMapping;

import org.springframework.web.bind.annotation.RequestParam;

import org.springframework.web.bind.annotation.RestController;

/**

 * Created with IntelliJ IDEA.

 *

 * @Date: 2019/7/14

 * @Time: 10:04

 * @email: inwsy@hotmail.com

 * Description:

 */

@RestController

public class HelloController {

    @RequestMapping("/hello")

    public String hello(@RequestParam String name) {

        return "hello "+name+",producer is ready";

    }

}
1.5 测试
启动服务producer,在浏览器访问链接:http://localhost:9000/hello?name=nacos, 可以看到页面显示hello nacos,producer is ready。
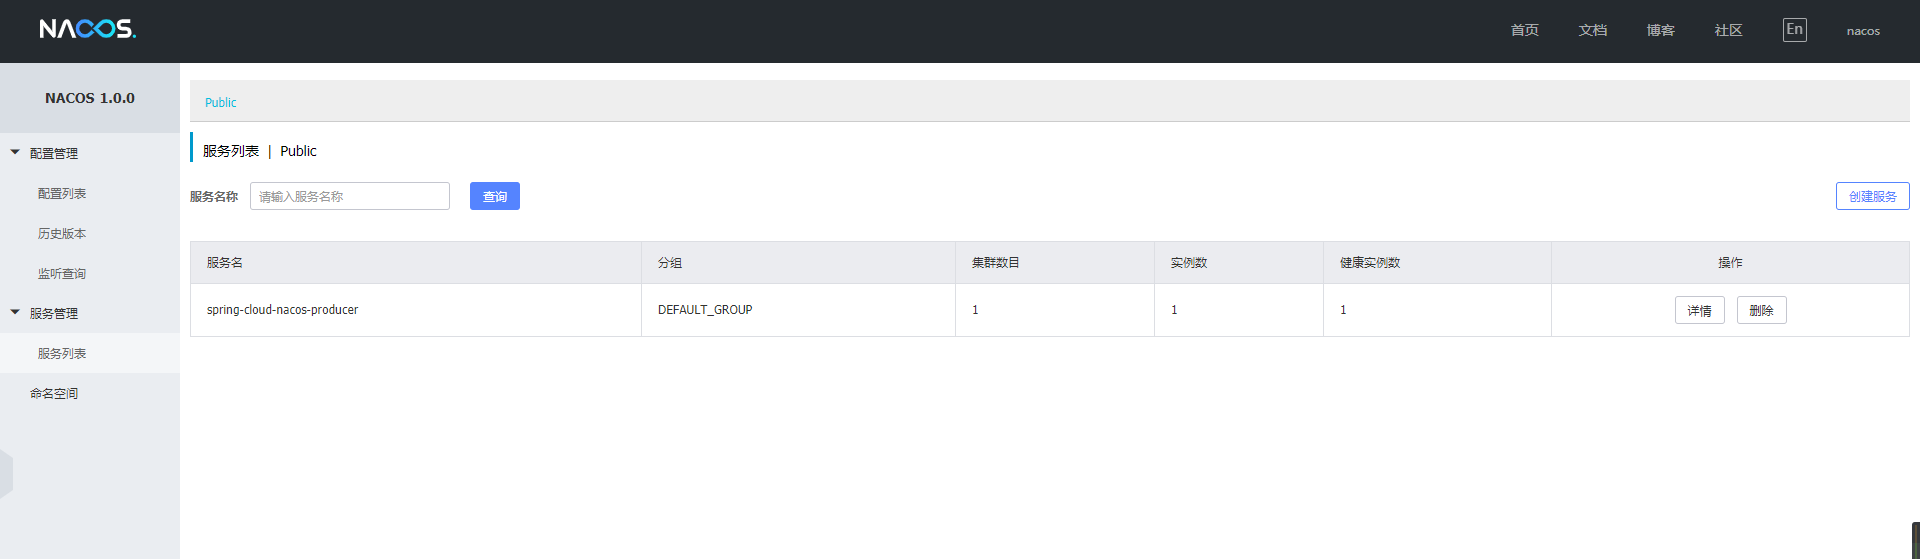
打开Nacos显示页面,可以看到服务spring-cloud-nacos-producer正常上线。
到这里,我们的服务提供者已经正常搭建完毕。
2. 服务消费者
2.1 pom.xml项目依赖
<?xml version="1.0" encoding="UTF-8"?>

<project xmlns="http://maven.apache.org/POM/4.0.0" xmlns:xsi="http://www.w3.org/2001/XMLSchema-instance"

	xsi:schemaLocation="http://maven.apache.org/POM/4.0.0 http://maven.apache.org/xsd/maven-4.0.0.xsd">

	<modelVersion>4.0.0</modelVersion>

	<parent>

		<groupId>org.springframework.boot</groupId>

		<artifactId>spring-boot-starter-parent</artifactId>

		<version>2.1.6.RELEASE</version>

		<relativePath/> <!-- lookup parent from repository -->

	</parent>

	<groupId>com.spring</groupId>

	<artifactId>nacos-cosumers</artifactId>

	<version>0.0.1-SNAPSHOT</version>

	<name>nacos-cosumers</name>

	<description>Demo project for Spring Boot</description>

	<properties>

		<java.version>1.8</java.version>

		<spring-cloud.version>Greenwich.SR2</spring-cloud.version>

	</properties>

	<dependencies>

		<dependency>

			<groupId>org.springframework.boot</groupId>

			<artifactId>spring-boot-starter-web</artifactId>

		</dependency>

		<dependency>

			<groupId>org.springframework.cloud</groupId>

			<artifactId>spring-cloud-starter-openfeign</artifactId>

		</dependency>

		<dependency>

			<groupId>org.springframework.cloud</groupId>

			<artifactId>spring-cloud-starter-alibaba-nacos-discovery</artifactId>

			<version>0.9.0.RELEASE</version>

		</dependency>

		<dependency>

			<groupId>org.springframework.boot</groupId>

			<artifactId>spring-boot-starter-test</artifactId>

			<scope>test</scope>

		</dependency>

	</dependencies>

	<dependencyManagement>

		<dependencies>

			<dependency>

				<groupId>org.springframework.cloud</groupId>

				<artifactId>spring-cloud-dependencies</artifactId>

				<version>${spring-cloud.version}</version>

				<type>pom</type>

				<scope>import</scope>

			</dependency>

		</dependencies>

	</dependencyManagement>

	<build>

		<plugins>

			<plugin>

				<groupId>org.springframework.boot</groupId>

				<artifactId>spring-boot-maven-plugin</artifactId>

			</plugin>

		</plugins>

	</build>

</project>
这里增加了spring-cloud-starter-openfeign依赖包
2.2 配置文件application.yml
server:

  port: 8080

spring:

  application:

    name: spring-cloud-nacos-consumers

  cloud:

    nacos:

      discovery:

        server-addr: localhost:8848
2.3 启动类NacosCosumersApplication.java
package com.spring.nacoscosumers;

import org.springframework.boot.SpringApplication;

import org.springframework.boot.autoconfigure.SpringBootApplication;

import org.springframework.cloud.client.discovery.EnableDiscoveryClient;

import org.springframework.cloud.openfeign.EnableFeignClients;

@SpringBootApplication

@EnableDiscoveryClient

@EnableFeignClients

public class NacosCosumersApplication {

	public static void main(String[] args) {

		SpringApplication.run(NacosCosumersApplication.class, args);

	}

}
@EnableFeignClients这个注解是声明Feign远程调用
2.4 Feign远程调用
创建一个remote接口
package com.spring.nacoscosumers.remote;

import org.springframework.cloud.openfeign.FeignClient;

import org.springframework.web.bind.annotation.RequestMapping;

import org.springframework.web.bind.annotation.RequestParam;

@FeignClient(name= "spring-cloud-nacos-producer")

public interface HelloRemote {

    @RequestMapping(value = "/hello")

    String hello(@RequestParam(value = "name") String name);

}
2.5 web层调用远程接口 Controller
package com.spring.nacoscosumers.controller;

import com.spring.nacoscosumers.remote.HelloRemote;

import org.springframework.beans.factory.annotation.Autowired;

import org.springframework.web.bind.annotation.PathVariable;

import org.springframework.web.bind.annotation.RequestMapping;

import org.springframework.web.bind.annotation.RestController;

/**

 * Created with IntelliJ IDEA.

 *

 * @Date: 2019/7/14

 * @Time: 10:24

 * @email: inwsy@hotmail.com

 * Description:

 */

@RestController

public class HelloController {

    @Autowired

    HelloRemote helloRemote;

    @RequestMapping("/hello/{name}")

    public String index(@PathVariable("name") String name) {

        return helloRemote.hello(name);

    }

}
2.6 测试
启动服务消费者nacos-consumers,打开浏览器访问链接:http://localhost:8080/hello/nacos, 这时页面正常返回hello nacos,producer is ready,证明我们的已经通过Nacos作为注册中心已经正常提供了服务注册与发现。
3. 集成Gateway
上面介绍了Nacos可以和Feign集成使用,更多的情况下,我们需要和API网关来集成。
这里我们还是使用之前的服务提供者,新建一个服务网关。
这里我们使用了Gateway做演示,想使用Zuul的朋友可以作为参考,在原有Zuul+Eureka的基础上只需要更换配置和依赖包就可以,无需其他过多的修改。
3.1 pom.xml项目依赖
<?xml version="1.0" encoding="UTF-8"?>

<project xmlns="http://maven.apache.org/POM/4.0.0" xmlns:xsi="http://www.w3.org/2001/XMLSchema-instance"

	xsi:schemaLocation="http://maven.apache.org/POM/4.0.0 http://maven.apache.org/xsd/maven-4.0.0.xsd">

	<modelVersion>4.0.0</modelVersion>

	<parent>

		<groupId>org.springframework.boot</groupId>

		<artifactId>spring-boot-starter-parent</artifactId>

		<version>2.1.6.RELEASE</version>

		<relativePath/> <!-- lookup parent from repository -->

	</parent>

	<groupId>com.spring</groupId>

	<artifactId>nacos-gateway</artifactId>

	<version>0.0.1-SNAPSHOT</version>

	<name>nacos-gateway</name>

	<description>Demo project for Spring Boot</description>

	<properties>

		<java.version>1.8</java.version>

		<spring-cloud.version>Greenwich.SR2</spring-cloud.version>

	</properties>

	<dependencies>

		<dependency>

			<groupId>org.springframework.cloud</groupId>

			<artifactId>spring-cloud-starter-gateway</artifactId>

		</dependency>

		<dependency>

			<groupId>org.springframework.cloud</groupId>

			<artifactId>spring-cloud-starter-alibaba-nacos-discovery</artifactId>

			<version>0.9.0.RELEASE</version>

		</dependency>

		<dependency>

			<groupId>org.springframework.boot</groupId>

			<artifactId>spring-boot-starter-test</artifactId>

			<scope>test</scope>

		</dependency>

	</dependencies>

	<dependencyManagement>

		<dependencies>

			<dependency>

				<groupId>org.springframework.cloud</groupId>

				<artifactId>spring-cloud-dependencies</artifactId>

				<version>${spring-cloud.version}</version>

				<type>pom</type>

				<scope>import</scope>

			</dependency>

		</dependencies>

	</dependencyManagement>

	<build>

		<plugins>

			<plugin>

				<groupId>org.springframework.boot</groupId>

				<artifactId>spring-boot-maven-plugin</artifactId>

			</plugin>

		</plugins>

	</build>

</project>
3.2 配置文件application.xml
server:

  port: 8088

spring:

  application:

    name: spring-cloud-nacos-gateway

  cloud:

    nacos:

      discovery:

        server-addr: localhost:8848

    gateway:

      discovery:

        locator:

          enabled: true

      routes:

        - id: hello_route

          #格式为:lb://应用注册服务名

          uri: lb://spring-cloud-nacos-producer

          predicates:

            - Method=GET
3.3 启动类NacosGatewayApplication.java
package com.spring.nacosgateway;

import org.springframework.boot.SpringApplication;

import org.springframework.boot.autoconfigure.SpringBootApplication;

@SpringBootApplication

public class NacosGatewayApplication {

	public static void main(String[] args) {

		SpringApplication.run(NacosGatewayApplication.class, args);

	}

}
3.4 测试
我们启动Gateway,打开浏览器访问链接:http://localhost:8088/spring-cloud-nacos-producer/hello?name=nacos, 浏览器正常返回:hello nacos,producer is ready, 证明我们通过服务网关来访问服务是正常的。
最后,我们打开看一下Nacos的服务列表:
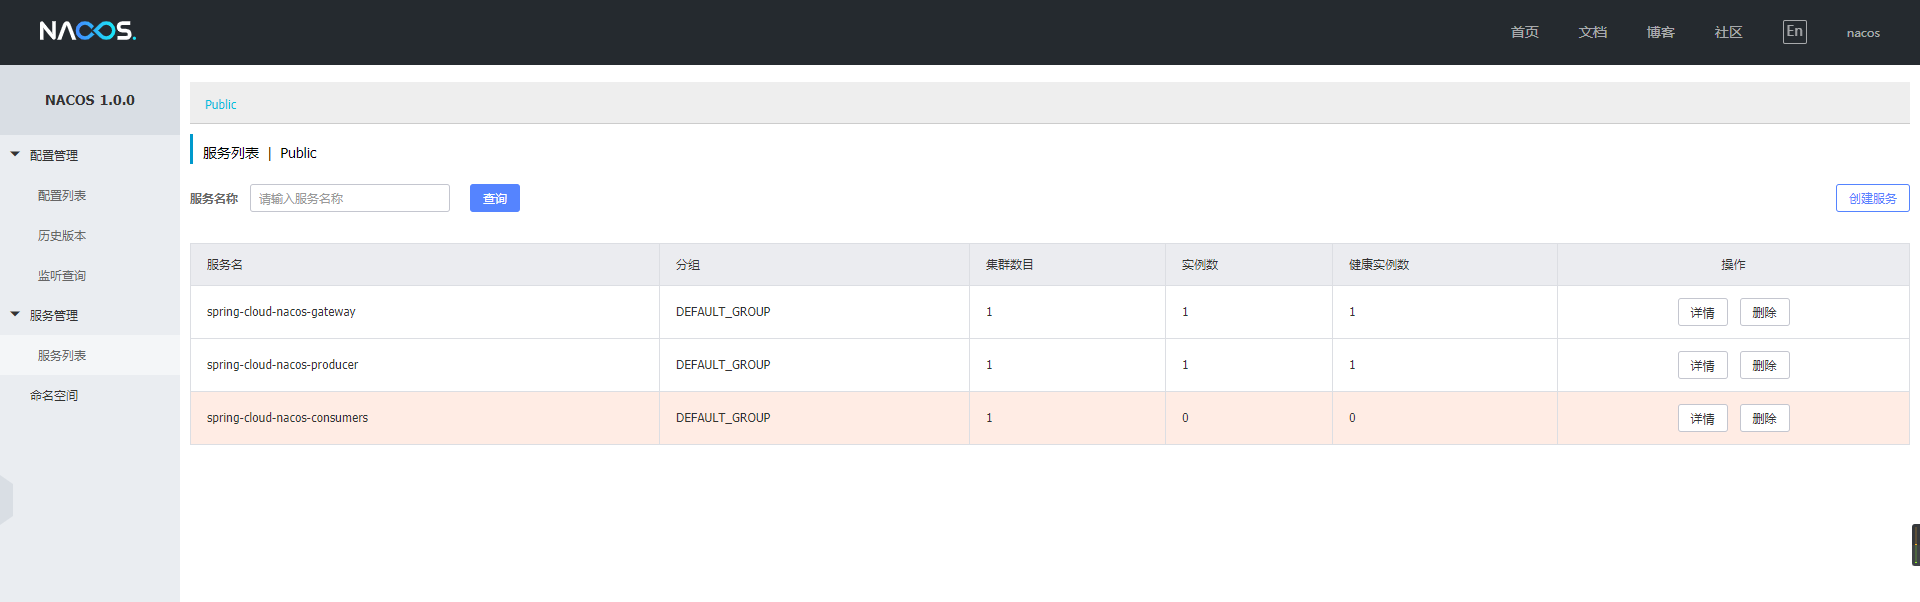
这里我把消费者服务停止掉了,可以看到Nacos可以实时的显示出来。
Nacos就介绍到这里,有不清楚的可以给我留言~
Spring Cloud Alibaba | Nacos服务注册与发现的更多相关文章
- Spring Cloud Alibaba Nacos 服务注册与发现功能实现!
Nacos 是 Spring Cloud Alibaba 中一个重要的组成部分,它提供了两个重要的功能:服务注册与发现和统一的配置中心功能. 服务注册与发现功能解决了微服务集群中,调用者和服务提供者连 ...
- Spring Cloud Alibaba 的服务注册与发现
Spring Cloud Alibaba 服务发现例子 一.需求 1.提供者完成的功能 2.消费者完成的功能 3.可以附加的额外配置 二.实现步骤 1.总的依赖引入 2.服务提供者和发现者,引入服务发 ...
- Spring Cloud Consul 实现服务注册和发现
Spring Cloud 是一个基于 Spring Boot 实现的云应用开发工具,它为基于 JVM 的云应用开发中涉及的配置管理.服务发现.断路器.智能路由.微代理.控制总线.全局锁.决策竞选.分布 ...
- Spring Cloud实践之服务注册与发现Eureka
一.简述: 服务提供者producer与服务消费者consumer都注册到eureka server,然后服务consumer在其应用内直接调用producer的服务名来调用服务,而不是像之前一样调用 ...
- Spring Cloud Consul使用——服务注册与发现(注册中心)
整理自该文章 一.Consul 服务端接下来我们开发 Consul 的服务端,创建一个 spring-cloud-consul-producer 项目 1.添加依赖包 <dependencies ...
- Spring Cloud Eureka 实现服务注册与发现
微服务 是一种架构模式,跟具体的语言实现无关,微服务架构将业务逻辑分散到了各个服务当中,服务间通过网络层进行通信共同协作:这样一个应用就可以划分为多个服务单独来维护发布.构建一个可靠微服务系统是需要具 ...
- 服务注册发现Eureka之一:Spring Cloud Eureka的服务注册与发现
Spring Cloud简介 Spring Cloud是一个基于Spring Boot实现的云应用开发工具,它为基于JVM的云应用开发中的配置管理.服务发现.断路器.智能路由.微代理.控制总线.全局锁 ...
- Spring Cloud之Eureka服务注册与发现
解决什么问题 ➟阐述微服务以及服务注册发现的部分概念 ➟阐述Eureka服务注册与发现的部分原理及细节 为什么需要服务中心 过去,每个应用都是一个CPU,一个主机上的单一系统.然而今天,随着大数据和云 ...
- Spring Cloud(一):服务注册与发现
Spring Cloud是什么 Spring Cloud是一系列框架的有序集合.它利用Spring Boot的开发便利性巧妙地简化了分布式系统基础设施的开发,如服务发现注册.配置中心.消息总线.负载均 ...
随机推荐
- C# WebRequest WebResponse的使用
using System;using System.Collections.Generic;using System.ComponentModel;using System.Data;using Sy ...
- 【C#】获取"我的电脑"的名字,如This PC、这台计算机
原文:[C#]获取"我的电脑"的名字,如This PC.这台计算机 注意:这里获取的[我的电脑]的名字,不是机器的名字.如图所示: 要获取的是This PC这个字符串. ----- ...
- PHP模拟单链表的数据结构
<?php /*** * 单链表 */ //节点,下标,节点名称,下一个节点的地址 class Node { public $id; public $name; public $next; pu ...
- delphi文件操作(比较全)
Delphi中默认有input和output两个文件变量,使用可以不用定义,直接使用. 但: input:只读.output:只写.用时注意以免引起异常. 文件是由文件名标识的一组数据的集合,文件通常 ...
- Linux C/C++编程手册查阅方法
Linux Programmer's Manual & User Commands https://www.kernel.org/doc/man-pages/ 搜索框输入epoll调用搜索引擎 ...
- 使用百度网盘+Git,把版本控制托管到云端,附精彩评论
http://www.cnblogs.com/vajoy/p/3929675.html 我试过多个这种双向同步的网盘,在网络状况不好.系统卡顿以及某些程序BUG的情况下,同步会有错乱现象,尤其是多个电 ...
- Qt 5.6.0 动态编译(VS2013 x86 target xp openssl icu webkit)
经历了多次延期后,在3月16号,Qt发布了5.6.0版本(全面支持高DPI无疑是一个亮点),从5.6.0版本开始,Qt直接移除了webkit模块,让webengine作为其替代选择,不过webengi ...
- c# 叫号小程序
写个叫号的小demo 长相如下 代码如下 using System; using System.Collections.Generic; using System.ComponentModel; us ...
- Hexo+NexT(六):手把手教你编写一个Hexo过滤器插件
Hexo+NexT介绍到这里,我认为已经可以很好地完成任务了.它所提供的一些基础功能及配置,都已经进行了讲解.你已经可以随心所欲地配置一个自己的博客环境,然后享受码字的乐趣. 把博客托管到Github ...
- js api 之 fetch、querySelector、form、atob及btoa
js api 之 fetch.querySelector.form.atob及btoa 转载请注明出处: https://www.cnblogs.com/funnyzpc/p/11095862.htm ...