centos 7 下安装Nginx
下载Nginx
wget nginx.tar.gz http://nginx.org/download/nginx-1.11.3.tar.gz
解压源码
tar -zxvf nginx-1.11..tar.gz
然后进入目录编译安装

cd nginx-1.11.

./configure --prefix=/usr/local/nginx \

--with-http_ssl_module --with-http_spdy_module \

--with-http_stub_status_module --with-pcre

如果没有error信息,就可以执行下边的安装了:

make

make install
安装prce(重定向支持)和openssl(https支持,如果不需要https可以不安装。)
yum -y install pcre*

yum -y install openssl*
Nginx配置文件详情
 #user  nobody;

 worker_processes  ;

 #error_log  logs/error.log;

 #error_log  logs/error.log  notice;

 #error_log  logs/error.log  info;

 #pid        logs/nginx.pid;

 events {

     worker_connections  ;

 }

 http {

     include       mime.types;

     default_type  application/octet-stream;

     #log_format  main  '$remote_addr - $remote_user [$time_local] "$request" '

     #                  '$status $body_bytes_sent "$http_referer" '

     #                  '"$http_user_agent" "$http_x_forwarded_for"';

     #access_log  logs/access.log  main;

     sendfile        on;

     #tcp_nopush     on;

     #keepalive_timeout  ;

     keepalive_timeout  ;

     #gzip  on;

     server {

         listen      ;

         server_name  localhost;

         #charset koi8-r;

         #access_log  logs/host.access.log  main;

         location / {

             root   html;

             index  index.html index.htm;

 proxy_set_header Host $host;

 proxy_set_header X-Real-IP $remote_addr;

 proxy_set_header X-Forwarded-For $proxy_add_x_forwarded_for;

 #需要代理的地址。upstream 配置负责均衡

 #proxy_pass http://localhost:5000;

         }

         #error_page                /.html;

         # redirect server error pages to the static page /50x.html

         #

         error_page        /50x.html;

         location = /50x.html {

             root   html;

         }

         # proxy the PHP scripts to Apache listening on 127.0.0.1:

         #

         #location ~ \.php$ {

         #    proxy_pass   http://127.0.0.1;

         #}

         # pass the PHP scripts to FastCGI server listening on 127.0.0.1:

         #

         #location ~ \.php$ {

         #    root           html;

         #    fastcgi_pass   127.0.0.1:;

         #    fastcgi_index  index.php;

         #    fastcgi_param  SCRIPT_FILENAME  /scripts$fastcgi_script_name;

         #    include        fastcgi_params;

         #}

         # deny access to .htaccess files, if Apache's document root

         # concurs with nginx's one

         #

         #location ~ /\.ht {

         #    deny  all;

         #}

     }

     # another virtual host using mix of IP-, name-, and port-based configuration

     #

     #server {

     #    listen       ;

     #    listen       somename:;

     #    server_name  somename  alias  another.alias;

     #    location / {

     #        root   html;

     #        index  index.html index.htm;

     #    }

     #}

     # HTTPS server

     #

     #server {

     #    listen        ssl;

     #    server_name  localhost;

     #    ssl_certificate      cert.pem;

     #    ssl_certificate_key  cert.key;

     #    ssl_session_cache    shared:SSL:1m;

     #    ssl_session_timeout  5m;

     #    ssl_ciphers  HIGH:!aNULL:!MD5;

     #    ssl_prefer_server_ciphers  on;

     #    location / {

     #        root   html;

     #        index  index.html index.htm;

     #    }

     #}

 }
启动nginx

./usr/local/nginx/sbin/nginx

重启或关闭进程:

./usr/local/nginx/sbin/nginx -s reload

./usr/local/nginx/sbin/nginx -s stop
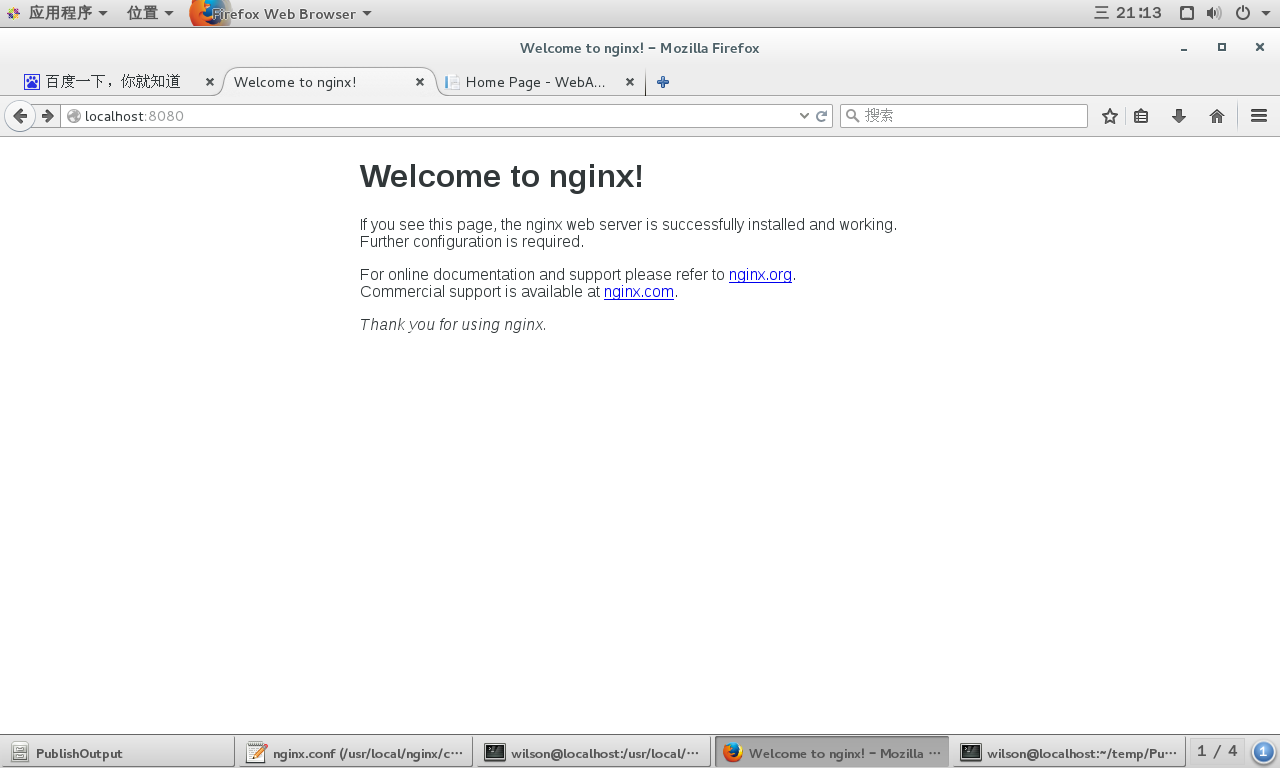
浏览器中输入http://localhost:8080,效果如下
官方文档中的安装方法,设置源后直接安装,对于配置文件自动写入默认路径
1、设置安装源
To set up the yum repository for RHEL/CentOS, create the file named /etc/yum.repos.d/nginx.repo with the following contents:

[nginx]

name=nginx repo

baseurl=http://nginx.org/packages/OS/OSRELEASE/$basearch/

gpgcheck=

enabled=

Replace “OS” with “rhel” or “centos”, depending on the distribution used, and “OSRELEASE” with “”, “”, or “”, for .x, .x, or .x versions, respectively.
具体文件内容为:
[nginx]

name=nginx repo

baseurl=http://nginx.org/packages/centos/7/$basearch/

gpgcheck=

enabled=
2、执行以下命令安装
sudo yum install nginx
3、启动、停止nginx服务
sudo nginx

sudo nginx -s stop
默认配置参数列表
Configure Arguments

Configure arguments common for nginx binaries from pre-built packages:

--prefix=/etc/nginx

--sbin-path=/usr/sbin/nginx

--conf-path=/etc/nginx/nginx.conf

--error-log-path=/var/log/nginx/error.log

--http-log-path=/var/log/nginx/access.log

--pid-path=/var/run/nginx.pid

--lock-path=/var/run/nginx.lock

--http-client-body-temp-path=/var/cache/nginx/client_temp

--http-proxy-temp-path=/var/cache/nginx/proxy_temp

--http-fastcgi-temp-path=/var/cache/nginx/fastcgi_temp

--http-uwsgi-temp-path=/var/cache/nginx/uwsgi_temp

--http-scgi-temp-path=/var/cache/nginx/scgi_temp

--user=nginx

--group=nginx

--with-http_ssl_module

--with-http_realip_module

--with-http_addition_module

--with-http_sub_module

--with-http_dav_module

--with-http_flv_module

--with-http_mp4_module

--with-http_gunzip_module

--with-http_gzip_static_module

--with-http_random_index_module

--with-http_secure_link_module

--with-http_stub_status_module

--with-http_auth_request_module

--with-threads

--with-stream

--with-stream_ssl_module

--with-http_slice_module

--with-mail

--with-mail_ssl_module

--with-file-aio

--with-http_v2_module

--with-ipv6
参考:http://nginx.org/en/linux_packages.html#stable
centos查看端口占用情况
netstat -lnp|grep
centos 7 下安装Nginx的更多相关文章
- Centos 7下安装nginx,使用yum install nginx,提示没有可用的软件包
Centos 7下安装nginx,使用yum install nginx,提示没有可用的软件包. 18 (flaskApi) [root@67 flaskDemo]# yum -y install n ...
- 在centos 7 下安装 nginx
在Linux下安装 nginx 1下载对应当前系统版本的nginx包(package) wget http://nginx.org/packages/centos/7/noarch/RPMS/ngi ...
- CentOS 7 下安装 Nginx
安装所需环境 Nginx 是 C语言 开发,建议在 Linux 上运行,当然,也可以安装 Windows 版本,本篇则使用 CentOS 7 作为安装环境. 一. gcc 安装安装 nginx 需要先 ...
- CentOS 7 下安装 Nginx(转)
转载自:http://www.linuxidc.com/Linux/2016-09/134907.htm 安装所需环境 Nginx 是 C语言 开发,建议在 Linux 上运行,当然,也可以安装 Wi ...
- centos系统下安装Nginx
参考链接 CentOS 7 用 yum 安装 Nginx Nginx负载均衡配置 下载并安装 #使用以下命令 sudo yum install -y nginx #sudo表示使用管理员权限运行命令 ...
- CentOS 6下安装nginx
原文:http://yubosun.akhtm.com/tech/centos-nginx.htm 1 在nginx官方网站下载一个rpm包,下载地址是:http://nginx.org/en/dow ...
- Linux Centos平台下安装Nginx
以home下安装为例,切换到home目录下 cd /home 安装依赖 nginx相关依赖 yum -y install make gcc gcc-c++ openssl openssl-devel ...
- centos虚拟机下安装nginx
通过yum安装 yum install epel-release -y(企业级的镜像源) yum install nginx-y 启动.停止.重启 service nginx start servic ...
- linux/centos下安装nginx(rpm安装和源码安装)详细步骤
Centos下安装nginx rpm包 ...
随机推荐
- WCF初探-17:WCF数据协定之等效性
数据协定等效性特点概述 对于客户端要将某种类型的数据成功发送到服务,或者服务要将数据成功发送到客户端的情况,接收端上并不一定必须存在此发送数据类型. 唯一的要求是两种类型的数据协定应该等效. 要使数据 ...
- hdoj 5003
题意:给你一个数组a,降序排序后,求sum+=0.95^(i-1)*ai 这题wa了两发,因为我没看清题意,要排序! 精度上面通过a^(i-1)=e^((i-1)*log(a)) 提到精度,就要想到底 ...
- candence 知识积累3
1. PCB板型: 1.新建PCB:PCB design ,新建的类型为board ,输入名称和保存位置,设置图纸参数.网格参数. 2.建立PCB板外框:菜单Add下选择相应的工具.在Option选项 ...
- Redisson-Parent 2.5.0 和 3.0.0 发布
Redisson-Parent 2.5.0 和 3.0.0 发布了,Redisson 是基于 Redis 服务之上构建的分布式.可伸缩的 Java 数据结构,高级的 Redis 客户端. Rediss ...
- android studio 开启genymotion 出现"failed to create framebuffer image"
出现错误 Unable to start the virtul device To start virtual devices, make sure that your video card supp ...
- [Algorithm Basics] Search
1, Binary Search On sorted array! public static int binarySearch(int e, int[] array, int low, int hi ...
- 数组第K小数问题 及其对于 快排和堆排 的相关优化比较
题目描述 给定一个整数数组a[0,...,n-1],求数组中第k小数 输入描述 首先输入数组长度n和k,其中1<=n<=5000, 1<=k<=n 然后输出n个整形元素,每个数 ...
- oracle数据库--启动和关闭
oracle--启动 oracle数据库的启动过程包含3个步骤:启动实例->加载数据库->打开数据库 分步骤启动过程可以对数据库进行不同的维护操作,对应我们不同的需求. 启动模式: 1.s ...
- mm/mmap.c
/* * linux/mm/mmap.c * * Written by obz. */#include <linux/stat.h>#include <linux/sched. ...
- cocoapod的下载安装解释
本文不提供cocoapod的下载安装的流程,因为那些只要百度一下就有的东西,而是对里面的代码进行解释,希望对iOS小白安装cocoapod有帮助: 一.cocoapod是什么? 开发过程中,我们会用到 ...