three.js 郭先生制作太阳系
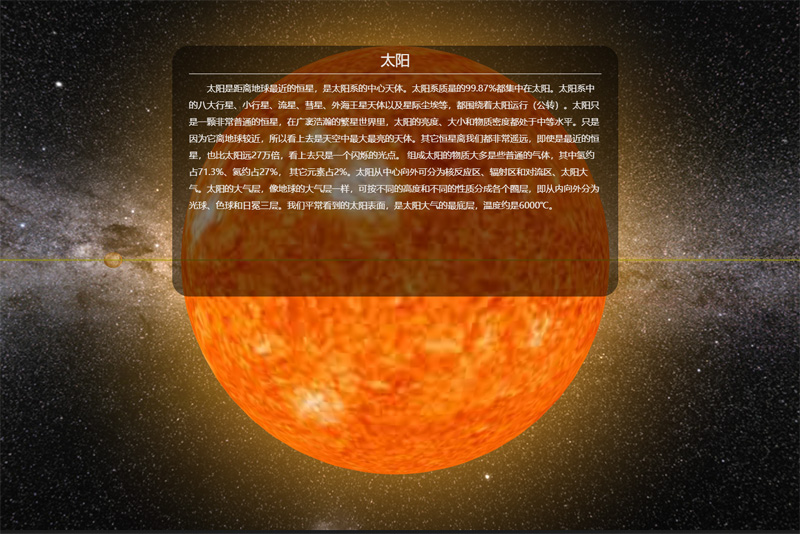
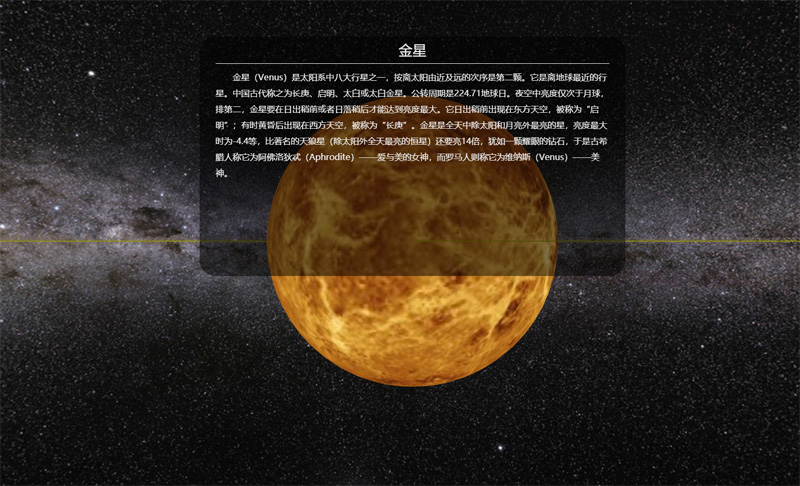
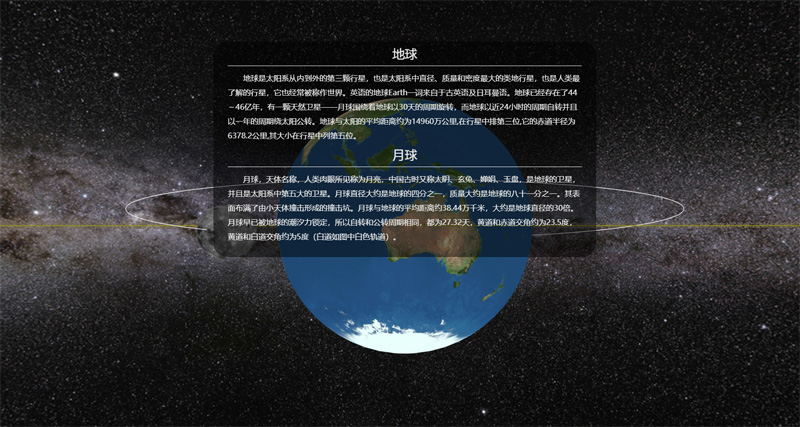
今天郭先生收到评论,想要之前制作太阳系的案例,因为找不到了,于是在vue版本又制作一版太阳系,在线案例请点击博客原文(加载时间比较长,请稍等一下)。话不多说先看效果图。


图片有点多,先放三张,相比于上一个版本,这个版本制作更加细致,动画更加流畅。那么下面分析一下主要代码。
1. 先介绍一下变量
这里查了一些资料radiuses、distances、pub_rotation、self_rotation、pitchs分别为八大行星半径比、到太阳的距离比、公转比、自转比、自转轴倾角比。
radiuses: [2440, 6052, 6371, 3397, 71492, 60268, 25559, 24766],

distances: [5791, 10820, 14960, 22794, 77833, 142940, 287099, 450400],

pub_rotation: [88, 225, 365, 687, 4329, 10767, 30769, 60152],

self_rotation: [58.65, 243, 1, 1, 0.41, 0.42, 0.64, 0.65],

pitchs: [0, 177, 23, 25, 3, 27, 98, 28],

sunObj: {

    radius: 60000//实际695500,为了好看太阳半径缩小了

},

moonObj: {

    distance: 800, //实际90 为了好看地月距离放大了

    radius: 1737,

    pitchs: 5,

    self_rotation: 27.25,

    pub_rotation: 27.25

},

asteriodObj: {

    radius: 2000,//

    pub_rotation: 408

},
2. 引入星球的纹理贴图
由于星球的贴图加载比较慢,所以要在贴图加载之后,再进行后续操作。
let loader = new THREE.TextureLoader();

taiyangT = loader.load('/static/images/texture/planets/sun.jpg');

shuixingT = loader.load('/static/images/texture/planets/shuixing.jpg');

jinxingT = loader.load('/static/images/texture/planets/jinxing.jpg');

diqiuT = loader.load('/static/images/texture/planets/diqiu.jpg');

huoxingT = loader.load('/static/images/texture/planets/huoxing.jpg');

muxingT = loader.load('/static/images/texture/planets/muxing.jpg');

tuxingT = loader.load('/static/images/texture/planets/tuxing.jpg');

tianwangxingT = loader.load('/static/images/texture/planets/tianwangxing.jpg');

haiwangxingT = loader.load('/static/images/texture/planets/haiwangxing.jpg');

yueqiuT = loader.load('/static/images/texture/planets/yueqiu.jpg');

asteriodsT = loader.load('/static/images/texture/planets/asteriod.jpg');

tuxinghuanT = loader.load('/static/images/texture/planets/tuxingring.png');
3. 绘制星球,并在场景中添加
这里我们写了一个公共的方法createMesh,这个方法传两个参数贴图和索引,可以根据这个索引找到自转周期、公转周期距离等等。
shuixing = this.createMesh(shuixingT, 0);

jinxing = this.createMesh(jinxingT, 1);

diqiu = this.createMesh(diqiuT, 2);

huoxing = this.createMesh(huoxingT, 3);

muxing = this.createMesh(muxingT, 4);

tuxing = this.createMesh(tuxingT, 5);

tianwangxing = this.createMesh(tianwangxingT, 6);

haiwangxing = this.createMesh(haiwangxingT, 7);

taiyang = this.createTaiyang();

yueqiu = this.createYueqiu();

scene.add(shuixing);

scene.add(jinxing);

scene.add(diqiu);

scene.add(huoxing);

scene.add(muxing);

scene.add(tuxing);

scene.add(tianwangxing);

scene.add(haiwangxing);

scene.add(taiyang);

scene.add(yueqiu);
创建公共网格方法如下
createMesh(texture, index) {

    let sphere = new THREE.SphereGeometry(this.radiuses[index] * this.radius_ratio, 60, 30);

    let material = new THREE.MeshBasicMaterial({map: texture});

    let mesh = new THREE.Mesh(sphere, material);

    mesh.position.x = this.distance_ratio * this.distances[index];

    return mesh;

}
创建太阳网格方法如下
createYueqiu() {

    let sphere = new THREE.SphereGeometry(this.moonObj.radius * this.radius_ratio, 30, 20);

    let material = new THREE.MeshBasicMaterial({map: yueqiuT});

    let mesh = new THREE.Mesh(sphere, material);

    mesh.position.x = this.distance_ratio * this.moonObj.distance;

    let moon = new THREE.Object3D();

    moon.position.copy(diqiu.position);

    moon.add(mesh);

    return moon;

}
4. 星体自转和公转
在render函数中调用自转和公转函数,控制自转的属性就是mesh.rotation。控制公转的属性就是mesh.position。这里使用欧拉角和THREE.Math方法
selfRotate() {

    shuixing.rotation.copy(new THREE.Euler(THREE.Math.degToRad(this.pitchs[0]), Math.sqrt(1 / this.self_rotation[0]) * this.self_ratio * this.timeS, 0));

    jinxing.rotation.copy(new THREE.Euler(THREE.Math.degToRad(this.pitchs[1]), Math.sqrt(1 / this.self_rotation[1]) * this.self_ratio * this.timeS, 0));

    diqiu.rotation.copy(new THREE.Euler(THREE.Math.degToRad(this.pitchs[2]), Math.sqrt(1 / this.self_rotation[2]) * this.self_ratio * this.timeS, 0));

    huoxing.rotation.copy(new THREE.Euler(THREE.Math.degToRad(this.pitchs[3]), Math.sqrt(1 / this.self_rotation[3]) * this.self_ratio * this.timeS, 0));

    muxing.rotation.copy(new THREE.Euler(THREE.Math.degToRad(this.pitchs[4]), Math.sqrt(1 / this.self_rotation[4]) * this.self_ratio * this.timeS, 0));

    tuxing.rotation.copy(new THREE.Euler(THREE.Math.degToRad(this.pitchs[5]), Math.sqrt(1 / this.self_rotation[5]) * this.self_ratio * this.timeS, 0));

    tianwangxing.rotation.copy(new THREE.Euler(0, Math.sqrt(1 / this.self_rotation[6]) * this.self_ratio * this.timeS, THREE.Math.degToRad(this.pitchs[6]), 'ZYX'));

    haiwangxing.rotation.copy(new THREE.Euler(THREE.Math.degToRad(this.pitchs[7]), Math.sqrt(1 / this.self_rotation[7]) * this.self_ratio * this.timeS, 0));

    // yueqiu.children[0].rotation.copy(new THREE.Euler(THREE.Math.degToRad(this.moonObj.pitchs), Math.sqrt(1 / this.moonObj.self_rotation) * this.self_ratio * this.timeS, 0));

    yueqiu.position.copy(diqiu.position);

    yueqiu.rotation.copy(new THREE.Euler(THREE.Math.degToRad(this.moonObj.pitchs), Math.sqrt(1 / this.moonObj.self_rotation) * this.self_ratio * this.timeS, 0));

    asteriods.rotation.copy(new THREE.Euler(0, this.timeS * this.pub_ratio / this.asteriodObj.pub_rotation / 2, 0));

},

pubRotate() {

    shuixing.position.set(Math.cos(this.timeP * this.pub_ratio / this.pub_rotation[0]) * this.distance_ratio * this.distances[0], 0, -Math.sin(this.timeP * this.pub_ratio / this.pub_rotation[0]) * this.distance_ratio * this.distances[0]);

    jinxing.position.set(Math.cos(this.timeP * this.pub_ratio / this.pub_rotation[1]) * this.distance_ratio * this.distances[1], 0, -Math.sin(this.timeP * this.pub_ratio / this.pub_rotation[1]) * this.distance_ratio * this.distances[1]);

    diqiu.position.set(Math.cos(this.timeP * this.pub_ratio / this.pub_rotation[2]) * this.distance_ratio * this.distances[2], 0, -Math.sin(this.timeP * this.pub_ratio / this.pub_rotation[2]) * this.distance_ratio * this.distances[2]);

    huoxing.position.set(Math.cos(this.timeP * this.pub_ratio / this.pub_rotation[3]) * this.distance_ratio * this.distances[3], 0, -Math.sin(this.timeP * this.pub_ratio / this.pub_rotation[3]) * this.distance_ratio * this.distances[3]);

    muxing.position.set(Math.cos(this.timeP * this.pub_ratio / this.pub_rotation[4]) * this.distance_ratio * this.distances[4], 0, -Math.sin(this.timeP * this.pub_ratio / this.pub_rotation[4]) * this.distance_ratio * this.distances[4]);

    tuxing.position.set(Math.cos(this.timeP * this.pub_ratio / this.pub_rotation[5]) * this.distance_ratio * this.distances[5], 0, -Math.sin(this.timeP * this.pub_ratio / this.pub_rotation[5]) * this.distance_ratio * this.distances[5]);

    tianwangxing.position.set(Math.cos(this.timeP * this.pub_ratio / this.pub_rotation[6]) * this.distance_ratio * this.distances[6], 0, -Math.sin(this.timeP * this.pub_ratio / this.pub_rotation[6]) * this.distance_ratio * this.distances[6]);

    haiwangxing.position.set(Math.cos(this.timeP * this.pub_ratio / this.pub_rotation[7]) * this.distance_ratio * this.distances[7], 0, -Math.sin(this.timeP * this.pub_ratio / this.pub_rotation[7]) * this.distance_ratio * this.distances[7]);

}
5. 使用动画,提升逼格
这里使用了tween控制相机的position和lookat属性,实现空间穿梭的感觉。
initTween() {

    let pos = {x: 0, y: 0, z: -96, lx: 0, ly: 0, lz: 0};

    tween1 = new TWEEN.Tween(pos).to({x: 57.91, y: 0, z: -5, lx: 57.91, ly: 0, lz: 0}, 20 * this.animation_time);

    tween1.easing(TWEEN.Easing.Linear.None);

    tween2 = new TWEEN.Tween(pos).to({x: 108.2, y: 0, z: -13, lx: 108.2, ly: 0, lz: 0}, 22 * this.animation_time);

    tween2.easing(TWEEN.Easing.Linear.None);

    tween3 = new TWEEN.Tween(pos).to({x: 149.6, y: 0, z: -14, lx: 149.6, ly: 0, lz: 0}, 24 * this.animation_time);

    tween3.easing(TWEEN.Easing.Linear.None);

    tween4 = new TWEEN.Tween(pos).to({x: 227.94, y: 0, z: -6, lx: 227.94, ly: 0, lz: 0}, 27 * this.animation_time);

    tween4.easing(TWEEN.Easing.Linear.None);

    tween5 = new TWEEN.Tween(pos).to({x: 436.5, y: 0, z: -6, lx: 436.5, ly: 0, lz: 0}, 30 * this.animation_time);

    tween5.easing(TWEEN.Easing.Linear.None);

    tween6 = new TWEEN.Tween(pos).to({x: 778.33, y: 0, z: -112, lx: 778.33, ly: 0, lz: 0}, 34 * this.animation_time);

    tween6.easing(TWEEN.Easing.Linear.None);

    tween7 = new TWEEN.Tween(pos).to({x: 1429.4, y: 0, z: -155, lx: 1429.4, ly: 0, lz: 0}, 35 * this.animation_time);

    tween7.easing(TWEEN.Easing.Linear.None);

    tween8 = new TWEEN.Tween(pos).to({x: 2871, y: 0, z: -46, lx: 2871, ly: 0, lz: 0}, 36 * this.animation_time);

    tween8.easing(TWEEN.Easing.Linear.None);

    tween9 = new TWEEN.Tween(pos).to({x: 4504, y: 0, z: -46, lx: 4504, ly: 0, lz: 0}, 37 * this.animation_time);

    tween9.easing(TWEEN.Easing.Linear.None);

    tween10 = new TWEEN.Tween(pos).to({x: -600, y: 452, z: 0, lx: 778.33, ly: 0, lz: 0}, 38 * this.animation_time);

    tween10.easing(TWEEN.Easing.Linear.None);

    tween1.chain(tween2).onUpdate(onUpdate).delay(50 * this.animation_time).onStart(() => this.show1 = false).onComplete(() => this.show2 = true);

    tween2.chain(tween3).onUpdate(onUpdate).delay(50 * this.animation_time).onStart(() => this.show2 = false).onComplete(() => this.show3 = true);

    tween3.chain(tween4).onUpdate(onUpdate).delay(50 * this.animation_time).onStart(() => this.show3 = false).onComplete(() => this.show4 = true);

    tween4.chain(tween5).onUpdate(onUpdate).delay(50 * this.animation_time).onStart(() => this.show4 = false).onComplete(() => this.show5 = true);

    tween5.chain(tween6).onUpdate(onUpdate).delay(50 * this.animation_time).onStart(() => this.show5 = false).onComplete(() => this.show6 = true);

    tween6.chain(tween7).onUpdate(onUpdate).delay(50 * this.animation_time).onStart(() => this.show6 = false).onComplete(() => this.show7 = true);

    tween7.chain(tween8).onUpdate(onUpdate).delay(50 * this.animation_time).onStart(() => this.show7 = false).onComplete(() => this.show8 = true);

    tween8.chain(tween9).onUpdate(onUpdate).delay(50 * this.animation_time).onStart(() => this.show8 = false).onComplete(() => this.show9 = true);

    tween9.chain(tween10).onUpdate(onUpdate).delay(50 * this.animation_time).onStart(() => this.show9 = false).onComplete(() => this.show10 = true);

    tween10.onUpdate(onUpdate).delay(50 * this.animation_time).onStart(() => this.show10 = false);

    tween1.start();

},
主要代码差不多就是这样,像这样制作太阳系并不难,只要你敢想。
转载请注明地址:郭先生的博客
three.js 郭先生制作太阳系的更多相关文章
- js傻瓜式制作电子时钟
js傻瓜式制作电子时间 使用到的知识点 setInterval函数 构建函数new Date if判断 demo: //css样式请自行设置 <span id="timer" ...
- three.js cannon.js物理引擎制作一个保龄球游戏
关于cannon.js我们已经学习了一些知识,今天郭先生就使用已学的cannon.js物理引擎的知识配合three基础知识来做一个保龄球小游戏,效果如下图,在线案例请点击博客原文. 我们需要掌握的技能 ...
- D3.js(v3)+react 制作 一个带坐标与比例尺的柱形图 (V3版本)
现在用D3.js + react做一个带坐标轴和比例尺的柱形图.我已经尽力把代码全部注释上了,最后我也会把完整柱形图代码奉上.如果还有疑惑的,可以去翻看一下我之前介绍的方法,以下方法都有介绍到. 还有 ...
- Walkway.js – 用线条制作简约的 SVG 动画
Walkway.js 是一个使用线条和路径元素组成 SVG 动画图像的简单方法.只需根据提供的配置对象创建一个新的 Walkway 实例就可以了.这种效果特别适合那些崇尚简约设计风格的网页.目前, W ...
- js笔记(制作一个简单的计数器)
首先编写静态页中的按钮: <input id="result" type="button" value="该程序已经运行了0秒!"/ ...
- 通过js代码来制作数据库增删改查插件
代码流程 1.订制表头:table_config 2.订制显示内容: table_config,data_list 3.加载框: 图片,position:fixed 4.-字符串格式化 ...
- 利用js键盘事件制作会移动效果
会移动的方块 描述 按键盘上的方向键方块会移动,按住alt键和方向键进行大幅度移动 <!DOCTYPE html> <html lang="en"> < ...
- js颜色选择器 制作分析
给html元素设置事件监听, 触发事件 弹出颜色选择器 颜色选择器绘制 获取上次选择的颜色(当前颜色) 绘制渐变色板(canvas) (方法: 横轴渐变ff0000, ffff00, 00ff00, ...
- 使用JS的画布制作一个瞄准镜
<canvas width="600" height="500" id="myCanvas"></canvas> & ...
随机推荐
- Spring Boot — 运行应用程序5种方式
1. 从IDE中的Run 按钮运行 你可以从IDE中运行Spring Boot应用, 就像一个简单的Java应用, 但是, 你首先需要导入项目. 导入步骤跟你的IDE和构建系统有关. 大多数IDEs能 ...
- 栈的顺序存储和链式存储c语言实现
一. 栈 栈的定义:栈是只允许在一端进行插入或删除操作的线性表. 1.栈的顺序存储 栈顶指针:S.top,初始设为-1 栈顶元素:S.data[S.top] 进栈操作:栈不满时,栈顶指针先加1,再到栈 ...
- actuator与spring-boot-admin 可以说的秘密
SpringBoot 是为了简化 Spring 应用的创建.运行.调试.部署等一系列问题而诞生的产物,自动装配的特性让我们可以更好的关注业务本身而不是外部的XML配置,我们只需遵循规范,引入相关的依赖 ...
- nginx配置奇怪问题记录
执行 nginx -t 检查配置报了如下错误: 下面是配置信息 遇到个很奇怪的问题,plm-api-stage 这么配置就可以正常校验过,但是改成 plm-stage-api,就会上面的警告信息: ...
- Drozer简单使用
1.Drozer简介 Drozer是一款针对Android系统的安全测试框架.Drozer可以通过与dalivik VM交互.与其他应用程序的IPC端点交互.与底层操作系统的交互,来避免正处于开发 ...
- html5中二进制对象Blob的使用——Blob与ArrayBuffer、TypeArray和String的相互转换
在网页开发中遇到这样一个问题,在使用select的时候,想让里面的文字水平居中.首先想到的是text-align:center;但是发现在Chrome浏览器下不兼容,需要使用到text-align-l ...
- Form表单,textarea标签输入框 字数限制,和已输入字数的统计显示
<script type="text/javascript"> $(document).ready(function() { <%-- 页面进来时就调用 --%& ...
- day10 字符编码
字符编码 在python中出现乱码就是字符编码没有匹配的问题 python3中执行python3编辑的代码只要没有修改过编码,都是用utf-8,如果出现乱码就修改头文件,改成和原来编码相同的字符编码 ...
- scrapy 源码解析 (一):启动流程源码分析(一)命令行启动
前言 虽然爬虫的入门级编写并不难,但要让爬虫真正稳定可靠的运行起来,真不是一件容易的事.首先,要用到scrapy,就必须要读懂scrapy这个爬虫框架,如果连这个框架的执行逻辑都搞不懂,那么爬虫也很难 ...
- Django- 开发通用且万能的的权限框架组件
本节内容 需求讨论 权限设计 代码设计 自定义权限钩子 业务场景分析 假设我们在开发一个培训机构的 客户关系管理系统,系统分客户管理.学员管理.教学管理3个大模块,每个模块大体功能如下 客户管理销售人 ...
