Kubernetes-Istio之Gateway和VirtualService
1: 确定入口IP和端口
执行以下命令以确定Kubernetes集群是否在支持外部负载均衡器的环境中运行:
 kubectl get svc istio-ingressgateway -n istio-system

NAME                   TYPE           CLUSTER-IP     EXTERNAL-IP   PORT(S)                                                                                                                                      AGE

istio-ingressgateway   LoadBalancer   10.108.152.2   <pending>     15020:32736/TCP,80:31380/TCP,443:31390/TCP,31400:31400/TCP,15029:32101/TCP,15030:32222/TCP,15031:30551/TCP,15032:31262/TCP,15443:30129/TCP   3d1h
如果EXTERNAL-IP设置了该值,则环境具有可用于入口网关的外部负载平衡器。如果EXTERNAL-IP值是<none>(或永久<pending>),则环境不为入口网关提供外部负载平衡器。在这种情况下,您可以使用服务的节点端口来访问网关。
我的pending,使用服务的节点端口来访问:
设置入口端口:
export INGRESS_PORT=$(kubectl -n istio-system get service istio-ingressgateway -o jsonpath='{.spec.ports[?(@.name=="http2")].nodePort}')
export SECURE_INGRESS_PORT=$(kubectl -n istio-system get service istio-ingressgateway -o jsonpath='{.spec.ports[?(@.name=="https")].nodePort}')
设置入口IP取决于群集提供者:
export INGRESS_HOST=$(kubectl get po -l istio=ingressgateway -n istio-system -o jsonpath='{.items[0].status.hostIP}')
2: 开启一个服务, istio-a.yml:
apiVersion: apps/v1

kind: Deployment

metadata:

  name: istio-a

spec:

  selector:

    matchLabels:

       name: istio-a

  replicas: 1

  template:

    metadata:

      annotations:

        sidecar.istio.io/inject: "true"  # 开启sidecar自动注入

      labels:

        name: istio-a

    spec:

      containers:

      - name: istio-a

         #  我自己的一个镜像

        image: registry.cn-shenzhen.aliyuncs.com/zsifan/istio-a:v1

        imagePullPolicy: Always

        ports:

        - containerPort: 10001

---

apiVersion: v1

kind: Service

metadata:

   name: istio-a

spec:

  ports:

    - port: 10001

#  # ClusterIP, NodePort, LoadBalancer

  type: ClusterIP

  selector:

    name: istio-a
3:使用Istio网关配置入口
1): 创建一个Istio Gateway
apiVersion: networking.istio.io/v1alpha3

kind: Gateway

metadata:

  name: httpbin-gateway

spec:

  selector:

    istio: ingressgateway # use Istio default gateway implementation

  servers:

  - port:

      number: 80

      name: http

      protocol: HTTP

    hosts:

    - "k8s.test.com"
2): 创建一个VirtualService,配置通过以下路径进入的流量的路由Gateway
apiVersion: networking.istio.io/v1alpha3

kind: VirtualService

metadata:

  name: httpbin-a

spec:

  hosts:

  - "k8s.test.com"      #  对应gateway 的hosts

  gateways:

  - httpbin-gateway    #  对应gateway name

  http:

  - match:

    - uri:

        prefix: /a     # 允许路径/a的通过

    rewrite:

      uri: /          # 重写url

    route:

    - destination:

        port:

          number: 10001  # 服务端口号

        host: istio-a      # 对用的服务

      timeout: 10s
3): 使用curl访问istio-a服务:
curl -I -HHost:k8s.test.com http://$INGRESS_HOST:$INGRESS_PORT/a/test

HTTP/1.1 200 OK

content-type: text/plain;charset=UTF-8

content-length: 13

date: Wed, 13 Nov 2019 13:27:44 GMT

x-envoy-upstream-service-time: 80

server: istio-envoy
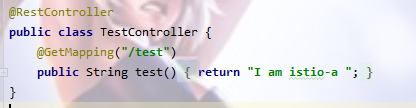
我的istio-a服务中就写了一个test:
如果访问url不是/a开头的而是未知的,将显示404:
curl -I -HHost:k8s.test.com http://$INGRESS_HOST:$INGRESS_PORT/b

HTTP/1.1 404 Not Found

vary: Origin,Access-Control-Request-Method,Access-Control-Request-Headers

content-type: application/json

date: Wed, 13 Nov 2019 13:32:06 GMT

x-envoy-upstream-service-time: 21

server: istio-envoy

transfer-encoding: chunked
如果我们想使用浏览器访问入口服务:
可以将gateway中的hosts修改为*,相应的VirtualService的hosts也要修改为*
apiVersion: networking.istio.io/v1alpha3

kind: Gateway

metadata:

  name: httpbin-gateway

spec:

  selector:

    istio: ingressgateway # use Istio default gateway implementation

  servers:

  - port:

      number: 80

      name: http

      protocol: HTTP

    hosts:

    - "*"

---

apiVersion: networking.istio.io/v1alpha3

kind: VirtualService

metadata:

  name: httpbin-a

spec:

  hosts:

  - "*"

  gateways:

  - httpbin-gateway

  http:

  - match:

    - uri:

        prefix: /a

    rewrite:

      uri: /

    route:

    - destination:

        port:

          number: 10001

        host: istio-a

      timeout: 10s
先输出ip和port确定请求地址:
echo $INGRESS_HOST:$INGRESS_PORT

192.168.17.210:31380
在浏览器请求<ip>:<port>/a/test

就搭建成功了
Kubernetes-Istio之Gateway和VirtualService的更多相关文章
- kubernetes istio之gateway
[root@master istio-]# kubectl apply -f samples/httpbin/httpbin.yaml service/httpbin created deployme ...
- Istio Routing 实践掌握virtualservice/gateway/destinationrule/AB版本发布/金丝雀发布
原文 在学习像 Istio 这样的新技术时,看一下示例应用程序总是一个好主意. Istio repo 有一些示例应用程序,但它们似乎有各种不足. 文档中的 BookInfo 是一个很好的示例. 但是, ...
- kubernetes + istio进行流量管理
实验目的: 本文介绍如何通过istio实现域名访问k8s部署的nginx服务 前提: 已经安装了kubernetes的服务器 了解 kubernetes 基本命令如何使用 (kubectl creat ...
- kubernetes istio的快速安装和使用例子
安装 [root@master ~]# wget https://github.com/istio/istio/releases/download/1.1.5/istio-1.1.5-linux.ta ...
- 15分钟在笔记本上搭建 Kubernetes + Istio开发环境
11月13~15日,KubeCon 上海大会召开,云原生是这个秋天最火热的技术.很多同学来问如何上手 Kubernetes和Istio 服务网格开发.本文将帮助你利用Docker CE桌面版,15分钟 ...
- Kubernetes+Istio
Kubernetes+Istio 微服务.SpringCloud.k8s.Istio杂谈 一.微服务与SOA “微服务”是一个名词,没有这个名词之前也有“微服务”,一个朗朗上口的名词能让大家产 ...
- ambassador kubernetes native api gateway
github 上的介绍: Ambassador is an open source Kubernetes-native API Gateway built on Envoy, designed for ...
- kubernetes istio之流量管理
1.部署 Bookinfo 应用 要在 Istio 中运行这一应用,无需对应用自身做出任何改变.我们只要简单的在 Istio 环境中对服务进行配置和运行,具体一点说就是把 Envoy sidecar ...
- 部署Bookinfo示例程序详细过程和步骤(基于Kubernetes集群+Istio v1.0)
部署Bookinfo示例程序详细过程和步骤(基于Kubernetes集群+Istio v1.0) 部署Bookinfo示例程序 在下载的Istio安装包的samples目录中包含了示例应用程序. ...
随机推荐
- Flutter Dart List.map() 获取下标
class HomePageState extends State{ final topTitles = ['审批单', '机票列表', '客服']; final topIcons = ['asset ...
- c++11 为什么使用ref,和引用的区别
std::ref只是尝试模拟引用传递,并不能真正变成引用,在非模板情况下,std::ref根本没法实现引用传递,只有模板自动推导类型时,ref能用包装类型reference_wrapper来代替原本会 ...
- IDEA 2018 搭建 Spring MVC helloworld
转自https://segmentfault.com/a/1190000017248622 网上看了不少idea搭建SpringMVC Helloworld的例子,但是一个个试下来都没有成功.我把他们 ...
- Tomcat启动原理/使用tomcat的应用是如何从tomcat的main函数开始运行的
从main方法开始打断点,逐步调试,了解程序运行过程 全局唯一的public static void main(String[] args)main Springboot* 内置tomcat,开发的时 ...
- (CSDN迁移) Java路径获取
package unit02; /** * * @time 2014年9月18日 下午10:29:48 * @porject ThinkingInJava * @author Kiwi */ publ ...
- 使用objcopy实现将文件编译进执行程序
一.简介 工作中可能遇到将一个文件编译进执行程序的需求,例如bin文件.jpg文件等等.实现的方法可以使用脚本来将文件内容写入一个新的C源文件数组,达成编译进程序的目的. 现在介绍一种简单.快捷的方 ...
- layui父页面获取子页面数据
var doc = layero.find('iframe')[0].contentDocument; var test= $(doc).find("input[name='test']&q ...
- 谷歌浏览器调试swoole长连接方法
谷歌浏览器调试swoole长连接方法network标签里面的ws 看frames
- Linux学习-软件包管理安装
rpm RPM是Red-Hat Package Manager(RPM软件包管理器)的缩写 软件包类型 二进制包:已经使用GCC编辑后的 tar源码包:需要编译 rpm包获取方式 1,系统镜像 需 ...
- listWdiget控件
2019-07-15 1.常用方法的功能 listWidget = QListWidget() #实例化一个(item base)的列表 listWidget.addItem('dd') #添加一个项 ...