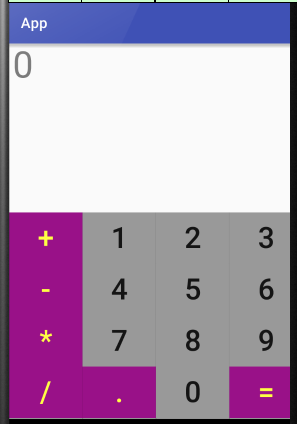
Android 网格布局 计算器
 <GridLayout xmlns:android="http://schemas.android.com/apk/res/android"

     xmlns:tools="http://schemas.android.com/tools"

     android:id="@+id/GridLayout1"

     android:layout_width="wrap_content"

     android:layout_height="wrap_content"

     android:rowCount="6"

     android:columnCount="4"

     android:orientation="horizontal">

     <TextView

         android:layout_width="match_parent"

         android:layout_height="230dp"

         android:layout_columnSpan="4"

         android:text="0"

         android:textSize="50sp"

         android:layout_marginLeft="5dp"

         android:layout_marginRight="5dp"

         />

     <Button

         android:layout_width="100dp"

         android:layout_height="70dp"

         android:text="+"

         android:textSize="40dp"

         android:background="#918"

         android:textColor="#FF4"

         />

     <Button

         android:layout_width="100dp"

         android:layout_height="70dp"

         android:text="1"

         android:textSize="40dp"

         android:background="#999"

         />

     <Button

         android:layout_width="100dp"

         android:layout_height="70dp"

         android:text="2"

         android:textSize="40dp"

         android:background="#999"

         />

     <Button

         android:layout_width="100dp"

         android:layout_height="70dp"

         android:text="3"

         android:textSize="40dp"

         android:background="#999"

         />

     <Button

         android:layout_width="100dp"

         android:layout_height="70dp"

         android:text="-"

         android:textSize="40dp"

         android:background="#918"

         android:textColor="#FF4"

         />

     <Button

         android:layout_width="100dp"

         android:layout_height="70dp"

         android:text="4"

         android:textSize="40dp"

         android:background="#999"

         />

     <Button

         android:layout_width="100dp"

         android:layout_height="70dp"

         android:text="5"

         android:textSize="40dp"

         android:background="#999"

         />

     <Button

         android:layout_width="100dp"

         android:layout_height="70dp"

         android:text="6"

         android:textSize="40dp"

         android:background="#999"

         />

     <Button

         android:layout_width="100dp"

         android:layout_height="70dp"

         android:text="*"

         android:textSize="40dp"

         android:background="#918"

         android:textColor="#FF4"

         />

     <Button

         android:layout_width="100dp"

         android:layout_height="70dp"

         android:text="7"

         android:textSize="40dp"

         android:background="#999"

         />

     <Button

         android:layout_width="100dp"

         android:layout_height="70dp"

         android:text="8"

         android:textSize="40dp"

         android:background="#999"

         />

     <Button

         android:layout_width="100dp"

         android:layout_height="70dp"

         android:text="9"

         android:textSize="40dp"

         android:background="#999"

         />

     <Button

         android:layout_width="100dp"

         android:layout_height="70dp"

         android:text="/"

         android:textSize="40dp"

         android:background="#918"

         android:textColor="#FF4"

         />

     <Button

         android:layout_width="100dp"

         android:layout_height="70dp"

         android:text="."

         android:textSize="40dp"

         android:background="#918"

         android:textColor="#FF4"

         />

     <Button

         android:layout_width="100dp"

         android:layout_height="70dp"

         android:text="0"

         android:textSize="40dp"

         android:background="#999"

         />

     <Button

         android:layout_width="100dp"

         android:layout_height="70dp"

         android:text="="

         android:textSize="40dp"

         android:background="#918"

         android:textColor="#FF4"

         />

 </GridLayout>
Android 网格布局 计算器的更多相关文章
- Android——网格布局仿计算器
代码如下: <?xml version="1.0" encoding="utf-8"?> <GridLayout xmlns:android= ...
- Android 网格布局短信发送界面
<?xml version="1.0" encoding="utf-8"?> <GridLayout xmlns:android=" ...
- Android 线性布局 计算器
<?xml version="1.0" encoding="utf-8"?> <LinearLayout xmlns:android=&quo ...
- android的布局-----GridLayout(网格布局)
学习导图 (一)简介 网格布局由GridLayout所代表,在android4.0之后新增加的布局管理器,因此需要android4.0之后的版本中使用,如果在更早的平台使用该布局管理器,则需要导入相应 ...
- Android中帧布局-FrameLayout和网格布局-GridLayout
帧布局-FrameLayout 一.概念 帧布局中,容器为每个加入其中的空间创建一个空白的区域(成为一帧).每个空间占据一帧,这些帧会按gravity属性自动对齐. 帧布局的效果是将其中的所有空间叠加 ...
- android——学习:网格布局——GridLayout
Android一开始就提供了几种布局控件,如线性布局LinearLayout.相对布局RelativeLayout和表格布局TableLayout等,但在很多情况下,这些布局控件是不能满足要求的,因此 ...
- Android布局_网格布局GirdLayout
自Android4.0版本后新增的GirdLayout网格布局(API 14) <?xml version="1.0" encoding="utf-8"? ...
- Android精通:TableLayout布局,GridLayout网格布局,FrameLayout帧布局,AbsoluteLayout绝对布局,RelativeLayout相对布局
在Android中提供了几个常用布局: LinearLayout线性布局 RelativeLayout相对布局 FrameLayout帧布局 AbsoluteLayout绝对布局 TableLayou ...
- Android开发---网格布局案例
Android开发---网格布局案例 效果图: 1.MainActivity.java package com.example.android_activity; import android.ap ...
随机推荐
- PAT乙级 1008. 数组元素循环右移问题 (20)
1008. 数组元素循环右移问题 (20) 时间限制 400 ms 内存限制 65536 kB 代码长度限制 8000 B 判题程序 Standard 一个数组A中存有N(N>0)个整数,在不允 ...
- 编译php时的一个脚本
./configure --prefix=/usr/local/php \ --with-curl \ --with-freetype-dir \ --with-gd \ --with-gettext ...
- web工程常见部署方式总结
作为一个web测试工程师,对测试所属的平台架构,项目部署情况应该是有所了解的,下面在此基础上总结下web项目在各种场景下常用的部署方式: 第一种方法: 开发常用部署方法,直接在myeclipse里部署 ...
- Delphi Xe 中如何把日期格式统一处理,玩转 TDatetime
日期格式的处理总是会很复杂,因为不同的环境日 期格式也不一样.为了程序统一处理, 最好把格式给统一了: 可以在程序的初始化段: FormatSettings.ShortDateFormat := ' ...
- 颜色表及html代码
颜色名称及色样表(HTML版) 颜色名 中文名称 Hex RGB 十进制 Decimal LightPink 浅粉红 #FFB6C1 255,182,193 Pink 粉红 #FF ...
- 浅析Java的HashCode,以及equals
1.JDK规定,equals相等的两个对象hashCode也必须相等,这两个方法都是从Object上面继承而来的,通过观察JDK源码可以发现Object的equals方法是对2个对象的地址(逻辑地址, ...
- Majority Element
#include<map> using namespace std;class Solution {public: int majorityElement(vector<int ...
- Windows Thin PC 激活方法
Windows Thin PC 激活方法 笔者之前分享了Windows Thin PC ,如果你已经安装了Windows Thin PC ,但还没有激活,可以参照以下方式进行Windows Thin ...
- ecshop编辑器fckeditor换百度ueditor编辑器教程
1.下载uediter编辑器,解压上传目录uediter到根目录/includes/下 2.修改admin/includes/lib_main.php /** * 生成编辑器 ...
- 1. python中的随机函数
本系列不会对python语法,理论作详细说明:所以不是一个学习教材:详细查考Vamei 大神:通俗易懂:是一个很好(基础-中级-高级)的学习教程.而这里只是我一个学习python的某些专题的 ...