spring-framework-core-ioc Container 笔记版本
Spring框架对于java开发人员来说是无比重要的.接触java也有3年了,接触Spring两年了.在工作中天天使用它,平时也会通过视频和书籍尝试更加的了解Spring.对于初学者来说,Spring是伟大的,也是神秘的.我写这篇博客的本意是想从Spring文档开始,学习Spring,我相信我所了解的Spring只是冰山一角.本文的所有代码实例,都会原样摘抄Spring官方文档,因为本人英文水平有限,所有使用的是谷歌浏览器翻译,文章中标注橙色部分的内容都是我根据自己少有的经验给出的结论,不作为标准解释,如有错误,请在留言指出.小标题不是官方文档的标题,但是顺序是一致的.本博客希望能帮助刚刚学习,或者准备学习spring的同学.因为工作原因,本文不定时更新.spring官方文档地址 https://docs.spring.io/spring/docs/5.2.1.RELEASE/spring-framework-reference
IOC容器
xml配置bean
创建三个POJO在PetStoreServiceImpl 中使用了JpaAccountDao 和JpaItemDao
public class PetStoreServiceImpl {
    private JpaAccountDao accountDao;
    private JpaItemDao itemDao;

    public JpaAccountDao getAccountDao() {
        return accountDao;
    }

    public void setAccountDao(JpaAccountDao accountDao) {
        this.accountDao = accountDao;
    }

    public JpaItemDao getItemDao() {
        return itemDao;
    }

    public void setItemDao(JpaItemDao itemDao) {
        this.itemDao = itemDao;
    }
}
public class JpaItemDao {
}
public class JpaAccountDao {
}
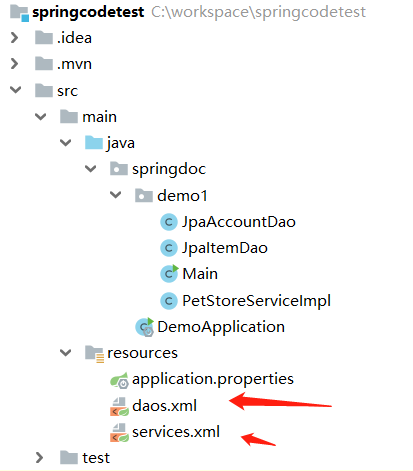
用两个xml文件分别配置上边的三个pojo
<?xml version="1.0" encoding="UTF-8"?>
<beans xmlns="http://www.springframework.org/schema/beans"
       xmlns:xsi="http://www.w3.org/2001/XMLSchema-instance"
       xsi:schemaLocation="http://www.springframework.org/schema/beans
        https://www.springframework.org/schema/beans/spring-beans.xsd">

<!-- services -->

    <bean id="petStore" class="springdoc.demo1.PetStoreServiceImpl">
        <property name="accountDao" ref="accountDao"/>
        <property name="itemDao" ref="itemDao"/>
        <!-- additional collaborators and configuration for this bean go here -->
    </bean>

</beans>
<?xml version="1.0" encoding="UTF-8"?>
<beans xmlns="http://www.springframework.org/schema/beans"
       xmlns:xsi="http://www.w3.org/2001/XMLSchema-instance"
       xsi:schemaLocation="http://www.springframework.org/schema/beans
        https://www.springframework.org/schema/beans/spring-beans.xsd">

<bean id="accountDao"
          class="springdoc.demo1.JpaAccountDao">
        <!-- additional collaborators and configuration for this bean go here -->
    </bean>

    <bean id="itemDao" class="springdoc.demo1.JpaItemDao">
        <!-- additional collaborators and configuration for this bean go here -->
    </bean>

    <!-- more bean definitions for data access objects go here -->

</beans>
public class Main {
    public static void main(String[] args) {
        ApplicationContext context = new ClassPathXmlApplicationContext( "daos.xml","services.xml");
    }
}
以上java代码,可以加载两个配置文件,并且实例化两个配置文件中的pojo.使其成为springbean.所谓springbean则是说,pojo被实例化,并且存储在spring框架中的一个单例map中,此后我们无论在任何地方使用该bean都会从单例map中获取.
使用ClassPathXmlApplicationContext的参数是可变参数,可以传入多个xml,但是只能是classpath下的xml,不要求xml顺序.<bean></bean>定义的就是一个pojo,属性id必须是唯一标识,class则为class文件的类路径.
<property></property>用来声明pojo的属性.上边的例子中petStoreServiceImpl则有两个pojo类型的属性,name属性必须和pojo中的属性名一致.ref则对应<bean></bean>的id,ref引用的id可以不在一个配置文件中,需要注意的是petStoreServiceImpl的属性必须有set()方法.get()方法则有我们自己使用.这里补充一句,当我们需要spring帮我们创建一个bean,其实spring是根据反射来创建的bean,跟new关键字一样.如果我们的pojo没有无参数构造,类如petStoreServiceImpl那在xml中声明的bean,一定要有参数.否则无法实例化.
以上可以分析出spring框架会先解析所有的xml,然后才会创建pojo实例.pojo的配置可以不再一个配置文件中,配置文件的加载顺序不强制.
在xml引用其他的xml
<?xml version="1.0" encoding="UTF-8"?>
<beans xmlns="http://www.springframework.org/schema/beans"
       xmlns:xsi="http://www.w3.org/2001/XMLSchema-instance"
       xsi:schemaLocation="http://www.springframework.org/schema/beans
        https://www.springframework.org/schema/beans/spring-beans.xsd">

<!-- services -->
    <bean id="petStore" class="springdoc.demo1.PetStoreServiceImpl">
        <property name="accountDao" ref="accountDao"/>
        <property name="itemDao" ref="itemDao"/>
        <!-- additional collaborators and configuration for this bean go here -->
    </bean>

    <import resource="daos.xml"/>
</beans>
public class Main {
    public static void main(String[] args) {
        ApplicationContext context = new ClassPathXmlApplicationContext( "services.xml");
    }
}
如果你觉得在ClassPathXmlApplicationContext中传入多个参数麻烦,你也可以只传入一个xml,而在这个xml中使用<import/>导入其他的xml.但是需要注意导入xml和当前xml的路径关系
<import/>标签的可以再<bean>标签之后.这也可以证明,spring是先解析xml然后才实例化的bean
获取bean
为了方便演示,我给ItemDao设置了个全局变量
public class JpaItemDao {
    private String name = "张三";

    public String getName() {
        return name;
    }

    public void setName(String name) {
        this.name = name;
    }
}
    @Test
    public void t1(){
        ApplicationContext context = new ClassPathXmlApplicationContext( "services.xml");
        //先获取PetStoreServiceImpl
        PetStoreServiceImpl petStore = context.getBean("petStore", PetStoreServiceImpl.class);
        //在获取ItemDao
        JpaItemDao itemDao = petStore.getItemDao();
        //在获取itemDao的变量
        String name = itemDao.getName();
        System.out.print(name);
    }
当然我们也可以直接获取ItemDao
  @Test
    public void t2(){
        ApplicationContext context = new ClassPathXmlApplicationContext( "services.xml");
        context.getBean("itemDao",JpaItemDao.class);
    }
此外我们还可以通过下面这种方式获取bean
 @Test
    public void t3(){
        GenericApplicationContext context = new GenericApplicationContext();
        new XmlBeanDefinitionReader(context).loadBeanDefinitions("services.xml", "daos.xml");
        context.refresh();
        JpaItemDao itemDao = context.getBean("itemDao", JpaItemDao.class);
        System.out.println(itemDao.getName());
    }
这么做有啥好处我不知道,但是context有一个set()确有大用处.这句代码可以关闭spring的循环依赖.有关依赖循环看看文档后边会不会有讲到.
context.setAllowCircularReferences(false);
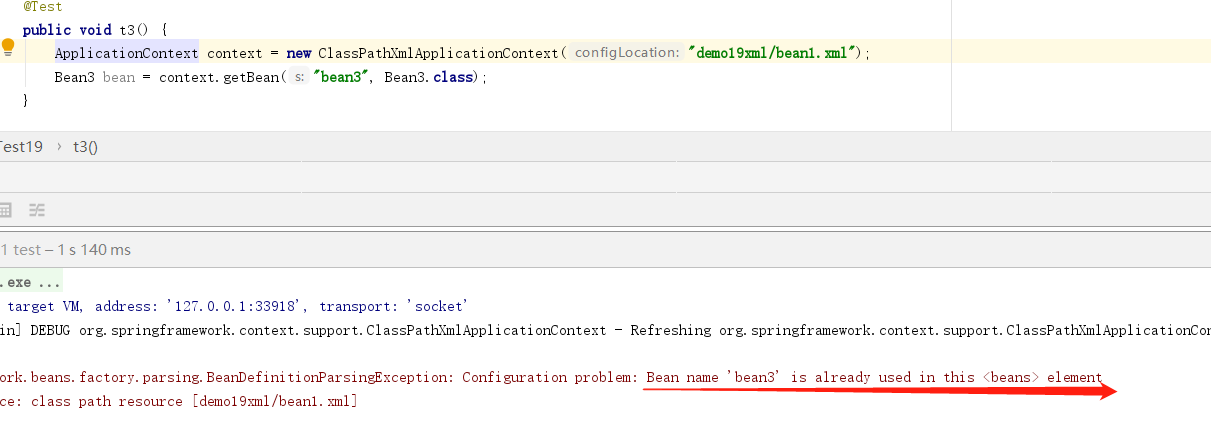
id不可重复
在xml中我们定义bean时,属性id是不能重复的.
public class Bean3 {
}
    <bean class="springdoc.demo19.Bean3" id="bean3"></bean>
    <bean class="springdoc.demo19.Bean3" id="bean3"></bean>
name定义别名
思考一个场景,当我们在A.xml定义了一个userBean,但是我们又需要在B.xml中的某个bean中引用这个userBean,但为了见名之意,我们不想ref='userBean',想使用ref='userDao'.这时,我们就可以给bean起一个别名
<?xml version="1.0" encoding="UTF-8"?>
<beans xmlns="http://www.springframework.org/schema/beans"
       xmlns:xsi="http://www.w3.org/2001/XMLSchema-instance"
       xsi:schemaLocation="http://www.springframework.org/schema/beans
        https://www.springframework.org/schema/beans/spring-beans.xsd">

<!-- services -->
    <bean id="petStore" name="petStore2,petStore3" class="springdoc.demo1.PetStoreServiceImpl">
        <property name="accountDao" ref="accountDao"/>
        <property name="itemDao" ref="itemDao"/>
        <!-- additional collaborators and configuration for this bean go here -->
    </bean>

    <import resource="daos.xml"/>
</beans>
    @Test
    public void t5() {
        ApplicationContext context = new ClassPathXmlApplicationContext("services.xml");
        PetStoreServiceImpl petStoreServiceImpl1 = context.getBean("petStore", PetStoreServiceImpl.class);
        PetStoreServiceImpl petStoreServiceImpl2 = context.getBean("petStore2", PetStoreServiceImpl.class);
        PetStoreServiceImpl petStoreServiceImpl3 = context.getBean("petStore3", PetStoreServiceImpl.class);
        System.out.println(petStoreServiceImpl1==petStoreServiceImpl2);
        System.out.println(petStoreServiceImpl2==petStoreServiceImpl3);
    }
上边代码中,我们给bean的name属性设置了两个值,用逗号分开,其实就是定义了两个别名.官方文档翻译过来是这样描述的.每个bean有一个或多个标识符,如果有多个,则其余的视为别名.
  <bean class="springdoc.demo1.PetStoreServiceImpl">
        <property name="accountDao" ref="accountDao"/>
        <property name="itemDao" ref="itemDao"/>
        <!-- additional collaborators and configuration for this bean go here -->
    </bean>
  @Test
    public void t5() {
        ApplicationContext context = new ClassPathXmlApplicationContext("services.xml");
        PetStoreServiceImpl petStoreServiceImpl1 = context.getBean("springdoc.demo1.PetStoreServiceImpl", PetStoreServiceImpl.class);
        PetStoreServiceImpl petStoreServiceImpl2 = context.getBean("springdoc.demo1.PetStoreServiceImpl", PetStoreServiceImpl.class);
        PetStoreServiceImpl petStoreServiceImpl3 = context.getBean("springdoc.demo1.PetStoreServiceImpl", PetStoreServiceImpl.class);
        System.out.println(petStoreServiceImpl1==petStoreServiceImpl2);
        System.out.println(petStoreServiceImpl2==petStoreServiceImpl3);
    }
不定义id属性
public class Person {
    private String name;

    public String getName() {
        return name;
    }

    public void setName(String name) {
        this.name = name;
    }
}
 <bean class="springdoc.demo1.Person">
        <property name="name" value="张三"/>
    </bean>
    <bean class="springdoc.demo1.Person">
        <property name="name" value="李四"/>
    </bean>
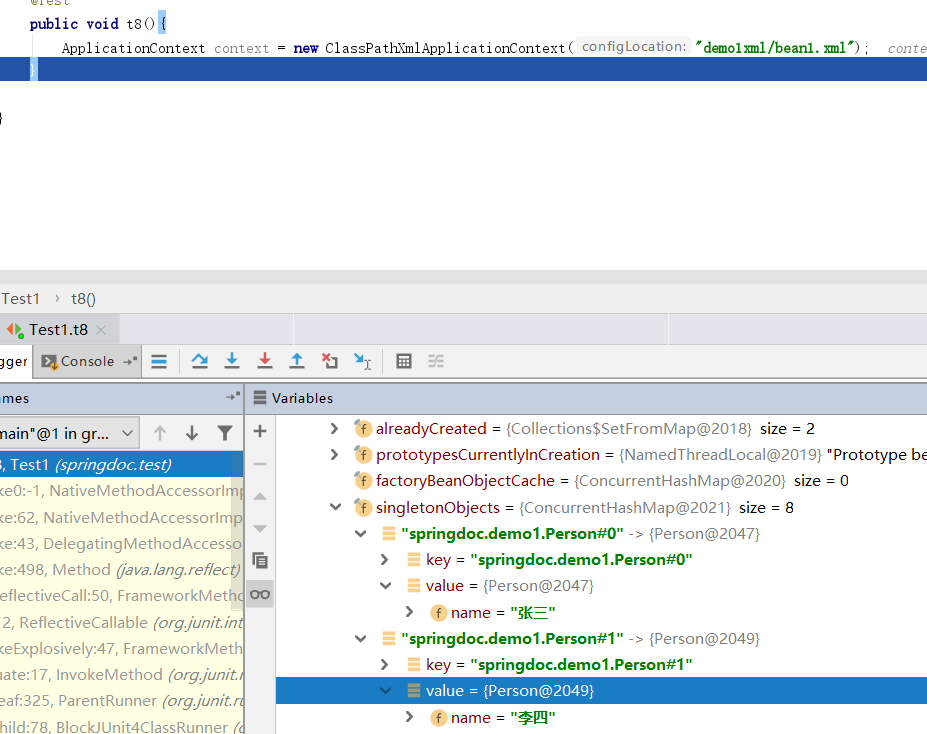
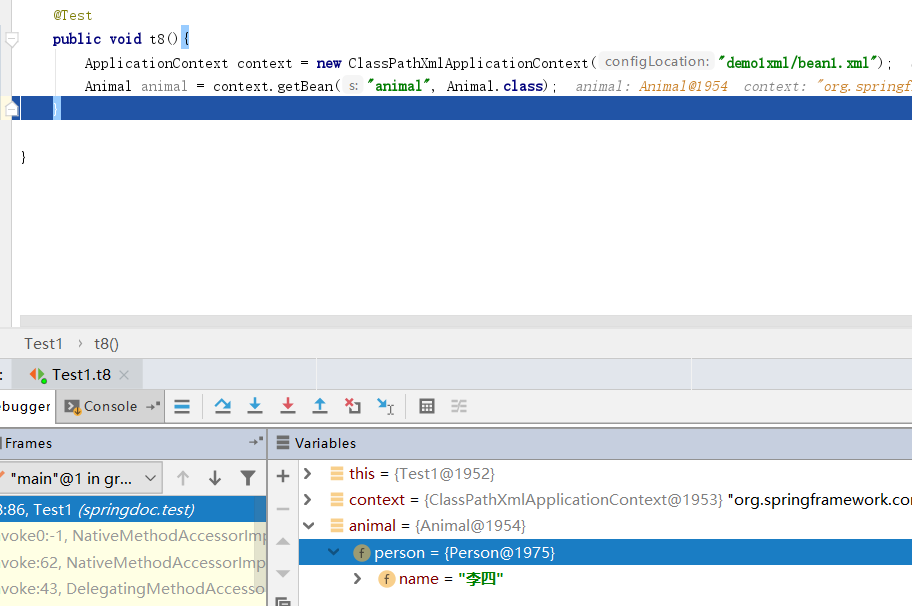
如果我们不定义id,spring则会帮我们生成一个唯一的id.我们也可以引用生成的id
public class Person {
    private String name;

    public String getName() {
        return name;
    }

    public void setName(String name) {
        this.name = name;
    }
}
   <bean class="springdoc.demo1.Animal" id="animal">
        <property name="person" ref="springdoc.demo1.Person#1"/>
    </bean>
<alias>给bean定义别名
我们也可以在bean之外定义别名
<?xml version="1.0" encoding="UTF-8"?>
<beans xmlns="http://www.springframework.org/schema/beans"
       xmlns:xsi="http://www.w3.org/2001/XMLSchema-instance"
       xsi:schemaLocation="http://www.springframework.org/schema/beans
        https://www.springframework.org/schema/beans/spring-beans.xsd">

    <bean id="accountDao"
          class="springdoc.demo1.JpaAccountDao">
        <!-- additional collaborators and configuration for this bean go here -->
    </bean>

    <alias name="itemDao" alias="itemDao2"/>

    <bean id="itemDao" class="springdoc.demo1.JpaItemDao">
        <!-- additional collaborators and configuration for this bean go here -->
    </bean>

    <!-- more bean definitions for data access objects go here -->

</beans>
    @Test
    public void t4() {
        ApplicationContext context = new ClassPathXmlApplicationContext("services.xml");
        JpaItemDao itemDao1 = context.getBean("itemDao", JpaItemDao.class);
        JpaItemDao itemDao2 = context.getBean("itemDao2", JpaItemDao.class);
        System.out.println(itemDao1==itemDao2);
    }
上边代码我们使用itemDao和itemDao2获取的是同一个bean,当然你也可以定义多个别名.
内部类实例化
public class OutBean {
    public static class InnerBean{
        private String name = "lisi";
    }
}
<bean id="inner" class="springdoc.demo5.OutBean$InnerBean"></bean>
   @Test
    public void t2() {
        //创建一个 spring父容器
        ApplicationContext context = new ClassPathXmlApplicationContext("demo5xml/beanxml3.xml");
        OutBean.InnerBean inner = context.getBean("inner", OutBean.InnerBean.class);
    }
如果需要实例化内部类,那么该内部类一定需要static修饰.在xml中也需要用外部类$内部类的方式指定内部类的class,同样获取时也一样需要外部类.内部类的方式
用静态工厂方法实例化
上边我们所配置的springbean基于Javabean,Javabean指的是有空的构造函数,每个属性有对应的get()set()方法.就是一个标准的Javabean.但在很多情况下,不见得我们要spring管理的bean就是javabean.
 <bean id="clientService" class="springdoc.demo1.ClientService" factory-method="createInstance">

    </bean>
public class ClientService {
    private static ClientService clientService = new ClientService();
    private ClientService() {}

    public static ClientService createInstance() {
        return clientService;
    }

    public void show(){
        System.out.println("ClientService");
    }
}
    @Test
    public void t6(){
        ApplicationContext context = new ClassPathXmlApplicationContext("services.xml");
        ClientService clientService = context.getBean("clientService", ClientService.class);
        ClientService clientService2 = context.getBean("clientService", ClientService.class);
        System.out.println(clientService==clientService2);
        clientService.show();
    }
上边写的pojo就不是一个javabean,而是一个工厂方法.工厂方法,构造函数私有化,无法new出实例,但是往往会提供一个静态的创建方法.自然spring无法通过空构造函数反射出对象,spring规定我们可以用factory-method属性给出一个创建该对象的静态方法方法.
使用实例工厂方法实例化
public class DefaultServiceLocator {
    private static JpaAccountDao jpaAccountDao = new JpaAccountDao();

    public JpaAccountDao createJpaAccountDaoInstance() {
        return jpaAccountDao;
    }
}
  <!-- the factory bean, which contains a method called createInstance() -->
    <bean id="serviceLocator" class="springdoc.demo1.DefaultServiceLocator">
        <!-- inject any dependencies required by this locator bean -->
    </bean>

    <!-- the bean to be created via the factory bean -->
    <bean id="instanceDao"
          factory-bean="serviceLocator"
          factory-method="createJpaAccountDaoInstance"/>
    @Test
    public void t7(){
        ApplicationContext context = new ClassPathXmlApplicationContext("services.xml");
        JpaAccountDao instanceDao = context.getBean("instanceDao", JpaAccountDao.class);
        instanceDao.show();
    }
实例工厂和静态工厂的区别是.静态工厂不提供公共的构造函数,所以无论是我们自己或者spring都无法通过反射或者new来实例对象.而实例工厂则恰恰相反,他对外开发公共的构造函数,我们需要先实例化工厂,然后在通过工厂的方法获取模板对象.当我们需要将实例工程交给spring管理时.我们首先要把工厂类配置成bean,然后在通过工厂类的id,和工厂中创建模板对象的方法,创建一个新的bean.这个bean才是我们真正需要的.
当然你也可以在一个实例工厂里获取多个bean实例,用同样方法在xml中配置两个bean.
public class DefaultServiceLocator {

    private static JpaAccountDao jpaAccountDao = new JpaAccountDao();

    private static JpaItemDao japItemDao = new JpaItemDao();

    public JpaAccountDao createJpaAccountDaoInstance() {
        return jpaAccountDao;
    }

    public JpaItemDao createJpaItemDaoInstance() {
        return japItemDao;
    }
}
 <!-- the factory bean, which contains a method called createInstance() -->
    <bean id="serviceLocator" class="springdoc.demo1.DefaultServiceLocator">
        <!-- inject any dependencies required by this locator bean -->
    </bean>

    <!-- the bean to be created via the factory bean -->
    <bean id="instanceDao"
          factory-bean="serviceLocator"
          factory-method="createJpaAccountDaoInstance"/>

    <bean id="instanceJpaAccountDao"
          factory-bean="serviceLocator"
          factory-method="createJpaItemDaoInstance"/>
    @Test
    public void t7() {
        ApplicationContext context = new ClassPathXmlApplicationContext("services.xml");
        JpaAccountDao instanceDao = context.getBean("instanceDao", JpaAccountDao.class);
        JpaItemDao jpaItemDao = context.getBean("instanceJpaAccountDao", JpaItemDao.class);
        instanceDao.show();
        System.out.println(jpaItemDao.getName());
    }
以上代码中的xml已经全部转移到demo1xml文件夹中
基于构造函数的依赖注入
public class SimpleMovieLister {

    private ThingThree thingThree;
    private ThingTwo thingTwo;

    public SimpleMovieLister(ThingThree thingThree, ThingTwo thingTwo) {
        this.thingThree = thingThree;
        this.thingTwo = thingTwo;
    }

    public void thingThreeShow(){
        thingThree.show();
    }

    public void thingTwoShow(){
        thingTwo.show();
    }
}
<?xml version="1.0" encoding="UTF-8"?>
<beans xmlns="http://www.springframework.org/schema/beans"
       xmlns:xsi="http://www.w3.org/2001/XMLSchema-instance"
       xsi:schemaLocation="http://www.springframework.org/schema/beans http://www.springframework.org/schema/beans/spring-beans.xsd">

    <bean id="thingTwo" class="springdoc.demo2.ThingTwo"></bean>
    <bean id="thingThree" class="springdoc.demo2.ThingThree"></bean>

    <bean id="simpleMovieLister" class="springdoc.demo2.SimpleMovieLister">
        <constructor-arg ref="thingTwo"></constructor-arg>
        <constructor-arg ref="thingThree"></constructor-arg>
    </bean>

</beans>
    @Test
    public void t1() {
        ApplicationContext context = new ClassPathXmlApplicationContext("demo2xml/bean1.xml");
        SimpleMovieLister simpleMovieLister = context.getBean("simpleMovieLister", SimpleMovieLister.class);
        simpleMovieLister.thingThreeShow();
        simpleMovieLister.thingTwoShow();
    }
SimpleMovieLister 类的构造函数是有两个pojo的构造函数.在xml中声明bean时,spring要求我们在bean中使用<constructor-arg ref=""> 来声明构造函数参数.仔细观察,在xml中的参数顺序和实际pojo的构造函数参数顺序不一致.这样也是没有问题的.
参数不是pojo的构造函数
public class ExampleBean {
    // Number of years to calculate the Ultimate Answer
    private int years;

    // The Answer to Life, the Universe, and Everything
    private String ultimateAnswer;

    public ExampleBean(int years, String ultimateAnswer) {
        this.years = years;
        this.ultimateAnswer = ultimateAnswer;
    }
}
    <bean id="exampleBean" class="springdoc.demo2.ExampleBean">
        <constructor-arg type="java.lang.String" value="42"/>
        <constructor-arg type="int" value="7500000"/>
    </bean>
参数不是pojo的构造函数,但参数类型相同
public class ExampleBean2 {

    private String a;
    private String b;

    public ExampleBean2(String a, String b) {
        this.a = a;
        this.b = b;
    }
}
    <bean id="exampleBean2" class="springdoc.demo2.ExampleBean2">
        <constructor-arg index="1" value="a"/>
        <constructor-arg index="0" value="b"/>
    </bean>
相同参数的,我们就没办法用type了,而使用index,通过参数下标注入value值.
或者我们可以直接使用name属性来确定参数,总之,我们需要让spring有一个标识,可以准确的注入属性
 <bean id="exampleBean2" class="springdoc.demo2.ExampleBean2">
        <constructor-arg name="a" value="a"/>
        <constructor-arg name="b" value="b"/>
    </bean>
基于Setter的依赖注入
public class SetBean {
    private String age;
    private String name;

    public String getAge() {
        return age;
    }

    public void setAge(String age) {
        this.age = age;
    }

    public String getName() {
        return name;
    }

    public void setName(String name) {
        this.name = name;
    }
}
    <bean id="setBean" class="springdoc.demo2.SetBean">
        <property name="name" value="张三"/>
        <property name="age" value="12"/>
    </bean>
注意set注入必须是标准的javabean规范.如果set方法不对则会抛出异常,例如上述setName()写成setNam()是不可以的
Setter的依赖注入和构造函数的依赖注入同时使用
public class SetAndConstrutor {
    private String name;
    private Integer age ;

    public SetAndConstrutor(Integer age){
        this.age = age;
    }

    public String getName() {
        return name;
    }

    public void setName(String name) {
        this.name = name;
    }

    public Integer getAge() {
        return age;
    }

}
 <bean id="setAndConstrutor" class="springdoc.demo2.SetAndConstrutor">
        <constructor-arg index="0" value="14"></constructor-arg>
        <property name="name" value="张三"/>
    </bean>
自动注入
在xml的配置bean时,我们可以选择自动注入.在<bean>标签上使用 autowire属性.该属性的可选择有 no byname bytype constructor.no代表不使用自动注入.
byName
public class Bean1 {
    private Bean2 bean2;

    public Bean2 getBean2() {
        return bean2;
    }

    public void setBean2(Bean2 bean2) {
        this.bean2 = bean2;
    }
}
public class Bean2 {
    private String name = "张三";
}
    <bean class="springdoc.demo15.Bean1" id="bean1" autowire="byName"></bean>
    <bean class="springdoc.demo15.Bean2" id="bean2"></bean>
byType
public class Bean3 {
    private Bean2 bean;

    public Bean2 getBean() {
        return bean;
    }

    public void setBean(Bean2 bean) {
        this.bean = bean;
    }
}
    <bean class="springdoc.demo15.Bean2" id="bean2"></bean>
    <bean class="springdoc.demo15.Bean3" id="bean3" autowire="byType"></bean>
这个例子,Bean3中的属性Bean2的属性名是bean,但是在配置文件中使用byType,是可以成功的.
无论是byName还是ByType.仅限于set注入.找不到对应的bean不抛出异常
constructor
public class Bean4 {
    private Bean2 bean;

    public Bean4(Bean2 bean) {
        this.bean = bean;
    }
}
    <bean class="springdoc.demo15.Bean2" id="bean2"></bean>
    <bean class="springdoc.demo15.Bean4" id="bean4" autowire="constructor"></bean>
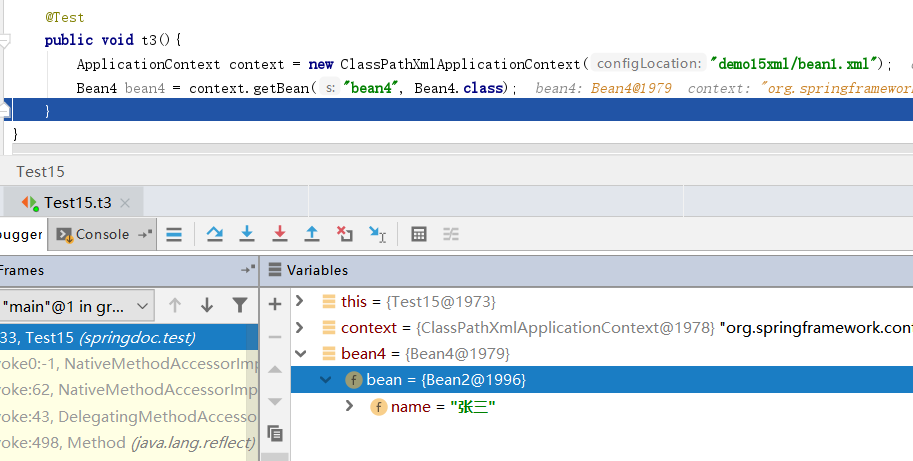
constructor其实是使用的byType属性注入.但是如果找不到对应的bean是会抛出异常的,因为他无法创建bean
如果我们使用byType那么,如果有类型相同的候选者,spring又会如何呢?
    <bean class="springdoc.demo15.Bean3" id="bean3" autowire="byType"></bean>
    <bean class="springdoc.demo15.Bean2" id="bean2"></bean>
    <bean class="springdoc.demo15.Bean2" id="bean22"></bean>
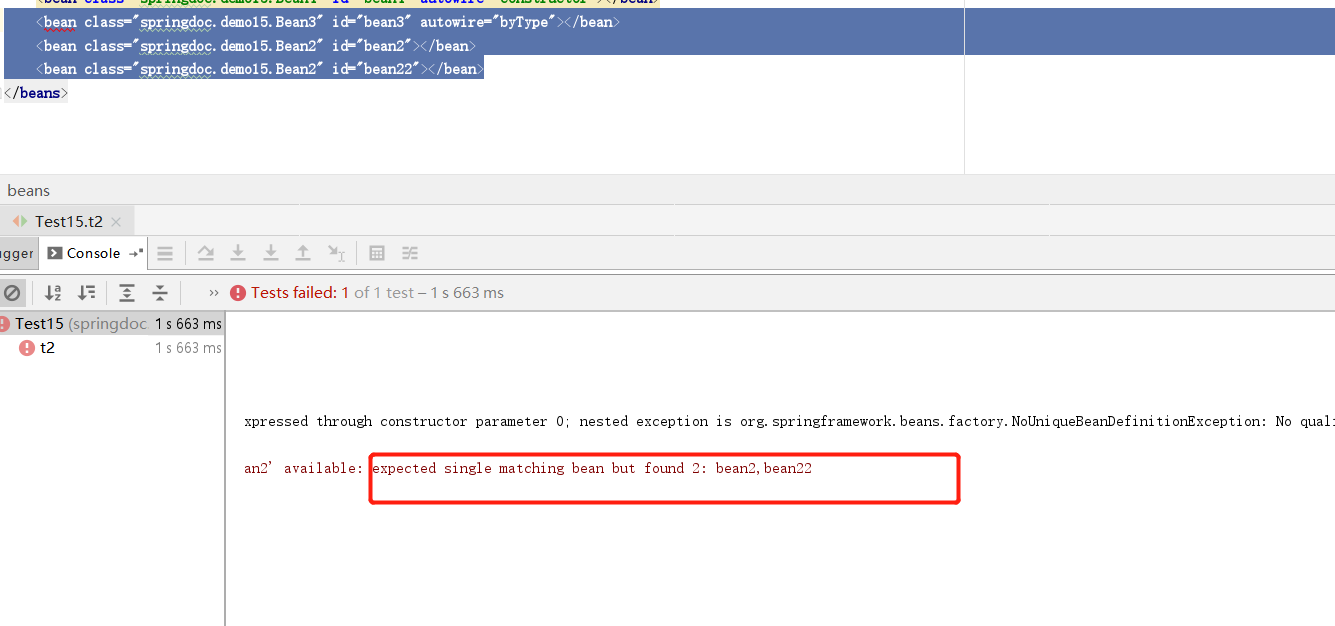
spring说,期待匹配单个bean,但是找到了两个bean2,bean22.针对这种问题可以使用两种方式解决
    <bean class="springdoc.demo15.Bean3" id="bean3" autowire="byType"></bean>
    <bean class="springdoc.demo15.Bean2" id="bean2">
        <property name="name" value="张三"/>
    </bean>
    <bean class="springdoc.demo15.Bean2" id="bean22" autowire-candidate="false">
        <property name="name" value="李四"/>
    </bean>

autowire-candidate="false",bean设置这个属性代表该bean不参与自动注入.就算只有这一个合适,他也不参与.
<!--    <bean class="springdoc.demo15.Bean1" id="bean1" autowire="byName"></bean>-->
<!--    <bean class="springdoc.demo15.Bean4" id="bean4" autowire="constructor"></bean>-->
    <bean class="springdoc.demo15.Bean3" id="bean3" autowire="byType"></bean>
<!--    <bean class="springdoc.demo15.Bean2" id="bean2">-->
<!--        <property name="name" value="张三"/>-->
<!--    </bean>-->
    <bean class="springdoc.demo15.Bean2" id="bean22" autowire-candidate="false">
        <property name="name" value="李四"/>
    </bean>
<!--    <bean class="springdoc.demo15.Bean2" id="bean222" primary="true">-->
<!--        <property name="name" value="王五"/>-->
<!--    </bean>-->
</beans>
当前适合bean3属性注入的bean只有bean22了,但是他不参与自动注入
primary="true" 优先注入
    <bean class="springdoc.demo15.Bean3" id="bean3" autowire="byType"></bean>
    <bean class="springdoc.demo15.Bean2" id="bean2">
        <property name="name" value="张三"/>
    </bean>
    <bean class="springdoc.demo15.Bean2" id="bean22" autowire-candidate="false">
        <property name="name" value="李四"/>
    </bean>
    <bean class="springdoc.demo15.Bean2" id="bean222" primary="true">
        <property name="name" value="王五"/>
    </bean>
静态工厂和构造器依赖注入
public class StaticFactoryBean {

    private StaticFactoryBean(){}

    public static Person getPerson(String name,Integer age){
        return new Person(name,age);
    }
}
    <bean id="person" class="springdoc.demo2.StaticFactoryBean" factory-method="getPerson">
            <constructor-arg name="name" value="zhangsan"></constructor-arg>
            <constructor-arg name="age" value="12"></constructor-arg>
    </bean>
这样的配置其实是值得思考的.给bean指定class时我们指定的是一个没有构造函数的StaticFactoryBean,却给出了<constructor-arg>参数.关键就在于factory-method属性,这个属性就是告诉spring,最终我们要的不是class指定的类,而是method创建的类,参数也是给method的.可见最终产生的springbean并不一定是class属性指定的类.
这里我表达下个人对创建springbean和依赖注入的理解.一个springbean其实是new的过程和new之后的产生的一个单例bean的结果.而依赖注入则是在new的过程中发生的一件事.当一个bean有成员变量时,我们可以选择给成员声明set()方法,也可以在构造器中声明属性.这两种方法最终的目的都是给bean注入属性.这里的属性,可以是 int boolean 等八个基本数据类型,也可以是String引用类型,或者是其他的pojo,已经jdk提供的集合等,而这个设置属性的过程spring称之为依赖注入.
这里提一嘴spring建议我们使用构造器注入.但是spring也说了.使用构造器注入无法循环依赖.所谓循环依赖,则是A创建springbean过程中使用到了B,B创建springbean过程中使用到了A.注意我说的是创建springbean而不是实例化bean.如果使用set注入则可以解决这个问题.大概说下spring处理循环依赖.当我们的两个pojo是set注入.实例化A后,准备给A的属性赋值,发现A的属性是B,这时spring不会立刻去实例化B,而是先把已经实例化好的A存到缓存Map中.在去实例化B,在实例化B后,给B设置属性,发现是A,这时会从单例池中获取BeanA,发现没有,因为A只是被实例化了,但是没有注入属性.还不是springbean.这时他会到缓存中查询A,查询到了.然后将A当做属性设置给B.此时的B已经成为了springbean,存到单例池中.在回过头来设置实例A的属性.最终将A也存放到单例池中.两个对象实例化,属性注入完成.
p-namespace命名空间注入参数
public class DataSourceBean {
    private String driverClassName;
    private String url;
    private String username;
    private String password;
    private Integer max;   private Cpu cpu;
public Cpu getCpu() {    return cpu;}

public void setCpu(Cpu cpu) {    this.cpu = cpu;}
    public Integer getMax() {
        return max;
    }

    public void setMax(Integer max) {
        this.max = max;
    }

    public String getDriverClassName() {
        return driverClassName;
    }

    public void setDriverClassName(String driverClassName) {
        this.driverClassName = driverClassName;
    }

    public String getUrl() {
        return url;
    }

    public void setUrl(String url) {
        this.url = url;
    }

    public String getUsername() {
        return username;
    }

    public void setUsername(String username) {
        this.username = username;
    }

    public String getPassword() {
        return password;
    }

    public void setPassword(String password) {
        this.password = password;
    }
}
    <bean id="dataSourceBean" class="springdoc.demo3.DataSourceBean">
        <property name="driverClassName" value="com.mysql.jdbc.Driver"/>
        <property name="url" value="http://localhost:3306/db1"/>
        <property name="username" value="root"/>
        <property name="password" value="123"/>
    </bean>
这个配置是否有些熟悉,没错的,我们曾经配置过的DataSource不管是哪个连接池或者是Dao框架都需要配置这个.那么你有没有见过这种配置方法呢?
<?xml version="1.0" encoding="UTF-8"?>
<beans xmlns="http://www.springframework.org/schema/beans"
       xmlns:xsi="http://www.w3.org/2001/XMLSchema-instance"
       xmlns:p="http://www.springframework.org/schema/p"
       xsi:schemaLocation="http://www.springframework.org/schema/beans
    https://www.springframework.org/schema/beans/spring-beans.xsd">

    <bean id="dataSourceBean2" class="springdoc.demo3.DataSourceBean"
          p:driverClassName="com.mysql.jdbc.Driver"
          p:url="jdbc:mysql://localhost:3306/mydb"
          p:username="root"
          p:password="masterkaoli"
          p:max="1"      p:cpu-ref="cpu"/>
  <bean id="cpu" class="springdoc.demo3.Cpu"></bean>
</beans>
请注意beans标签中的xmlns:p命名空间必须要带上.p:属性名-ref注入bean类型的参数
public class Person {
    private String name;
    private Integer age;
    private Student student;

    public Person(String name, Integer age, Student student) {
        this.name = name;
        this.age = age;
        this.student = student;
    }
}
<beans xmlns="http://www.springframework.org/schema/beans"
       xmlns:xsi="http://www.w3.org/2001/XMLSchema-instance"
       xmlns:c="http://www.springframework.org/schema/c"
       xsi:schemaLocation="http://www.springframework.org/schema/beans
        https://www.springframework.org/schema/beans/spring-beans.xsd">

    <bean id="student" class="springdoc.demo4.Student"></bean>

    <bean id="person" class="springdoc.demo4.Person"
          c:name="masterkaoli"
          c:age="1"
          c:student-ref="student"/>
</beans>

请注意beans标签中的xmlns:c命名空间必须要带上.c:属性名-ref注入bean类型的参数
另外这种写法也是可以的
    <bean id="person2" class="springdoc.demo4.Person"
          c:_0="masterkaoli"
          c:_1="221"
          c:_2-ref="student"/>
读取properties文件注入属性
  <bean class="org.springframework.context.support.PropertySourcesPlaceholderConfigurer">
        <property name="locations">
                <value>classpath:demo3xml/db.properties</value>
        </property>
    </bean>

    <bean id="dataSourceBean3" class="springdoc.demo3.DataSourceBean">
        <property name="driverClassName" value="${jdbc.driverClassName}"/>
        <property name="url" value="${jdbc.url}"/>
        <property name="username" value="${jdbc.username}"/>
        <property name="password" value="${jdbc.password}"/>
        <property name="max" value="${jdbc.max}"/>
    </bean>
jdbc.driverClassName=com.mysql.jdbc.Driver
jdbc.url=jdbc:mysql://localhost:3306/mydb
jdbc.username=root
jdbc.password=123
jdbc.max=10
这种做法,实际是创建了一个PropertySourcesPlaceholderConfigurer类型的bean,然后将配置文件的内容写入到PropertySourcesPlaceholderConfigurer的bean属性中.此外配置文件最好使用前缀,否则有可能会重复,因为这个PropertySourcesPlaceholderConfigurer也会存储其他非用户类的配置参数.
无properties文件注入属性
    <bean class="org.springframework.context.support.PropertySourcesPlaceholderConfigurer">
        <property name="properties">
            <value>
                jdbc2.driverClassName=com.mysql.jdbc.Driver
                jdbc2.url=jdbc:mysql://localhost:3306/mydb
                jdbc2.username=root
                jdbc2.password=123
                jdbc2.max=100
            </value>
        </property>
    </bean>

    <bean id="dataSourceBean4" class="springdoc.demo3.DataSourceBean">
        <property name="driverClassName" value="${jdbc2.driverClassName}"/>
        <property name="url" value="${jdbc2.url}"/>
        <property name="username" value="${jdbc2.username}"/>
        <property name="password" value="${jdbc2.password}"/>
        <property name="max" value="${jdbc2.max}"/>
    </bean>
这个代码中把<properties>的name参数换成了properties值,在value中直接配置参数,也是可行的.但是需要注意两种做法只能选择其一
idref的用法
public class Computer {
   private String color;

    public String getColor() {
        return color;
    }

    public void setColor(String color) {
        this.color = color;
    }
}
<bean id="computer" class="springdoc.demo3.Computer">
        <property name="color" value="green"/>
</bean>
常规的,我们给一个属性设置字符串值,可以直接在value中写字符串.但是我们也可以这么做
<bean id="blue" class="springdoc.demo3.Cpu"></bean>

    <bean id="computer2" class="springdoc.demo3.Computer">
        <property name="color">
            <idref bean="blue"/>
        </property>
    </bean>
value被替换成了idref,值其实就是blue而他确实一个bean的id.官方文档上说,这样可以保证value的值一定存在...确实我get不到这个点的意义
<ref>标签
在我们给一个bean注入属性,而属性是另一个bean时,构造器注入我们会使用<constructor-arg>或者<property>这两个标签.而他们都有一个共同的属性是ref这个属性中写的是另一个bean的id.spring也单独给我们了一个标签让我们注入bean
<ref local=''/><ref bean=''/><ref parent=''/>这三种写法,其中local属性在spring4.0已经被废弃.因为他只能引用同一个xml文件中的bean.而bean属性则和<property ref=''>作用一样.但是parent属性我们需要单独看看.
首先我们开看看官方文档
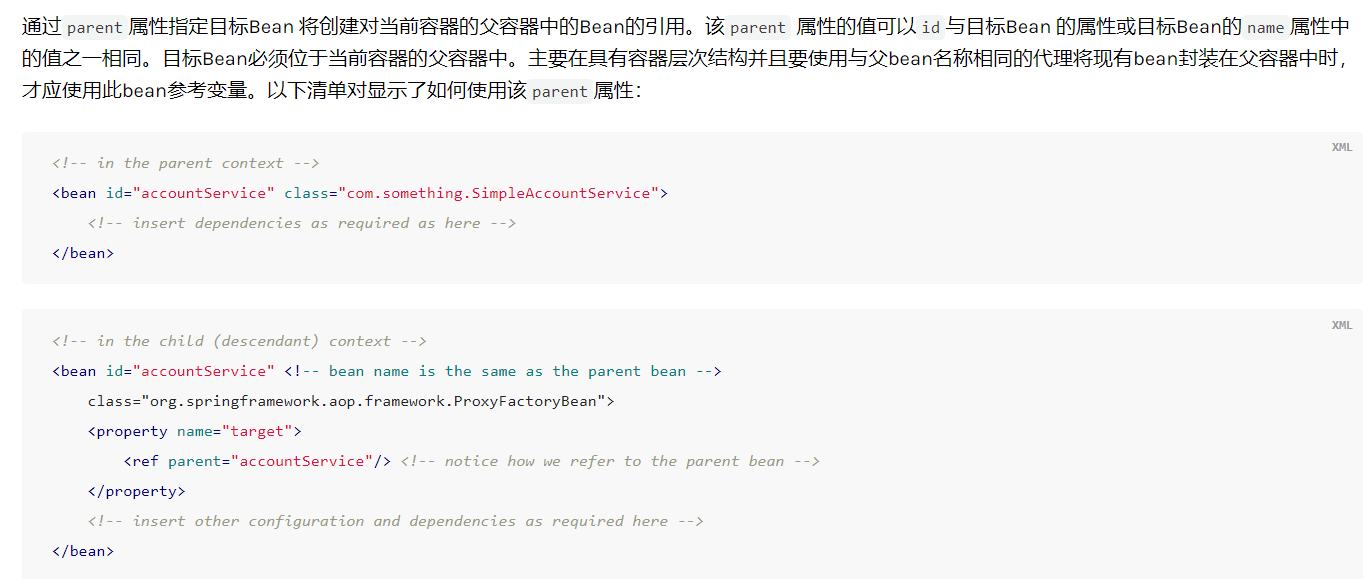
这里有一个关键词.父容器.如果不知道什么是父容器,我们来看一下配置
<!-- 加载spring容器 -->
<!-- 初始化加载application.xml的各种配置文件 -->
<context-param>
    <param-name>contextConfigLocation</param-name>
    <param-value>classpath:spring/application-*.xml</param-value>
</context-param>
<listener>
    <listener-class>org.springframework.web.context.ContextLoaderListener</listener-class>
</listener>
<!-- 配置springmvc前端控制器 -->
<servlet>
    <servlet-name>taotao-manager</servlet-name>
    <servlet-class>org.springframework.web.servlet.DispatcherServlet</servlet-class>
    <!-- contextConfigLocation不是必须的, 如果不配置contextConfigLocation
,     springmvc的配置文件默认在:WEB-INF/servlet的name+"-servlet.xml" -->
    <init-param>
    <param-name>contextConfigLocation</param-name>
        <param-value>classpath:spring/springmvc.xml</param-value>
    </init-param>
<load-on-startup>1</load-on-startup>
</servlet>
这是springmvc的标配xml.首先配置的是Spring容器的初始化加载的application文件,然后是SpringMVC的前端控制器(DispatchServlet),当配置完DispatchServlet后会在Spring容器中创建一个新的容器。其实这是两个容器,Spring作为父容器,SpringMVC作为子容器。对于传统的spring mvc来说,ServletDispatcher对应的容器为子容器,而web.xml中通过ContextLoaderListner的contextConfigLocation属性配置的为父容器。有了这个概念我们来尝试下做一个子父容器
public class ParentBean {
    private String name = "我是父bean";

    public String getName() {
        return name;
    }

    public void setName(String name) {
        this.name = name;
    }
}
public class ChildBean {
    private String name = "我是子bean";

    private ParentBean pBean;

    public String getName() {
        return name;
    }

    public void setName(String name) {
        this.name = name;
    }

    public ParentBean getpBean() {
        return pBean;
    }

    public void setpBean(ParentBean pBean) {
        this.pBean = pBean;
    }
}
<?xml version="1.0" encoding="UTF-8"?>
<beans xmlns="http://www.springframework.org/schema/beans"
       xmlns:xsi="http://www.w3.org/2001/XMLSchema-instance"
       xsi:schemaLocation="http://www.springframework.org/schema/beans http://www.springframework.org/schema/beans/spring-beans.xsd">

    <bean id="parentBean" class="springdoc.demo5.ParentBean"></bean>

</beans>
<?xml version="1.0" encoding="UTF-8"?>
<beans xmlns="http://www.springframework.org/schema/beans"
       xmlns:xsi="http://www.w3.org/2001/XMLSchema-instance"
       xsi:schemaLocation="http://www.springframework.org/schema/beans http://www.springframework.org/schema/beans/spring-beans.xsd">

    <bean id="childBean" class="springdoc.demo5.ChildBean">
        <property name="pBean">
            <ref parent="parentBean"/>
        </property>
    </bean>

</beans>
创建两个pojo,ChildBean中需要注入一个ParentBean.在xml中我们使用的是<ref parent>关键在于怎么创建子父容器
    @Test
    public void t1() {
        //创建一个 spring父容器
        ApplicationContext parentContext = new ClassPathXmlApplicationContext("demo5xml/parentxml.xml");

        //创建一个 spring子容器 此处传递父bean作为参数
        ClassPathXmlApplicationContext childContext = new ClassPathXmlApplicationContext(parentContext);
        //然后才能设置资源文件,切记一定要先设置 父bean
        childContext.setConfigLocation("demo5xml/childxml.xml");
        //这个不要忘记了
        childContext.refresh();

        //父容器获取自己的bean
        ParentBean parentBean = parentContext.getBean("parentBean", ParentBean.class);

        //子容器获取自己的bean
        ChildBean childBean = childContext.getBean("childBean", ChildBean.class);

        //子容器获取父容器的bean,可以获取到
        ParentBean parentBean2 = childContext.getBean("parentBean", ParentBean.class);

        //父容器获取子容器的bean 此时是获取不到的,因为父容器不能获取子容器的bean
        // ChildBean childBean3 = parentContext.getBean("childBean", ChildBean.class);
    }
其实在xml配置中这样也可以
  <bean id="childBean" class="springdoc.demo5.ChildBean">
        <property name="pBean">
            <ref bean="parentBean"/>
        </property>
    </bean>
配置这样也可以
<bean id="childBean" class="springdoc.demo5.ChildBean">
        <property name="pBean" ref="parentBean"></property>
    </bean>
所以这个猜测过程应该是,你可以给你的applicationContext设置一个父applicationContext.然后子context.getBean()他会现在自己的singletonObjects这个单例池找,找不到会到父类的单例池找
匿名内部类参数
public class Student {
    private String name;

    public String getName() {
        return name;
    }

    public void setName(String name) {
        this.name = name;
    }
}
public class Teacher {
    private String name;
    private Student student;

    public String getName() {
        return name;
    }

    public void setName(String name) {
        this.name = name;
    }

    public Student getStudent() {
        return student;
    }

    public void setStudent(Student student) {
        this.student = student;
    }
}
<bean id="Teacher" class="springdoc.demo5.Teacher">
        <property name="name" value="张老师"/>
        <property name="student">
            <bean class="springdoc.demo5.Student">
                <property name="name" value="王五同学"/>
            </bean>
        </property>
    </bean>
Teacher类中需要一个Student属性.我们也可以使用上边的方式创建一个内部的bean.需要注意的是内部bean没有id,因为他不能单独出现,不能给其他的bean使用.此外以上写法还可以换成<constructor-arg>构造参数形式.
依赖注入集合类型属性
public class CollectionsBean {
    private List list;
    private Set set;
    private Map map;
    private Properties properties;

    public List getList() {
        return list;
    }

    public void setList(List list) {
        this.list = list;
    }

    public Set getSet() {
        return set;
    }

    public void setSet(Set set) {
        this.set = set;
    }

    public Map getMap() {
        return map;
    }

    public void setMap(Map map) {
        this.map = map;
    }

    public Properties getProperties() {
        return properties;
    }

    public void setProperties(Properties properties) {
        this.properties = properties;
    }
}
    <bean id="collectionsBean" class="springdoc.demo5.CollectionsBean">
        <property name="list">
            <list>
                <value>我是list第一个元素</value>
                <ref bean="teacher"/>
            </list>
        </property>

        <property name="set">
            <set>
                <value>我是set第一个元素</value>
                <ref bean="teacher"></ref>
            </set>
        </property>

        <property name="map">
            <map>
                <entry key="1" value="我是map第一个value"/>
                <entry key="2" value-ref="teacher"/>
            </map>
        </property>

        <property name="properties">
            <props>
                <prop key="p1">我是properties的第一个元素</prop>
                <prop key="p2">我是properties的第二个元素</prop>
            </props>
        </property>
    </bean>
set list map的键和值都可以是bean | ref | idref | list | set | map | props | value | null 类型,上边的配置方式同样适用于<constructor-arg>构造函数依赖注入
bean的继承
public class Bean1 {
    private String name;
    private Integer age;

    public String getName() {
        return name;
    }

    public void setName(String name) {
        this.name = name;
    }

    public Integer getAge() {
        return age;
    }

    public void setAge(Integer age) {
        this.age = age;
    }
}
public class Bean2 extends Bean1 {
    private Character gender;

    public Character getGender() {
        return gender;
    }

    public void setGender(Character gender) {
        this.gender = gender;
    }
}
定义两个pojoBean2继承了Bean1
<bean id="bean1" class="springdoc.demo6.Bean1">
<property name="name" value="张三"></property>
<property name="age" value="12"></property>
</bean>
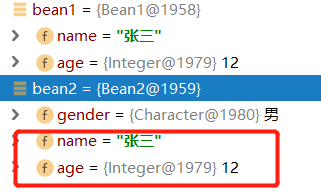
<bean id="bean2" class="springdoc.demo6.Bean2">
<property name="gender" value="男"></property>
</bean>
如果按照我们的设想,父bean被注册后,子bean应该会有父类的属性.但不是的
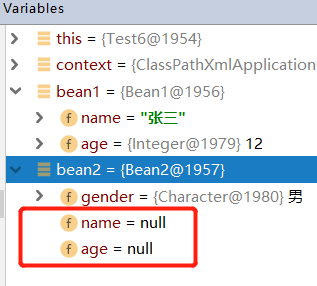
下面看下spring怎么处理bean之间的继承的
   <bean id="bean1" class="springdoc.demo6.Bean1">
        <property name="name" value="张三"></property>
        <property name="age" value="12"></property>
    </bean>
    <bean id="bean2" class="springdoc.demo6.Bean2" parent="bean1">
        <property name="gender" value="男"></property>
    </bean>
在子类加上 parent属性
spring不能对 抽象类,接口实例化
spring的实例化其实跟new关键字一样。所以它不能做违反Java语法的操作


public class Bean5 extends Bean3 {
}
public abstract class Bean3 {
    private String name;

    public String getName() {
        return name;
    }

    public void setName(String name) {
        this.name = name;
    }
}
 <bean id="bean3" class="springdoc.demo6.Bean3" abstract="true">
        <property name="name" value="抽象类的字段"></property>
    </bean>

    <bean id="bean5" class="springdoc.demo6.Bean5" parent="bean3">

    </bean>
bean设置abstract属性并且value为true,这样是可以让子类继承抽象类的属性的.
public class Bean5{
    private String name;

    public String getName() {
        return name;
    }

    public void setName(String name) {
        this.name = name;
    }
}
    <bean id="bean3" abstract="true">
        <property name="name" value="抽象类的字段"></property>
    </bean>

    <bean id="bean5" class="springdoc.demo6.Bean5" parent="bean3">

    </bean>
上边代码我们没有让Bean5继承任何的类.而在xml中bean3也没有指定class属性,也就是说,bean3根本没有对应任何的抽象类.此时bean5也可以照样引用抽象类bean3前提是,bean3必须有抽象类属性对应的set()方法.而此时定义的抽象类,仅仅是作为模板的使用
依赖注入集合类型属性之合并集合
上边我们说过了注入集合类型给bean的属性,和bean的继承.接下来我们看看子bean集合继承父bean集合的规则
public abstract class Parent {
    private Properties pProperties;
    private List pList;
    private Map pmap;
    private Set pset;

    public Properties getpProperties() {
        return pProperties;
    }

    public void setpProperties(Properties pProperties) {
        this.pProperties = pProperties;
    }

    public List getpList() {
        return pList;
    }

    public void setpList(List pList) {
        this.pList = pList;
    }

    public Map getPmap() {
        return pmap;
    }

    public void setPmap(Map pmap) {
        this.pmap = pmap;
    }

    public Set getPset() {
        return pset;
    }

    public void setPset(Set pset) {
        this.pset = pset;
    }
}
public class Child extends Parent{

}
    <bean id="parent" abstract="true" class="springdoc.demo7.Parent">
        <property name="pProperties">
            <props>
                <prop key="pkey">1</prop>
                <prop key="pkey2">2</prop>
            </props>
        </property>
        <property name="pList">
            <list>
                <value>a</value>
                <value>b</value>
            </list>
        </property>
        <property name="pmap">
            <map>
                <entry key="map1" value="mapa"></entry>
                <entry key="map2" value="mapb"></entry>
            </map>
        </property>
        <property name="pset">
            <set>
                <value>cc</value>
                <value>bb</value>
            </set>
        </property>
    </bean>

    <bean id="child" parent="parent" class="springdoc.demo7.Child">
        <property name="pProperties">
            <props merge="true">
                <prop key="pkey3">3</prop>
                <prop key="pkey">11</prop>
            </props>
        </property>
        <property name="pList">
            <list merge="true">
                <value>c</value>
                <value>a</value>
            </list>
        </property>
        <property name="pmap">
            <map merge="true">
                <entry key="map3" value="mapc"></entry>
                <entry key="map1" value="mapaa"></entry>
            </map>
        </property>
        <property name="pset">
            <set merge="true">
                <value>dd</value>
                <value>aa</value>
                <value>cc</value>
            </set>
        </property>
    </bean>
注意看 set list prop map标签都有一个merge属性,值为true,这就表明该属性,会跟父bean的集合合并.
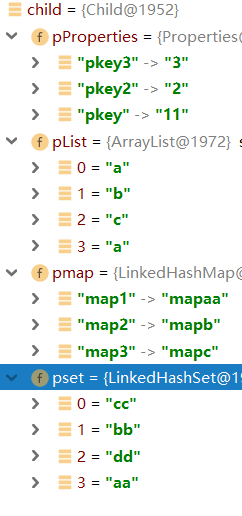
properties key相同合并,list不合并,map key相同合并,set 不合并.若父bean的集合类型和子bean的集合类型不一致则合并失败,抛出异常(补充,对于注入数组和注入list一样)
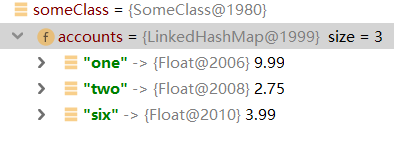
强制转换
spring会对注入的属性进行尝试强制转换
public class SomeClass {
    private Map<String, Float> accounts;

    public void setAccounts(Map<String, Float> accounts) {
        this.accounts = accounts;
    }
}
<bean id="something" class="springdoc.demo7.SomeClass">
        <property name="accounts">
            <map>
                <entry key="one" value="9.99"/>
                <entry key="two" value="2.75"/>
                <entry key="six" value="3.99"/>
            </map>
        </property>
    </bean>
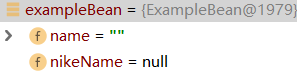
空字符串值和空字符串值
value属性接受 "" 空字符,而null 则使用<null/>标签
public class ExampleBean {
    private String name;
    private String nikeName;

    public String getName() {
        return name;
    }

    public void setName(String name) {
        this.name = name;
    }

    public String getNikeName() {
        return nikeName;
    }

    public void setNikeName(String nikeName) {
        this.nikeName = nikeName;
    }
}
  <bean id="exampleBean" class="springdoc.demo7.ExampleBean">
        <property name="name" value=""/>
        <property name="nikeName">
            <null/>
        </property>
    </bean>
复杂属性的设置
public class Bean1 {
  private Bean2 bean2;

    public Bean2 getBean2() {
        return bean2;
    }

    public void setBean2(Bean2 bean2) {
        this.bean2 = bean2;
    }
}
public class Bean2 {
    private Bean3 bean3;

    public Bean3 getBean3() {
        return bean3;
    }

    public void setBean3(Bean3 bean3) {
        this.bean3 = bean3;
    }
}
public class Bean3 {
    private String name;

    public String getName() {
        return name;
    }

    public void setName(String name) {
        this.name = name;
    }
}
   <bean id="bean1" class="springdoc.demo8.Bean1">
        <property name="bean2" ref="bean2"/>
        <property name="bean2.bean3.name" value="张无忌"/>
    </bean>

    <bean id="bean2" class="springdoc.demo8.Bean2">
        <property name="bean3" ref="bean3"/>
    </bean>

    <bean id="bean3" class="springdoc.demo8.Bean3">
        <property name="name" value="金毛狮王"/>
    </bean>
bean1引用bean2,bean2引用bean3.分别配置好bean1,bean2,bean3后,我们可以在bean1中使用属性 . 的方式改变bean3的name属性,但是这也会影响到bean3本身的name属性
depends-on
public class Bean1 {
    public Bean1(){
        System.out.println("bean1");
    }
}
public class Bean2 {
    public Bean2(){
        System.out.println("bean2");
    }
}
public class Bean3 {
    public Bean3(){
        System.out.println("bean3");
    }
}
    <bean class="springdoc.demo9.Bean1" id="bean1"></bean>
    <bean class="springdoc.demo9.Bean2" id="bean2"></bean>
    <bean class="springdoc.demo9.Bean3" id="bean3"></bean>
按照顺序创建三个bean
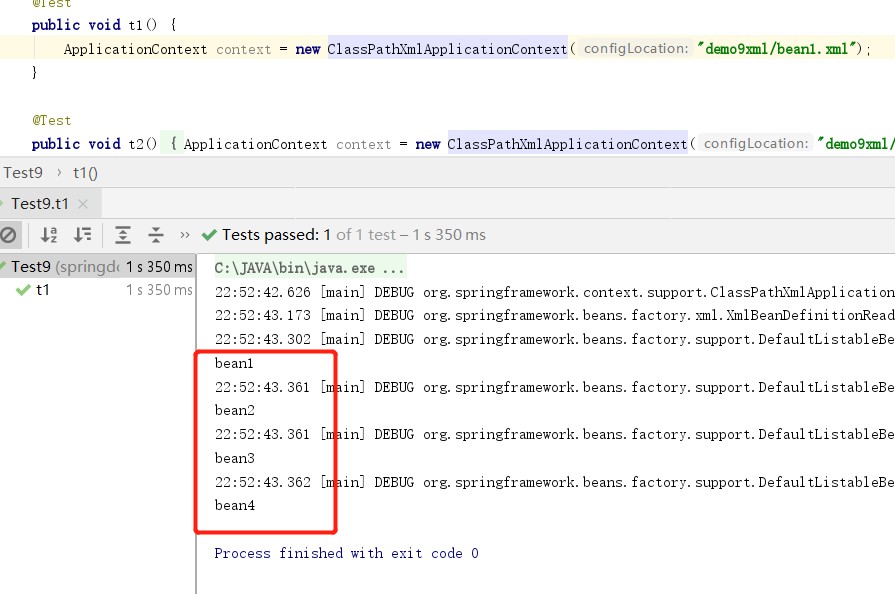
要求bean1实例化在bean2和bean3之后
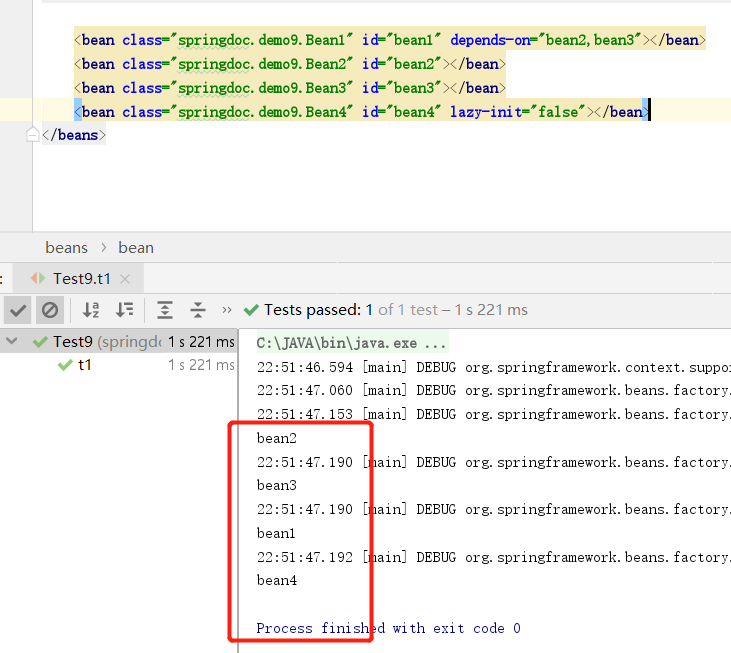
depends-on用于那些不属于强引用的bean之间.可以设置bean的实例化顺序.同样,上边实例中,bean2和bean3会在bean1之前销毁.
lazy-init
public class Bean4 {
    public Bean4(){
        System.out.println("bean4");
    }
}
<bean class="springdoc.demo9.Bean4" id="bean4" lazy-init="true"></bean>
lazy-init属性表示bean是否懒加载.不设置为false.设置为true则代表,如果没有使用到当前bean则spring不会实例化.直到第一次使用才会实例化
bean的范围
默认情况下我们创建一个bean,他是单例的.也就是说我们每次getBean()获取的都是同一个对象
bean class="springdoc.demo10.SingletonBean" id="singletonBean"></bean>
除了单例bean,spring还允许我们设置原型bean.每次getBean()都是一个新的对象
<bean class="springdoc.demo10.PrototypeBean" id="prototypeBean" scope="prototype"></bean>
在web环境下.bean的范围还可以是 request,session,application,和 websocket.
public class InitMethodBean {
    public InitMethodBean(){
        System.out.println("构造函数");
    }

    public void init(){
        System.out.println("初始化回调");
    }
}
<bean class="springdoc.demo10.InitMethodBean" id="initMethodBean" init-method="init"></bean>
属性init-method规定了bean在实例化后自动调用的方法
销毁回调
public class DestroyMethod {
    public DestroyMethod(){
        System.out.println("构造函数");
    }

    public void initMethod(){
        System.out.println("初始化回调");
    }

    public void destroyMethod(){
        System.out.println("销毁回调");
    }
}
<bean class="springdoc.demo10.DestroyMethod" id="destroyMethod" init-method="initMethod" destroy-method="destroyMethod"></bean>
为了测试效果我们使用AbstractApplicationContext
默认的回调
public class DefaultMethod {

    public DefaultMethod(){
        System.out.println();
    }

    public void init(){
        System.out.println("init");
    }

    public void destroy(){
        System.out.println("destroy");
    }
}
<beans xmlns="http://www.springframework.org/schema/beans"
       xmlns:xsi="http://www.w3.org/2001/XMLSchema-instance"
       xsi:schemaLocation="http://www.springframework.org/schema/beans http://www.springframework.org/schema/beans/spring-beans.xsd"
        default-init-method="init" default-destroy-method="destroy">

    <bean class="springdoc.demo10.DefaultMethod" id="defaultMethod"></bean>

</beans>
在beans上使用default-init-method和 default-destroy-method属性,可以规定该xml中所有bean的生命周期回调,一般用于规范开发.
三种生命周期回调的顺序
除了上边的做法spring还提供了两种生命周期回调的方法.1通过注解2通过继承接口
@Component
public class Bean1 implements InitializingBean, DisposableBean {
    @Override
    public void afterPropertiesSet() throws Exception {
        System.out.println("接口形式的回调after");
    }

    @Override
    public void destroy() throws Exception {
        System.out.println("接口形式的回调destroy");
    }

    public void customAfter(){
        System.out.println("xml形式的回调after");
    }

    public void customDestroy(){
        System.out.println("xml形式的回调destroy");
    }

    @PostConstruct
    public void AnnoAfter(){
        System.out.println("注解形式的回调after");
    }

    @PreDestroy
    public void AnnoDestroy(){
        System.out.println("注解形式的回调destroy");
    }
}
 <context:component-scan base-package="springdoc.demo12"/>
    <bean class="springdoc.demo12.Bean1" id="bean1" init-method="customAfter" destroy-method="customDestroy"></bean>
因为我们启动spring使用的是ClassPathXmlApplicationContext所以要使用注解需要先在xml开启扫描.三种声明周期回调的执行顺序分别时注解,继承接口和xml配置
BeanPostProcessor和Ordered实例化后对bean进行改进
BeanPostProcessor用来扩展IOC容器,Ordered可以指定BeanPostProcessor的顺序.这两个都是接口
public Bean1(){
    System.out.println("bean1");
}

public void init(){
    System.out.println("Bean1Init");
}

public void destroy(){
    System.out.println("Bean1Destroy");
}
public class Bean2 {
    public Bean2(){
        System.out.println("bean2");
    }
    public void init(){
        System.out.println("Bean2Init");
    }

    public void destroy(){
        System.out.println("Bean2Destroy");
    }
}
public class CustomBeanPostProcessor implements BeanPostProcessor, Ordered {
    @Override
    public Object postProcessBeforeInitialization(Object bean, String beanName) throws BeansException {
        System.out.println("BeanPostProcessor1,before");
        return bean;
    }

    @Override
    public Object postProcessAfterInitialization(Object bean, String beanName) throws BeansException {
        System.out.println("BeanPostProcessor1,after");
        return bean;
    }

    @Override
    public int getOrder() {
        return 100;
    }
}
public class CustomBean2PostProcessor implements BeanPostProcessor, Ordered {
    @Override
    public Object postProcessBeforeInitialization(Object bean, String beanName) throws BeansException {
        System.out.println("BeanPostProcessor2,before");
        return bean;
    }

    @Override
    public Object postProcessAfterInitialization(Object bean, String beanName) throws BeansException {
        System.out.println("BeanPostProcessor2,after");
        return bean;
    }

    @Override
    public int getOrder() {
        return 1;
    }
}
<?xml version="1.0" encoding="UTF-8"?>
<beans xmlns="http://www.springframework.org/schema/beans"
       xmlns:xsi="http://www.w3.org/2001/XMLSchema-instance"
       xsi:schemaLocation="http://www.springframework.org/schema/beans http://www.springframework.org/schema/beans/spring-beans.xsd"
        default-init-method="init" default-destroy-method="destroy">

    <bean class="springdoc.demo11.Bean1" id="bean1"></bean>
    <bean class="springdoc.demo11.Bean2" id="bean2"></bean>
    <bean class="springdoc.demo11.CustomBeanPostProcessor" id="beanPostProcessor"></bean>
    <bean class="springdoc.demo11.CustomBean2PostProcessor" id="beanPostProcessor2"></bean>
</beans>
BeanPostProcessor有两个方法,before和after,spring容器内的每一个bean在实例化后都会先执行before()方法,然后执行after()方法.我们可以定义多个BeanPostProcessor,多个BeanPostProcessor按照Ordered接口中的getOrder()方法的返回值顺序执行.数值越大越靠后执行.当然BeanPostProcessor本身也需要被spring容器管理才能生效.在BeanPostProcessor中的两个方法中都有bean这个参数,意味着我们可以自己对spring创建的bean进一步进行改变.BeanPostProcessor优先于Bean的回调
BeanFactoryPostProcessor实例化前,对beanDefinition进行改造
首先我们先抛出一个概念,在spring在解析xml或者扫描注解后,并不会立刻对bean进行实例化,而是先把每一个pojo的描述信息放进一个definition中,比如这个pojo被定义为单例还是原型,这个pojo是否是懒加载,这个pojo的属性有哪些,这个pojo的构造参数有哪些等等,然后再根据pojo的definition看这个pojo是否需要实例化.而BeanFactoryPostProcessor就是在所有的pojo的描述信息装载完毕后,执行的钩子函数.
public class CustomBeanFactoryPostProcessor implements BeanFactoryPostProcessor {
    @Override
    public void postProcessBeanFactory(ConfigurableListableBeanFactory configurableListableBeanFactory) throws BeansException {
        BeanDefinition bean1 = configurableListableBeanFactory.getBeanDefinition("bean1");
        bean1.setLazyInit(true);
        System.out.println("configurableListableBeanFactory");
    }
}
在这里我把bean1设为了懒加载那么结果就是bean1不会被立刻实例化.当然BeanFactoryPostProcessor也可以有多个,同样实现Ordered接口可以指定其执行顺序.
注解的方式(spring文档中并没有一下子用注解替换全部的xml配置,所以我这边也随着文档的替换速度来.)
@Required
必须的依赖注入
public class Bean1 {
    private String name;

    public String getName() {
        return name;
    }

    public void setName(String name) {
        this.name = name;
    }
}
<bean class="springdoc.demo12.Bean1" id="bean1"></bean>
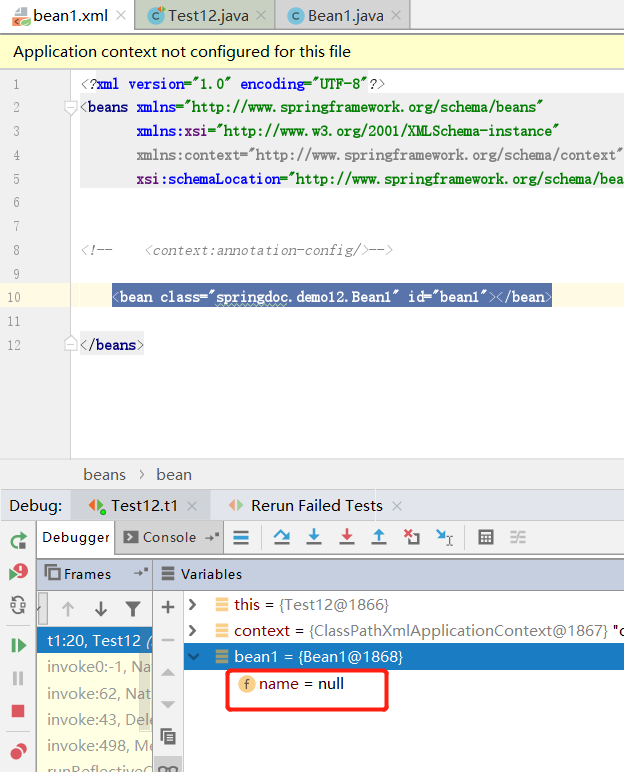
一个简单的demo,pojo有一个name属性,我们现在没有注入.@Required注解规定属性必须注入.
public class Bean1 {

    private String name;

    public String getName() {
        return name;
    }

    @Required
    public void setName(String name) {
        this.name = name;
    }
}
除了在set()方法加上注解之外,我们还需要在xml中配置
<bean class="org.springframework.beans.factory.annotation.RequiredAnnotationBeanPostProcessor"/>
看这个bean的名字也知道,这是spring定义的一个后置处理器.跟我们之前自己写的那个CustomBeanPostProcessor 实现类是一样的.
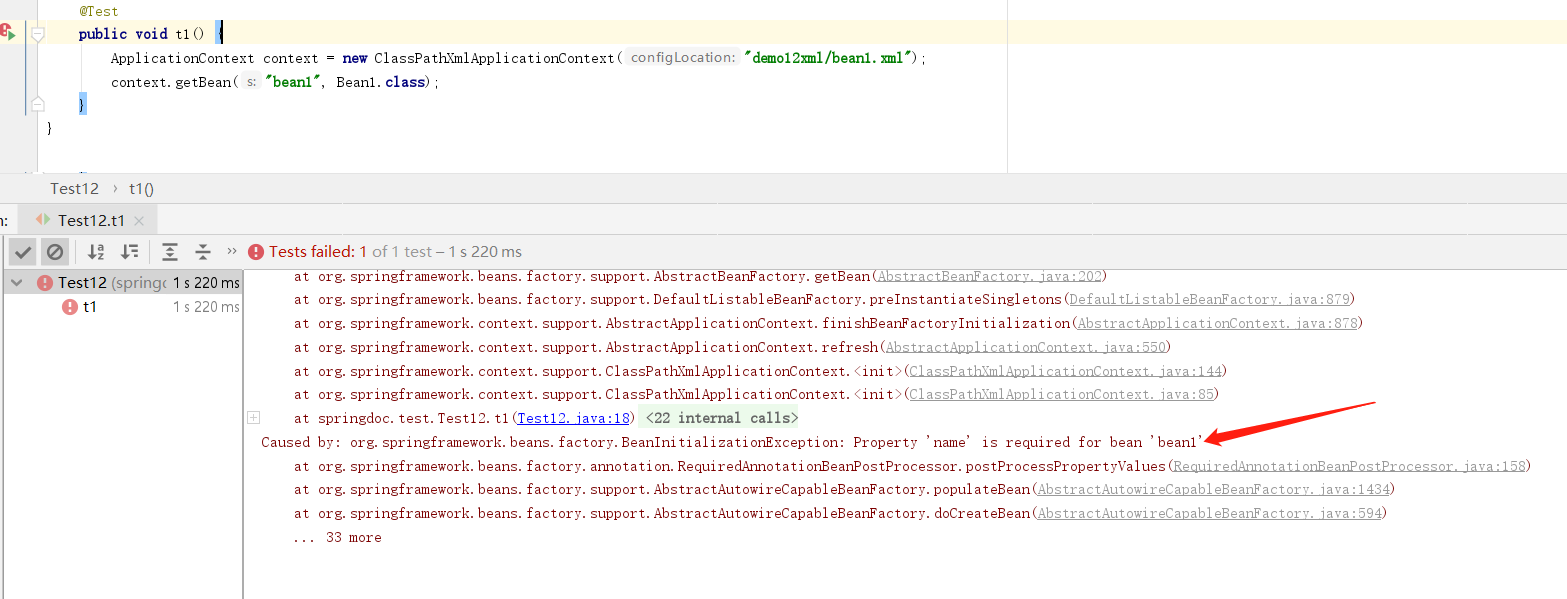
在xml中配置上属性即可.需要注意的是@Required在spring5.1开始已经标记废弃
@Autowired
set() 方法使用@Autowired(不是set方法也行)
public class Bean2 {
    private Bean3 bean4;

    public Bean3 getBean3() {
        return bean4;
    }

    @Autowired
    public void setBean3(Bean3 bean4) {
        this.bean4 = bean4;
    }
}
    <bean class="org.springframework.beans.factory.annotation.AutowiredAnnotationBeanPostProcessor "/>

    <bean id="bean2" class="springdoc.demo12.Bean2"></bean>

    <bean id="bean3" class="springdoc.demo12.Bean3">
        <property name="name" value="张三"/>
    </bean>

    <bean id="bean4" class="springdoc.demo12.Bean3">
        <property name="name" value="李四"/>
    </bean>
除了在pojo的set()方法上使用@Autowired,还要在xml配置AutowiredAnnotationBeanPostProcessor
public class Bean2 {
    private Bean3 bean3;

    public Bean3 getBean3() {
        return bean3;
    }

    @Autowired
    public void setBean3(Bean3 bean5) {
        this.bean3 = bean5;
    }
}
set()方法有多个参数
public class Bean2 {
    private Bean3 bean3;
    private Bean3 bean4;

    public Bean3 getBean3() {
        return bean3;
    }

    @Autowired
    public void setBean3(Bean3 bean3,Bean3 bean4) {
        this.bean3 = bean3;
        this.bean4 = bean4;
    }
}
这里我们只用一个@Autowired,而set()方法有多个参数.也是可以注入成功的
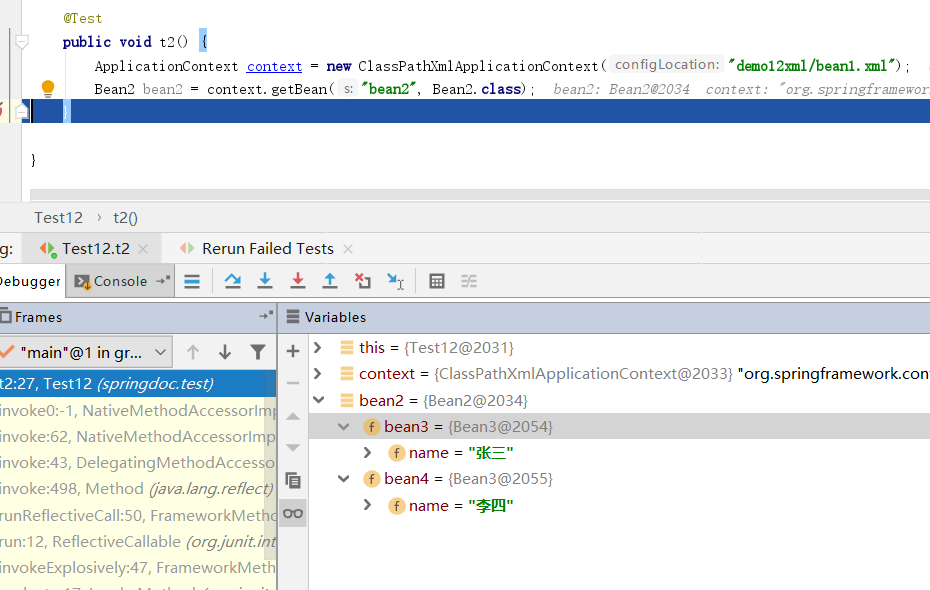
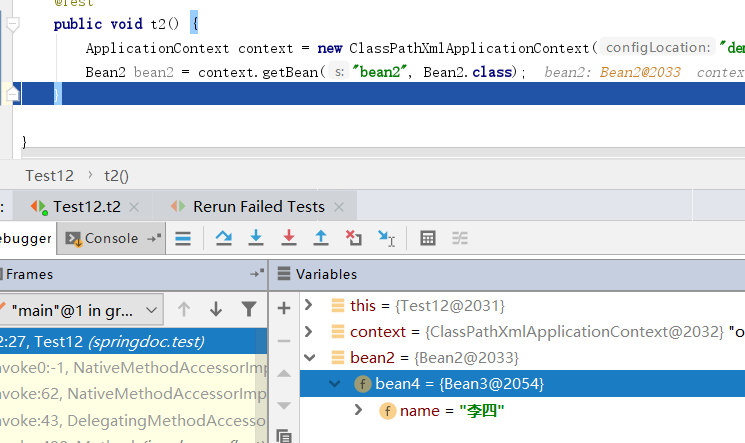
在构造函数使用@Autowired
public class Bean4 {
    private Bean3 bean3;
    private Bean3 bean33;

    @Autowired
    public Bean4(Bean3 bean3, Bean3 bean4) {
        this.bean3 = bean3;
        this.bean33 = bean4;
    }
}
    <bean id="bean3" class="springdoc.demo12.Bean3">
        <property name="name" value="张三"/>
    </bean>

    <bean id="bean4" class="springdoc.demo12.Bean3">
        <property name="name" value="李四"/>
    </bean>

    <bean id="bean42" class="springdoc.demo12.Bean4"></bean>
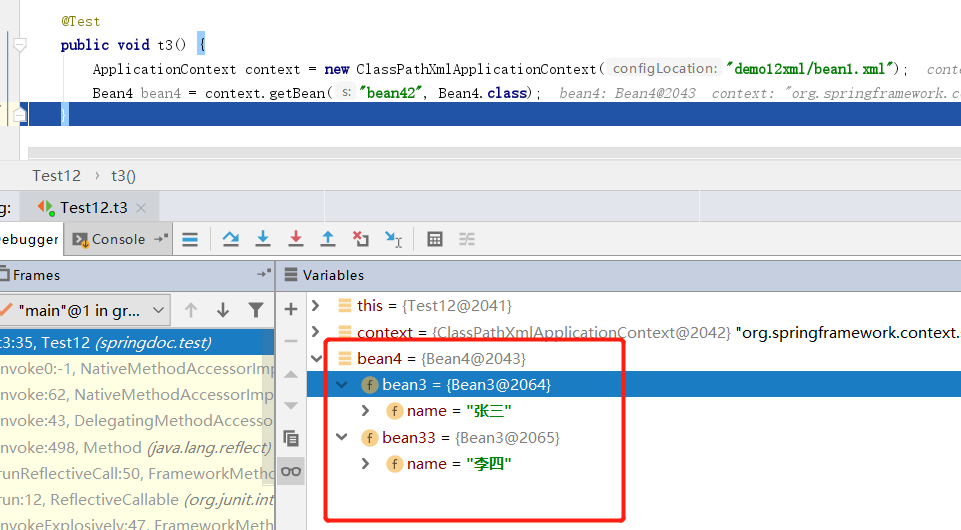
同样,@Autowired用到构造器上也和刚才的规则一样.根据构造器的参数名找对应bean的id,而且如果只有一个构造函数,不使用@Autowired注解也可以.但是注意这不等于之前我们纯xml配置时不使用<constructor-arg>.因为我们在xml配置了AutowiredAnnotationBeanPostProcessor所以只有一个构造器才不用显式的配置.
在成员变量使用@Autowired
public class Bean5 {
    @Autowired
    public Bean3 bean3;
    @Autowired
    public Bean3 bean4;
}
<bean id="bean5" class="springdoc.demo12.Bean5"></bean>
同样将@Autowried用到成员变量,也是根据变量名去寻找bean的id.
使用需要注意,如果根据变量名或参数名找不到bean则会抛出异常
@Autowried注入数组集合
public class Person {
    private String name;

    public String getName() {
        return name;
    }

    public void setName(String name) {
        this.name = name;
    }
}
public class Animal {
    @Autowired
    private Person[] persons;

    @Autowired
    private List<Person> personList;

    @Autowired
    private String[] strs;
}
    <bean class="org.springframework.beans.factory.annotation.AutowiredAnnotationBeanPostProcessor "/>

    <bean class="springdoc.demo13.Animal" id="animal"></bean>

    <bean class="springdoc.demo13.Person" id="person1">
        <property name="name" value="张三"/>
    </bean>

    <bean class="springdoc.demo13.Person" id="person2">
        <property name="name" value="李四"/>
    </bean>

    <bean class="springdoc.demo13.Person" id="person3">
        <property name="name" value="王五"/>
    </bean>

    <bean class="springdoc.demo13.Person" id="person4">
        <property name="name" value="赵六"/>
    </bean>

    <bean class="java.lang.String" id="s1">
        <constructor-arg name="original" value="字符串1"></constructor-arg>
    </bean>

    <bean class="java.lang.String" id="s2">
        <constructor-arg name="original" value="字符串2"></constructor-arg>
    </bean>
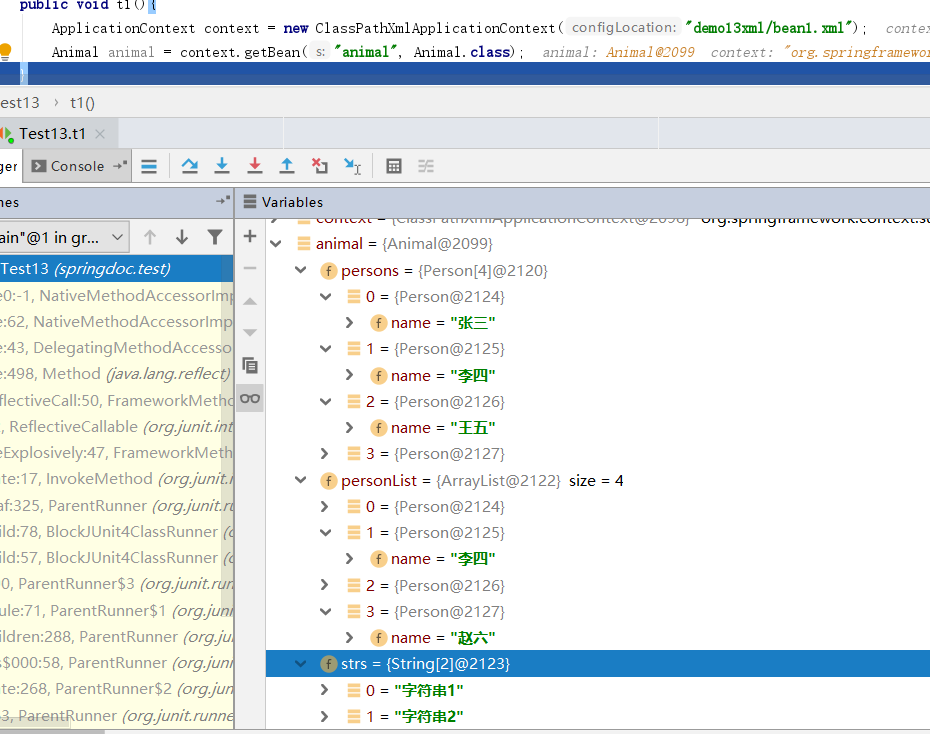
注入集合数组,不是根据变量名去找对应的bean了,而是将spring容器中所有相同类型的bean组成一个数组或者集合.这种玩法,还是挺有意思的
@Autowried的required属性.需要注意的是,对于构造器注入不能使用required,否则,有一个bean找不到则创建bean失败
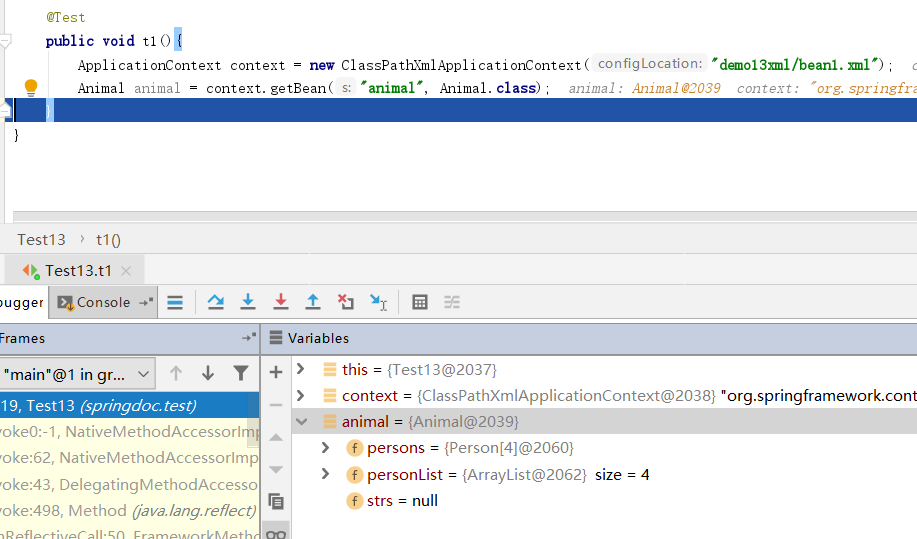
public class Animal {
    @Autowired
    private Person[] persons;

    @Autowired
    private List<Person> personList;

    @Autowired(required = false)
    private String[] strs;
}
 <bean class="org.springframework.beans.factory.annotation.AutowiredAnnotationBeanPostProcessor "/>

    <bean class="springdoc.demo13.Animal" id="animal"></bean>

    <bean class="springdoc.demo13.Person" id="person1">
        <property name="name" value="张三"/>
    </bean>

    <bean class="springdoc.demo13.Person" id="person2">
        <property name="name" value="李四"/>
    </bean>

    <bean class="springdoc.demo13.Person" id="person3">
        <property name="name" value="王五"/>
    </bean>

    <bean class="springdoc.demo13.Person" id="person4">
        <property name="name" value="赵六"/>
    </bean>

<!--    <bean class="java.lang.String" id="s1">-->
<!--        <constructor-arg name="original" value="字符串1"></constructor-arg>-->
<!--    </bean>-->

<!--    <bean class="java.lang.String" id="s2">-->
<!--        <constructor-arg name="original" value="字符串2"></constructor-arg>-->
<!--    </bean>-->
在给Animal注入strs属性时,我们添加一个required属性值为false则代表这个属性不强制注入,也就是说,有了注入,没有不抛出异常
需要注意的是@Autowried(required)如果用到方法注入.会出现多个参数,如果有一个找不到bean,则不全部不会注入
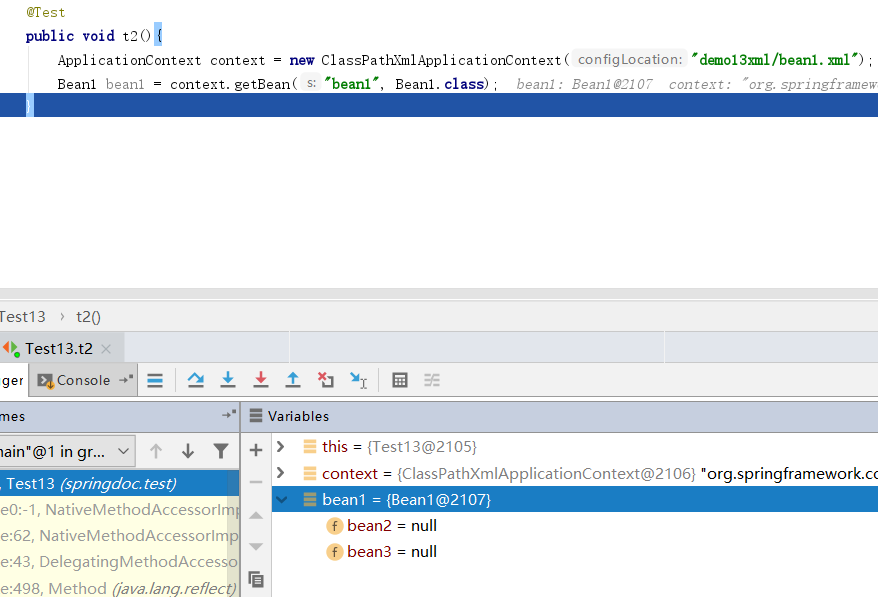
public class Bean1 {
    public Bean2 bean2;
    public Bean3 bean3;

    @Autowired(required = false)
    public void set(Bean2 bean2, Bean3 bean3) {
        this.bean2 = bean2;
        this.bean3 = bean3;
    }
}
    <bean class="springdoc.demo13.Bean1" id="bean1"></bean>
<!--    <bean class="springdoc.demo13.Bean2" id="bean2"></bean>-->
    <bean class="springdoc.demo13.Bean3" id="bean3"></bean>
这里我们把bean2注释掉,这样spring就找不到这个bean,结果就是可以找到的bean3也不会注入成功
阻止这种做法我们可以使用@Nullable注解.需要注意的是,@Nullable注解在spring5才有
    <bean class="springdoc.demo13.Bean1" id="bean1"></bean>
<!--    <bean class="springdoc.demo13.Bean2" id="bean2"></bean>-->
    <bean class="springdoc.demo13.Bean3" id="bean3"></bean>
    <bean class="springdoc.demo13.Bean4" id="bean4"></bean>
public class Bean4 {
    public Bean2 bean2;
    public Bean3 bean3;

    @Autowired
    public void set(@Nullable Bean2 bean2, Bean3 bean3) {
        this.bean2 = bean2;
        this.bean3 = bean3;
    }
}
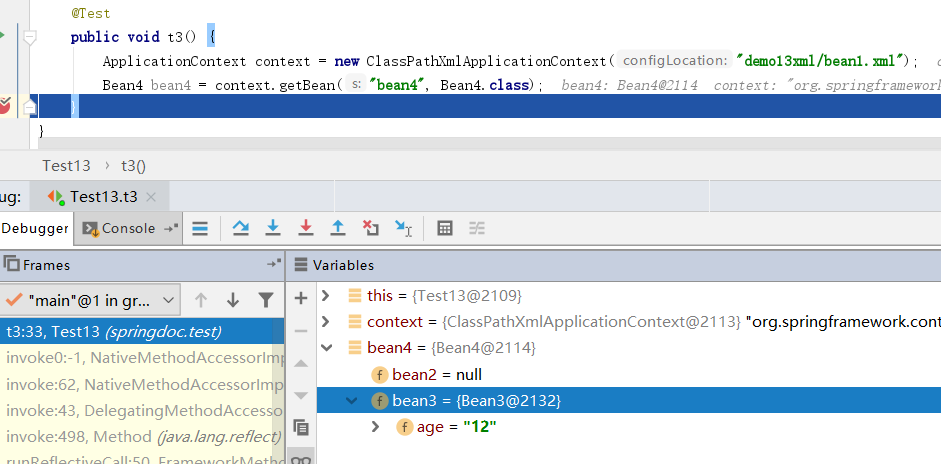
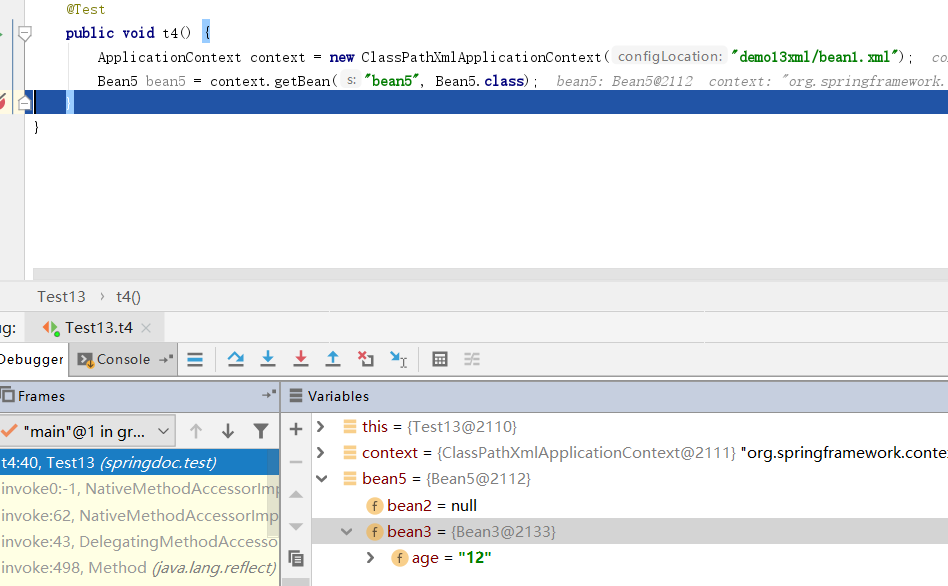
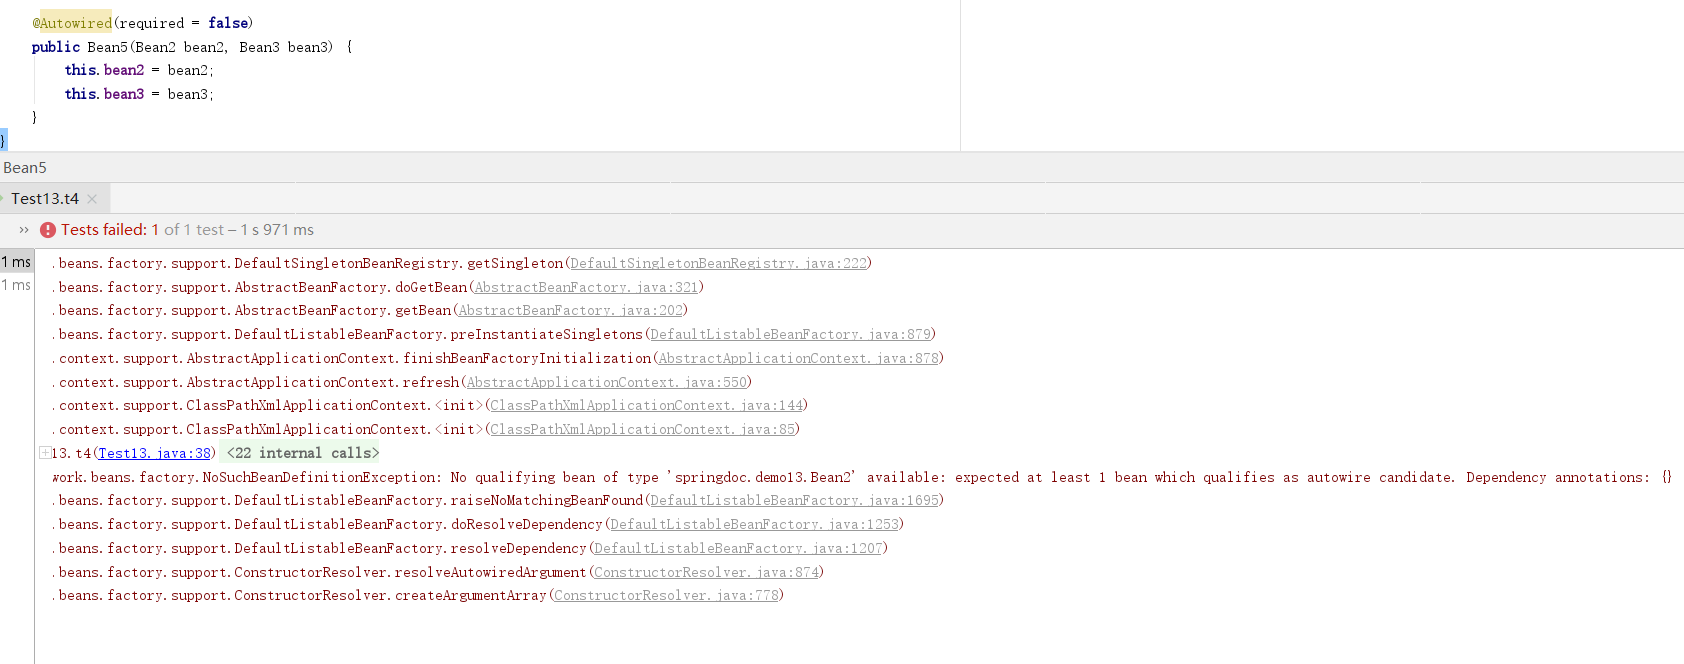
额外的我们需要注意required属性用到构造函数注入,如果参数bean不存在,则实例化bean失败,@Nullable可以使用到构造函数注入.即,构造函数所需bean不存在,也可以实例出对象
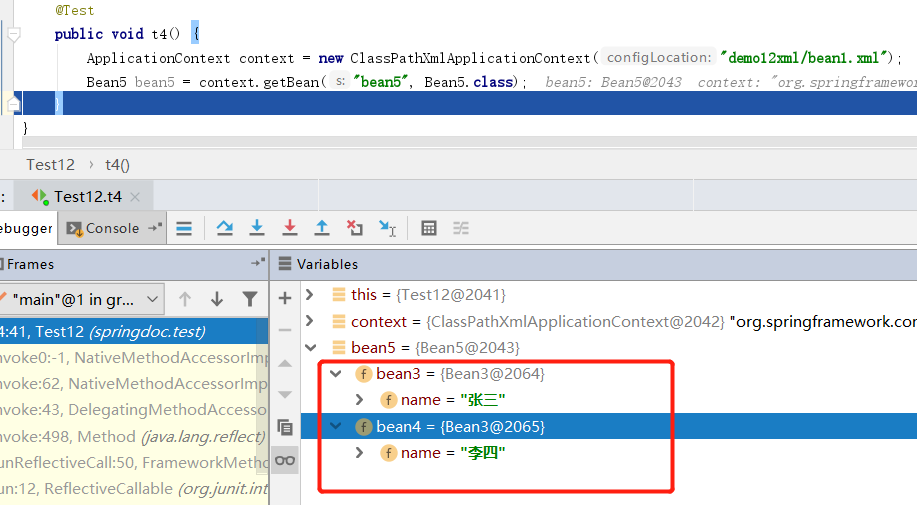
public class Bean5 {
    public Bean2 bean2;
    public Bean3 bean3;

    @Autowired
    public Bean5(@Nullable Bean2 bean2, Bean3 bean3) {
        this.bean2 = bean2;
        this.bean3 = bean3;
    }
}
public class Bean5 {
    public Bean2 bean2;
    public Bean3 bean3;

    @Autowired(required = false)
    public Bean5(Bean2 bean2, Bean3 bean3) {
        this.bean2 = bean2;
        this.bean3 = bean3;
    }
}
@Autowried到底是byType还是byName
之前我们在xml配置bean时自动注入,分byname和bytype两个形式,那么使用@Autowried是什么方式自动注入的呢?
public class Bean1 {
    private String name;

    public String getName() {
        return name;
    }

    public void setName(String name) {
        this.name = name;
    }
}
public class Bean2 {

    private Bean1 bean;

    public Bean1 getBean() {
        return bean;
    }

    @Autowired
    public void setBean(Bean1 bean1) {
        this.bean = bean1;
    }
}
  <bean class="springdoc.demo16.Bean1" id="bean1">
        <property name="name" value="张三"/>
    </bean>

    <bean class="springdoc.demo16.Bean1" id="bean11">
        <property name="name" value="李四"/>
    </bean>

    <bean class="springdoc.demo16.Bean2" id="bean2"></bean>
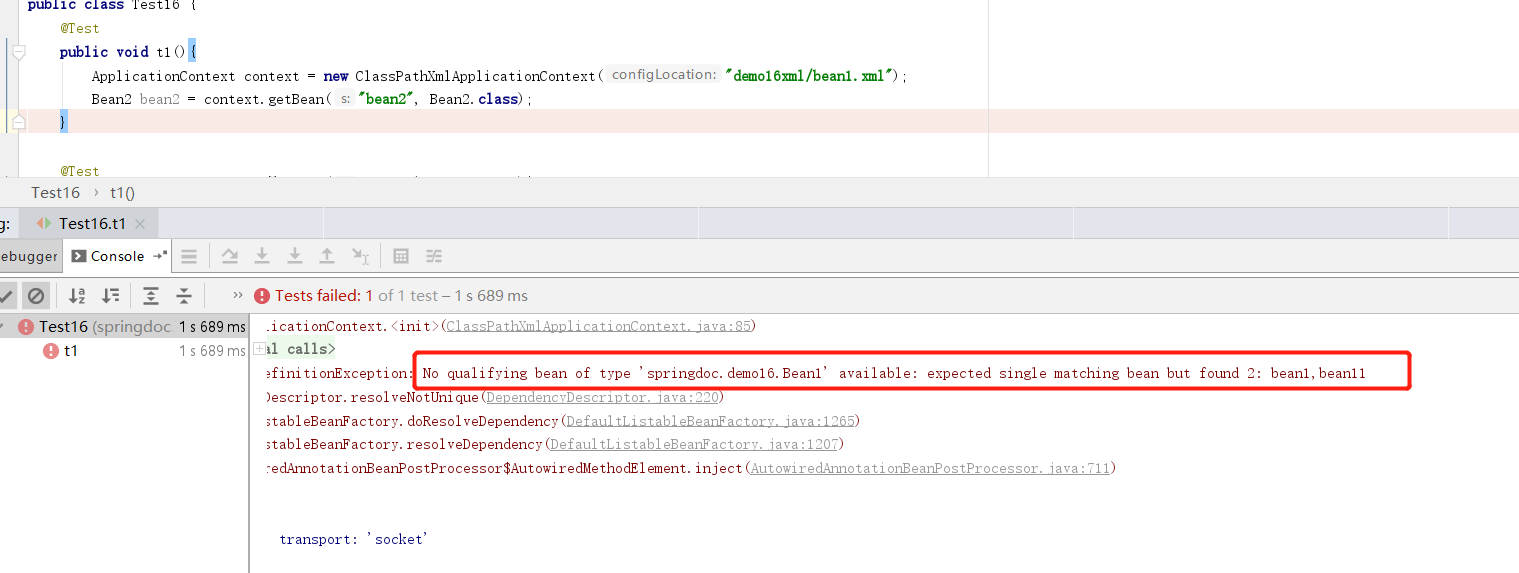
上边代码使用@Autowred通过方法注入参数.参数类型为Bean1 变量名为bean1.而在xml配置了两个类型为Bean1的bean,id分别时bean1和bean11.看结果
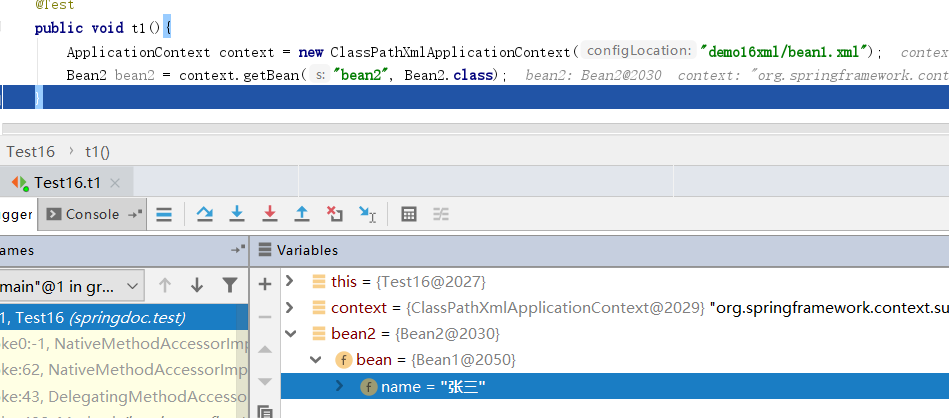
貌似看这个结果,好像是byName.但是我们把xml中名称为bean1的bean注释掉在看结果
<!--    <bean class="springdoc.demo16.Bean1" id="bean1">-->
<!--        <property name="name" value="张三"/>-->
<!--    </bean>-->

    <bean class="springdoc.demo16.Bean1" id="bean11">
        <property name="name" value="李四"/>
    </bean>

    <bean class="springdoc.demo16.Bean2" id="bean2"></bean>
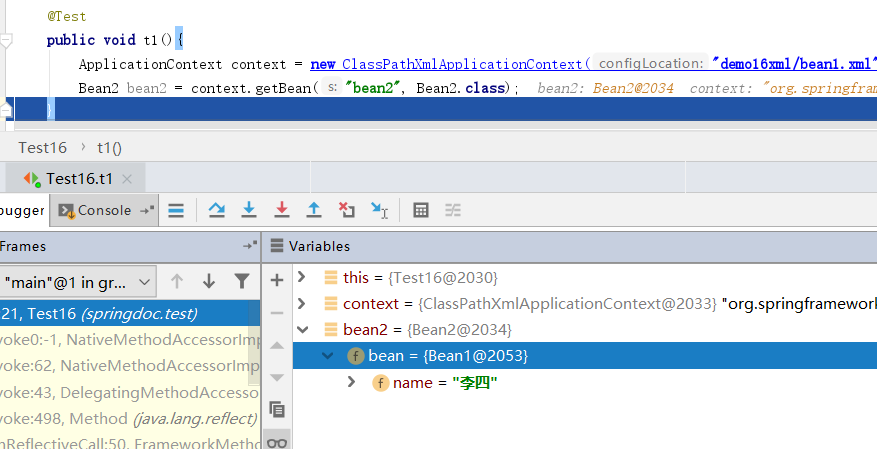
此时就就是byType了,因为根本找不到变量名和beanId相同的bean.
最后我们将pojo中的变量名改掉
public class Bean2 {

    private Bean1 bean;

    public Bean1 getBean() {
        return bean;
    }

    @Autowired
    public void setBean(Bean1 bean) {
        this.bean = bean;
    }
}
    <bean class="springdoc.demo16.Bean1" id="bean1">
        <property name="name" value="张三"/>
    </bean>

    <bean class="springdoc.demo16.Bean1" id="bean11">
        <property name="name" value="李四"/>
    </bean>

    <bean class="springdoc.demo16.Bean2" id="bean2"></bean>
此时没有名称相同的bean但是有两个类型相同的bean
结果是报错,期望得到单个bean,但是找到了两个.
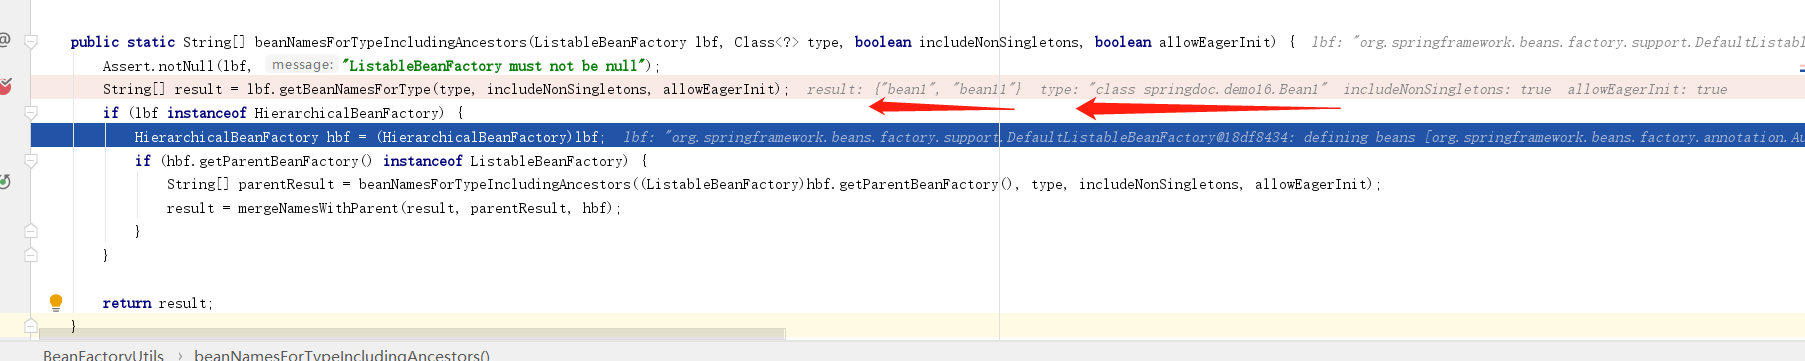
结论:从源码中大概还是能看出一点蛛丝马迹,spring 先找到所有类型符合注入的bean,然后在根据bean如果有多个,则根据名称选择.先byName,在byType,@Autowried使用到成员变量和构造函数也是一样的
@Primary
在说这个注解之前,先回忆下,在xml中使用primary参数的含义.然后我们提前看下.基于java的容器配置.简单说就是bean不在xml中配置了,使用java代码也可以.
public class Bean2 {
    private String name;

    public Bean2(String name) {
        this.name = name;
    }
}
@Configuration
public class Config {

    @Bean
    public Bean2 getBean2() {
        return new Bean2("张三");
    }

}
使用@Configuration注解标注的类,是配置类,相当于一个xml,而被@Bean标注的方法,则相当于xml中的<bean>可以看出,被@Bean标注的类都需要返回一个pojo.而这个pojo是最终成为springbean.ApplicationContext现在使用AnnotionConfigApplicationContext它接收一个Config配置类.就像ClassPathXmlApplicationContext功能类似.而getBean,则还可以通过beanid和bean的class获取.bean的id其实是被@Bean注解标注的方法名.
public class Bean1 {
    @Autowired
    private Bean2 bean;
}
@Configuration
public class Config {

    @Bean
    public Bean2 getBean2() {
        return new Bean2("张三");
    }

    @Bean
    public Bean2 getBean22() {
        return new Bean2("李四");
    }

    @Bean
    public Bean1 getBean1() {
        return new Bean1();
    }
}
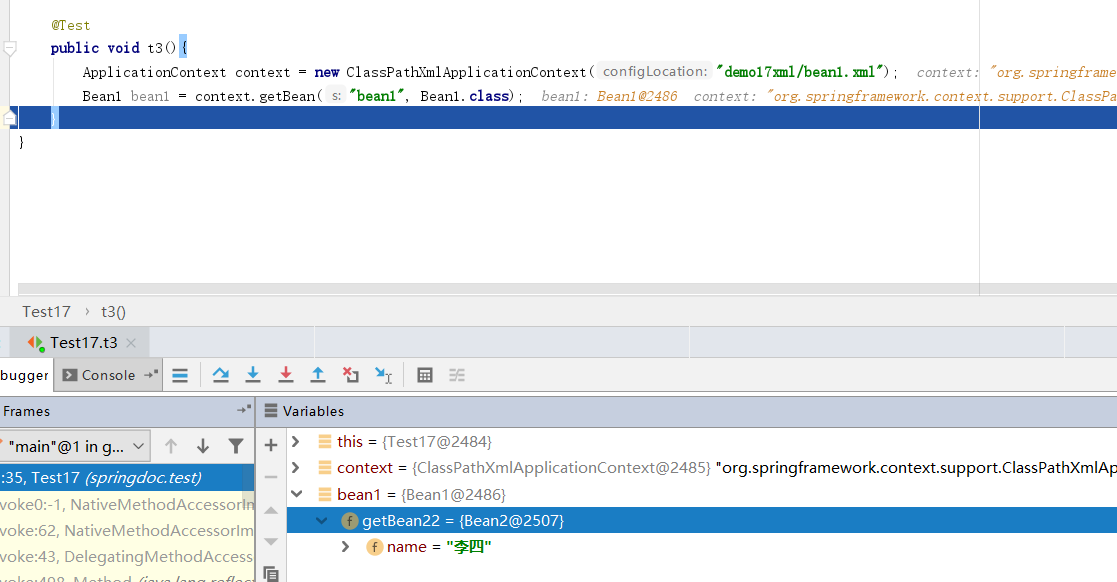
此时我们配置了三个bean,在getBean1中我们注入了Bean2这个属性.属性名是bean.带入之前byName和byType的思路,此时应该是报错.因为找到两个类型一致的Bean而且名称都不相同
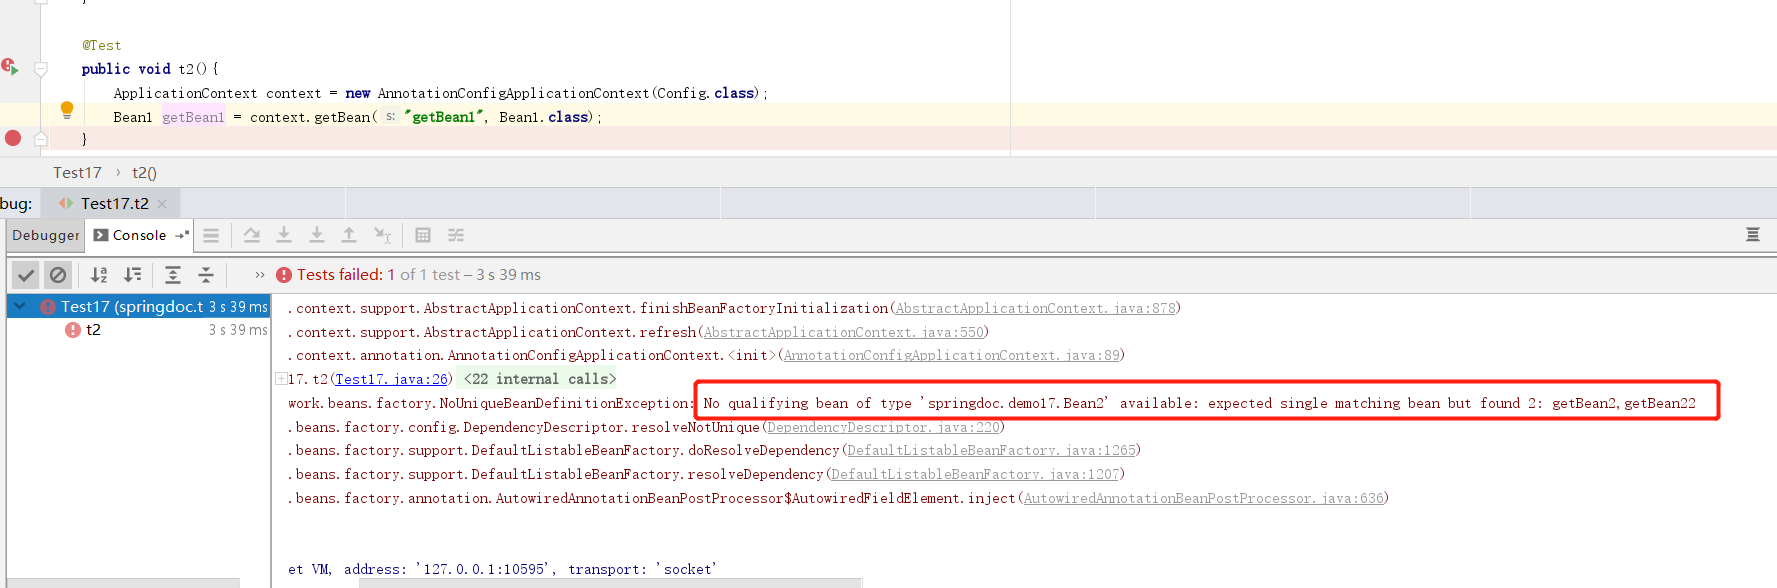
看这个报错的名字都相同,我们来试试修改属性名,让他和配置类中的一个bean名称相同在试试
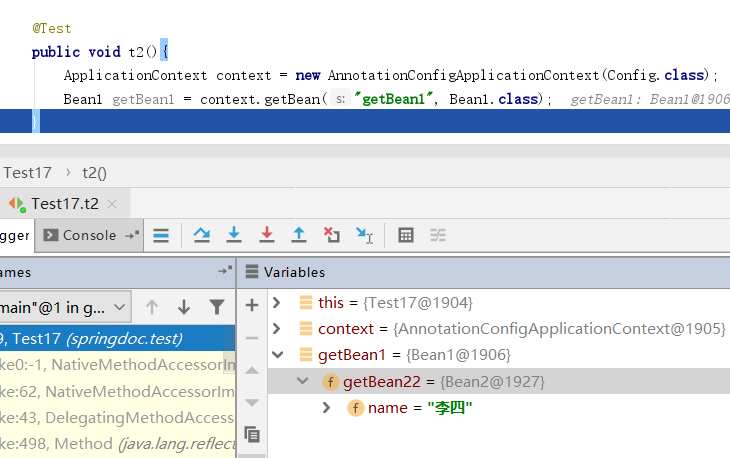
public class Bean1 {
    @Autowired
    private Bean2 getBean22;
}
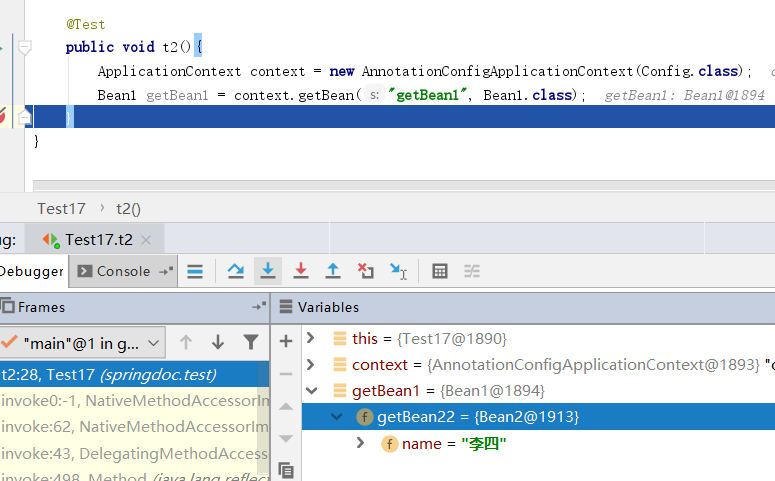
这样是可以匹配到对应的bean的.但是下边才到正主@Pirmary注解
@Configuration
public class Config {

    @Bean
    @Primary
    public Bean2 getBean2() {
        return new Bean2("张三");
    }

    @Bean
    public Bean2 getBean22() {
        return new Bean2("李四");
    }

    @Bean
    public Bean1 getBean1() {
        return new Bean1();
    }
}
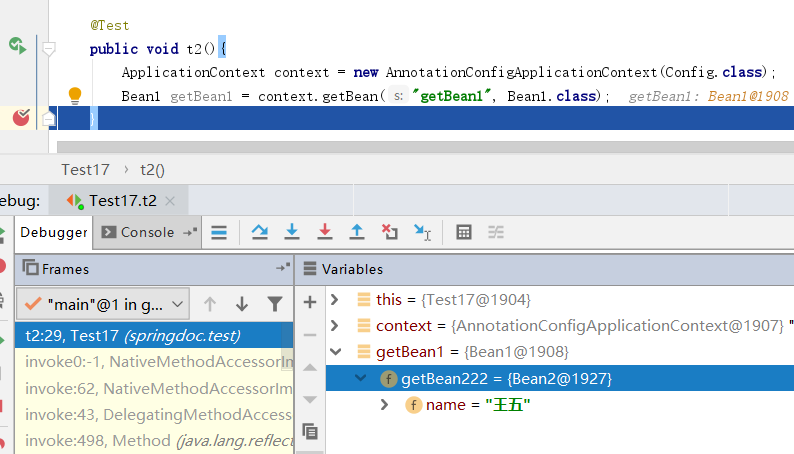
public class Bean1 {
    @Autowired
    private Bean2 getBean22;
}
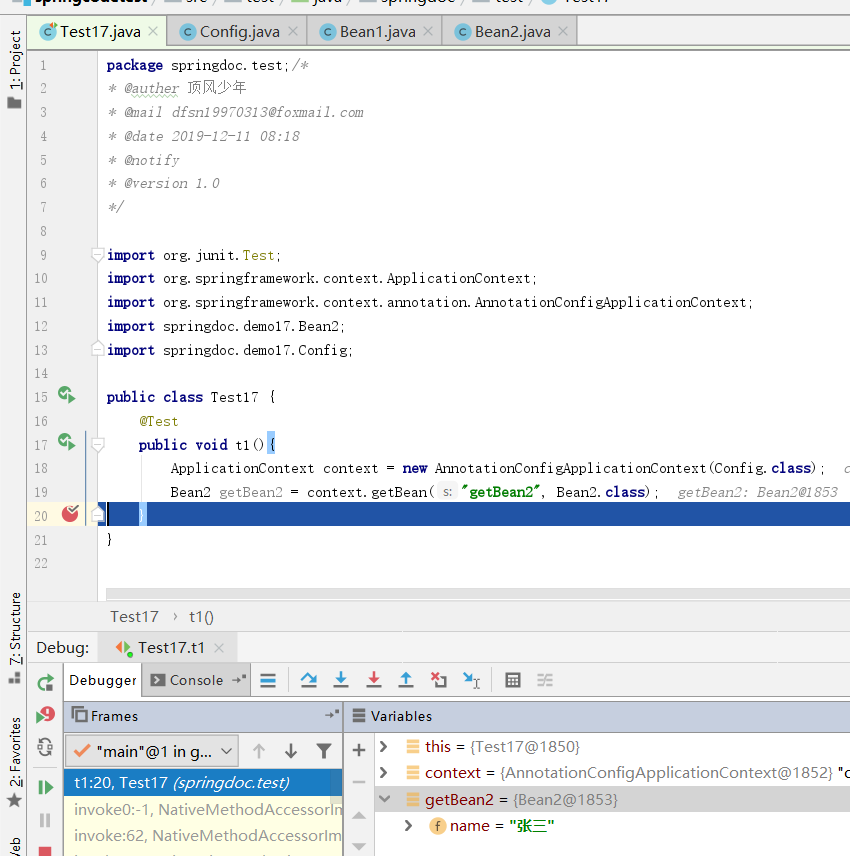
在getBean2()方法上加上@Pirmary注解,提升优先级.而在Bean1类中,我们注入的属性名依然是getBean22,看结果
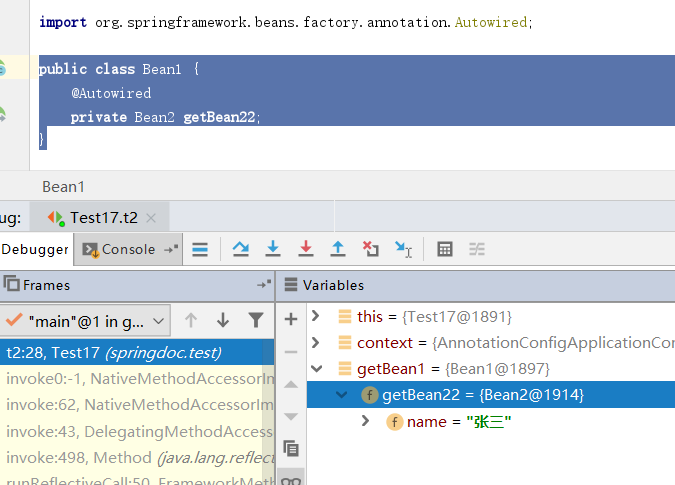
spring依然会选择注入getBean2()这个方法的返回值,这也能验证,spring是先byType后byName的.
@Qualifier
@Configuration
public class Config {

    @Bean
    @Primary
    @Qualifier(value = "zhangsan")
    public Bean2 getBean2() {
        return new Bean2("张三");
    }

    @Bean
    @Qualifier(value = "lisi")
    public Bean2 getBean22() {
        return new Bean2("李四");
    }

    @Bean
    public Bean1 getBean1() {
        return new Bean1();
    }
}
public class Bean1 {
    @Autowired
    @Qualifier(value = "lisi")
    private Bean2 getBean22;
}
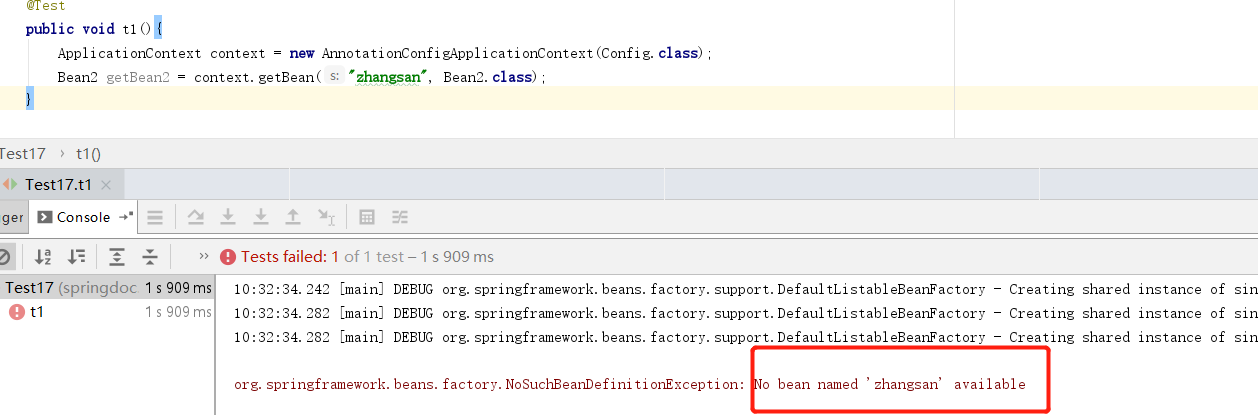
@Qualifier和@Bean,@Autowired和@Qualifier配对使用,即可准确的细粒度的指定自动注入的到底是哪一个bean.即便getBean2()方法标识了@Pirmary注解也无效,毕竟人家已经点名了,你优先级再高也没什么用.但是我们需要注意的是@Qualifier(value='xx')并不是beanid,我们使用这个获取bean是会失败的
同样在xml的配置中我们也可以使用<qualifier value=''>标签.
<?xml version="1.0" encoding="UTF-8"?>
<beans xmlns="http://www.springframework.org/schema/beans"
       xmlns:xsi="http://www.w3.org/2001/XMLSchema-instance"
       xmlns:context="http://www.springframework.org/schema/context"
       xsi:schemaLocation="http://www.springframework.org/schema/beans http://www.springframework.org/schema/beans/spring-beans.xsd http://www.springframework.org/schema/context https://www.springframework.org/schema/context/spring-context.xsd">

    <context:component-scan base-package="springdoc.demo17"/>

   <bean class="springdoc.demo17.Bean1" id="bean1"></bean>

    <bean class="springdoc.demo17.Bean2" id="bean2" primary="true">
        <qualifier value="zhangsan"/>
        <constructor-arg name="name" value="zhangsan"/>
    </bean>

    <bean class="springdoc.demo17.Bean2" id="bean01">
        <qualifier value="lisi"/>
        <constructor-arg name="name" value="lisi"/>
    </bean>

</beans>
@Qualifier的值相同
看下面的情况,有两个@Qualifier并且指定的value值相同,结果确实又通过byName自动注入
@Configuration
public class Config {

    @Bean
    @Primary
    @Qualifier(value = "zhangsan")
    public Bean2 getBean2() {
        return new Bean2("张三");
    }

    @Bean
    @Qualifier(value = "lisi")
    public Bean2 getBean222() {
        return new Bean2("王五");
    }

    @Bean
    @Qualifier(value = "lisi")
    public Bean2 getBean22() {
        return new Bean2("李四");
    }

    @Bean
    public Bean1 getBean1() {
        return new Bean1();
    }
}
public class Bean1 {
    @Autowired
    @Qualifier(value = "lisi")
    private Bean2 getBean22;
}
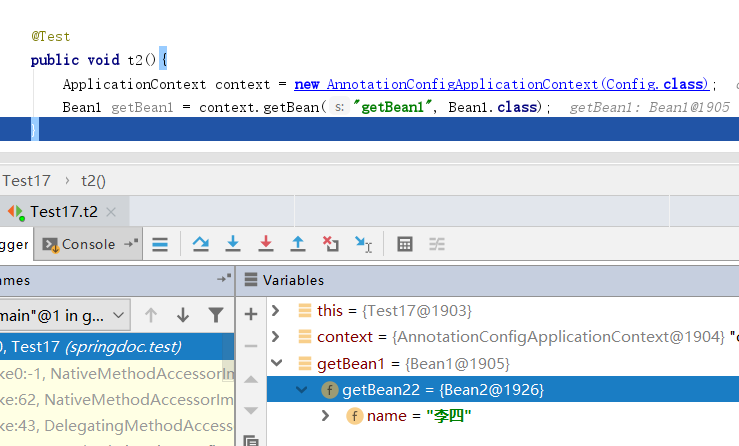
更改需要注入的属性@Qualifier的值再试试.
public class Bean1 {
    @Autowired
    @Qualifier(value = "lisi")
    private Bean2 getBean222;
}
可以看到spring在想尽办法来为我们选择唯一可以注入的bean.
@Resource
@Resource和@Autowried都有自动注入属性的功能,他们之间的区别在于@Resource是以name优先选择的.看下面示例
public class Bean1 {
    private String name;

    public Bean1(String name) {
        this.name = name;
    }
}
public class Bean2 {
    @Autowired
    private Bean1 bean;

    @Resource
    private Bean1 b;
}
@Configuration
public class Config {

    @Bean
    public Bean1 getBean1(){
        return new Bean1("张三");
    }

    @Bean
    public Bean2 getBean2(){
        return new Bean2();
    }
}
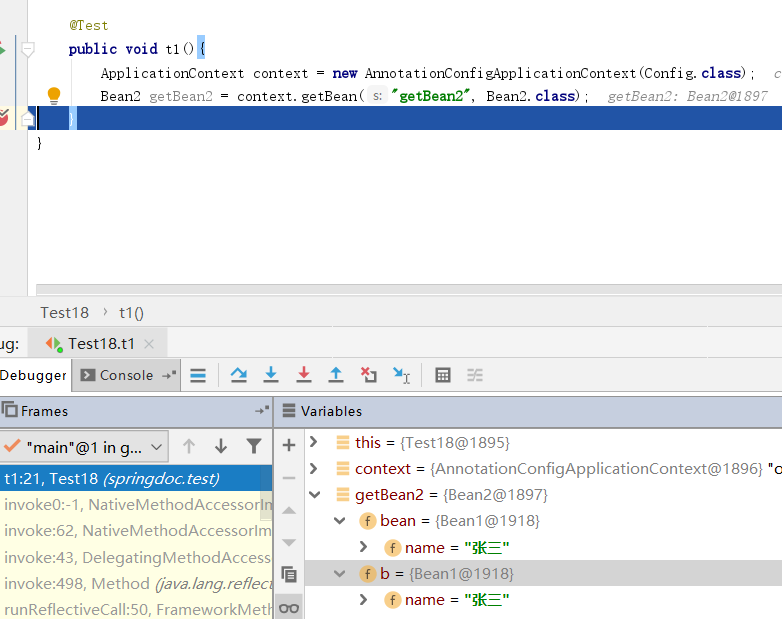
给Bean2注入两个属性,分别使用@Autowried和@Resource注入.可以看到两个注解都是通过type找到了Bean1 .继续往下看
@Configuration
public class Config {
@Bean
public Bean1 getBean1(){
return new Bean1("张三");
}
@Bean
public Bean2 getBean2(){
return new Bean2();
}
@Bean
public Bean3 b(){
return new Bean3();
}
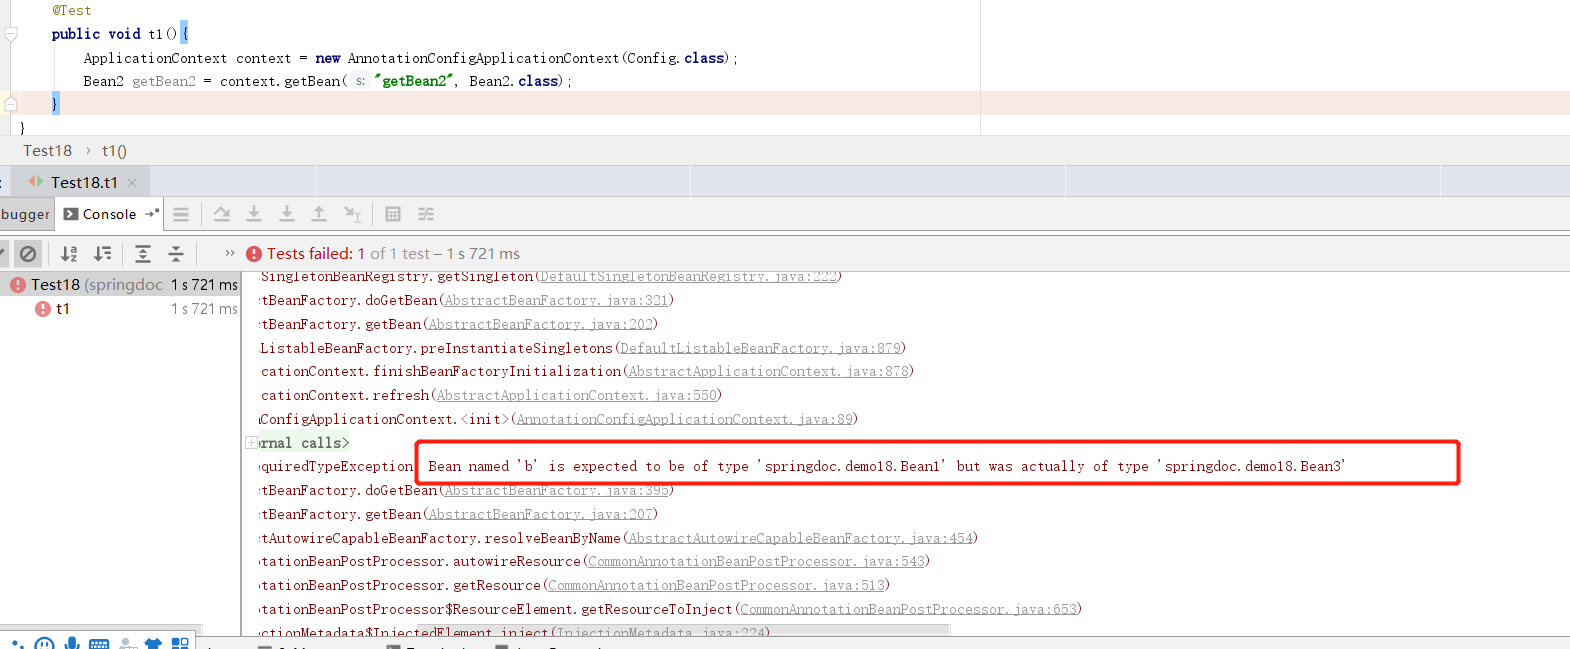
}
当我们多配置一个Bean3并且它得name为b.此时自动注入就发生了错误. Bean的名称是b,应该需要Bean1类型,但实际是Bean3类型.所以得出结果@Resource确定是name优先的
@PropertySource
@propertySource注解用来读取properties属性文件.并把读取到的属性存放到bean中.
@Configuration
@PropertySource(value = {"classpath:application.properties","file:C:\\Users\\dfsn1\\Desktop\\local.properties"})
public class Config {

}
这里我们读取了了两个properties文件,一个在classpath下,另一个是本地文件.这里需要注意,如果路径是classpath开头,则使用的是spring的ClassPathResource,如果是file开头则是FileSystemResourcezai
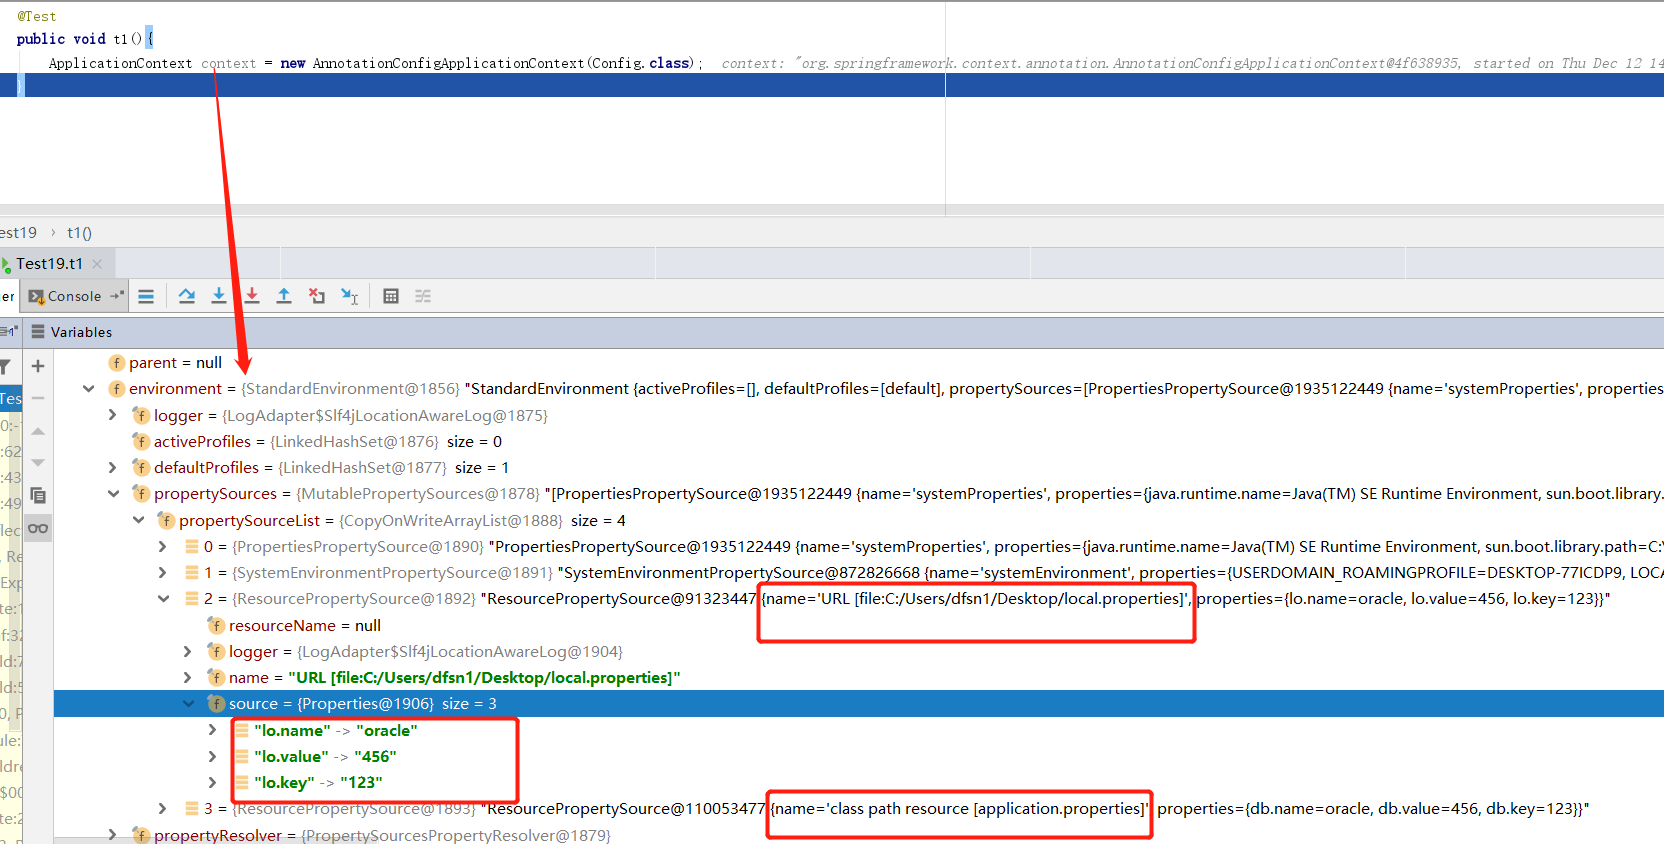
spring将读取到的key和value存放到了上下文中的environment ->propertySource->propertySourceList中.并且在spring单例池(beanFactory->singletonObjects中)中也做了备份.
@Configuration
@PropertySource(value = {"file:C:\\Users\\dfsn1\\Desktop\\local.properties","classpath:application.properties"})
public class Config {
    @Bean
    public Bean1 getBean1(){
        return new Bean1();
    }
}
@Value
在我们使用xml配置bean注入属性时,如果属性值是来自properties那么我们会注入一个org.springframework.context.support.PropertySourcesPlaceholderConfigurer用来读取properties文件.现在使用注解注入,我们则要使用@PropertySource和@Value注解来共同注入配置文件的属性.
public class Bean1 {
    @Autowired
    @Value("${db.key}")
    private String name;
}
@Configuration
@PropertySource(value = {"file:C:\\Users\\dfsn1\\Desktop\\local.properties","classpath:application.properties","file:C:\\Users\\dfsn1\\Desktop\\local2.properties"})
public class Config {
    @Bean
    public Bean1 getBean1(){
        return new Bean1();
    }
}
这是local.properties
lo.key = 123
lo.value = 456
lo.name = oracle
db.key = aaa
这是application.properties
db.key = 123
db.value = 456
db.name = oracle
db.key = 456
这是local2.properties
db.key = ccc
db.key= yyy
首先我们先看着三个文件在spring的environment中存储顺序
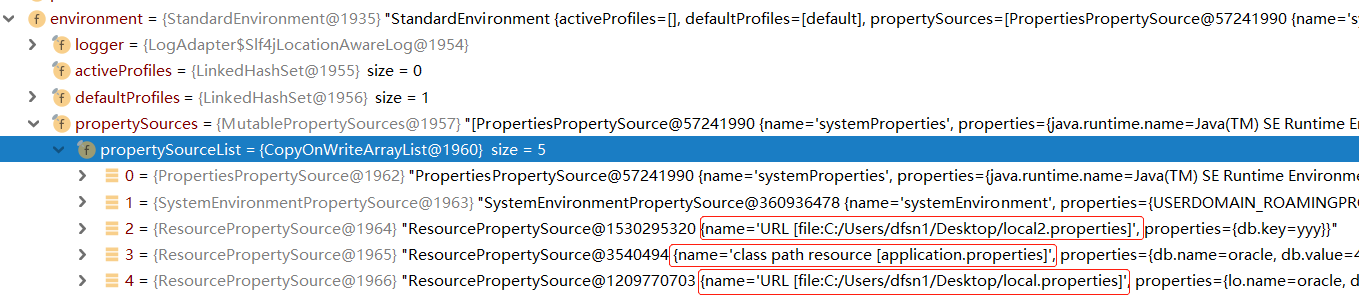
这个顺序刚好跟我们@PropertySource的value顺序相反,再看执行结果
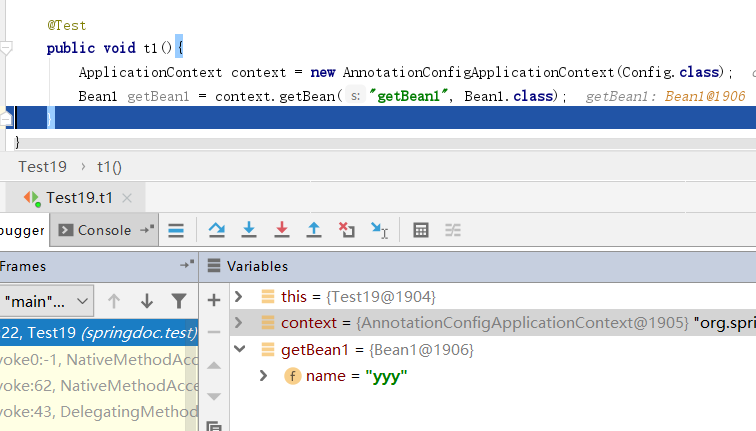
所以我推测,当我们使用@Value注入属性时,spring会到environment顺序查找文件,如果一个文件中存在相同的key,则会从该文件中读取key对应的value,一个文件中的相同的key会被替换.但是不会在读取其他的文件.没有经过源码确认.
如果在配置文件中找不到对应的key呢?
public class Bean1 {
    @Autowired
    @Value("${db.aa}")
    private String name;
}
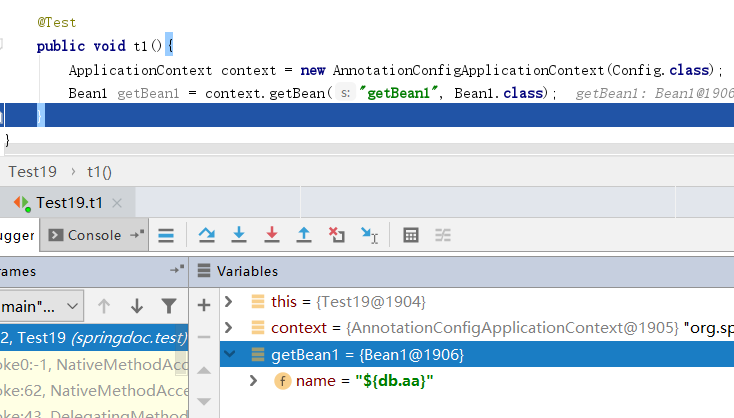
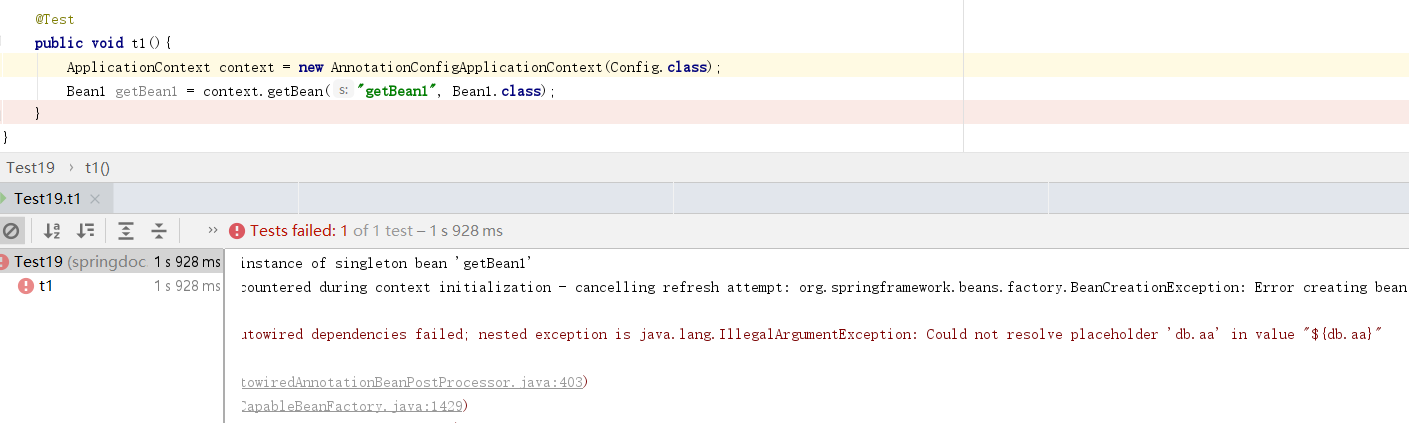
这个结果没有想到吧.spring官方文档说Spring提供了一个默认的宽松内嵌值解析器。它将尝试解析属性值,如果无法解析,${catalog.name}则将注入属性名称(例如)作为值。如果要严格控制不存在的值,则应声明一个PropertySourcesPlaceholderConfigurer,当配置PropertySourcesPlaceholderConfigurer使用JavaConfig,该 @Bean方法必须是static。
@Configuration
@PropertySource(value = {"file:C:\\workspace\\springcodetest\\src\\main\\resources\\demo19xml\\local.properties","classpath:application.properties","file:C:\\workspace\\springcodetest\\src\\main\\resources\\demo19xml\\local2.properties"})
public class Config {
    @Bean
    public Bean1 getBean1(){
        return new Bean1();
    }

    @Bean
    public static PropertySourcesPlaceholderConfigurer propertyPlaceholderConfigurer() {
        return new PropertySourcesPlaceholderConfigurer();
    }
}
@Component
@Component(value = "Bean2")
public class Bean2 {
    private String name = "张三";
}
@Configuration
@ComponentScan(basePackages={"springdoc.demo19"})
public class Config2 {
}
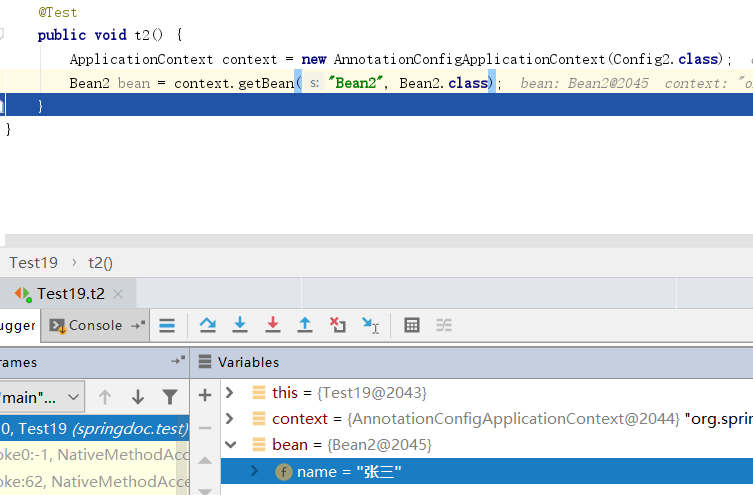
被@Component标记的类,将作为bean被注入到spring中,但是我们还需要开启组件扫描,在配置类上添加@ComponentScan注解,basePackages属性指定需要扫描的包,被检测到的包,才能使用@Component注解.下面方式为在xml开启组件扫描
<context:component-scan base-package="org.example"/>
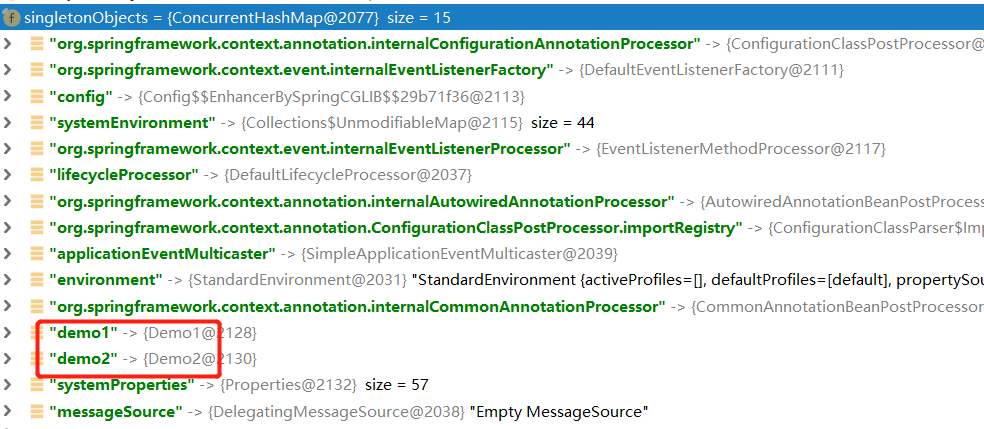
再回头看@Component注解的value值如果我们指定,那么他就是bean的id,如果我们不指定,默认为class类名的驼峰命名.
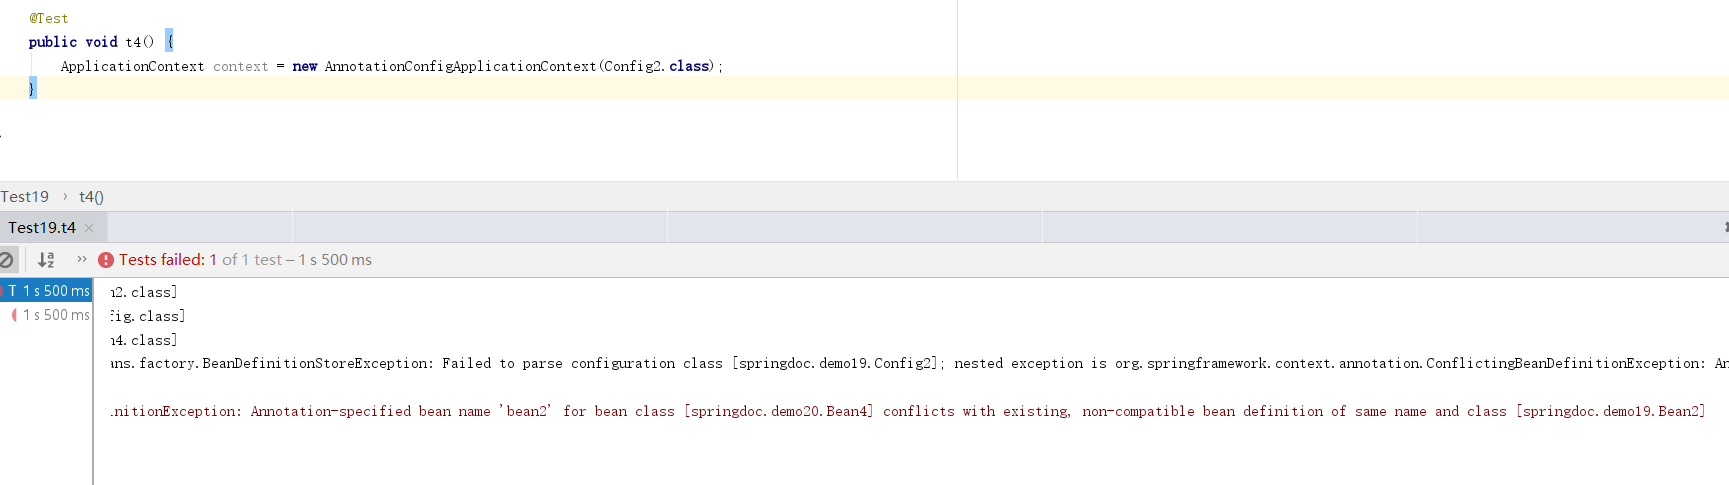
@Component
public class Bean2 {
    private String name = "张三";
}
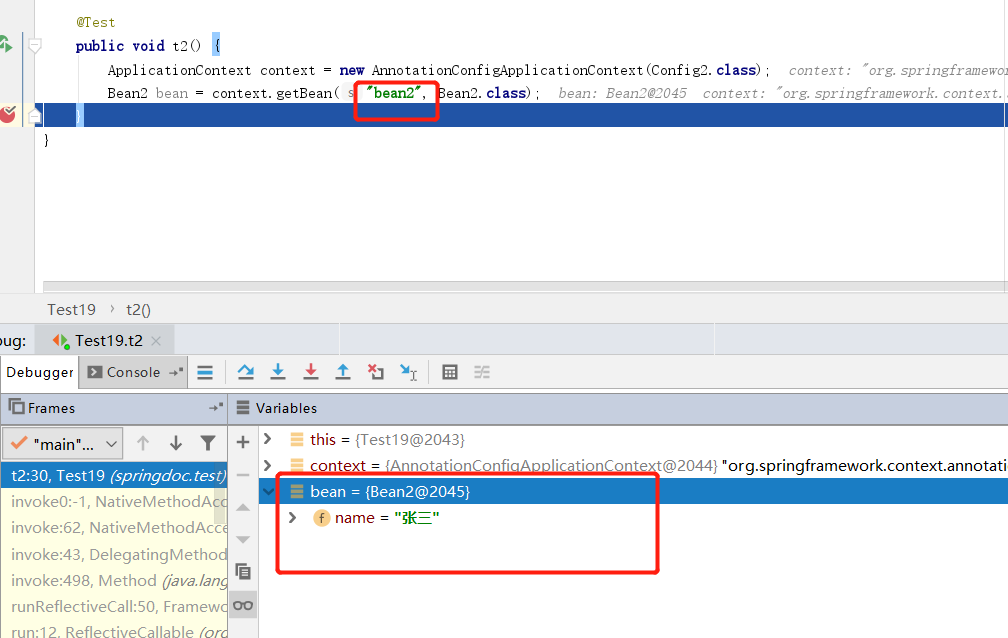
和xml配置bean一样,不能有重复的id,如果使用value属性,则不可重复,不同包也不行.
package springdoc.demo19;
import org.springframework.stereotype.Component;

@Component("bean2")
public class Bean2 {
    private String name = "张三";
}
package springdoc.demo20;
import org.springframework.stereotype.Component;

@Component("bean2")
public class Bean4 {
    private String name = "李四";
}
@Controller @Service @Repository
这三个注解语义上不同,但作用和@Component一样。在语义上往往在表示层用@Controller在服务层使用@Service在持久层使用@Repository
自动检测构造器
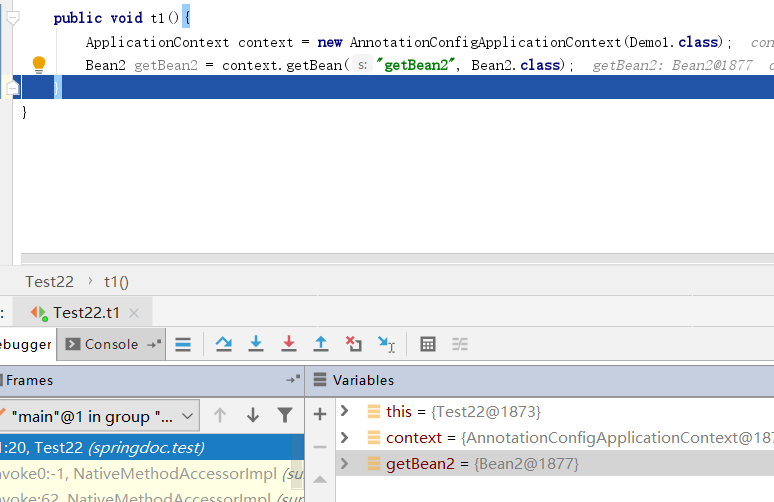
@Component
public class Demo2 {
    private String name = "张三";
}
@Component
public class Demo1 {

    private Demo2 demo2;

    public Demo1(Demo2 demo2) {
        this.demo2 = demo2;
    }
}
@Configuration
@ComponentScan(value = "springdoc.demo21")
public class Config {
}
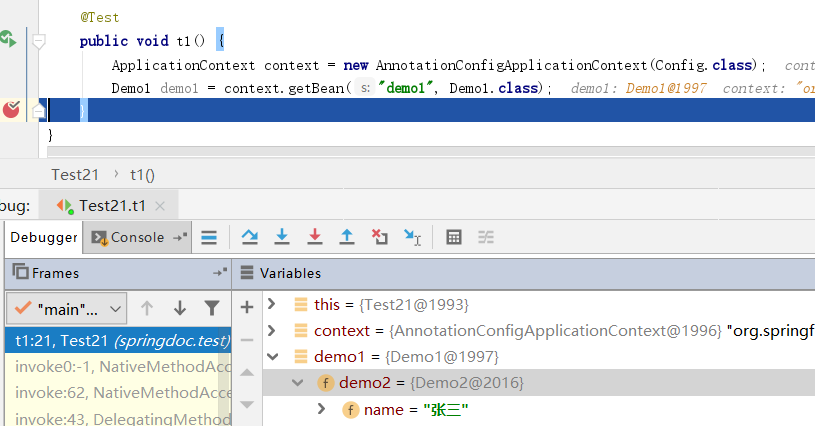
在使用@Component注解创建bean时,spring会自动检测pojo的构造函数,从单例池中自动注入构造函数依赖。若构造函数所依赖的bean不存在则异常。
@ComponentScan之扫描过滤
@ComponentScan注解是一个强大的注解,他的作用,如上描述,给他一个包路径,他能检测到该包路径以及以下所有的类,扫描这些类是否需要创建为springbean,这些bean是否需要依赖注入等等。思考一个场景当我们扫描项目的顶级包。顶级包下有若干个自包,以及数量庞大的class。那么这些类我们全部都需要扫描吗?例如有些pojo类,他本身的存在就是即用即new的。于是我们需要根据不同场景过滤扫描。
includeFilters属性和excludeFilters确定需要扫描哪些,和排除扫描哪些。而这两个属性的值都是接收ComponentScan.Filter类型的数组

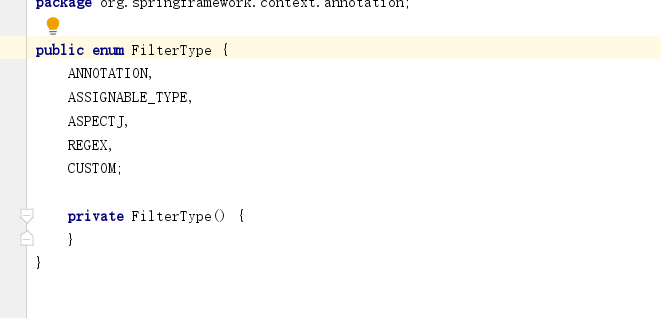
FilterType下有五种匹配模式,顺序依次是。注解匹配,类型匹配,AspectJ表达式匹配,正则表达式匹配,自定义匹配器。我们选取注解匹配和类型匹配这两种简单的匹配模式做演示。
@Component
public class Demo1 {

    private Demo2 demo2;

    public Demo1(Demo2 demo2) {
        this.demo2 = demo2;
    }
}
@Component
public class Demo2 {
    private String name = "张三";
}
@Service
public class Demo3 {
}
创建三个pojo两个使用@Component注解一个使用@Service注解
@Configuration
@ComponentScan(value = "springdoc.demo21", excludeFilters = @ComponentScan.Filter(type = FilterType.ANNOTATION, classes = {Service.class}))
public class Config {
}
配置类我们添加excludeFilters属性,排除被Service注解的类。看下面结果。没有出现被@Service注解的bean
接下来我测试包含指定Class,在刚才的基础上添加以下几个类
public interface Parent {
}
@Service
public class Child1 implements Parent{
}
@Service
public class Child2 implements Parent{
}
配置类修改为,包含指定类,注意如果使用includeFilters必须带上最后一个参数useDefaultFilters=false,否则不生效
@Configuration
@ComponentScan(value = "springdoc.demo21", includeFilters = @ComponentScan.Filter(type = FilterType.ASSIGNABLE_TYPE, classes = {Parent.class}), useDefaultFilters = false)
public class Config {
}
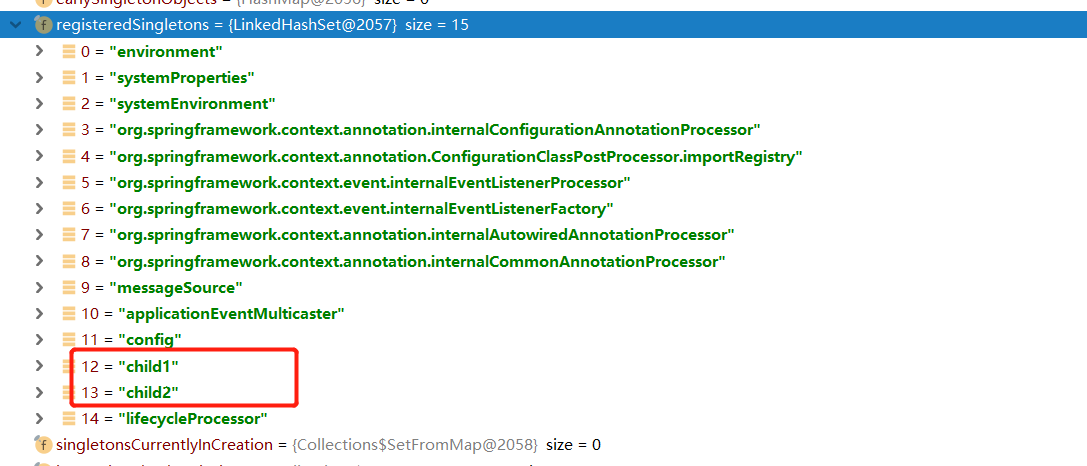
此时已经没有了bean1 bean2 bean3.只有两个实现了Parent接口的实现类。
另外如果我们使用包含Class类型的方式时,被选中的class不带注解也可以
//@Service
public class Child1 implements Parent{
}
//@Service
public class Child2 implements Parent{
}
同样也可以正常的创建bean
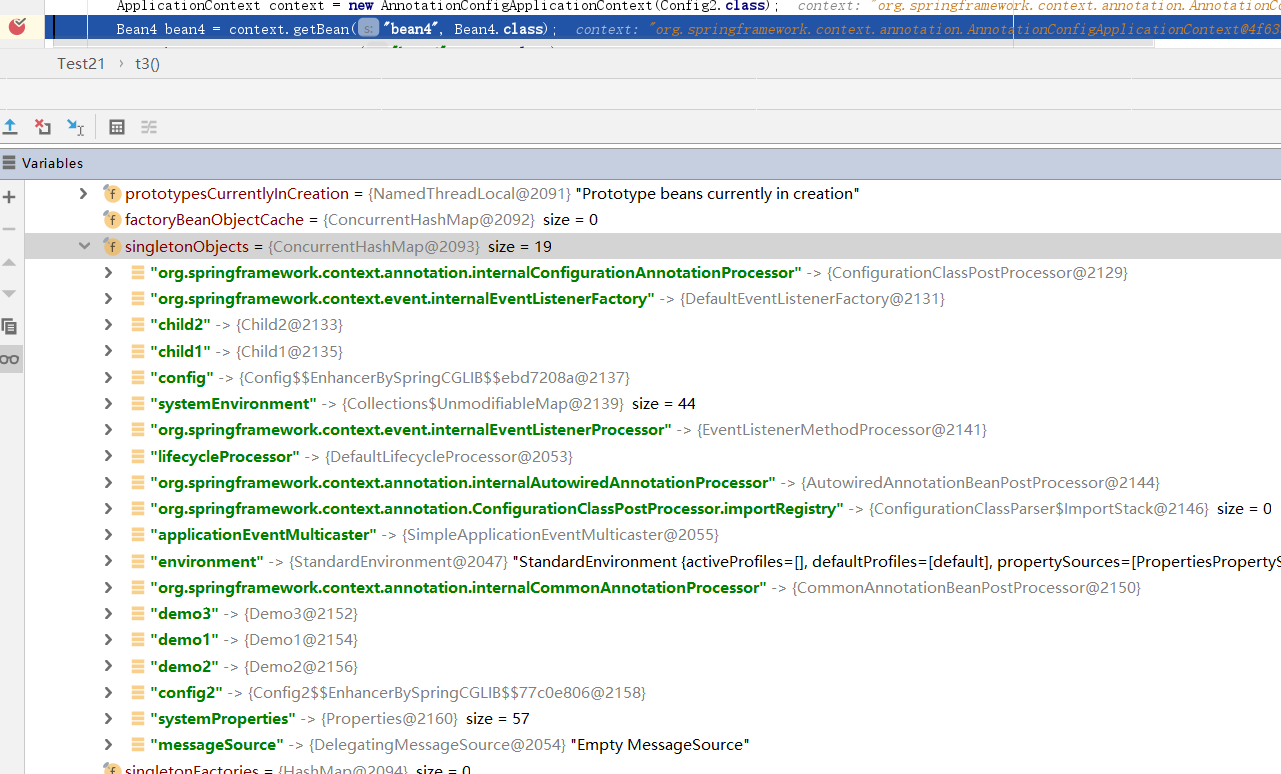
bean范围
在使用xml配置bean时我们使用scope属性来指定创建好的bean。在注解中我们同样可以这样指定
@Component
@Scope(value = "prototype")
public class Bean4 {
}
不使用@Scope注解创建的bean默认是单例的,使用@Scope我们可以指定bean为原型
同样我们可以使用@RequestScope,@SessionScope,@ApplicationScope这三个注解,分别给@Scope的值是request,session,application
@Lazy懒加载
@Component
@Lazy
public class Bean5 {
}
spring5.0生成候选组件的索引
@SpringBootApplication
public class DemoApplication {
    public static void main(String[] args) {
        SpringApplication.run(DemoApplication.class, args);
    }
}
这是springboot的启动类。SpringApplication.run接收的是一个class。而@SpringBootApplication注解上标记的有
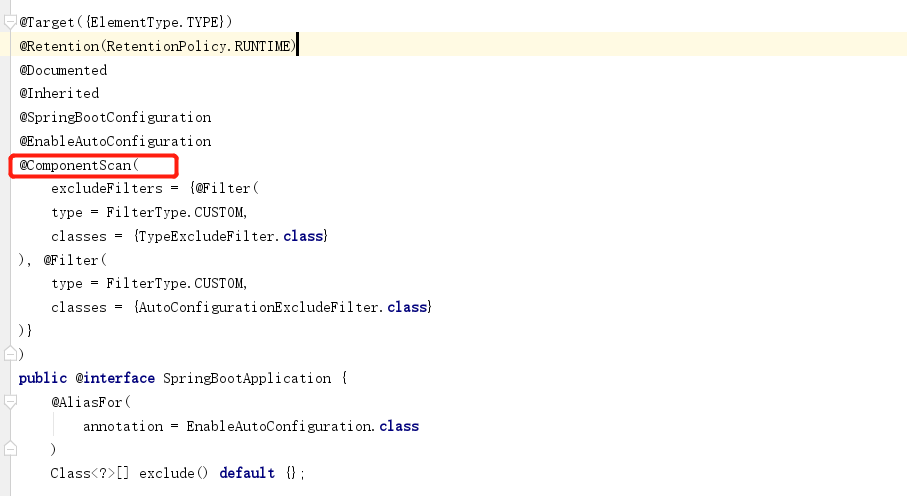
这其实相当于我们 new AnnotationConfigApplicationContext(config.class);在这个过程中,spring会扫描包路径下的@Component注解。把他们对于200个类一下的项目来说是很快的。如果是大型项目,启动起来比较费力。所以spring提供了组件索引,使用方式很简单。只有引入一下maven依赖
<dependency>
            <groupId>org.springframework</groupId>
            <artifactId>spring-context-indexer</artifactId>
            <version>5.2.1.RELEASE</version>
            <optional>true</optional>
        </dependency>
成功编译项目后再classes\META-INF会产生一个spring.components。当项目启动时,则会根据这个索引去注册bean.
java配置bean
@Configuration和@Component
@Configuration
public class Demo1 {
    @Bean
    public Bean2 getBean2(){
        return new Bean2();
    }
}
public class Bean2 {
}
@Configuration和@Component功能一样,用来标识该类需要被spring管理。并且也会检测类中的其他注解。被这两个注解注释的类,会自动的被springIOC容器管理。
@Bean注解用于注释到一个方法上,将方法的返回值交给spring的IOC容器管理。和XML配置中的<bean/>作用相同。@Bean可以和@Configuration同时用,或者和@Component一起使用,但通常和@Configuration一块。
//@Component
public class Demo1 {
    @Bean
    public Bean2 getBean2(){
        return new Bean2();
    }
}
注意此时我们将Demo1上的@Component去掉此时也是可以将getBean2添加到容器的。原因仅仅是因为我们使用了。new AnnotationConfigApplicationContext(Demo1.class);这种写法叫做精简模式。不建议使用。
AnnotationConfigApplicationContext
AnnotationConfigApplicationContext接收可变的Class类型参数,这意味着spring启动时可以同时加载多个配置类。同样我们也可以使用一下写法。
AnnotationConfigApplicationContext ctx = new AnnotationConfigApplicationContext();
ctx.register(AppConfig.class, OtherConfig.class);
ctx.register(AdditionalConfig.class);
ctx.refresh();
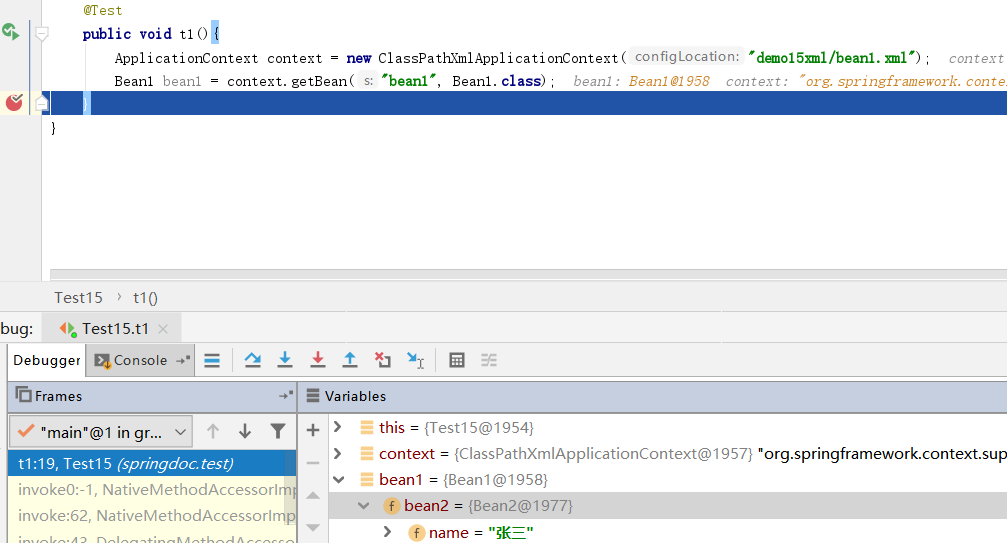
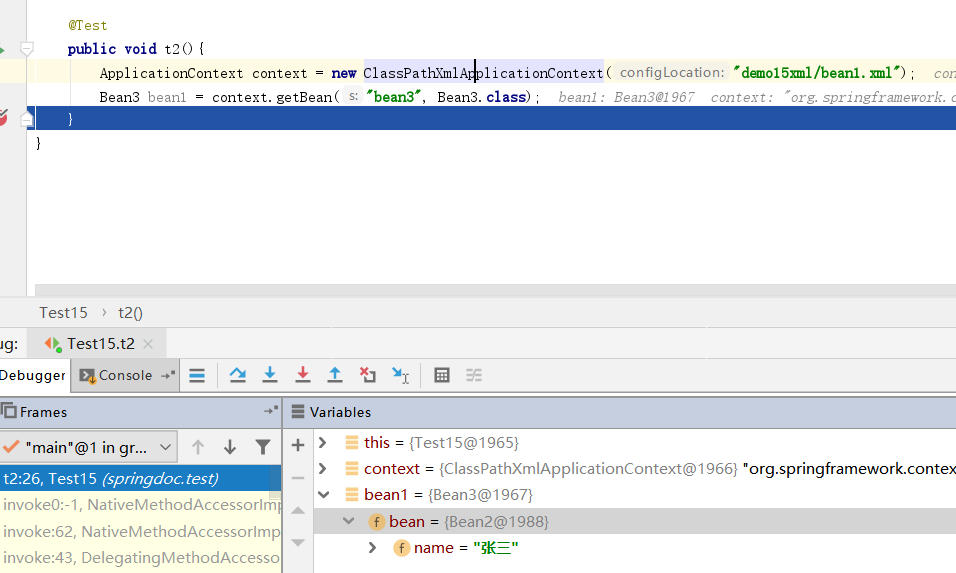
bean的依赖
public class Bean4 {
}
public class Bean3 {
private Bean4 bean4;
public Bean3(Bean4 bean4) {
this.bean4 = bean4;
}
}
@Bean
public Bean4 getBean(){
return new Bean4();
}
@Bean
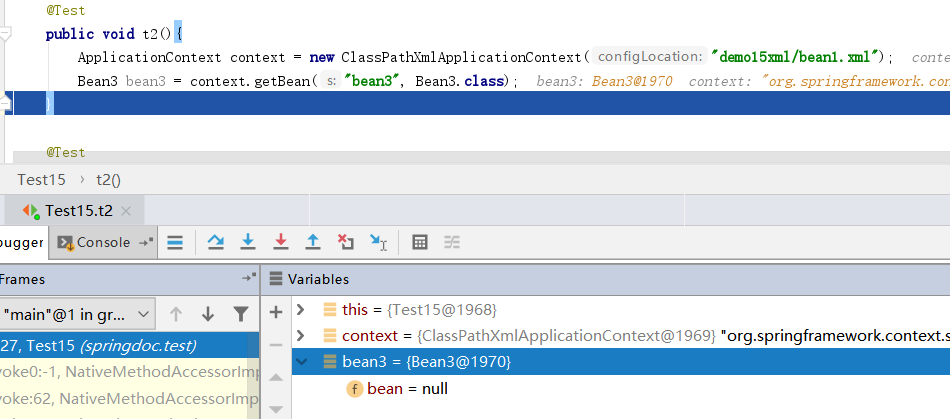
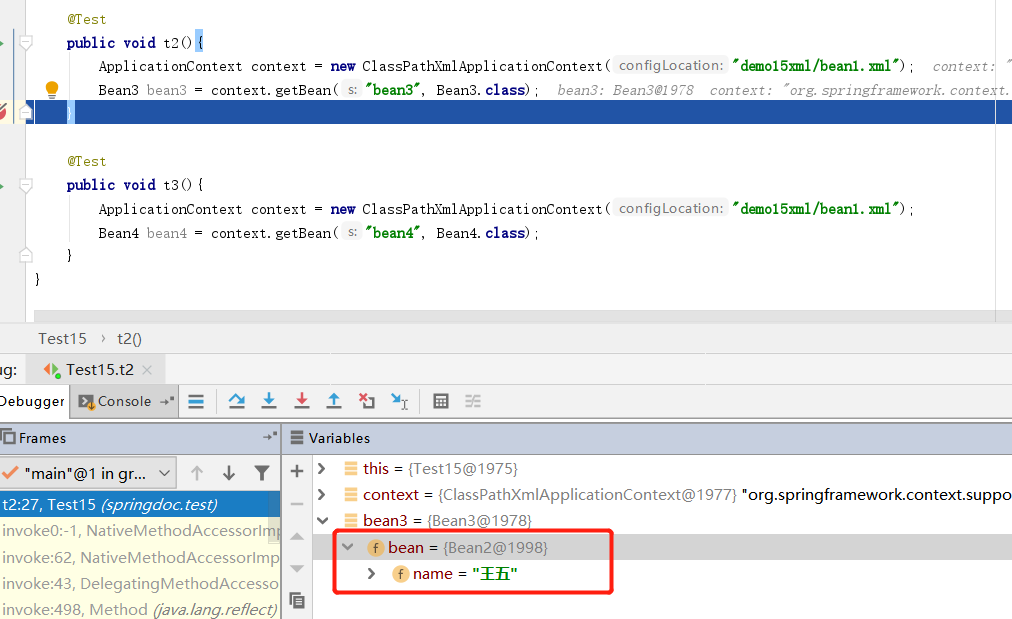
public Bean3 getBean3(Bean4 bean4) {
return new Bean3(bean4);
}
在我们声明Bean3时需要接收一个Bean4的参数。这里和xml中的依赖注入是一样的。我们必须保证能通过byType和byName能找到对应的Bean4.否则失败。
@Description
有时,提供有关bean的更详细的文本描述会很有帮助。当暴露出bean(可能通过JMX)以进行监视时,这特别有用
@Bean
@Description(value = "我是一个快乐的bean")
public Bean4 getBean4() {
return new Bean4();
}
@Import
这个跟xml配置中的<import/>功能类似
@Configuration
@Import(value = Config2.class)
public class Config {
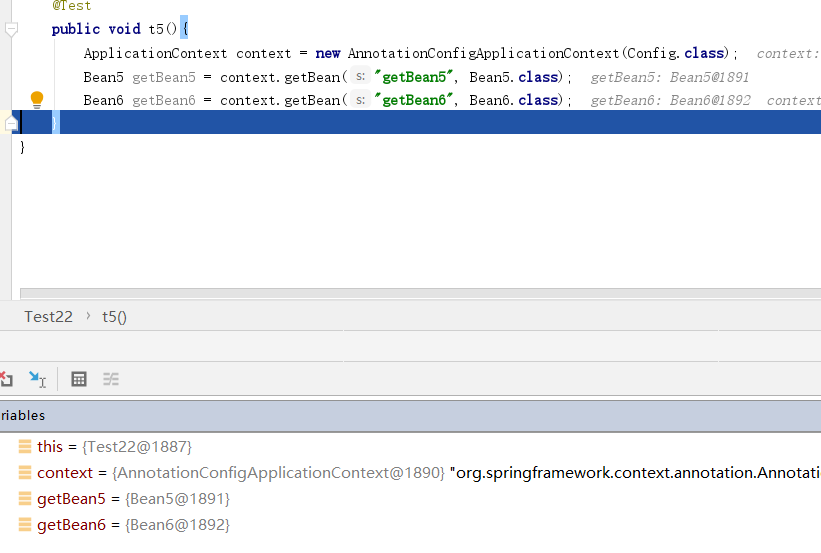
@Bean
public Bean5 getBean5() {
return new Bean5();
}
}
public class Config2 {
@Bean
public Bean6 getBean6() {
return new Bean6();
}
}
xml和@Configuration互相拾取
@Configurationpublic class Config {
@Bean public Bean1 getBean1() { return new Bean1(); }
@Bean public Bean2 getBean2() { return new Bean2(); }}
<?xml version="1.0" encoding="UTF-8"?>
<beans xmlns="http://www.springframework.org/schema/beans"
xmlns:xsi="http://www.w3.org/2001/XMLSchema-instance"
xsi:schemaLocation="http://www.springframework.org/schema/beans http://www.springframework.org/schema/beans/spring-beans.xsd">
<bean class="springdoc.demo23.Bean1" id="bean"></bean>
</beans>
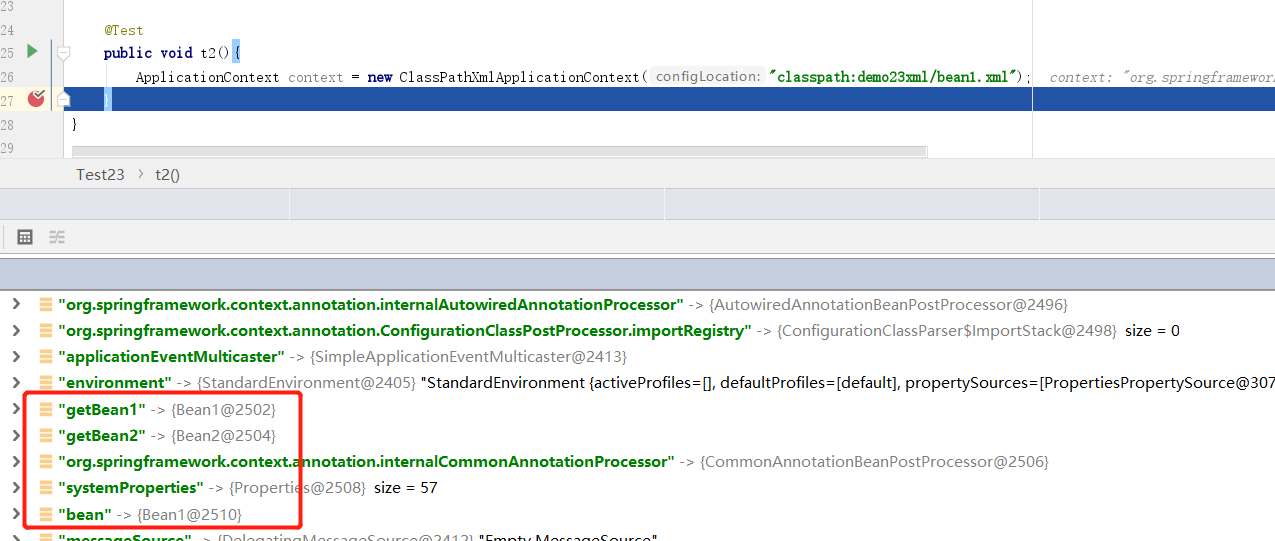
考虑以上情况,项目中有xml配置也有注解配置。那我到底是应该创建一个ClassPathXmlApplicationContext还是创建一个AnnotationConfigApplicationContext。其实你创建谁都行。
使用@ImportResource可以加载xml文件。
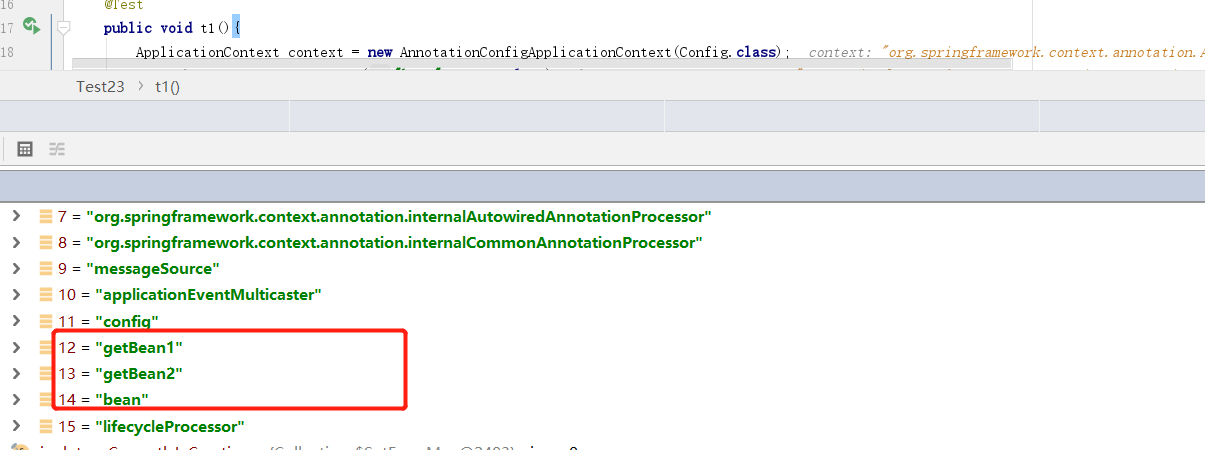
@Configuration@ImportResource(value = "classpath:demo23xml/bean1.xml")public class Config {
@Bean public Bean1 getBean1() { return new Bean1(); }
@Bean public Bean2 getBean2() { return new Bean2(); }}
同样在xml中也可以使用
<context:component-scan base-package="springdoc.demo22.Config3"/>
<bean class="springdoc.demo23.Bean1" id="bean"></bean>
环境抽象
在实际开发中,我们需要针对不同的环境有不同的配置或者使用不同的对象。例如,在开发环境和生产环境中的配置文件是不同的。
@Configuration
public class Config2 {
@Bean
@Profile(value = "test")
public Bean1 getBean1() {
return new Bean1();
}
@Bean
@Profile(value = "prop")
public Bean2 getBean2() {
return new Bean2();
}
}
@Profile
@Profile注解可以标记到方法,或者类上。上边写法,我们规定,当前环境是test则将Bean1交给spring管理,如果是prop则把Bean2交给spring管理。
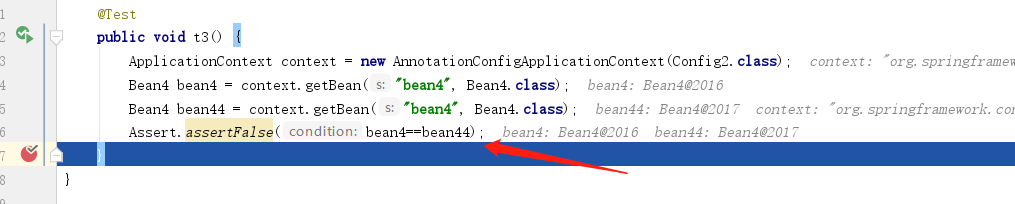
@Test
public void t3() {
AnnotationConfigApplicationContext ctx = new AnnotationConfigApplicationContext();
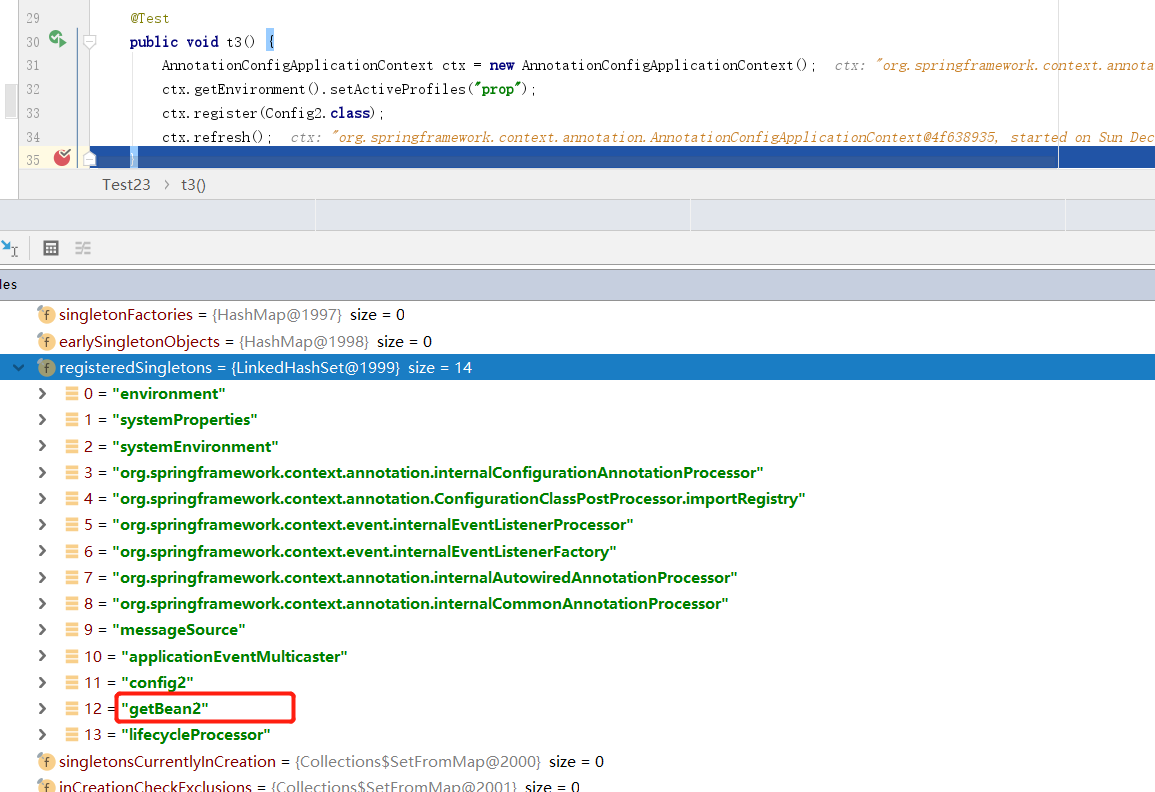
ctx.getEnvironment().setActiveProfiles("prop");
ctx.register(Config2.class);
ctx.refresh();
}
通过以上方式设置当前环境为prop,可以看到spring只创建了bean2没有创建bean1.
@Configuration@ComponentScan(value = "springdoc.demo23")public class Config2 { @Bean(value = "testBean1") @Profile(value = "test") public Bean1 getBean1() { return new Bean1(); }
@Bean(value = "propBean1") @Profile(value = "prop") public Bean2 getBean2() { return new Bean2(); }}
@Component(value = "testBean3")@Profile(value = "test")public class Bean3 {}
@Component(value = "propBean3")@Profile(value = "prop")public class Bean4 {}
@Test
public void t3() {
AnnotationConfigApplicationContext ctx = new AnnotationConfigApplicationContext();
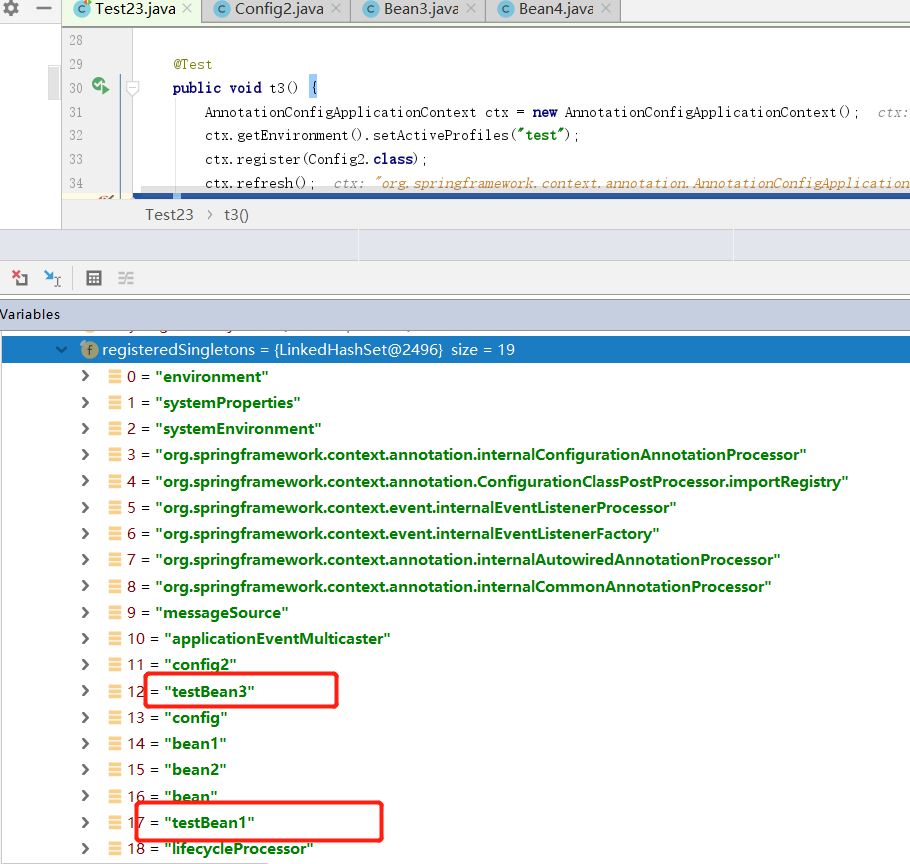
ctx.getEnvironment().setActiveProfiles("test");
ctx.register(Config2.class);
ctx.refresh();
}
以上代码,我们开始的是test环境,也就是说springbean中应该有testBean1和testBean3
最典型的设置配置环境的方法是springboot中在properties文件中使用 spring.profiles.active= xxx
国际化
spring对于支持国际化还是很简单的。首先国际化就是,针对不同国家的而配置不同的语言。举个例子,对于中国用户,我们输出中文,对于美国用户输出英文。在spring中使用ResourceBundleMessageSource对象支持国际化。
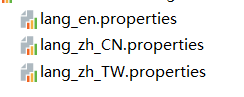
创建三个文件
//对应的 lang_en.properties
said=helloword{0}{1}
//对应的 lang_zh_CN.properties
said=你好世界{0}{1}
//对应的 lang_zh_TW.properties
said=你好世界繁体{0}{1}
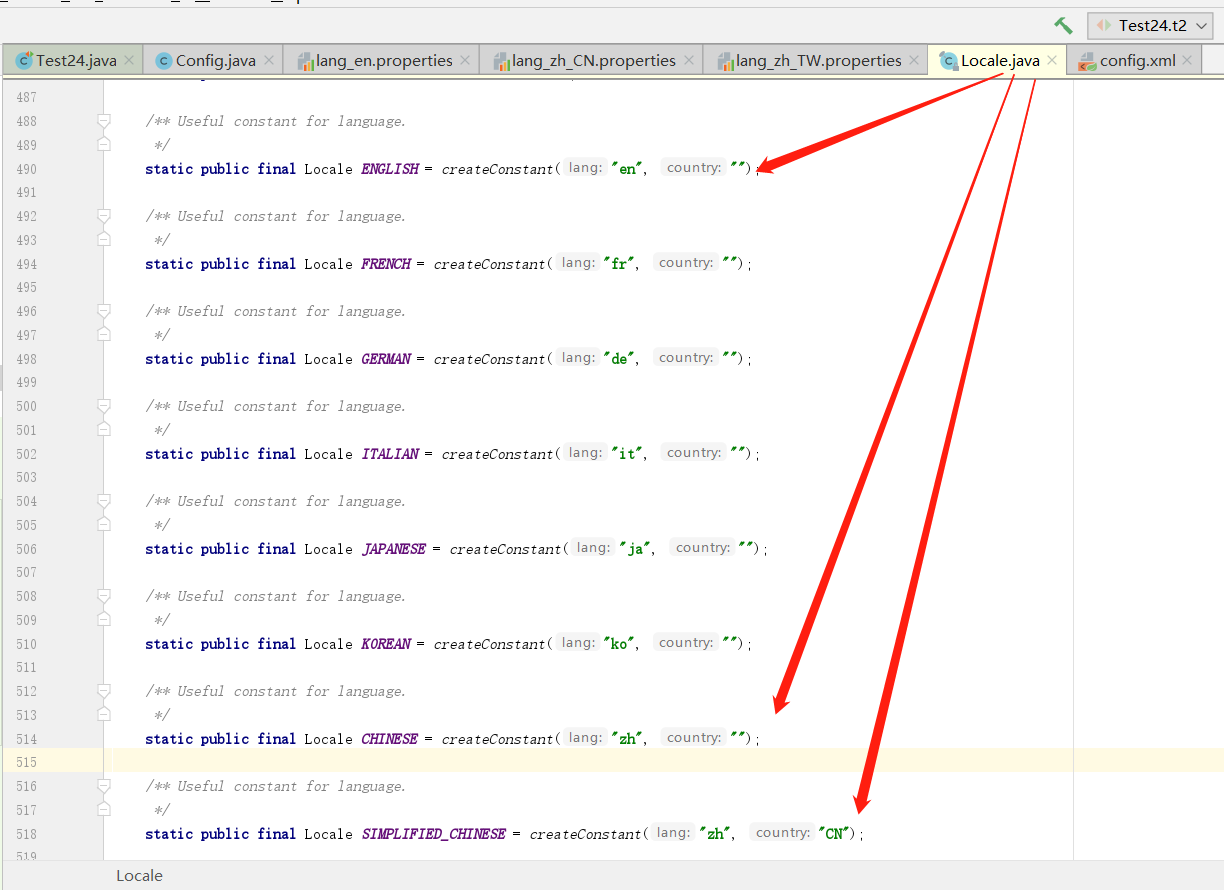
文件名的定义有规定,组名_语言标识符,具体可以定义哪些语言在 java.util.Locale中找,注意zh_CN是简体中文 zh_TW是繁体,不能随便写。value可以使用{下标来定义替换文字}
下边注册一个ResourceBundleMessageSource,注意id必须是 messageSource。属性basenames接收集合,集合中每一个值则是配置文件组的组名,可以指定多个。
<bean id="messageSource"
class="org.springframework.context.support.ResourceBundleMessageSource">
<property name="basenames">
<list>
<value>lang</value>
</list>
</property>
</bean>
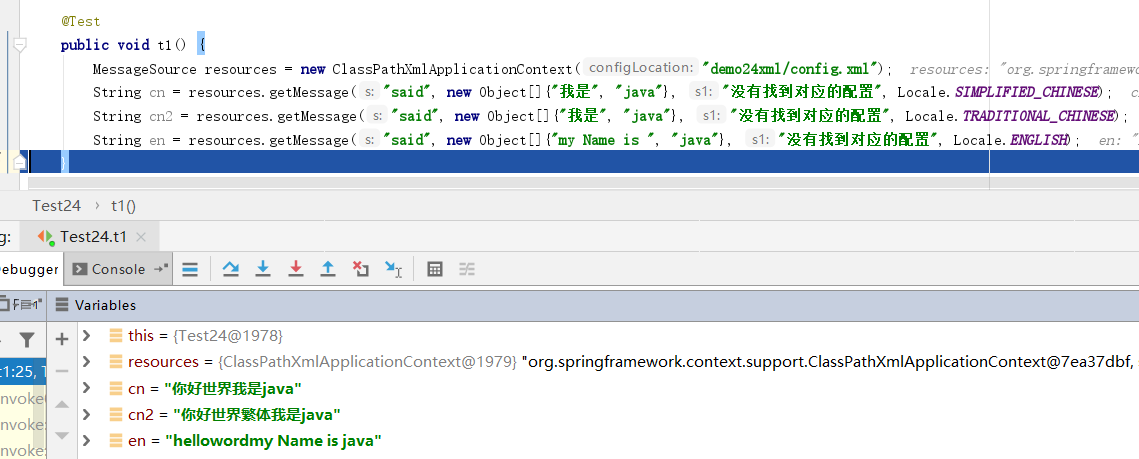
@Test
public void t1() {
MessageSource resources = new ClassPathXmlApplicationContext("demo24xml/config.xml");
String cn = resources.getMessage("said", new Object[]{"我是", "java"}, "没有找到对应的配置", Locale.SIMPLIFIED_CHINESE);
String cn2 = resources.getMessage("said", new Object[]{"我是", "java"}, "没有找到对应的配置", Locale.TRADITIONAL_CHINESE);
String en = resources.getMessage("said", new Object[]{"my Name is ", "java"}, "没有找到对应的配置", Locale.ENGLISH);
}
这里的参数分别是 1 要查询的key ,2 需要替换的字符串可以有多个,3 如果没有找到key给的默认值,4 要使用哪种语言,这里就是定义properties时定义的语言标识符。
通过java注入bean也可以
@Configuration
public class Config {
@Bean(value = "messageSource")
public ResourceBundleMessageSource getResourceBundleMessageSource(){
ResourceBundleMessageSource resourceBundleMessageSource = new ResourceBundleMessageSource();
resourceBundleMessageSource.setBasenames("lang");
return resourceBundleMessageSource;
}
}
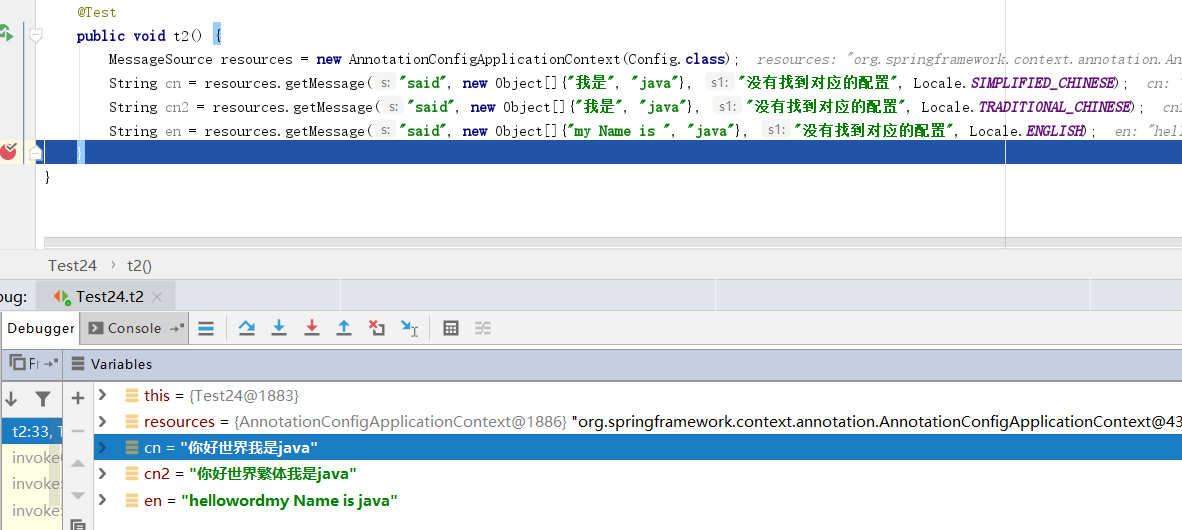
订阅与事件监听
继承ApplicationEvent类,使其成为一个事件类
import org.springframework.context.ApplicationEvent;
public class BlackListEvent extends ApplicationEvent {
private final String address;
private final String content;
public BlackListEvent(Object source, String address, String content) {
super(source);
this.address = address;
this.content = content;
}
public String getAddress() {
return address;
}
public String getContent() {
return content;
}
}
实现ApplicationListener接口,使其成为一个监听类,泛型指定需要监听的事件
import org.springframework.context.ApplicationListener;
public class BlackListNotifier implements ApplicationListener<BlackListEvent> {
@Override
public void onApplicationEvent(BlackListEvent event) {
System.out.println(event.getAddress() + "已被列入黑名单,不能发送邮件订阅者1");
}
}
import org.springframework.context.ApplicationListener;
public class BlackListNotifier2 implements ApplicationListener<BlackListEvent> {
@Override
public void onApplicationEvent(BlackListEvent event) {
System.out.println(event.getAddress() + "已被列入黑名单,不能发送邮件订阅者2");
}
}
或者使用 @EventListener注解,value属性接收class数组,可以传入多个,代表监听多个事件。
@Component
public class BlackListNotifier3 {
@EventListener(value = {BlackListEvent.class})
public void t(BlackListEvent event){
System.out.println("我是订阅者3");
}
}
发布事件 实现ApplicationEventPublisherAware
public class EmailService implements ApplicationEventPublisherAware {
private List<String> blackList;
private ApplicationEventPublisher publisher;
public void setBlackList(List<String> blackList) {
this.blackList = blackList;
}
@Override
public void setApplicationEventPublisher(ApplicationEventPublisher publisher) {
this.publisher = publisher;
}
// 主要逻辑就在这里,发送邮件之前先做一次判断,判断是否在黑名单内
public void sendEmail(String address, String content) {
if (blackList.contains(address)) {
publisher.publishEvent(new BlackListEvent(this, address, content));
return;
}
// send email...
System.out.println(address + "邮件已被发送...");
}
}
当满足条件下,使用ApplicationEventPublisher.publishEvent()接收一个事件。此时监听此事件的监听类都会执行。
@Configuration
@ComponentScan(value = "springdoc.demo25")
public class ListenerConfig {
@Bean
public EmailService emailService() {
EmailService emailService = new EmailService();
// 在这里添加黑名单集合
emailService.setBlackList(Arrays.asList("known.spammer@example.org", "known.hacker@example.org", "john.doe@example.org", "blackAddredd@123.com"));
return emailService;
}
@Bean
public BlackListNotifier blackListNotifier() {
return new BlackListNotifier();
}
@Bean
public BlackListNotifier2 blackListNotifier2() {
return new BlackListNotifier2();
}
}
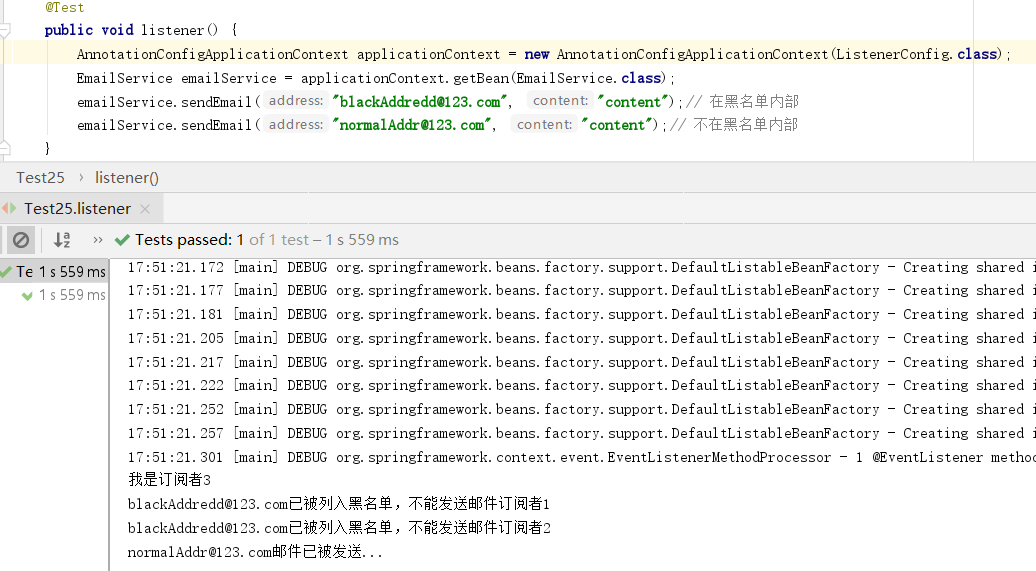
其实spring的事件监听就是使用的observer模式,不了解observer模式的可以前往 https://www.cnblogs.com/zumengjie/p/12054663.html
public class BlackListNotifier2 implements ApplicationListener<BlackListEvent> { @Overridepublic void onApplicationEvent(BlackListEvent event) { System.out.println(event.getAddress() + "已被列入黑名单,不能发送邮件订阅者2"); }}
spring-framework-core-ioc Container 笔记版本的更多相关文章
- Spring Framework------>version4.3.5.RELAESE----->Reference Documentation学习心得----->使用spring framework的IoC容器功能----->方法一:使用XML文件定义beans之间的依赖注入关系
XML-based configuration metadata(使用XML文件定义beans之间的依赖注入关系) 第一部分 编程思路概述 step1,在XML文件中定义各个bean之间的依赖关系. ...
- 框架应用:Spring framework (一) - IoC技术
IoC概念以及目标 IoC就是让原本你自己管理的对象交由容器来进行管理,其主要的目的是松耦合. IoC发展史 既然IoC的目标是为了松耦合,那它怎么做到的? 最后目标:降低对象之间的耦合度,IoC技术 ...
- Spring Framework Part2 IOC
spring serious of blog edit by 马士兵教育 IoC概念 IoC是一个概念,是一种思想,其实现方式多种多样.当前比较流行的实现方式之一是DI. 基于XML的DI Appli ...
- Spring Framework之IoC容器
Spring IoC 概述 问题 1.什么是依赖倒置? 2.什么是控制反转? 3.什么是依赖注入? 4.它们之间的关系是怎样的? 5.优点有哪些? 依赖倒置原则 (Dependency Inversi ...
- Spring Framework Part3 IoC and Dynamic Proxy
spring serious of blog edit by 马士兵教育 Maven方式创建Spring工程 工程创建 1.新建项目 选择Maven Project 2.勾选 Create a sim ...
- Spring IOC Container原理解析
Spring Framework 之 IOC IOC.DI基础概念 关于IOC和DI大家都不陌生,我们直接上martin fowler的原文,里面已经有DI的例子和spring的使用示例 <In ...
- Spring系列(零) Spring Framework 文档中文翻译
Spring 框架文档(核心篇1和2) Version 5.1.3.RELEASE 最新的, 更新的笔记, 支持的版本和其他主题,独立的发布版本等, 是在Github Wiki 项目维护的. 总览 历 ...
- Spring Framework学习要点摘抄
以下摘自Spring Framework官方文档,版本Spring 4.3. <context:annotation-config/> implicitly registered post ...
- JavaIOC框架篇之Spring Framework
欢迎查看Java开发之上帝之眼系列教程,如果您正在为Java后端庞大的体系所困扰,如果您正在为各种繁出不穷的技术和各种框架所迷茫,那么本系列文章将带您窥探Java庞大的体系.本系列教程希望您能站在上帝 ...
随机推荐
- java 连缀用法
连缀用法,即是在实例化对象时,同时为对象的属性设值. 如示例所示,在创建对象时,同时调用属性的设值函数,为属性赋值 Apple apple = new Apple() .setColor(" ...
- python中反转列表的三种方式
1.内建函数reversed() li =[1, 2, 3, 4, 5, 6] a = list(reversed(li)) print (a) 注意:reversed()函数返回的是一个迭代器,而不 ...
- Python爬取十四万条书籍信息告诉你哪本网络小说更好看
前言 本文的文字及图片来源于网络,仅供学习.交流使用,不具有任何商业用途,版权归原作者所有,如有问题请及时联系我们以作处理. 作者: TM0831 PS:如有需要Python学习资料的小伙伴可以加点击 ...
- Python爬取《冰雪奇缘2》豆瓣影评
前言 文的文字及图片来源于网络,仅供学习.交流使用,不具有任何商业用途,版权归原作者所有,如有问题请及时联系我们以作处理. 作者: 刘铨@CCIS Lab PS:如有需要Python学习资料的小伙伴可 ...
- angular版聊天室|仿微信界面IM聊天|NG2+Node聊天实例
一.项目介绍 运用angular+angular-cli+angular-router+ngrx/store+rxjs+webpack+node+wcPop等技术实现开发的仿微信angular版聊天室 ...
- 干货,Wireshark使用技巧-过滤规则
- 过滤规则使用 在抓取报文时使用的规则,称为过滤规则,Wireshark底层是基于Winpcap,因此过滤规则是Winpcap定义的规则,设置过滤规则后,抓到的报文仅包含符合规则的报文,其它报文则被 ...
- linux 编译源码报错,找不到libXrender.so.1
1.通过xshell连接到服务器编译hadoop源码得时候遇到问题, 2.使用Xshell的时候登陆后的环境变量中会比SecureCRT登陆后的环境变量多出一条 DISPLAY=localhost:1 ...
- 【LeetCode】TreeNode类实现解析(java实现)
https://blog.csdn.net/styshoo/article/details/52865386 在LeetCode中,TreeNode是经常用到的一个结构体,表示数据结构树(Tree)中 ...
- [20190510]rman备份的疑问7.txt
[20190510]rman备份的疑问7.txt --//上午测试rman备份时备份文件大小回缩的测试.链接:--//http://blog.itpub.net/267265/viewspace-26 ...
- Python字符串内置方法使用及年龄游戏深入探究
目录 作业 ==程序代码自上往下运行,建议自上而下的完成下列任务== 作业 使用代码实现以下业务逻辑: 写代码,有如下变量name = " aleX",请按照要求实现每个功能: 移 ...