springboot2.x实现oauth2授权码登陆
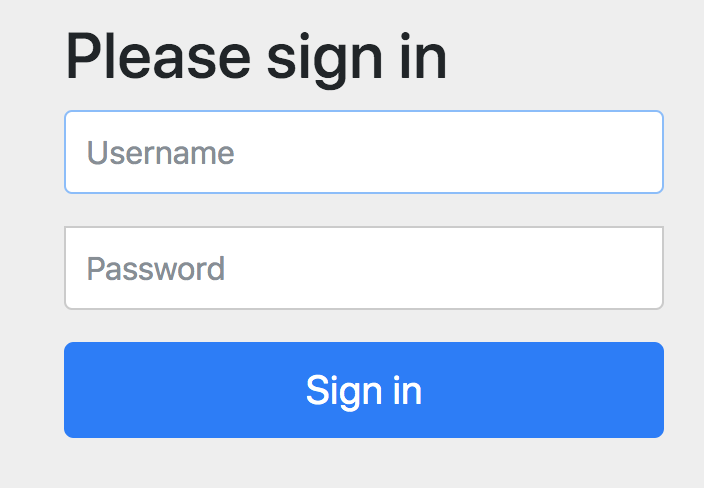
一 进行授权页

三 授权资源类型
@Override

public void configure(ClientDetailsServiceConfigurer clients) throws Exception {

clients.inMemory()

.withClient(ClientID)

.secret(passwordEncoder.encode(ClientSecret))

.authorizedGrantTypes("authorization_code", "refresh_token",

"password", "implicit")

.scopes("read","write","del","userinfo")

.redirectUris(RedirectURLs);

}

四 接到code

五 获取access_token
@Override
public void configure(AuthorizationServerSecurityConfigurer oauthServer) throws Exception {
  oauthServer.tokenKeyAccess("isAuthenticated()")
      .checkTokenAccess("permitAll()")
      .allowFormAuthenticationForClients();//支持把secret和clientid写在url上,否则需要在头上
}
Authorization Ccode------RFRLFY

access_token_url http://localhost:8081/oauth/token?client_id=android1&code=RFRLFY&grant_type=authorization_code&redirect_uri=http://localhost:8081/callback&client_secret=android1

Access Token Response ---------{"access_token":"faadf3bf-6488-4036-bc3b-21b0a979602c","token_type":"bearer","refresh_token":"1b01f133-c5ab-419f-8125-088c85916ecb","expires_in":,"scope":"read"}
回调页面代码,主要实现了对code的获取,对access_token的组织,然后请求时把access_token带上,这个方法一般会做成公用的过滤器
@Controller

public class UserController {

  @RequestMapping(value = "/callback", method = RequestMethod.GET)

  public ResponseEntity<String> callback(@RequestParam("code") String code) throws JsonProcessingException, IOException {

    ResponseEntity<String> response = null;

    System.out.println("Authorization Ccode------" + code);

    RestTemplate restTemplate = new RestTemplate();

    String access_token_url = "http://localhost:8081/oauth/token";

    access_token_url += "?client_id=android1&code=" + code;

    access_token_url += "&grant_type=authorization_code";

    access_token_url += "&redirect_uri=http://localhost:8081/callback";

    access_token_url += "&client_secret=android1";

    System.out.println("access_token_url " + access_token_url);

    response = restTemplate.exchange(access_token_url, HttpMethod.POST, null, String.class);

    ObjectMapper mapper = new ObjectMapper();

    JsonNode node = mapper.readTree(response.getBody());

    String token = node.path("access_token").asText(); System.out.println("access_token" +access_token);
String url = "http://localhost:8081/index"; HttpHeaders headers1 = new HttpHeaders(); headers1.add("Authorization", "Bearer " + token); HttpEntity<String> entity = new HttpEntity<>(headers1); ResponseEntity<String> result = restTemplate.exchange(url, HttpMethod.GET, entity, String.class); return result; }
六 拿着access_token去请求具体的资源
@Configuration

@EnableResourceServer

@Order(6)

public class ResourceServerConfig extends ResourceServerConfigurerAdapter {

@Override

public void configure(HttpSecurity http) throws Exception {

http.csrf().disable()//禁用了 csrf 功能

.authorizeRequests()//限定签名成功的请求

.antMatchers("/index").access("#oauth2.hasScope('del')") //授权码scopes里需要选中del才可以访问

.antMatchers("/user").authenticated()//签名成功后可访问,不受role限制

.anyRequest().permitAll()//其他没有限定的请求,允许访问

.and().anonymous()//对于没有配置权限的其他请求允许匿名访问

.and().formLogin()//使用 spring security 默认登录页面

.and().httpBasic();//启用http 基础验证

}

}
八 需要注意的地方
如果你对用户进行了角色和权限的配置,对于某些保护接口需要有指定权限才能访问的话,需要重getAuthorities方法,否则,你的权限将会失效!
@Entity
@Data
public class User extends BaseEntity implements UserDetails {
@Id
@GeneratedValue
private Long id;
private String username;
private String password;
private String firstName;
private String lastName;
private String email;
private String imageUrl; @JsonIgnore
@ManyToMany(targetEntity = Role.class, fetch = FetchType.EAGER)
@BatchSize(size = 20)
private Set<Role> roles = new HashSet<>(); @Transient
private Set<GrantedAuthority> authorities = new HashSet<>(); /**
* 注意,这块需要加@Override重写,否则权限无效.
*
* @return
*/
@Override
public Set<GrantedAuthority> getAuthorities() {
Set<GrantedAuthority> authorities = new HashSet<>();
for (Role role : this.roles) {
for (Authority authority : role.getAuthorities()) {
authorities.add(new SimpleGrantedAuthority(authority.getValue()));
}
}
return authorities;
} @Override
public boolean isAccountNonExpired() {
return true;
} @Override
public boolean isAccountNonLocked() {
return true;
} @Override
public boolean isCredentialsNonExpired() {
return true;
} @Override
public boolean isEnabled() {
return true;
}
}
感谢阅读!
springboot2.x实现oauth2授权码登陆的更多相关文章
- 13.详解oauth2授权码流程
13.详解oauth2授权码流程 把登陆系统单独独立出来,可以给自己写的微服务用,也可以给第三方的系统调用我们的服务 显式的和隐式的,两种方式,
- 阶段5 3.微服务项目【学成在线】_day16 Spring Security Oauth2_06-SpringSecurityOauth2研究-Oauth2授权码模式-申请令牌
3.3 Oauth2授权码模式 3.3.1 Oauth2授权模式 Oauth2有以下授权模式: 授权码模式(Authorization Code) 隐式授权模式(Implicit) 密码模式(Reso ...
- Spring Security OAuth2 授权码模式
背景: 由于业务实现中涉及到接入第三方系统(app接入有赞商城等),所以涉及到第三方系统需要获取用户信息(用户手机号.姓名等),为了保证用户信息的安全和接入方式的统一, 采用Oauth2四种模式之一 ...
- 微信授权就是这个原理,Spring Cloud OAuth2 授权码模式
上一篇文章Spring Cloud OAuth2 实现单点登录介绍了使用 password 模式进行身份认证和单点登录.本篇介绍 Spring Cloud OAuth2 的另外一种授权模式-授权码模式 ...
- 阶段5 3.微服务项目【学成在线】_day16 Spring Security Oauth2_07-SpringSecurityOauth2研究-Oauth2授权码模式-资源服务授权测试
下面要完成 5.6两个步骤 3.3.4 资源服务授权 3.3.4.1 资源服务授权流程 资源服务拥有要访问的受保护资源,客户端携带令牌访问资源服务,如果令牌合法则可成功访问资源服务中的资 源,如下图 ...
- asp.net利用QQ邮箱发送邮件,关键在于开启pop并设置授权码为发送密码
public static bool SendEmail(string mailTo, string mailSubject, string mailContent) { ...
- oAuth2授权协议 & 微信授权登陆和绑定 & 多环境共用一个微信开发平台回调设置
OAuth2(open Auth)开放授权协议 授权码模式流程: 1.浏览器(客户端)点击一个比如使用微信登陆按钮 2.会跳到认证服务器页面,让用户选择是否授权 3.如果用户点击授权,那么会跳转到开始 ...
- Spring Cloud2.0之Oauth2环境搭建(授权码模式和密码授权模式)
oauth2 server 微服务授权中心, github源码 https://github.com/spring-cloud/spring-cloud-security 对微服务接口做一些权 ...
- Oauth2.0认证---授权码模式
目录: 1.功能描述 2.客户端的授权模式 3.授权模式认证流程 4.代码实现 1.功能描述 OAuth在"客户端"与"服务提供商"之间,设置了一个授权层(au ...
随机推荐
- mysql视图的基本操作
1. 创建视图 CREATE VIEW 视图名 AS 查询语句 [WITH CHECK OPTION] - 这里WITH CHECK OPTION要求插入或者更新要满足查询语句where后面的条件 2 ...
- 字典dict的深入学习(item() / items() 一致的)
字典Dict的跟进学习: 一. items()方法的遍历:items()方法把字典中每对key和value组成一个元组,并把这些元组放在列表中返回. dict = {"name" ...
- java中List、Map、Set、Stack、Queue、Collections等的使用
java中List.Map.Set.Stack.Queue.Collections等的使用 List 创建方法: List<String> list=new ArrayList<&g ...
- Java中通过代码得到int类型数值的二进制形式
一.完整代码 public class BigInteger { int sing; byte[] val; public BigInteger(int val){ // 将传递的初始值,按位取值,存 ...
- ORA-19625: error identifying file
问题描述:rman进行备份的时候,出现报错ORA-19625,无效的文件 1.进行数据库备份,然后就出现了报错,没有这个24号的归档日志 RMAN> run{ 2> allocate ch ...
- 安卓逆向基础(002)-android虚拟机
一, android分两种 1.Android 5.0以下(不含5.0) dalvik字节码 为dalvik虚拟机(jit机制) 基于寄存器架构 .dex=>dexopt=>.odex d ...
- 《Java基础知识》Java static关键字以及Java静态变量和静态方法
static 修饰符能够与变量.方法一起使用,表示是“静态”的. 静态变量和静态方法能够通过类名来访问,不需要创建一个类的对象来访问该类的静态成员,所以static修饰的成员又称作类变量和类方法.静态 ...
- 《Dotnet9》系列-开源C# WPF控件库1《MaterialDesignInXAML》强力推荐
时间如流水,只能流去不流回! 点赞再看,养成习惯,这是您给我创作的动力! 本文 Dotnet9 https://dotnet9.com 已收录,站长乐于分享dotnet相关技术,比如Winform.W ...
- 安装Visual Studio Code并汉化
安装很简单,直接点击安装文件,然后一直点击next就可以了.这款软件是免费的,不需要破解. 下载地址 这里需要使用快捷键[Ctrl+Shift+P],在弹出的搜索框中输入[configure lang ...
- Ligg.EasyWinApp-000: 一款Windows应用编程框架介绍
本框架(解决方案)是一个Windows应用编程框架和UI库,通过该框架,不需任何代码,通过XML配置文件,搭建任意复杂的Windows应用界面,以类似Execel公式的方式实现基本的过程控制( ...
