UIView设置阴影
UI设计师有时候希望我们的产品比较酷。
阴影是他们喜欢的效果之一。
怎么设置阴影呢?
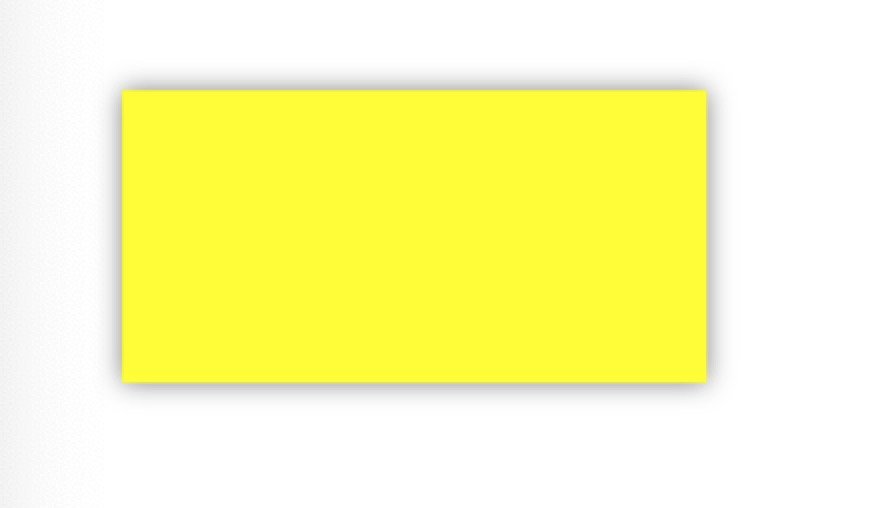
1、设置一个四边都相同的阴影
   UIImageView *testImgView = [[UIImageView alloc]initWithFrame:CGRectMake(, , , )];

    [testImgView setBackgroundColor:[UIColor yellowColor]];

    // 阴影颜色

    testImgView.layer.shadowColor = [UIColor blackColor].CGColor;

    // 阴影偏移,默认(0, -3)

    testImgView.layer.shadowOffset = CGSizeMake(,);

    // 阴影透明度,默认0

    testImgView.layer.shadowOpacity = 0.5;

    // 阴影半径,默认3

    testImgView.layer.shadowRadius = ;

    [self.view addSubview:testImgView];
效果如图:
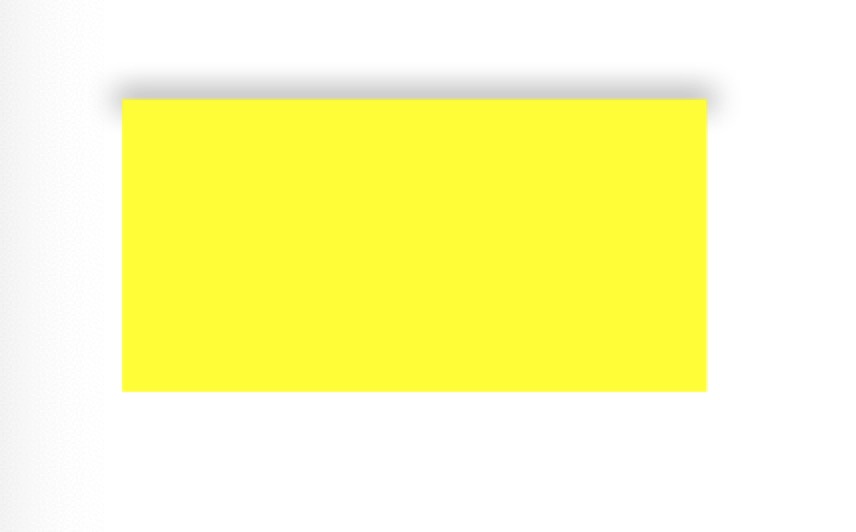
2、设置单边阴影
//单边阴影

    UILabel *testLabel = [[UILabel alloc]initWithFrame:CGRectMake(, , , )];

    [testLabel setBackgroundColor:[UIColor yellowColor]];

    // 阴影颜色

    testLabel.layer.shadowColor = [UIColor blackColor].CGColor;

    // 阴影偏移,默认(0, -3)

    testLabel.layer.shadowOffset = CGSizeMake(,);

    // 阴影透明度,默认0

    testLabel.layer.shadowOpacity = 0.5;

    // 阴影半径,默认3

    testLabel.layer.shadowRadius = ;

    // 单边阴影 顶边

    float shadowPathWidth = testLabel.layer.shadowRadius;

    CGRect shadowRect = CGRectMake(-shadowPathWidth/2.0, -shadowPathWidth/2.0, testLabel.bounds.size.width+shadowPathWidth, shadowPathWidth);

    UIBezierPath *path = [UIBezierPath bezierPathWithRect:shadowRect];

    testLabel.layer.shadowPath = path.CGPath;

    [self.view addSubview:testLabel];
效果如下:
3、和阴影相关的属性
/** Shadow properties. **/

/* The color of the shadow. Defaults to opaque black. Colors created

 * from patterns are currently NOT supported. Animatable. */

@property(nullable) CGColorRef shadowColor;

/* The opacity of the shadow. Defaults to 0. Specifying a value outside the

 * [0,1] range will give undefined results. Animatable. */

@property float shadowOpacity;

/* The shadow offset. Defaults to (0, -3). Animatable. */

@property CGSize shadowOffset;

/* The blur radius used to create the shadow. Defaults to 3. Animatable. */

@property CGFloat shadowRadius;

/* When non-null this path defines the outline used to construct the

 * layer's shadow instead of using the layer's composited alpha

 * channel. The path is rendered using the non-zero winding rule.

 * Specifying the path explicitly using this property will usually

 * improve rendering performance, as will sharing the same path

 * reference across multiple layers. Upon assignment the path is copied.

 * Defaults to null. Animatable. */

@property(nullable) CGPathRef shadowPath;
UIView设置阴影的更多相关文章
- iPhone之为UIView设置阴影(CALayer的shadowColor,shadowOffset,shadowOpacity,shadowRadius,shadowPath属性)
效果图: 以下代码实现: 第一个图片的代码 //加阴影--任海丽编辑 _imageView.layer.shadowColor = [UIColor blackColor].CGColor;//sha ...
- UIView 设置阴影(属性说明)
以下代码实现: 第一个图片的代码 //加阴影--任海丽编辑 _imageView.layer.shadowColor = [UIColor blackColor].CGColor;//shadowCo ...
- UIView设置阴影无效的原因之一
本想在底部的按钮设置个阴影, 代码如下: self.layer.shadowColor = [UIColor blackColor].CGColor; self.layer.shadowOffset ...
- swift 设置阴影和圆角
1.正常view设置阴影 func setShadow(view:UIView,sColor:UIColor,offset:CGSize, opacity:Float,radius:CGFloat) ...
- div四个边框分别设置阴影样式
对于div边框的阴影一直没有很好地理解,也一直不明白怎么给四个边框分别设置阴影.昨天项目中碰到了这个问题,就认真想了一下,在此总结一二. 首先,还是从官方解释说起. 网上的解释通常都是什么水平阴影长度 ...
- iOS UIView设置圆角
UIView设置圆角 1.比较简单的情况,UIView四个角都是圆角: UIView *aView = [[UIView alloc] init]; aView.frame = CGRectMake( ...
- UIView设置背景渐变色
UIView设置背景渐变色 // Allocate bitmap context CGContextRef bitmapContext = CGBitmapContextCreate(NULL, , ...
- 使文字在div中水平和垂直居中的的css样式为,四个边分别设置阴影样式
text-align:center; /*水平居中*/ line-height: 20px; /*行距设为与div高度一致*/ HTML元素 <div>水平垂直居中</div> ...
- IOS UIView圆角,阴影,边框,渐增光泽
圆角 sampleView.layer.cornerRadius = 2.5; // 圓角的弧度sampleView.layer.masksToBounds = YES; 阴影 sampleView. ...
随机推荐
- JS---BOM基本知识 (顶级对象,系统对话框,加载事件,location对象, history对象, navigator对象)
BOM JavaScript分三个部分: 1. ECMAScript标准---基本语法 2. DOM--->Document Object Model 文档对象模型,操作页面元素的 3. BOM ...
- leaflet-webpack 入门开发系列六矢量瓦片(附源码下载)
前言 leaflet-webpack 入门开发系列环境知识点了解: node 安装包下载webpack 打包管理工具需要依赖 node 环境,所以 node 安装包必须安装,上面链接是官网下载地址 w ...
- linux中批量添加文件前缀的操作
需要在文件夹内所有txt文件的文件名前面添加"gt_"; 就是由原来的文件“xxx.txt”变成“gt_xxx.txt”: 网上搜来的脚本如下: for i in `ls`; do ...
- Mac上打开终端的7种简单方法
终端机是用于给Mac命令的便捷工具,尽管它可能会吓倒许多人.毕竟,这不像输入句子然后Mac响应那样简单.如果您有兴趣学习使用Terminal或只想输入一两个命令,我们在下面列出了一些文章,可以帮助您使 ...
- ASP.NET Core on K8S深入学习(11)K8S网络知多少
本篇已加入<.NET Core on K8S学习实践系列文章索引>,可以点击查看更多容器化技术相关系列文章. 一.Kubernetes网络模型 我们都知道Kubernetes作为容器编排引 ...
- 计算几何 val.2
目录 计算几何 val.2 几何单位结构体板子 旋转卡壳 基础概念 求法 模板 半平面交 前置芝士:线段交 S&I算法 模板 最小圆覆盖 随机增量法 时间复杂度 模板 后记 计算几何 val. ...
- 用Python写算法题--洛谷P1149 火柴棒等式
题目 题目来源 P1149 火柴棒等式,https://www.luogu.org/problem/P1149 题目描述 给你n根火柴棍,你可以拼出多少个形如"A+B=C"的等式? ...
- 修改so库中的依赖名
修改so库中的依赖名 在ArchLinuxArm上有一些针对aarch64, arm, armeabi-v7a等Android常用架构的so库可以下载,有时候可以省去很多编译时间,且都是编译optim ...
- Abp RabbitMqEventBus
RabbitMQ安装介绍查看该网址 两个App都要配置 appsettings.json { "RabbitMQ": { "Connections": { &q ...
- Redis内存数据库在Exchange会议室的整体应用架构
注:本文是别人写的,感觉写得很好就转过来,版权归原作者所有哦,谁知道出处可以告诉我,谢谢. 根据以上的会议室应用现状分析,该架构的核心是把历史发生的会议室申请数据定时同步到Redis内存数据库中,对于 ...