
20165226 实验四 Android程序设计
实验四 Android程序设计
实验目的
一、Android Studio的安装测试
二、Activity测试
三、UI测试
四、布局测试
五、事件处理测试
实验内容及步骤
(一)Android Studio的安装测试
- 安装Android Studio
成功安装后再进行Android SDK。
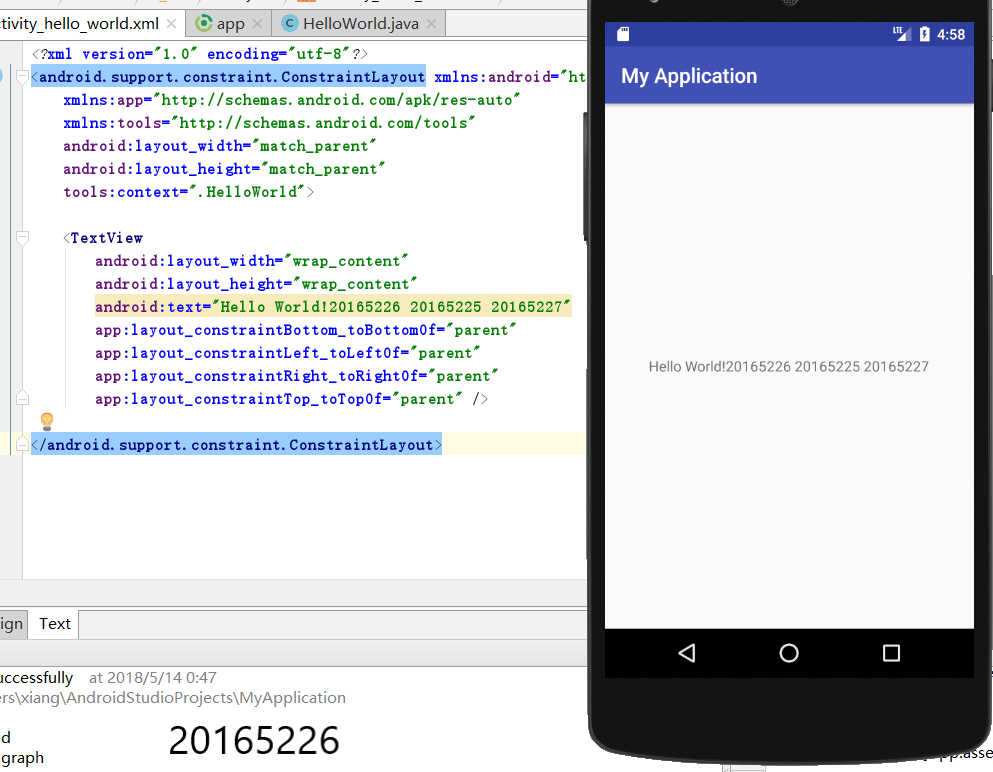
- 修改res目录中的内容,hello world后要显示自己的学号,以及自己学号前后一名同学的学号
(二)Activity测试
构建项目ThirdActivity
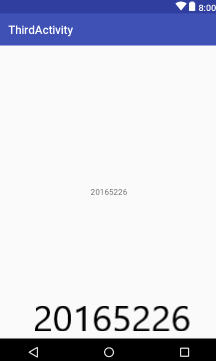
创建ThirdActivity,在ThirdActivity中显示自己的学号,修改代码让MainActivity启动ThirdActivity
package com.example.xiang.thirdactivity;

import android.os.Bundle;

import android.app.Activity;

import android.content.Intent;

import android.view.Menu;

import android.view.MotionEvent;

import android.view.View;

import android.view.View.OnTouchListener;

import android.widget.TextView;

public class MainActivity extends Activity implements

        OnTouchListener {

    @Override

    protected void onCreate(Bundle savedInstanceState) {

        super.onCreate(savedInstanceState);

        setContentView(R.layout.activity_main);

        TextView tv = (TextView) findViewById(R.id.textView1);

        tv.setOnTouchListener(this);

    }

    @Override

    public boolean onCreateOptionsMenu(Menu menu) {

// Inflate the menu; this adds items to the action bar if it

// is present.

        getMenuInflater().inflate(R.menu.menu_main, menu);

        return true;

    }

    @Override

    public boolean onTouch(View arg0, MotionEvent event) {

        Intent intent = new Intent(this, ThirdActivity.class);

        intent.putExtra("message", "20165226");

        startActivity(intent);

        return true;

    }

}
- 提交代码运行截图和码云Git链接,截图加学号水印

(三)UI测试
- 构建项目MyApplication3,运行教材相关代码
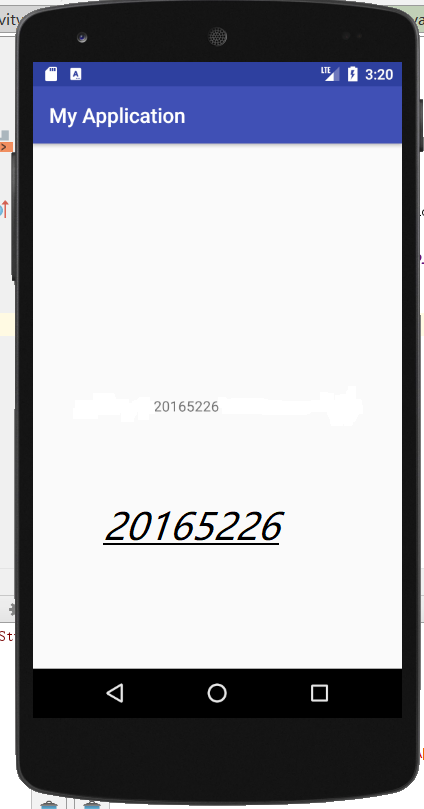
- 修改代码让Toast消息中显示自己的学号信息
- MainActivity
package MyApplication3.app.src.main.java.com.example.xiang.myapplication;

import android.support.v7.app.AppCompatActivity;

import android.os.Bundle;

import android.content.Context;

import android.support.v7.app.AppCompatActivity;

import android.os.Bundle;

import android.app.Activity;

import android.util.AttributeSet;

import android.view.Menu;

import android.view.MenuItem;

import android.view.View;

import android.widget.Button;

import android.widget.Toast;

public class MainActivity extends AppCompatActivity {

    @Override

    protected void onCreate(Bundle savedInstanceState) {

        super.onCreate(savedInstanceState);

        setContentView(R.layout.activity_main);

        Button btnshow1 = (Button) findViewById(R.id.btn1);

        btnshow1.setOnClickListener(new View.OnClickListener() {

            @Override

            public void onClick(View v) {

                Toast toast = Toast.makeText(MainActivity.this, "20165226", Toast.LENGTH_LONG);

                toast.show();

            }

        });

    }

    @Override

    public boolean onCreateOptionsMenu(Menu menu) {

        // Inflate the menu; this adds items to the action bar if it

        // is present.

        getMenuInflater().inflate(R.menu.menu_main, menu);

        return true;

    }

}
- activity_main.xml
<?xml version="1.0" encoding="utf-8"?>

<android.support.constraint.ConstraintLayout xmlns:android="http://schemas.android.com/apk/res/android"

    xmlns:app="http://schemas.android.com/apk/res-auto"

    xmlns:tools="http://schemas.android.com/tools"

    android:layout_width="match_parent"

    android:layout_height="match_parent"

    tools:context=".MainActivity">

    <TextView

        android:layout_width="wrap_content"

        android:layout_height="wrap_content"

        android:text="20165226"

        app:layout_constraintBottom_toBottomOf="parent"

        app:layout_constraintLeft_toLeftOf="parent"

        app:layout_constraintRight_toRightOf="parent"

        app:layout_constraintTop_toTopOf="parent" />

</android.support.constraint.ConstraintLayout>
- 结果
(四)布局测试
- 构建项目,运行教材相关代码
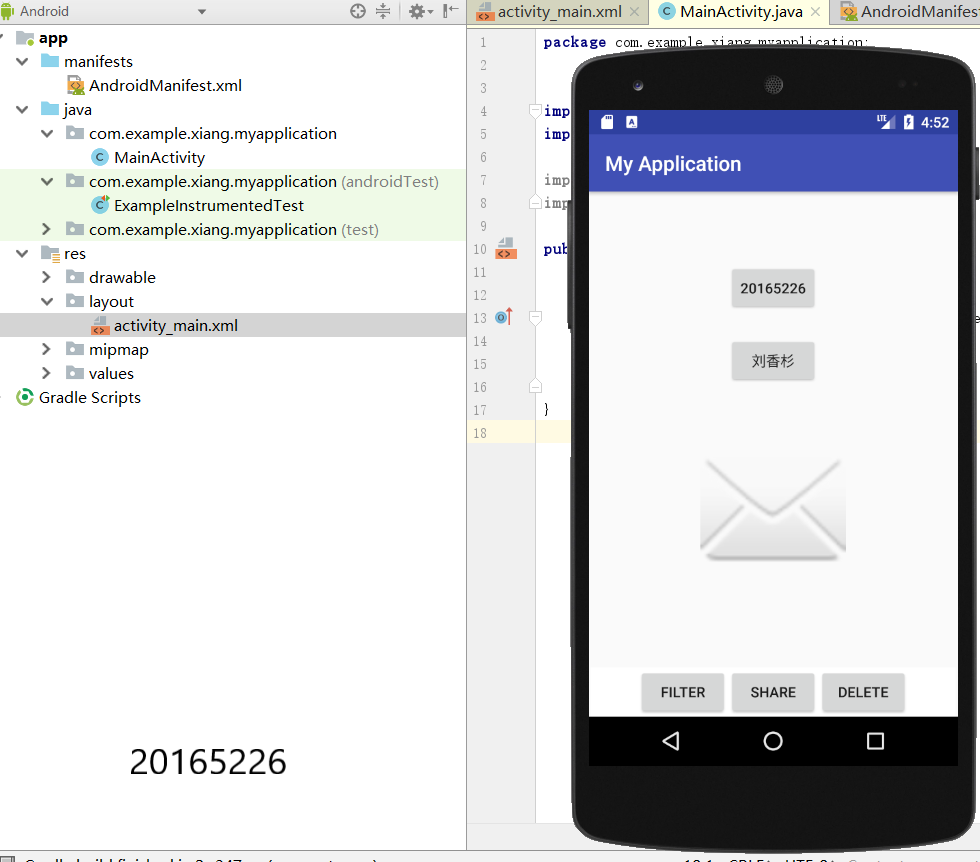
- 修改布局让P290页的界面与教材不同
- activity_main.xml
<RelativeLayout

    xmlns:android="http://schemas.android.com/apk/res/android"

    xmlns:tools="http://schemas.android.com/tools"

    android:layout_width="match_parent"

    android:layout_height="match_parent"

    android:paddingLeft="2dp"

    android:paddingRight="2dp">

    <Button

        android:id="@+id/cancelButton"

        android:layout_width="wrap_content"

        android:layout_height="wrap_content"

        android:text="20165226"

        android:layout_marginTop="70dp"

        android:layout_alignParentTop="true"

        android:layout_centerHorizontal="true" />

    <Button

        android:id="@+id/saveButton"

        android:layout_width="wrap_content"

        android:layout_height="wrap_content"

        android:text="刘香杉"

        android:layout_below="@+id/cancelButton"

        android:layout_alignLeft="@+id/cancelButton"

        android:layout_alignStart="@+id/cancelButton"

        android:layout_marginTop="23dp" />

    <ImageView

        android:layout_width="150dp"

        android:layout_height="150dp"

        android:layout_marginTop="45dp"

        android:padding="4dp"

        android:src="@android:drawable/ic_dialog_email"

        android:id="@+id/imageView"

        android:layout_below="@+id/saveButton"

        android:layout_centerHorizontal="true" />

    <LinearLayout

        android:id="@+id/filter_button_container"

        android:layout_width="match_parent"

        android:layout_height="wrap_content"

        android:layout_alignParentBottom="true"

        android:gravity="center|bottom"

        android:background="@android:color/white"

        android:orientation="horizontal" >

        <Button

            android:id="@+id/filterButton"

            android:layout_width="wrap_content"

            android:layout_height="fill_parent"

            android:text="Filter" />

        <Button

            android:id="@+id/shareButton"

            android:layout_width="wrap_content"

            android:layout_height="fill_parent"

            android:text="Share" />

        <Button

            android:id="@+id/deleteButton"

            android:layout_width="wrap_content"

            android:layout_height="fill_parent"

            android:text="Delete" />

    </LinearLayout>

</RelativeLayout>
- 结果
(五)事件处理测试
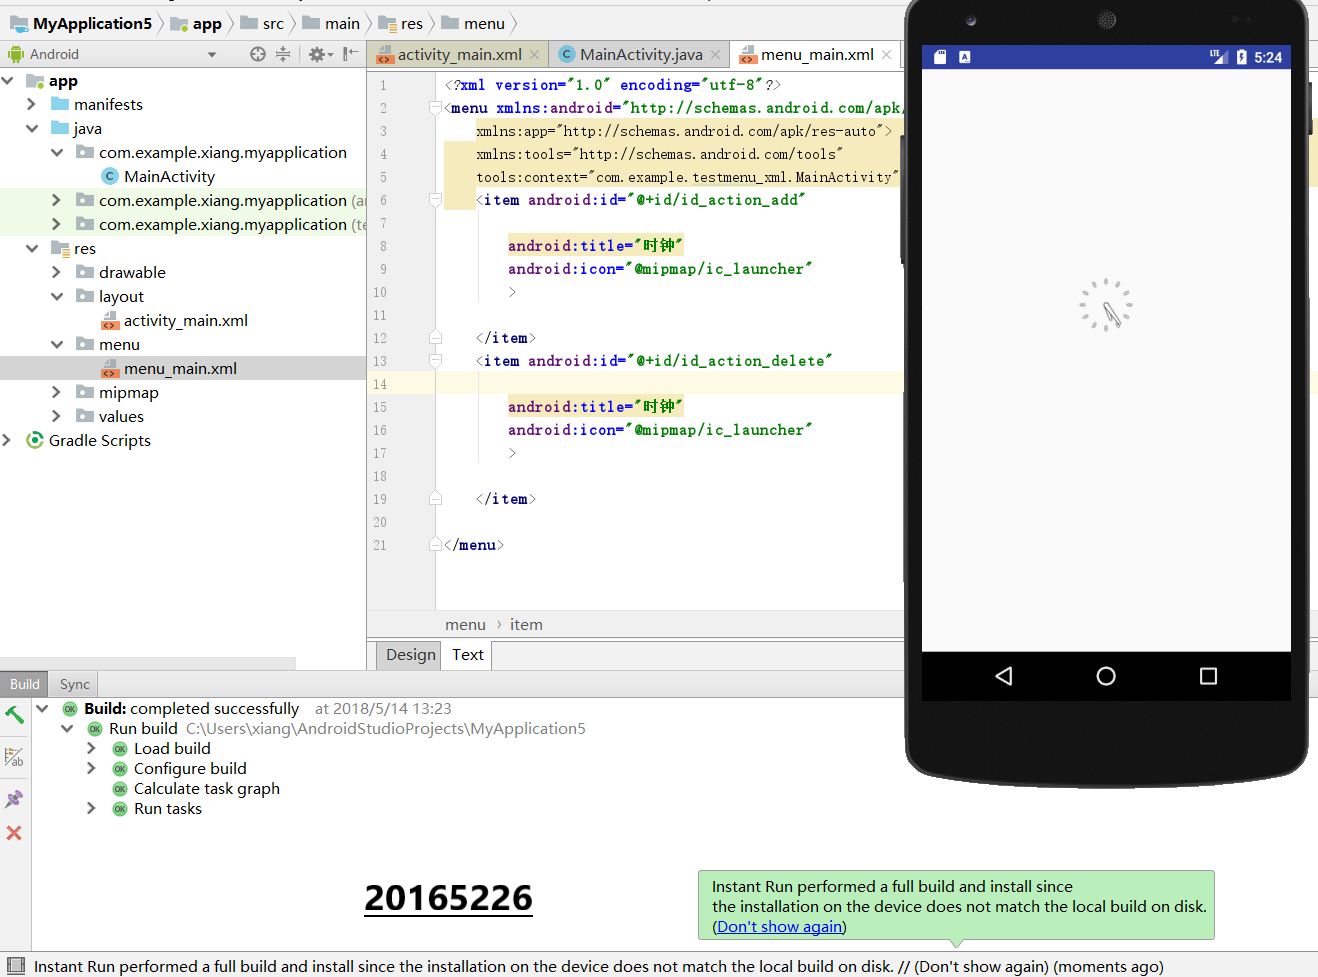
- 构建项目,运行教材相关代码
<RelativeLayout xmlns:android="http://schemas.android.com/apk/res/android"

    xmlns:tools="http://schemas.android.com/tools"

    android:layout_width="match_parent"

    android:layout_height="match_parent"

    android:paddingBottom="150dp"

    android:paddingLeft="150dp"

    android:paddingRight="150dp"

    tools:context=".MainActivity">

    <AnalogClock

        android:id="@+id/analogClock1"

        android:layout_width="wrap_content"

        android:layout_height="wrap_content"

        android:layout_alignParentTop="true"

        android:layout_centerHorizontal="true"

        android:layout_marginTop="200dp"

        android:onClick="changeColor" />

</RelativeLayout>
- 结果
遇到问题及解决方案
问题1:下载gradle时,不能正常顺利下载,在一次次点击
try again始终弹出design not successful
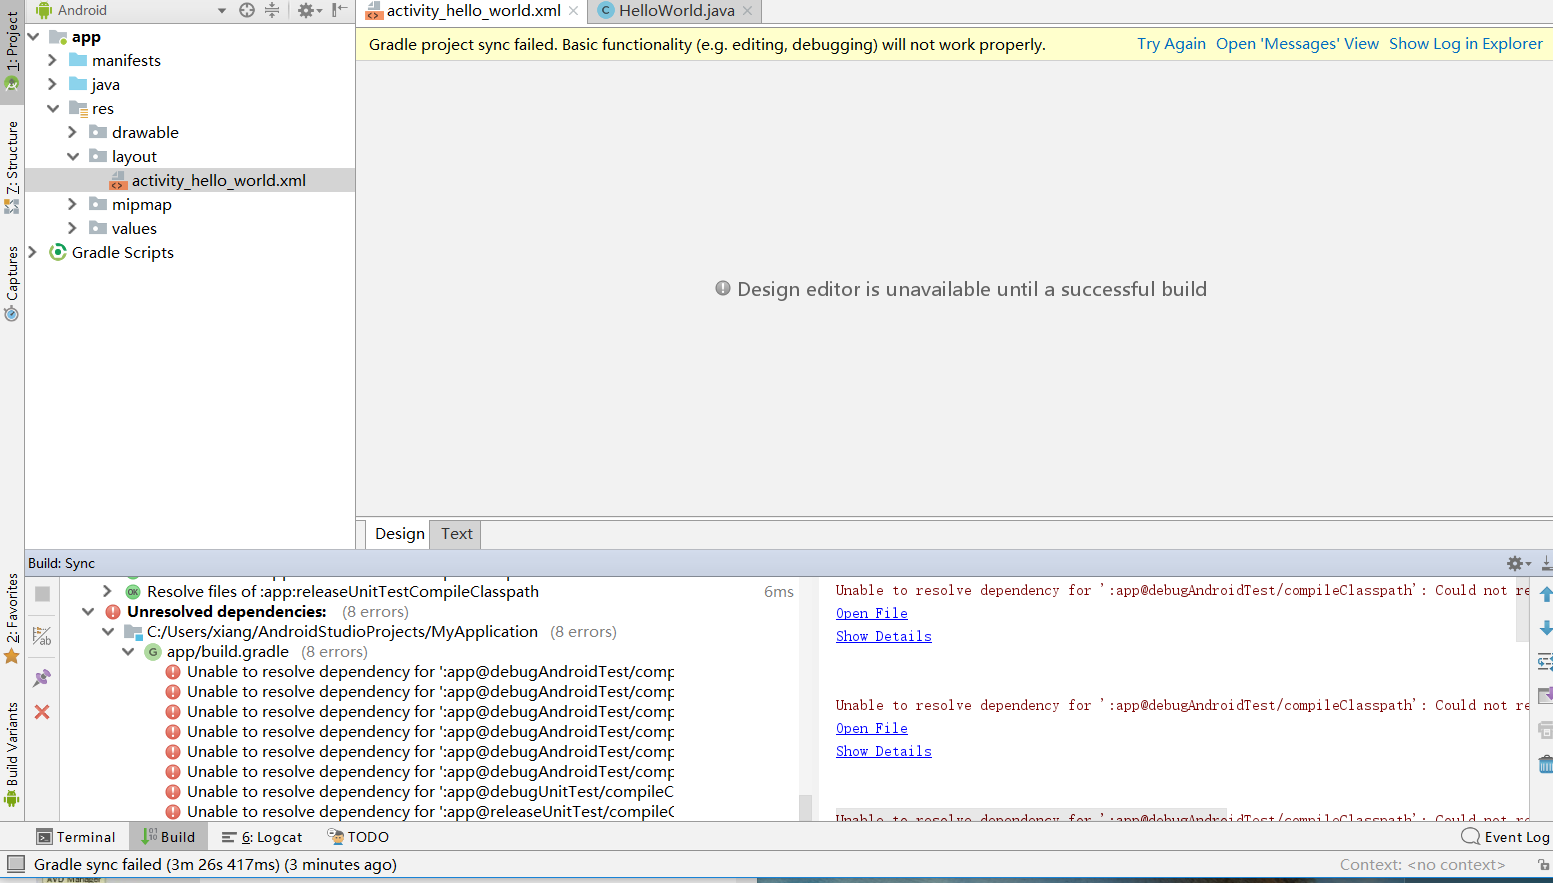
问题1解决方案:外下,然后把gradle拖进相关文件,或者检查等待网络畅通。
问题2:在运行时,因文件命名有误,build failed

问题2解决方案:通过重命名文件为
menu_main.xml,成功解决问题。
统计PSP(Personal Software Process)时间:
| 步骤 | 耗时 | 百分比 |
|---|---|---|
| 设计 | 90min | 50% |
| 代码实现 | 45 | 25% |
| 测试 | 20 | 11% |
| 分析总结 | 25 | 14% |
实验小结
本次实验主要学会了下载安装Android Studio及其使用情况。Android Studio相对来说十分陌生,但他是建立在java基础之上,有Java搭建平台会好懂很多。在各种尝试下仍不能运行时,有些焦急,但在顺利解决问题之后,特别是显示出虚拟界面时,有小小的满足与成就。
20165226 实验四 Android程序设计的更多相关文章
- 实验四 Android程序设计 实验报告
实验四 Android程序设计 实验报告 目录 代码托管地址 Android程序设计-1 Android程序设计-2 Android程序设计-3 Android程序设计-4 Android程序设计-5 ...
- 第十四周实验报告:实验四 Android程序设计
20162317袁逸灏 第十四周实验报告:实验四 Android程序设计 实验内容 Android Studio 实验要求 学会使用Android Studio 学习 活动 以及相关知识内容 学习 U ...
- 20165235实验四 Android程序设计
20165235实验四 Android程序设计 实验课程:JAVA编程设计 实验名称:Android开发 姓名:祁瑛 学号:20165235 实验时间:2018.05.16 指导老师:娄家鹏 Andr ...
- 20165220Java实验四 Android程序设计
一.实验报告封面 课程:Java程序设计 班级:1652班 姓名:葛宇豪 学号:20165220 指导教师:娄嘉鹏 实验日期:2018年5月14日 实验时间:13:45 - 15:25 实验序号:实验 ...
- 20172328《程序设计与数据结构》实验四 Android程序设计报告
20172328<程序设计与数据结构>实验四 Android程序设计报告 课程:<程序设计与数据结构> 班级: 1723 姓名: 李馨雨 学号:20172328 实验教师:王志 ...
- 20172302《程序设计与数据结构》实验四Android程序设计实验报告
课程:<程序设计与数据结构> 班级: 1723 姓名: 侯泽洋 学号:20172302 实验教师:王志强老师 实验日期:2018年5月30日 必修/选修: 必修 1.实验内容 (1)And ...
- 实验四 Android程序设计
20155224 实验四 Android程序设计 实验报告 实验报告封面: 课程:Java程序设计 班级:1652班 姓名:王高源 学号:20165225 指导教师:娄嘉鹏 实验日期:2018年5月1 ...
- 20165236 实验四 Android程序设计
20165236 实验四 Android程序设计 一.实验报告 课程:Java程序设计 班级:1652班 姓名:郭金涛 学号:20165236 指导教师:娄嘉鹏 实验 ...
- 20165205 2017-2018-2 《Java程序设计》实验四 Android程序设计
20165205 2017-2018-2 <Java程序设计>实验四 Android程序设计 实验内容 实验四 Android程序设计-1 Android Stuidio的安装测试: 参考 ...
随机推荐
- SpringXML方式配置bean的生存范围Scope
在一个bean的配置里面可以指定一个属性Scope,也就是bean的范围,bean的生命周期. Scope可取的值5种:singleton(默认).prototype.request.session. ...
- Corosync+pacemaker实现集群的高可用
一.Corosync和pacemaker的了解: Corosync是集群管理套件的一部分,他在传递信息的时候可以通过一个简单的配置文件来定义信息传递的方式和协议等.也就是说,corosync是Mess ...
- Python的介绍及Pycharm软件的安装
一.Python介绍 1. Python是一种解释性.面向对象.动态数据类型的高级程序设计语言. Python语言创始人是吉多.范罗苏姆:起源与1989年 2. 缺点:运行速度慢(由于是解释性语言 ...
- Kafka 单节点单Kafka Broker集群
下载与安装 从 http://www.apache.org/dist/kafka/ 下载最新版本的 kafka,这里使用的是 kafka_2.12-0.10.2.1.tgz $ tar zxvf ka ...
- R︱Yandex的梯度提升CatBoost 算法(官方述:超越XGBoost/lightGBM/h2o)
俄罗斯搜索巨头 Yandex 昨日宣布开源 CatBoost ,这是一种支持类别特征,基于梯度提升决策树的机器学习方法. CatBoost 是由 Yandex 的研究人员和工程师开发的,是 Matri ...
- 在ROS Kinetic中使用Gazebo 8进行机器人仿真
在ROS Kinetic中使用Gazebo 8比在ROS Indigo中使用Gazebo 3-8要容易一些. 目前最新稳定版本的Gazebo8为8.1.1. 安装流程如下: $ sudo apt-g ...
- [Linux] Boot分区满了的处理方法 The volume "boot" has only 0 bytes disk space remaining
1.查看系统目前正在用的内核 abby@abby:~$ uname -r ..--generic 2.查看/boot保存的所有内核 abby@abby:~$ ls -lah /boot total 3 ...
- HDU 2273
http://acm.hdu.edu.cn/showproblem.php?pid=2273 N辆车排队过马路,不能相撞,问最短时间 ans=车的总长度/最小速度 #include <iostr ...
- 会议室预定demo mrbs
关于会议室的增删改查 查: HTML: login继承django自带的admin用户认证系统 <!DOCTYPE html> <html lang="en"&g ...
- Linux服务器运行环境搭建(三)——MySQL数据库安装
官网:http://www.mysql.com/ 官网下载地址:http://dev.mysql.com/downloads/mysql/ 说明:官网下载页面的“Select Platform” 选择 ...