vue项目之购物车
简单的完成一个购物车项目,满足基本功能
安装创建好项目以后需要引入安装elementui和vuex
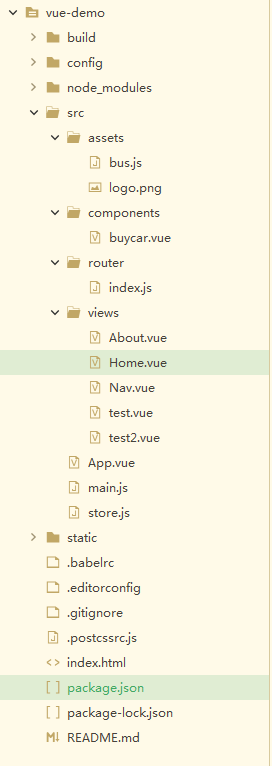
项目目录如下:(home.vue为主页面)
### ~home.vue
<template>

  <div>

    <!-- <div>我是默认显示页面</div> -->

    <!-- 绑定自定义事件,事件函数里面执行操作 -->

    <Nav v-if="see" :NavActiveIndex="activeIndex" @fromNavVal='fromNavValfn'></Nav>

    <div v-else>折叠以后{{activeIndex2}}</div>

    <router-view />

  </div>

</template>

<script>

  import Nav from './Nav.vue'

  export default {

    name: 'home',

    components: {

      //nav是home的子组件

      Nav

    },

    data() {

      return {

        activeIndex: '/buycar',

        activeIndex2: '',

        see: true,

      };

    },

    methods: {

      fromNavValfn(val) {

        //此时的val为子组件中$emit中发射过来的参数

        // console.log(val)

        this.activeIndex2 = val;

        this.see = !this.see;

      }

    }

  }

</script>

<style>

</style>
###~About.vue
<template>

  <div>

   This is an about page

  </div>

</template>

<script>

</script>

<style>

</style>
###~Nav.vue
<template>

    <div>

    <!-- {{NavActiveIndex}} -->

      <!-- 父子组件之间通讯用props和emit,无关系组件之间需要用eventbus和vuex -->

      <!-- 要传入默认绑定激活的路由 default-active 此处在父组件home中 activeIndex: '/about' 默认绑定根路由下的about-->

      <el-menu

        :default-active="NavActiveIndex"

        class="el-menu-demo"

        mode="horizontal"

        @select="handleSelect"

        background-color="#545c64"

        text-color="#fff"

        router

        active-text-color="#ffd04b">

        <el-menu-item index="/buycar">购物车{{buycarCount}}</el-menu-item>

        <el-submenu index="">

          <template slot="title">我的工作台</template>

          <el-menu-item index="/about">about</el-menu-item>

          <el-menu-item index="/test">test</el-menu-item>

          <el-menu-item index="/test2">test2</el-menu-item>

        </el-submenu>

        <el-menu-item index=""><a href="https://www.ele.me" target="_blank">订单管理</a></el-menu-item>

      </el-menu>

      <button @click="click">折叠导航栏</button>

    </div>

</template>

<script>

  import bus from '@/assets/bus.js'

  export default {

      name: 'nav',

      props:{

        NavActiveIndex:String

      },

      data() {

        return {

          activeIndex: '',

          activeIndex2: 'nav的123',

          buycarCount : ,

        };

      },

      created(){

        //非父子组件之间接受方法

        //$on监听事件

        //数量改变的时候触发这个事件

        bus.$on('buycarCountChange',(num) => {

            this.buycarCount = num ;

        })

      },

      methods: {

        handleSelect(key, keyPath) {

          console.log(key, keyPath);

        },

        click(){

          //第一个参数为父组件绑定的自定义事件名字,第二个为携带的参数

            this.$emit('fromNavVal',this.activeIndex2)

        }

      }

  }

</script>

<style>

</style>
###~router/index.js
import Vue from 'vue'

import Router from 'vue-router'

import home from '../views/Home.vue'

import test from '../views/test.vue'

// import about from '../views/About.vue'

Vue.use(Router)

export default new Router({

  mode:'history',

  routes: [

    {

      path: '/',

      name: 'home',

      component: home,

      children:[

        {

          path:'buycar',

          name:'buycar',

          component: () => import('@/components/buycar.vue')

        },

        {

          path: 'about',

          name: 'about',

          component: () => import ('../views/About.vue')

        },

        {

          path: 'test2',

          name: 'test',

          component: () => import ('../views/test2.vue')

        },

      ]

    },

    {

      path:'/test',

      component:test,

    }

  ]

})
###~assets /bus.js
import Vue from 'vue';

const EventBus = new Vue();

// console.log(1)

export default EventBus;

//事件注册中心

//所有的事件共同使用的

//所有的组件都可以向这个中心注册或者接受事件
###~main.js
// The Vue build version to load with the `import` command

// (runtime-only or standalone) has been set in webpack.base.conf with an alias.

import Vue from 'vue'

import App from './App'

import router from './router'

// import store from './store'

import ElementUI from 'element-ui'

import 'element-ui/lib/theme-chalk/index.css'

Vue.use(ElementUI)

Vue.config.productionTip = false

/* eslint-disable no-new */

new Vue({

  el: '#app',

  router,

  // store,

  components: { App },

  template: '<App/>'

})
###~store.js
import Vue from 'vue'

import Vuex from 'vuex'

Vue.use(Vuex)

// export default new Vuex.store({

//     state:{

//       buycarCount: 10

//     },

//     mutations:{

//         changebuyCarCount(state,num){

//           state.buycarCount = num ;

//         }

//     },

//     actions:{

//

//     }

//

//

// })

//
###~buycar.vue
<template>

  <div>

    <div v-if='list.length>0'>

      <div>

        <el-col :span="">商品信息</el-col>

        <el-col :span="">尺码/颜色</el-col>

        <el-col :span="">吊牌价</el-col>

        <el-col :span="">数量</el-col>

        <el-col :span="">折扣</el-col>

        <el-col :span="">总金额</el-col>

        <el-col :span="">删除</el-col>

      </div>

      <div>

        <ul>

          <li v-for="item in list">

            <el-col :span="">

              <el-checkbox v-model="selectArrCloth" :label="item.id" @change="item.checked = ! item.checked">{{item.name}}</el-checkbox>

              <img src="../assets/logo.png" style="width: 20px; height: 20px;">

            </el-col>

            <el-col :span="">{{item.size}} {{item.color}}</el-col>

            <el-col :span="">{{item.price}}</el-col>

            <el-col :span="">

              <span @click="pre(item)">-</span>

              {{item.count}}

              <span @click="add(item)">+</span>

            </el-col>

            <el-col :span="">{{item.active}}</el-col>

            <el-col :span="">{{item.price * item.count * item.active}}</el-col>

            <el-col :span="">

              <img src="../assets/logo.png" @click="del(item)" style="width: 30px; height: 30px;">

            </el-col>

          </li>

        </ul>

      </div>

    </div>

    <div v-else>购物车没有商品,快去逛逛</div>

    <div>

      <div class="cls">

      <!-- {{selectArrCloth}} -->

        <el-checkbox v-model="allCheck" @change="getAllChecked">全选</el-checkbox>

      </div>

      <div class="cls">合计 {{totalPrice}} 元</div>

      <div class="cls">已选商品 {{totalCount}} 件</div>

    </div>

  </div>

</template>

<script>

  import bus from '@/assets/bus.js'

  export default {

    data() {

      return {

        selectArrCloth: [],

        totalCount: ,

        totalPrice: ,

        allCheck: false,

        list: []

      }

    },

    created() {

      this.getList()

    },

    methods: {

      getAllChecked(val) {

        let selectArrCloth = [];

        if (val) {

          this.list.forEach(item => {

            //根据状态来添加价格,所以需要点击全选的时候循环给数组中数据给true反之给false

            item.checked = true;

            selectArrCloth.push(item.id)

          })

          this.selectArrCloth = selectArrCloth;

        } else {

          this.list.forEach(item => {

            item.checked = false;

          })

          this.selectArrCloth = [];

        }

        this.getTotalCount();

      },

      getTotalCount: function() {

        let totalCount = ;

        let totalPrice = ;

        //循环添加属性

        this.list.forEach(item => {

          if (item.checked) {

            totalPrice = totalPrice + (parseFloat(item.price).toFixed() * parseFloat(item.active) * item.count)

            totalCount = totalCount + parseInt(item.count)

          }

        })

        this.totalCount = totalCount;

        this.totalPrice = totalPrice;

      },

      getList() {

        //ajax

        let arr = [{

            name: '款式1',

            count: '',

            size: 'L',

            color: '红色',

            price: '',

            active: '0.5',

            id: ''

          },

          {

            name: '款式2',

            count: '',

            size: 'L',

            color: '红色',

            price: '',

            active: '0.5',

            id: ''

          },

          {

            name: '款式3',

            count: '',

            size: 'L',

            color: '红色',

            price: '',

            active: '0.5',

            id: ''

          },

          {

            name: '款式4',

            count: '',

            size: 'L',

            color: '红色',

            price: '',

            active: '0.5',

            id: ''

          },

        ]

        //循环给数组中元素增加一个默认checked为false的属性

        arr.forEach(item => {

          item.checked = false;

        })

        this.list = arr;

      },

      pre: function(item) {

        if (item.count == ) return;

        item.count--;

        this.getTotalCount();

      },

      add: function(item) {

        item.count++;

        this.getTotalCount();

      },

      del: function(item) {

        //当点击这个图片的下标与数组中下标一致清除这个数据返回新数组

        let index = this.list.findIndex(cloth => {

          return cloth.id == item.id

        })

        // console.log(index)

        this.list.splice(index, )

        this.getTotalCount();

      },

    },

    watch: {

      //当id状态数组发生改变的时候会执行这个方法

      selectArrCloth: function() {

        this.getTotalCount();

        if (this.selectArrCloth.length == this.list.length) {

          this.allCheck = true;

        } else {

          this.allCheck = false;

        }

      },

      //监听list

      //此时list为一个对象

      list:{

        //当值为函数的时候不会进行深度遍历

        //需要让其数组进行深度遍历用handler方法

        //当deep为true的时候就会深度监听

        handler:function(){

          let count = ;

          this.list.forEach(item => {

            count += parseInt(item.count)

          })

          bus.$emit('buycarCountChange', count)

        },

        deep: true

      }

    }

  }

</script>

<!-- 加上scoped为本组件生效 -->

<style scoped>

  .cls {

    display: inline-block;

    margin-top: 50px;

    margin-left: 400px;

    color: red;

  }

</style>
以上为购物车demo
vue项目之购物车的更多相关文章
- vue项目中icon图标的完美引入
第一步: 进入阿里矢量图标库并登录 地址:https://www.iconfont.cn 第二步: 选择项目需要的图标添加到库 第三步: 选完之后点击右上角的购物车,打开后点击添加到项目,没有就自己建 ...
- vue项目使用阿里巴巴矢量图标库教程
前言:element-ui自带的图标库还是不够全,还是需要需要引入第三方icon,自己在用的时候一直有些问题,参考了些教程,详细地记录补充下. 对于我们来说,首选的当然是阿里icon库 地址:http ...
- vue 项目记录.路飞学城(一)
前情提要: 通过vue 搭建路飞学城记录 一:项目分析 二:项目搭建 1:创建项目 vue init webpack luffy 2:初始化项目 清除默认的HelloWorld.vue组件和APP. ...
- vue项目中使用阿里iconfont图标
在上一篇文章中介绍了如何在vue项目中使用vue-awesome,如果你想了解,请移步<vue项目中使用vue-awesome> 这里介绍一下vue项目中如何使用阿里的iconfont图标 ...
- vue项目实战, webpack 配置流程记录
vue项目实战记录,地址在这 购物车单界面 npm install npm run dev 跑起来可以看到界面效果 这里简单记录一下webpack的编译流程 入口 package.json " ...
- 前端Vue项目——登录页面实现
一.geetest滑动验证 geetest官方文档地址:https://docs.geetest.com/ 产品——极速验证:基于深度学习的人机识别应用.极验「行为验证」是一项可以帮助你的网站与APP ...
- MintUI引入vue项目以及引入iconfont图标
官网地址:http://mint-ui.github.io/#!/zh-cn 中文文档:http://mint-ui.github.io/docs/#/zh-cn2 示例展示:http://eleme ...
- 一步步创建第一个Vue项目
写在了GitHub https://github.com/TaoPanfeng/vue-cms 1 初始化 创建一个文件夹 vue-cms 在vue-cms目录下创建文件 package.json 在 ...
- vue 项目中使用阿里巴巴矢量图标库iconfont
原文:https://www.jianshu.com/p/38262f18eee2 1.打开iconfont阿里巴巴官网https://www.iconfont.cn 2.新建项目(这样方便后期维护图 ...
随机推荐
- cookie和session的区别及其原理
1.为什么要有cookie/session? HTTP是一种无状态的协议,为了分辨链接是谁发起的,需自己去解决这个问题.不然有些情况下即使是同一个网站每打开一个页面也都要登录一下.而Session和C ...
- Flask中路由参数
Flask中路由参数.请求方式设置 一.参数设置 1.参数类型 Flask中参数的使用 @app.route('/parames/<username>/') def hello_world ...
- ajax结合mysql数据库和smarty实现局部数据状态的刷新
效果状态:通过点击锁定状态实现状态锁定与不锁定之间的切换 1.主程序:01.php导入smarty和mysql类,取得数据导入列表模板 <?php include './include/M ...
- SQL 里ESCAPE的用法
TABLES:makt. SELECT SINGLE * FROM makt AND maktx LIKE '%/_' ESCAPE '/' . SQL中escape的用法使用 ESCAPE 关键字定 ...
- 工具 --- Git使用
创建远程仓库 Github 首相在GitHub网站创建一个仓库:右上角加号➕,选择new repository 然后创建编辑仓库:名称.说明.是否公开.语言.分支风格等信息.然后创建. 复制仓库地址 ...
- vue项目中event bus的简单使用
之前做的一个vue后台管理系统中,需要实现这样一个功能:从列表页点击新建或编辑进入新建.编辑页面,新建.编辑完成后需要关闭当前的新建和编辑tab,而tab的关闭则是由项目中的tag组件控制的, 新建和 ...
- No package 'eventlog' found
syslog-ng のインスト�ル手� ●ダウンロ�ドサイト http://www.balabit.com/downloads/files/syslog-ng/sources/stable/src/ ...
- 使用dockerfile 搭建django系统(nginx+redis+mongodb+celery)
背景 有需求需要对django系统进行docker化,以达到灵活部署和容灾.该系统基于django 2.2版本开发,数据库采用mongodb,服务器使用nginx,因系统有部分异步任务,异步任务则采用 ...
- Spark和Scala当中的collect方法的用法和例子
[学习笔记] collect: 收集一个弹性分布式数据集的所有元素到一个数组中,这样便于我们观察,毕竟分布式数据集比较抽象.Spark的collect方法,是Action类型的一个算子,会从远程集群拉 ...
- Kubernetes---Pod phase
⒈Pod phase Pod的status字段是一个PodStatus对象,PodStatus中有一个 phase字段. Pod的相位(phase)是Pod 在其生命周期中的简单宏观概述.该阶段并不是 ...