mybatis-plus分页查询
在springboot中整合mybatis-plus
按照官方文档进行的配置:快速开始|mybatis-plus
引入依赖:
 <!-- 引入mybatisPlus -->

        <dependency>

             <groupId>com.baomidou</groupId>

             <artifactId>mybatis-plus-boot-starter</artifactId>

             <version>3.2.0</version>

         </dependency>

         <!-- 引入mysql驱动包 -->

         <dependency>

             <groupId>mysql</groupId>

             <artifactId>mysql-connector-java</artifactId>

             <version>5.1.27</version>

         </dependency>

         <!-- 引入Druid依赖,阿里巴巴所提供的数据源 -->

         <dependency>

             <groupId>com.alibaba</groupId>

             <artifactId>druid</artifactId>

             <version>1.0.29</version>

     </dependency>
在application.yml配置
 spring:

   datasource:

     type: com.alibaba.druid.pool.DruidDataSource

     driver-class-name: com.mysql.jdbc.Driver

     url: jdbc:mysql://127.0.0.1:3306/test?useUnicode=true&characterEncoding=UTF-8

     username: root

     password: 123456
在启动类上面添加@MapperScan注解,扫描mapper包
 @SpringBootApplication

 @MapperScan("com.qiao.demo02.mapper")

 public class SpringbootDemo02Application {

     public static void main(String[] args) {

         SpringApplication.run(SpringbootDemo02Application.class, args);

     }

 }
新建User和UserMapper
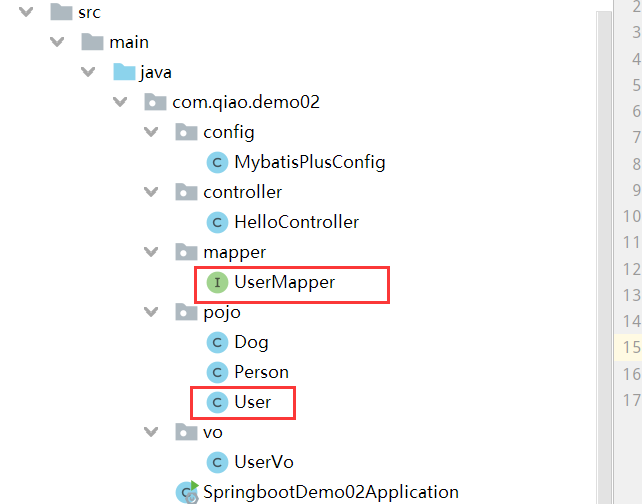
user类
 @Data

 public class User {

     @TableId

     private Integer userId;

     private String userName;

     private Integer userAge;

     private String userEmail;

 }
UserMapper接口
 public interface UserMapper extends BaseMapper<User> {

 }
最重要的是继承BaseMapper<E>接口:里面声明了很强大的CRUD方法
 public interface BaseMapper<T> extends Mapper<T> {

     int insert(T entity);

     int deleteById(Serializable id);

     int deleteByMap(@Param("cm") Map<String, Object> columnMap);

     int delete(@Param("ew") Wrapper<T> wrapper);

     int deleteBatchIds(@Param("coll") Collection<? extends Serializable> idList);

     int updateById(@Param("et") T entity);

     int update(@Param("et") T entity, @Param("ew") Wrapper<T> updateWrapper);

     T selectById(Serializable id);

     List<T> selectBatchIds(@Param("coll") Collection<? extends Serializable> idList);

     List<T> selectByMap(@Param("cm") Map<String, Object> columnMap);

     T selectOne(@Param("ew") Wrapper<T> queryWrapper);

     Integer selectCount(@Param("ew") Wrapper<T> queryWrapper);

     List<T> selectList(@Param("ew") Wrapper<T> queryWrapper);

     List<Map<String, Object>> selectMaps(@Param("ew") Wrapper<T> queryWrapper);

     List<Object> selectObjs(@Param("ew") Wrapper<T> queryWrapper);

     IPage<T> selectPage(IPage<T> page, @Param("ew") Wrapper<T> queryWrapper);

     IPage<Map<String, Object>> selectMapsPage(IPage<T> page, @Param("ew") Wrapper<T> queryWrapper);

 }
分页查询
这点官方文档讲的也很详细:https://mp.baomidou.com/guide/page.html
新建一个config包,在里面建一个MybatisPlus配置类 返回一个分页拦截器
 package com.qiao.demo02.config;

 @Configuration

 @ConditionalOnClass(value = {PaginationInterceptor.class})

 public class MybatisPlusConfig {

     @Bean

     public PaginationInterceptor paginationInterceptor() {

         PaginationInterceptor paginationInterceptor = new PaginationInterceptor();

         return paginationInterceptor;

     }

 }
这样就能使用mybatis的分页功能了
Junit测试
  @Resource

     private UserMapper userMapper;

     @Test

     public void queryUserForPage(){

         IPage<User> userPage = new Page<>(2, 2);//参数一是当前页,参数二是每页个数

         userPage = userMapper.selectPage(userPage, null);

         List<User> list = userPage.getRecords();

         for(User user : list){

             System.out.println(user);

         }

     }
Controller返回json串
先定义一个包装类UserVo,用来保存分页所需要的数据
 package com.qiao.demo02.vo;

 @Data

 public class UserVo {

     private Integer current;

     private Integer size;

     private Long total;

     private List<User> userList;

 }
然后在控制器编写代码,这里省略了service层,实际开发业务代码写在service层,Controller只负责:接受参数、调用service层方法处理业务逻辑,返回结果
Controller类贴上了@RestController注解
 @GetMapping("queryUser")

     public UserVo queryList(Integer current, Integer size) {

         /**

          * 这些代码应该写在service层

          */

         UserVo userVo = new UserVo();

         IPage<User> page = new Page<>(current, size);

         userMapper.selectPage(page, null);

         userVo.setCurrent(current);

         userVo.setSize(size);

         userVo.setTotal(page.getTotal());

         userVo.setUserList(page.getRecords());

         return userVo;

     }
附上结果,前端直接处理json数据即可

mybatis-plus分页查询的更多相关文章
- Mybatis包分页查询java公共类
Mybatis包分页查询java公共类 分页----对于数据量非常大的查询中.是不可缺少的. mybatis底层的分页sql语句因为须要我们自己去手动写.而实现分页显示的时候我们须要依据分页查询条 ...
- springmvc+mybatis 实现分页查询
为简化分页功能,设计了一个分页的JSP标签,只需要在页面使用分页标签,就可以完成所有页面的分页功能. 1. 项目结构和数据库设计 (1) 项目结构: (2) 数据库设计 2. PageModel.ja ...
- spring-boot 集合mybatis 的分页查询
spring-boot 集合mybatis 的github分页查询 一.依赖包 <!-- mysql 数据库驱动. --> <dependency> <groupId&g ...
- 使用mybatis实现分页查询示例代码分析
*******************************************分页查询开始*************************************************** ...
- mybatis之分页查询
1)StudentDao.java /** * 持久层*/ public class StudentDao { /** * 增加学生 */ public void add(Student studen ...
- SpringBoot整合Mybatis关于分页查询的方法
最近公司在用到SpringBoot整合Mybatis时当web端页面数据增多时需要使用分页查询以方便来展示数据.本人对分页查询进行了一些步骤的总结,希望能够帮助到有需要的博友.如有更好的方式,也希望评 ...
- Mybatis 使用分页查询亿级数据 性能问题 DB使用ORACLE
一般用到了mybatis框架分页就不用自己写了 直接用RowBounds对象就可以实现,但这个性能确实很低 今天我用到10w级得数据分页查询,到后面几页就迭代了很慢 用于记录 1.10万级数据如下 [ ...
- mybatis中分页查询
1 如果在查询方法中有多个参数,可以使用map对象将所有数据都存储进去.比如分页查询,需要用到两个参数,可以将这两个参数包装到map中. 例子:分页查询 dao层方法 public List<S ...
- Mybatis的分页查询
示例1:查询业务员的联系记录 1.控制器代码(RelationController.java) //分页列出联系记录 @RequestMapping(value="toPage/custom ...
- MyBatis学习总结(12)——Mybatis+Mysql分页查询
package cn.tsjinrong.fastfile.util; /** * @ClassName: Page * @Description: TODO(分页组件的父类,用来封装分页的 通用 ...
随机推荐
- vue+elementui 中 @keyup 键盘上下左右移动聚焦
<template> <el-table :data="CreditUnclearOutlineList" border style="width: 1 ...
- vue组件间函数调用
vue父子组件间函数调用 <Child ref="myChild"></Child> // 父组件 // 引入子组件 import Child from ' ...
- 单独编译和使用webrtc音频回声消除模块(附完整源码+测试音频文件)
单独编译和使用webrtc音频降噪模块(附完整源码+测试音频文件) 单独编译和使用webrtc音频增益模块(附完整源码+测试音频文件) 说实话很不想写这篇文章,因为这和我一贯推崇的最好全部编译并使用w ...
- luoguP3799 妖梦拼木棒 [组合数学]
题目背景 上道题中,妖梦斩了一地的木棒,现在她想要将木棒拼起来. 题目描述 有n根木棒,现在从中选4根,想要组成一个正三角形,问有几种选法? 输入输出格式 输入格式: 第一行一个整数n 第二行n个整数 ...
- 后缀自动机模板——不同子串个数p2408
后缀自动机的入门博客 https://www.luogu.org/blog/Kesdiael3/hou-zhui-zi-dong-ji-yang-xie 有两种求法,分别对应了两种性质 #includ ...
- Python ORM封装
import sys import asyncio import logging logging.basicConfig(level=logging.INFO) # 一次使用异步 处处使用异步 imp ...
- Lua的控制流程
一.条件语句 if语句 if语句是由一个布尔表达式作为条件判断,或者紧跟其他语句组成. if else语句 if语句可以是else搭配使用,在if条件表达式为false时执行else语句代码 if嵌套 ...
- 牛客多校第八场 C CDMA 线性代数:沃尔什矩阵
题意: 构造出一个由1和-1组成的$2^k*2^k$的矩阵,使得矩阵任意两列内积为0 题解: 数学知识,沃尔什矩阵.沃尔什矩阵的特性被CDMA(码分多址)采用,使得编码成为无线信号的频段和振幅之外的第 ...
- 数据结构C++版-树
一.概念 树是节点的有限集合. 二叉树: 二.补充知识点 1.<二叉树编码实战二>课程笔记: 递归的基本概念:程序调用自身的编程技巧称为递归,是函数自己调用自己. 迭代:利用变量的原值推算 ...
- CodeForces 1152E Neko and Flashback
题目链接:http://codeforces.com/problemset/problem/1152/E 题目大意 有一个 1~n-1 的排列p 和长度为 n 的数组 a,数组b,c定义如下: b:b ...