导航控制器(UINavigationController)
导航控制器管理一系列显示层次型信息的场景。它创建一个视图管理器"栈",栈底为根视图控制器,用户在场景间切换时,依次将试图控制器压入栈中,且当前场景的试图控制器位于栈顶。要返回上一级,导航控制器将弹出栈顶的控制器,从而回到它下面的控制器。
导航控制器还管理一个导航栏(UINavigationBar)。导航栏类似于工具栏,但它是使用导航项(UINavigationItem)实例填充的,该实例被加入到导航控制器管理的每个场景中。默认情况下,场景的导航项包含一个标题和一个Back按钮。Back按钮是以栏按钮项(UIBarButtonItem)的方式加入到导航项的。
导航项在Attributes inspector面板里有三个可设置属性:Title、Prompt和Back Button
Title -- 导航项的标题
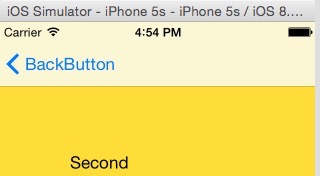
Prompt -- 显示在标题上方的文本,向用户提供使用说明
Back Button -- 下一个场景的后退按钮的文本,假如没有设置,默认显示的文本是标题
在任何场景中,都可通过属性parentViewController来获取导航控制器。
UINavigationController分为三个部分:顶部的Navigation Bar,中间的Custom Content以及底部的Navigation toolbar。如图所示:

代码添加UINavigationController:
- (BOOL)application:(UIApplication *)application didFinishLaunchingWithOptions:(NSDictionary *)launchOptions {

    UIViewController *firstVC = [[UIViewController alloc] initWithNibName:@"FirstVC" bundle:nil];

    UINavigationController *navigationController = [[UINavigationController alloc] initWithRootViewController:firstVC];

    self.window.rootViewController = navigationController;

    self.window.backgroundColor = [UIColor greenColor];

    [self.window makeKeyAndVisible];

    SecondVC *secondVC = [[SecondVC alloc] init];

    ThirdVC *thirdVC = [[ThirdVC alloc] init];

    NSArray *array = @[secondVC, thirdVC];

    [navigationController setViewControllers:array animated:YES];

    [navigationController pushViewController:firstVC animated:YES];

    return YES;

}
UIViewController的navigationItem属性
添加navigationItem是UIViewController的一个属性,这个属性是为UINavigationController服务的。这个属性包含以下几个界面元素:
leftBarButtonItem -- 左按钮
rightBarButtonItem -- 右按钮
backBarButtonItem -- 返回按钮
title -- 标题
prompt -- 提示
UIBarButtonItem *leftButton = [[UIBarButtonItem alloc] initWithTitle:@"LeftButton" style:UIBarButtonItemStylePlain target:self action:@selector(test1)];

firstVC.navigationItem.leftBarButtonItem = leftButton;

UIBarButtonItem *rightButton = [[UIBarButtonItem alloc] initWithTitle:@"RightButton" style:UIBarButtonItemStylePlain target:self action:@selector(test1)];

firstVC.navigationItem.rightBarButtonItem = rightButton;

UIBarButtonItem *backButton = [[UIBarButtonItem alloc] initWithTitle:@"BackButton" style:UIBarButtonItemStylePlain target:self action:@selector(test1)];

firstVC.navigationItem.backBarButtonItem = backButton;

firstVC.navigationItem.title = @"My Title";

//firstVC.navigationItem.titleView = [[UIView alloc] init];

firstVC.navigationItem.prompt = @"Just A Prompt";

leftBarButtonItem和rightBarButtonItem可以指定多个按钮,backButton只能指定一个按钮。
设定了prompt会增加NavigationBar的高度。
要进一步自定义title,可以通过titleView属性将title设置成一个自定义的UIView。
通过设定navigationItem.leftItemsSupplementBackButton = YES可以同时显示leftBarButtonItem和backBarButtonItem。
添加单个按钮:
UIBarButtonItem *rightButton = [[UIBarButtonItem alloc] initWithTitle:@"编辑" style:UIBarButtonItemStylePlain target:self action:@selector(test1)];

NSDictionary *attributes = @{NSFontAttributeName: [UIFont fontWithName:@"TimesNewRomanPS-BoldMT" size:14.0f],

                             NSForegroundColorAttributeName: [UIColor greenColor]};

[rightButton setTitleTextAttributes:attributes forState:UIControlStateNormal];

firstVC.navigationItem.rightBarButtonItem = rightButton;
添加多个按钮:
UIBarButtonItem *cleanButton = [[UIBarButtonItem alloc] initWithTitle:@"清空"

                                                                style:UIBarButtonItemStylePlain

                                                               target:self

                                                               action:@selector(cleanTextView)];

UIBarButtonItem *saveButton = [[UIBarButtonItem alloc] initWithTitle:@"保存"

                                                               style:UIBarButtonItemStylePlain

                                                              target:self

                                                              action:@selector(saveTextView)];

firstVC.navigationItem.rightBarButtonItems = @[cleanButton, saveButton];
P.s. UIBarButtonItemStylePlain和UIBarButtonItemStyleDone的区别就是后者字体更粗而已。
利用navigationController.navigationBar.titleTextAttributes属性修改文本外观
NSDictionary *dict = [NSDictionary dictionaryWithObject:[UIColor greenColor] forKey:NSForegroundColorAttributeName];

navigationController.navigationBar.titleTextAttributes = dict;
UIViewController的edgesForExtendedLayout属性与extendedLayoutIncludesOpaqueBars属性
这也是两个与UINavigationController有关联的属性:
edgesForExtendedLayout — 这个属性属于UIExtendedEdge类型,它指定了视图的哪条边需要扩展开;默认值是UIRectEdgeAll(全部扩展),也可以通过UIRectEdgeLeft|UIRectEdgeRight这种方式设定部分扩展定、或设定为UIRectEdgeNone(全部不扩展)。
假如childVC有一个Y坐标为100的子控件,当edgesForExtendedLayout包含了UIRectEdgeTop时,它是从最顶端开始计算Y坐标;否则是从Navigationbar的offsetY开始计算Y坐标。
extendedLayoutIncludesOpaqueBars — 这个属性指定了当Navigationbar使用了不透明图片时,视图是否延伸至Bar所在区域,默认值时NO(不延伸)。当Navigationbar并未使用不透明图片做背景时,该属性无效。
当Navigationbar使用了不透明图片当背景时,各种情况如下:
1. edgesForExtendedLayout默认值(UIRectEdgeAll) && extendedLayoutIncludesOpaqueBars默认值(NO)
虽然edgesForExtendedLayout包含了UIRectEdgeTop,但由于是不透明图片做背景,并且extendedLayoutIncludesOpaqueBars设定了不延伸,这个时候子控件的Y坐标还是从Navigationbar的offsetY开始计算。当隐藏navigationBar时(navigationController.navigationBarHidden = YES),childVC会整体上移
2. edgesForExtendedLayout默认值(UIRectEdgeAll) && extendedLayoutIncludesOpaqueBars为YES
虽然是不透明图片做背景,但extendedLayoutIncludesOpaqueBars设定为延伸,这个时候子控件的Y坐标是从最顶端计算。当隐藏navigationBar时childVC不会改变位置。
可以通过下面的代码来验证这两个属性的各种搭配情况:
CGSize imageSize = CGSizeMake(, );

UIGraphicsBeginImageContextWithOptions(imageSize, YES, );

[[UIColor greenColor] set];

UIBezierPath * path = [UIBezierPath bezierPathWithRect:CGRectMake(, , imageSize.width, imageSize.height)];

[path fill];

UIImage *image = UIGraphicsGetImageFromCurrentImageContext ();

UIGraphicsEndImageContext();

[[UINavigationBar appearance] setBackgroundImage:image forBarMetrics:UIBarMetricsDefault];

firstVC.edgesForExtendedLayout = UIRectEdgeNone;

firstVC.extendedLayoutIncludesOpaqueBars = YES;
UINavigationController底部的ToolBar
UIBarButtonItem *one = [[UIBarButtonItem alloc] initWithBarButtonSystemItem:UIBarButtonSystemItemAdd target:nil action:nil];

UIBarButtonItem *two = [[UIBarButtonItem alloc] initWithBarButtonSystemItem:UIBarButtonSystemItemBookmarks target:nil action:nil];

UIBarButtonItem *three = [[UIBarButtonItem alloc] initWithBarButtonSystemItem:UIBarButtonSystemItemAction target:nil action:nil];

navigationController.toolbarHidden = NO;

[firstVC setToolbarItems:[NSArray arrayWithObjects:one, two, three, nil] animated:YES];
UINavigationControllerDelegate
该代理的两个主要方法如下,主要作用是在切换前对目标ViewController进行设置:
- (void)navigationController:(UINavigationController *)navigationController willShowViewController:(UIViewController *)viewController animated:(BOOL)animated

{

    NSLog(@"%@",viewController);

    viewController.view.backgroundColor = [UIColor greenColor];

    NSLog(@"willShowViewController");

}

- (void)navigationController:(UINavigationController *)navigationController didShowViewController:(UIViewController *)viewController animated:(BOOL)animated

{

    NSLog(@"%@",viewController);

    NSLog(@"didShowViewController");

}
UINavigationController的topViewController与visibleViewController属性
topViewController — 获取顶层ViewController
visibleViewController — 获取当前显示的ViewController
绝大多数情况下,topViewController是等于visibleViewController的,对于在topViewController上通过presentViewController跳转到一个新的ViewController情况,topViewController是不等于visibleViewController的。
导航控制器(UINavigationController)的更多相关文章
- iOS开发UINavigation——导航控制器UINavigationController
iOS开发UINavigation系列一——导航栏UINavigtionBar摘要iOS中的导航条可以附着于导航控制器之中使用,也可以在controller中单独使用,这篇博客,主要讨论有关导航栏的使 ...
- 利用协议代理实现导航控制器UINavigationController视图之间的正向传值和反向传值
实验说明 (1)正向传值:比如A类里地值要传给B类用,就是我们先在A类中声明一个B类对象(当然B类头文件要import过来),然后把A类中得某个 值传递给B类中得某个值(所以需要在B类中先准备一个变量 ...
- IOS UINavigationController 导航控制器
/** 导航控制器掌握: 1.创建导航控制器 UINavigationController *nav = [[UINavigationController alloc] initWithRootVie ...
- IOS第12天(2,UINavigationController导航控制器)
****HMAppDelegate.m @implementation HMAppDelegate - (BOOL)application:(UIApplication *)application d ...
- UINavigationController 导航控制器 ,根据文档写的一些东西
今天讲了导航控制器UINavigationController 和标签栏视图控制器UITabBarController 先来说一说导航视图控制器 UINavigationController 导航控 ...
- IOS 导航控制器基本使用(UINavigationController代码创建方式)
● UINavigationController的使用步骤 ➢ 初始化UINavigationController ➢ 设置UIWindow的rootViewController为UINavigati ...
- iOS开发UI篇—多控制器和导航控制器简单介绍
iOS开发UI篇—多控制器和导航控制器简单介绍 一.多控制器 一个iOS的app很少只由一个控制器组成,除非这个app极其简单.当app中有多个控制器的时候,我们就需要对这些控制器进行管理 有多个vi ...
- IOS开发UI篇—导航控制器属性和基本使用
IOS开发UI篇—导航控制器属性和基本使用 一.导航控制器的一些属性和基本使用 1.把子控制器添加到导航控制器中的四种方法 (1) 1.创建一个导航控制器 UINavigationController ...
- IOS开发-表视图LV3导航控制器
学到这里感觉有点难了,其实这篇文章再草稿箱里放了好久了~ 最近对于学习的热情下降了.这不行-抓紧学习走起! 在这一章节的学习中主要针对导航控制器及表视图来建立多视图的应用, 首先要了解一些概念-- 1 ...
随机推荐
- HDU 1299 基础数论 分解
给一个数n问有多少种x,y的组合使$\frac{1}{x}+\frac{1}{y}=\frac{1}{n},x<=y$满足,设y = k + n,代入得到$x = \frac{n^2}{k} + ...
- CF767 B. The Queue 贪心+细节
LINK 题意:一个业务开始时间为s,结束时间为f,一个人办护照的时间需要m分(如果在x时开始服务,且x+m==f那么还是合法的),你可以选择任意时间到达,但如果你和其他人同时到达,你要排在他的后面. ...
- Grass is Green
Root 3719 - Grass is Green Time limit: 3.000 seconds This year exactly n <tex2html_verbatim_ma ...
- 不平衡分类学习方法 --Imbalaced_learn
最近在进行一个产品推荐课题时,由于产品的特性导致正负样本严重失衡,远远大于3:1的比例(个人认为3:1是建模时正负样本的一个临界点),这样的样本不适合直接用来建模,例如正负样本的比例达到了50:1,就 ...
- NSURLSession---iOS-Apple苹果官方文档翻译
CHENYILONG Blog NSURLSession---iOS-Apple苹果官方文档翻译 NSURLSession 技术博客http://www.cnblogs.com/ChenYilong/ ...
- 快速幂取模_C++
一.题目背景 已知底数a,指数b,取模值mo 求ans = ab % mo 二.朴素算法(已知可跳过) ans = 1,循环从 i 到 b ,每次将 ans = ans * a % mo 时间复杂度O ...
- 实验吧CTF题库之二叉树遍历
题目链接:http://www.shiyanbar.com/ctf/1868 直接推算出来这棵树是: 后序遍历是:ACBFGED 参考资料: 1. http://www.shiyanbar.com/c ...
- uboot之---make smdk2410_config命令详细解析
先进入顶层Makefile.有很多相对不同板子的配置,如: gec2440_config:unconfig @$(MKCONFIG) $(@:_config=) arm arm920t gec2440 ...
- spark作业提交参数设置(转)
来源:https://www.cnblogs.com/arachis/p/spark_parameters.html 摘要 1.num-executors 2.executor-memory 3.ex ...
- go语言基本介绍
Golang发展历史 1. 诞生历史a. 诞生与2006年1月2号下午15点4分5秒b. 2009发布并正式开源c. 2012年第一个正式版本Go 1.0发布d. 截至到2017年8月24号Go 1. ...