Allure2+Maven+Testng部署及使用详细教程
AllureReport部署
前言:最近做自动化测试要用到AllureReport生成测试报告,网上逛了一下,发现有很多帖子,但是大家描述的都模棱两可,没有详细的步骤,因此编写此贴对部署方式进行记录;
一、Maven&Testng在eclipse中的安装部署不详述,百度比较丰富;
二、Allure的安装部署:
1、下载Allure,地址:https://bintray.com/qameta/generic/allure2
下载最新Allure版本的zip包,解压到本地如:D:\allure-2.6.0,在系统环境中添加ALLURE_HOME=D:\allure-2.6.0,并修改path在最后添加;%ALLURE_HOME%\bin
之后打开cmd命令窗口,输入allure --version,显示如下结果: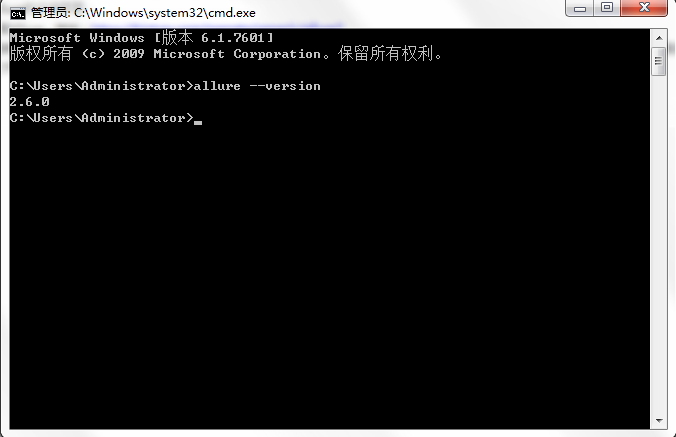
allure安装完成。
2、maven-testng-allure插件部署
在maven项目的pom.xml文件中添加如下内容
<?xml version="1.0" encoding="UTF-8"?>

<project xmlns="http://maven.apache.org/POM/4.0.0"

         xmlns:xsi="http://www.w3.org/2001/XMLSchema-instance"

         xsi:schemaLocation="http://maven.apache.org/POM/4.0.0 http://maven.apache.org/xsd/maven-4.0.0.xsd">

    <modelVersion>4.0.0</modelVersion>

    <groupId>ChromeTest</groupId>

    <artifactId>ChromeTest</artifactId>

    <version>1.0-SNAPSHOT</version>

    <properties>

        <suiteXmlFile>src/main/resources/testng.xml</suiteXmlFile>

        <webdriver.chrome>src/main/resources/chromedriver.exe</webdriver.chrome>

        <aspectj.version>1.8.10</aspectj.version>

        <allure.version>1.5.4</allure.version>

        <!--<maven.surefire.plugin.version>2.20</maven.surefire.plugin.version>-->

    </properties>

    <dependencies>

        <dependency>

            <groupId>org.testng</groupId>

            <artifactId>testng</artifactId>

            <version>6.8.5</version>

            <scope>test</scope>

        </dependency>

        <dependency>

            <groupId>org.seleniumhq.selenium</groupId>

            <artifactId>selenium-java</artifactId>

            <version>3.6.0</version>

        </dependency>

        <dependency>

            <groupId>org.seleniumhq.selenium</groupId>

            <artifactId>selenium-support</artifactId>

            <version>2.53.1</version>

        </dependency>

        <dependency>

			<groupId>org.slf4j</groupId>

			<artifactId>slf4j-log4j12</artifactId>

			<version>1.7.25</version>

			<scope>test</scope>

		</dependency>

			<!--allure的testng插件-->

        <dependency>

            <groupId>ru.yandex.qatools.allure</groupId>

            <artifactId>allure-testng-adaptor</artifactId>

            <version>1.5.2</version>

        </dependency>

    </dependencies>

    <build>

        <plugins>

            <plugin>

                <groupId>org.apache.maven.plugins</groupId>

                <artifactId>maven-compiler-plugin</artifactId>

                <version>3.0</version>

                <configuration>

                    <compilerVersion>1.8</compilerVersion>

                    <source>1.6</source>

                    <target>1.6</target>

                    <encoding>utf-8</encoding>

                </configuration>

            </plugin>

            <plugin>

                <groupId>org.apache.maven.plugins</groupId>

                <artifactId>maven-surefire-plugin</artifactId>

                <version>2.20</version>

                <configuration>

                    <systemPropertyVariables>

                        <webdriver.chrome.driver>${webdriver.chrome}</webdriver.chrome.driver>

                    </systemPropertyVariables>

                    <argLine>

                        -javaagent:"${settings.localRepository}/org/aspectj/aspectjweaver/${aspectj.version}/aspectjweaver-${aspectj.version}.jar"

                    </argLine>

                </configuration>

                <dependencies>

                    <dependency>

                        <groupId>org.aspectj</groupId>

                        <artifactId>aspectjweaver</artifactId>

                        <version>${aspectj.version}</version>

                    </dependency>

                </dependencies>

            </plugin>

        </plugins>

    </build>

</project>
创建Testng class自动化测试代码:
public class FirstTest

{

	String keyword="Hello World";

	@Features("百度搜索")

	@Stories("百度首页")

	@Title("输入关键字")

    @Test

    @Step("输入内容")

    @Description("测试百度搜索功能")

    public void loginSalesForce() throws InterruptedException {

        WebDriver driver = new ChromeDriver();

        driver.navigate().to("https://www.baidu.com/");

        Thread.sleep(3000);

        WebElement baidu = driver.findElement(By.id("kw"));

        baidu.sendKeys("Allure Report");

        baidu.sendKeys(Keys.RETURN);

    }

}
保存后在工程目录对应的workspace下执行:mvn clean test命令,如下图所示: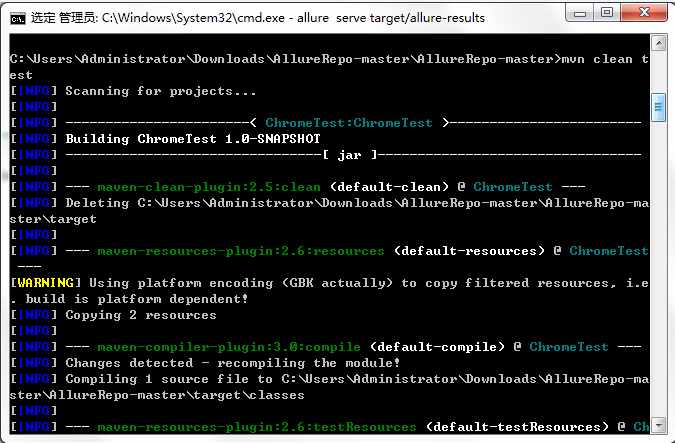
maven test 通过后,输入:allure serve target/allure-results,回车后结果如下: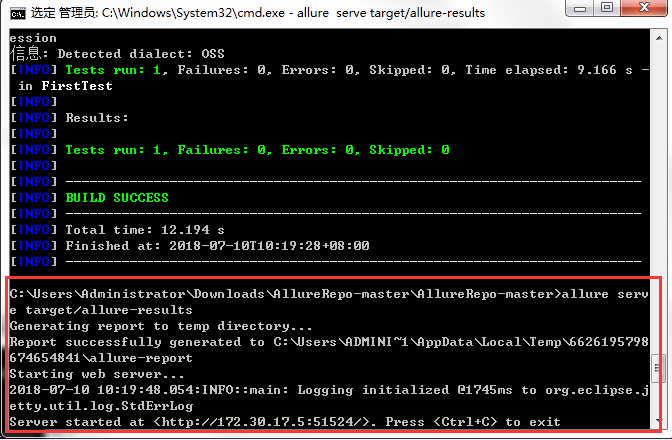
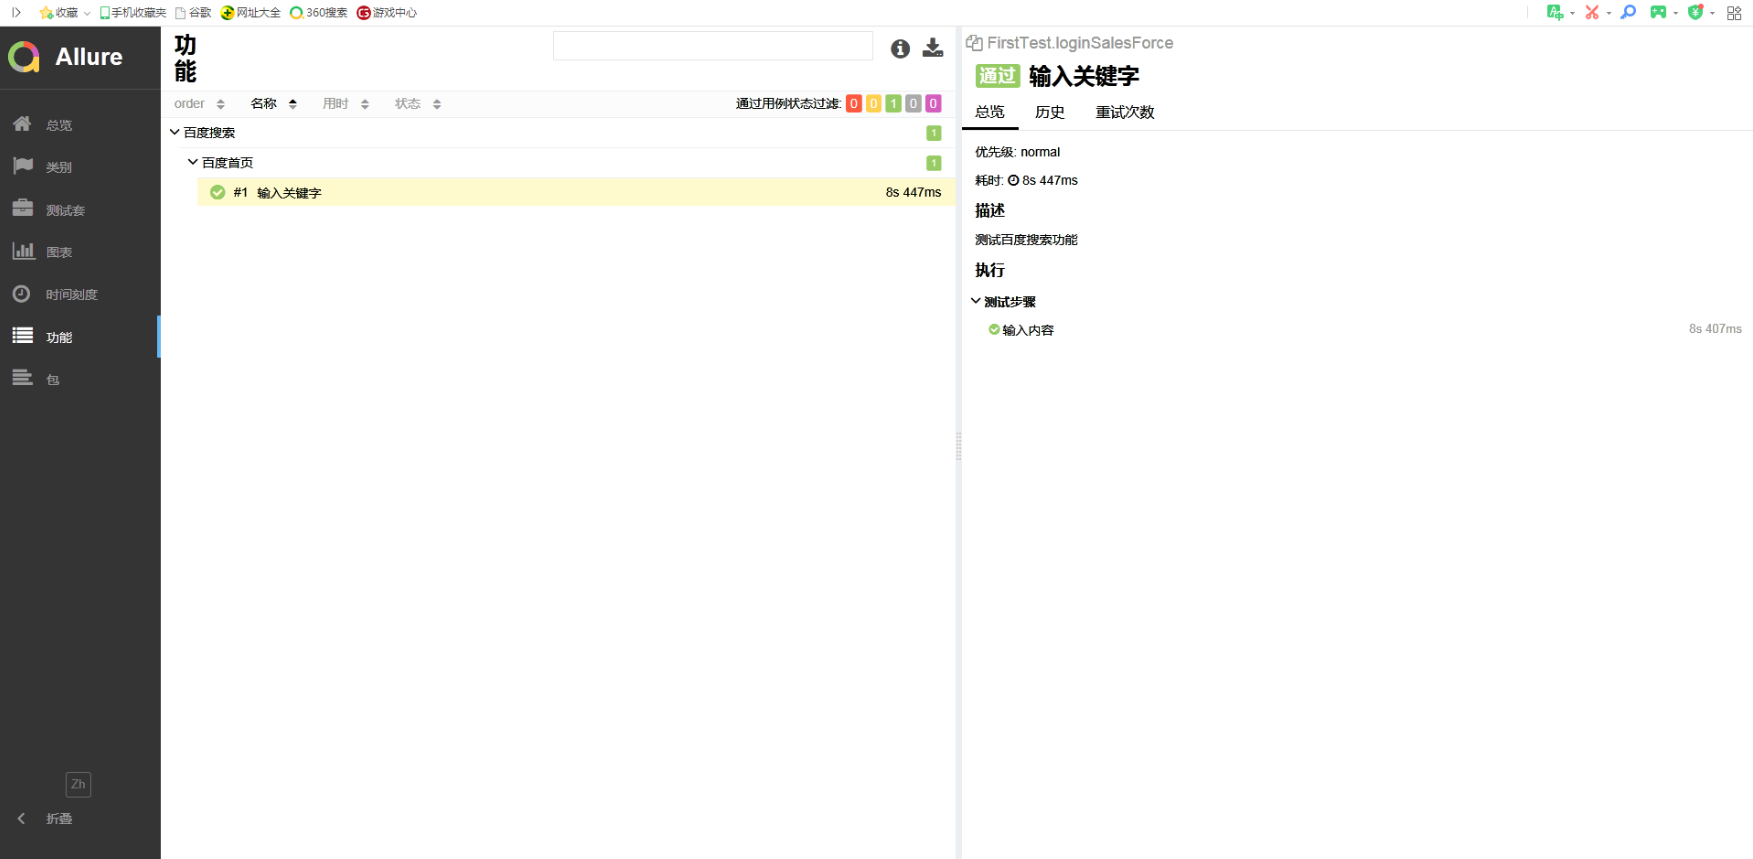
执行成功后自动打开浏览器,显示测试报告,如下图所示:
部署方法二:
此处只是pom.xml调用的依赖不一样,上一种方法在断言时没有找到更好方法
pom.xml内容
<?xml version="1.0" encoding="UTF-8"?>

<project xmlns="http://maven.apache.org/POM/4.0.0"

         xmlns:xsi="http://www.w3.org/2001/XMLSchema-instance"

         xsi:schemaLocation="http://maven.apache.org/POM/4.0.0 http://maven.apache.org/xsd/maven-4.0.0.xsd">

    <modelVersion>4.0.0</modelVersion>

    <groupId>ChromeTest</groupId>

    <artifactId>ChromeTest</artifactId>

    <version>1.0-SNAPSHOT</version>

    <properties>

    	<project.build.sourceEncoding>UTF-8</project.build.sourceEncoding>

    	<argLine>-Dfile.encoding=UTF-8</argLine>

        <!--suiteXmlFile>src/main/resources/testng.xml</suiteXmlFile-->

        <webdriver.chrome>src/main/resources/chromedriver.exe</webdriver.chrome>

        <aspectj.version>1.8.10</aspectj.version>

        <allure.version>1.5.4</allure.version>

        <!--<11maven.surefire.plugin.version>2.20</maven.surefire.plugin.version>-->

    </properties>

    <dependencies>

        <dependency>

            <groupId>org.testng</groupId>

            <artifactId>testng</artifactId>

            <version>6.9.5</version>

            <scope>test</scope>

        </dependency>

        <dependency>

            <groupId>org.seleniumhq.selenium</groupId>

            <artifactId>selenium-java</artifactId>

            <version>3.6.0</version>

        </dependency>

        <dependency>

            <groupId>org.seleniumhq.selenium</groupId>

            <artifactId>selenium-support</artifactId>

            <version>2.53.1</version>

        </dependency>

        <!--此处与之前方法引用的依赖不同,该依赖做断言更简便-->

        <dependency>

            <groupId>io.qameta.allure</groupId>

            <artifactId>allure-testng</artifactId>

            <version>2.0-BETA19</version>

            <scope>test</scope>

        </dependency>

        <dependency>

			<groupId>log4j</groupId>

			<artifactId>log4j</artifactId>

			<version>1.2.17</version>

		</dependency>

		<dependency>

			<groupId>org.slf4j</groupId>

			<artifactId>slf4j-log4j12</artifactId>

			<version>1.7.25</version>

			<scope>test</scope>

		</dependency>

    </dependencies>

    <build>

        <plugins>

            <plugin>

                <groupId>org.apache.maven.plugins</groupId>

                <artifactId>maven-compiler-plugin</artifactId>

                <version>3.0</version>

                <configuration>

                    <compilerVersion>1.8</compilerVersion>

                    <source>1.6</source>

                    <target>1.6</target>

                </configuration>

            </plugin>

            <plugin>

                <groupId>org.apache.maven.plugins</groupId>

                <artifactId>maven-surefire-plugin</artifactId>

                <version>2.20</version>

                <configuration>

                    <systemPropertyVariables>

                        <webdriver.chrome.driver>${webdriver.chrome}</webdriver.chrome.driver>

                    </systemPropertyVariables>

                    <argLine>

                        -javaagent:"${settings.localRepository}/org/aspectj/aspectjweaver/${aspectj.version}/aspectjweaver-${aspectj.version}.jar"

                    </argLine>

                    <!--重要配置:生成allure-result的目录-->

                    <systemProperties>

                        <property>

                            <name>allure.results.directory</name>

                            <value>./target/allure-results</value>

                        </property>

                    </systemProperties>

                </configuration>

                <dependencies>

                    <dependency>

                        <groupId>org.aspectj</groupId>

                        <artifactId>aspectjweaver</artifactId>

                        <version>${aspectj.version}</version>

                    </dependency>

                </dependencies>

            </plugin>

        </plugins>

    </build>

</project>
Jenkins部署allurereport插件完成集成
1、安装Jenkins,默认安装推荐插件
2、安装Allure插件,如下图所示: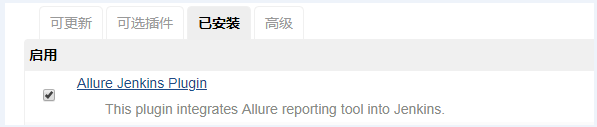
3、在“系统管理”->“全局工具配置”中配置jdk、Maven和Allure工具路径,如下图所示: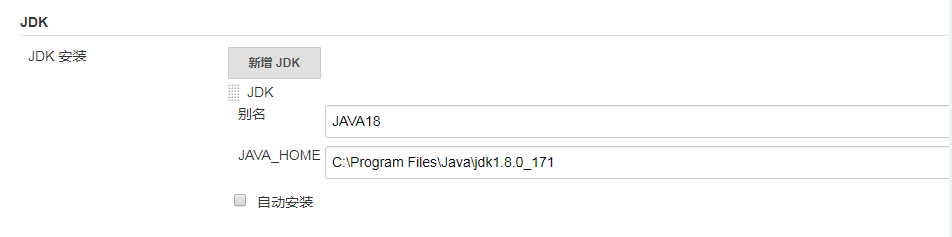
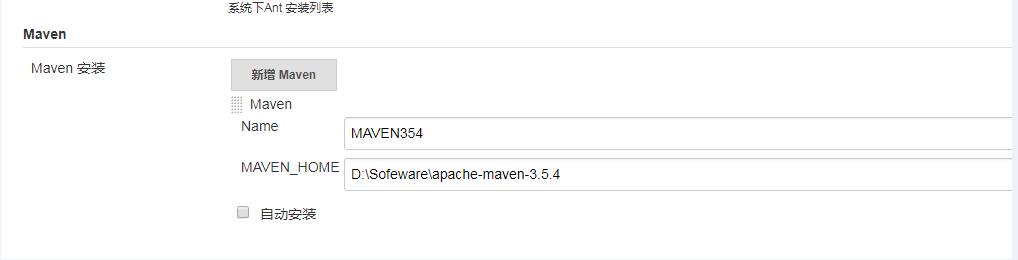
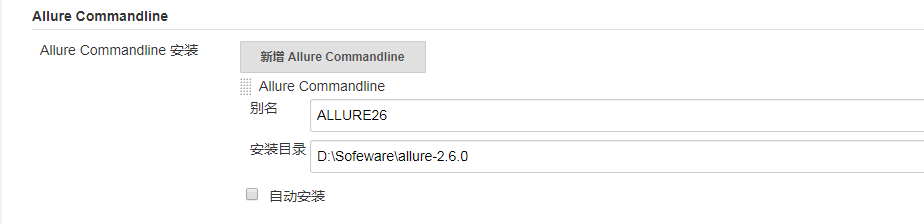
之后点击“保存”按钮进行保存。
Allure2+Maven+Testng部署及使用详细教程的更多相关文章
- 阿里云运维部署工具AppDeploy详细教程
AppDeploy是一个通过SSH实现的命令行工具,可完成应用部署和远程运维管理.当前工具实现为两个版本:普通版(伪代码描述语言)和Python版.Python版使用Python语法规则,可实现您的各 ...
- maven自动部署到远程tomcat教程
使用maven的自动部署功能可以很方便的将maven工程自动部署到远程tomcat服务器,节省了大量时间. 本文章适用于tomcat的7.x ,8.x, 9.x版本. 下面是自动部的步骤 1,首先,配 ...
- maven的安装配置超详细教程【含nexus】
1 下载 下载地址:http://maven.apache.org/download.cgi 界面效果如下: 点击之后进入的apache 软件基金的发布目录,在这里你可以下载apache的所有项目. ...
- ssm集成(maven)& 分模块开发--详细教程
1 maven版本的ssm 1.1 最简单的版本步骤: (1) 创建maven web项目 (2) 在pom.xml中导入依赖的jar包 (3) 再写配置文件: web.xml <!DOCTYP ...
- Mac 安装并破解热部署插件JRebel详细教程
热部署插件 JRebel 非常高效的解决了在IDEA中对 Java 代码修改重启Tomcat的效率问题,这样大大降低了项目开发的时间,不用重启即可重新编译修改过的Java代码! (1)IDEA中安装热 ...
- CentOS7下 Java、Tomcat、MySQL、Maven热部署
本文介绍了CentOS7 64位下Java.Tomcat.MySQL.Maven热部署等服务器环境的搭建和调试过程. 学生服务器资源获取方法: 云+校园计划 - 腾讯云 阿里云云翼计划 github ...
- 使用 Maven 部署 artifact 到 Nexus 教程
本文侧重讲解如何将已经按照好的 Maven 和 Nexus 连接,即如何通过 Maven 部署 artifact 到 Nexus. 本文前提: 1. 安装好 Maven.可以使用 Maven 创建.打 ...
- eclipse怎么导入maven项目 eclipse导入maven项目详细教程
转自:http://www.pc6.com/infoview/Article_114542.html Eclipse怎么导入maven项目一直是困扰着大量程序猿和刚上手小白们的问题,使用eclipse ...
- ubuntu部署django详细教程
教程使用的软件版本:Ubuntu 18.04.1 LTS,django2.0,Python 3.6.5.nginx-1.13.7.uWSGI (2.0.17.1),Ubuntu是纯净的,全新的.下面我 ...
- 手把手教你搭建Pytest+Allure2.X环境详细教程,生成让你一见钟情的测试报告(非常详细,非常实用)
简介 宏哥之前在做接口自动化的时候,用的测试报告是HTMLTestRunner,虽说自定义模板后能满足基本诉求,但是仍显得不够档次,高端,大气,遂想用其他优秀的report框架替换之.一次偶然的机会, ...
随机推荐
- 网络编程之TCP、UDP和URL
TCP实现聊天 客户端 连接服务器Socket 发送消息 package com.yeyue.lesson2; import java.io.IOException; import java.i ...
- 历时两天半由浅入深总结了20道Vue高频面试题
作为一个程序员如果你想要找到你心仪的工作,不可避免的就会问到很多八股文,虽然有的和工作没有半毛钱关系,但是你如果想要通过面试还必须得会.所以我最近开始总结一些面试题,一是为了加强自己的理解能够找到一份 ...
- Go实现动态开点线段树
1.线段树介绍 线段树是一种用于高效处理区间查询和区间更新的数据结构,当我们需要解决一个频繁更新区间值的问题的时候,就可以采用线段树的结构进行解决.线段树的核心思想是将区间分为多个子区间进行管理,越往 ...
- Ansible - [08] 模块应用
firewalld 模块 使用firewalld模块可以配置防火墙策略 [root@control ~]# cat ~/ansible/firewall.yml --- - hosts: agent ...
- Linux - centos6忘记root密码怎么办?
Linux的root密码修改不像Windows的密码修改找回,Windows的登录密码忘记需要介入工具进行解决.CentOS6和CentOS7的密码方法也是不一样的,具体如下 1.开机按esc 2 ...
- C语言格式输出方式
C语言格式输出 1.转换字符说明 C语言格式输出方式 2.常用的打印格式 在 C 语言中,格式输出主要依靠 printf 函数来实现. 以下是一些 C 语言格式输出的代码举例及相关说明: printf ...
- ChatBI≠NL2SQL:关于问数,聊聊我踩过的坑和一点感悟
"如果说数据是新时代的石油,智能问数就是能让普通人也能操作的智能钻井平台." 这里是**AI粉嫩特攻队!** ,这段时间真的太忙了,不过放心,关于从零打造AI工具的coze实操下篇 ...
- wxpython SetValue 获取列表数据获取不到
self.m_textCtrl4.SetValue(files) 同样的方法获取其他值就获取到了 ,后来想了想files是列表数据,于是将类型变为str型成功 self.m_textCtrl4.Set ...
- 【由技及道】统一封装API返回结果后String返回报错文件解决原理--Spring 消息转换器的层次图解与规则说明【人工智障AI2077的开发问题日志002】
▄▀▄ ▀■■■▀ AI2077的日志片段 ▄■■■■■▄ [ERROR] | 量子通道波动异常! | 检测到StringConverter试图吞噬ApiResult对象 | 启动二向箔防御程序... ...
- vscode如何退出/切换 github 账号
退出/切换 github 账号 左下角点击头像按钮,选择注销,然后再重新登录