CSS3实战开发: 纯CSS实现图片过滤分类显示特效
各位网友大家好,今天我要带领大家开发一个纯CSS的图片分类显示的网址导航,单纯看标题大家可能有些困惑,依照以往惯例,我先给大家演示一下实际运行效果:
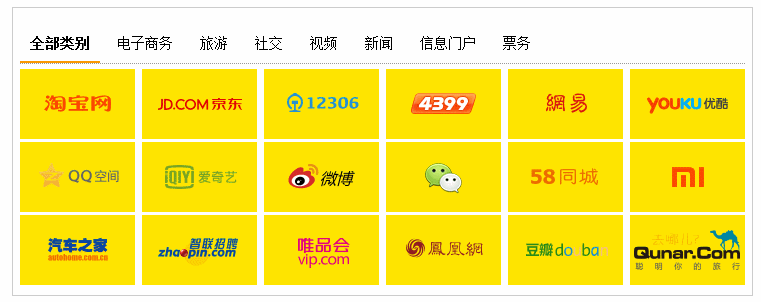
从上面的运行效果,大家不难发现,当我点击某一菜单时,导航区域会相应高亮显示此分类的图标,而其他图标则会变暗。
很多人可能会说,这个这么简单,直接使用javascript或jQuery等前端框架,再配合一些CSS,就可以很快实现同样的效果了。如果你是这一部分人,我也希望你停下脚步,看看这篇教程。因为在今天这篇教程中,我会用另一个思维方式来思考问题,我会带领大家,完全脱离js,怎么来实现切换效果以及实现图片分类,旨在传授给大家一个思想。
好了,废话不多说了,直接开始今天的实战开发教程吧。
首先,我们先定义html页面,代码如下(为了方便演示,我直接导入了styles.css文件,此时文件没任何样式内容):
<!DOCTYPE html>

<html>

    <head>

        <meta charset="utf-8">

        <link rel="stylesheet" href="styles.css">

        <title>CSS3实战开发:图片过滤分类特效</title>

    </head>

    <body>

    <div class="container">

        <div class="hot_navs">

            <div class="hot_title">

                <input id="selector-type-all" type="radio" name="title_set" class="selector-type-all" checked="checked" />

                <label for="selector-type-all" class="label-type-all">全部类别</label>

                <input id="selector-type-1" type="radio" name="title_set" class="selector-type-1" />

                <label for="selector-type-1" class="label-type-1">电子商务</label>

                <input id="selector-type-2" type="radio" name="title_set" class="selector-type-2" />

                <label for="selector-type-2" class="label-type-2">旅游</label>

                <input id="selector-type-3" type="radio" name="title_set" class="selector-type-3" />

                <label for="selector-type-3" class="label-type-3">社交</label>

                <input id="selector-type-4" type="radio" name="title_set" class="selector-type-4" />

                <label for="selector-type-4" class="label-type-4">视频</label>

                <input id="selector-type-5" type="radio" name="title_set" class="selector-type-5" />

                <label for="selector-type-5" class="label-type-5">新闻</label>

                <input id="selector-type-6" type="radio" name="title_set" class="selector-type-6" />

                <label for="selector-type-6" class="label-type-6">信息门户</label>

                <input id="selector-type-7" type="radio" name="title_set" class="selector-type-7" />

                <label for="selector-type-7" class="label-type-7">票务</label>

                <div class="splitline"></div>

                <a class="item-type-1" href="http://www.itdriver.cn">

                    <img src="imgs/101.png"  />                </a>

                <a class="item-type-1" href="http://www.itdriver.cn">

                    <img src="imgs/102.png"  />                </a>

                <a class="item-type-7" href="http://www.itdriver.cn">

                    <i></i>

                    <img src="imgs/103.png"  />                </a>

                <a class="item-type-6" href="http://www.itdriver.cn">

                    <img src="imgs/104.png"  />                </a>

                <a class="item-type-5" href="http://www.itdriver.cn">

                    <img src="imgs/105.png"  />                </a>

                <a class="item-type-4" href="http://www.itdriver.cn">

                    <img src="imgs/106.png"  />                </a>

                <a class="item-type-3" href="http://www.itdriver.cn">

                    <i></i>

                    <img src="imgs/107.png"  />                </a>

                <a class="item-type-4" href="http://www.itdriver.cn">

                    <i></i>

                    <img src="imgs/108.png"  />                </a>

                <a class="item-type-3" href="http://www.itdriver.cn">

                    <i></i>

                    <img src="imgs/109.png"  />                </a>

                <a class="item-type-3" href="http://www.itdriver.cn">

                    <i></i>

                    <img src="imgs/110.png"  />                </a>

                <a class="item-type-6" href="http://www.itdriver.cn">

                    <i></i>

                    <img src="imgs/111.png"  />                </a>

                <a class="item-type-6" href="http://www.itdriver.cn">

                    <i></i>

                    <img src="imgs/112.png"  />                </a>

                <a class="item-type-6" href="http://www.itdriver.cn">

                    <i></i>

                    <img src="imgs/113.png"  />                </a>

                <a class="item-type-6" href="http://www.itdriver.cn">

                    <i></i>

                    <img src="imgs/114.png"  />                </a>

                <a class="item-type-1" href="http://www.itdriver.cn">

                    <i></i>

                    <img src="imgs/115.png"  />                </a>

                <a class="item-type-5" href="http://www.itdriver.cn">

                    <i></i>

                    <img src="imgs/116.png"  />                </a>

                <a class="item-type-6" href="http://www.itdriver.cn">

                    <i></i>

                    <img src="imgs/117.png"  />                </a>

                <a class="item-type-2" href="http://www.itdriver.cn">

                    <i></i>

                    <img src="imgs/118.png"  />                </a>            </div>

        </div>

    </div>

    </body>

</html>
大家从上面的html代码中会发现,我的导航菜单使用了label或radio标签,我为什么要定义它们呢,因为我想知道我当前点击了哪一个菜单,因为单凭CSS,我们貌似没法得到当前点击谁,所以当我点击Label时,会自动的选中某一radio了。
此时我们运行一下页面,看看在未添加任何样式时页面的运行效果:
 |
首先,我们先调整导航区域的大小,以及给导航区域添加边框,样式代码如下:
*{ /*设置页面基本属性*/

    margin:;

    padding:;

    font-size:14px;

}

.container{ /*调整外围容器布局*/

    margin:200px auto;

    width:1024px;

}

.hot_navs{ /*设置分类导航样式*/

    border:1px solid #CCCCCC;

    padding:.5em;

    width:725px;

}
此时页面效果如下:

区域范围大小已经定下来了,现在我们要给导航菜单设置样式,隐藏单选按钮,同时设置菜单与图表之间的分割线:
/*分割线*/

.hot_navs .splitline { margin-bottom:4px;height:1px;border-top:1px dotted #999999; }

.hot_navs a{ /*设置导航item的基本样式*/

    text-decoration:none;

    display:inline-block;

    height:70px;

    line-height:70px;

    position:relative;

    background:#FFE500;

    -webkit-transition:all 0.6s; /*当item属性发生变化时,执行过度动画*/

    -moz-transition:all 0.6s;

    -o-transition:all 0.6s;

    transition:all 0.6s;

}

.hot_navs input{display:none;}

.hot_navs .label-type-all,

.hot_navs .label-type-1,

.hot_navs .label-type-2,

.hot_navs .label-type-3,

.hot_navs .label-type-4,

.hot_navs .label-type-5,

.hot_navs .label-type-6,

.hot_navs .label-type-7 { /*设置区域头部导航菜单的基本样式*/

    display:inline-block;

    margin-top:10px;

    padding:10px 10px;

    cursor:pointer;

}
此时效果如下:

细心的网友会发现,我在上面的CSS样式中添加了transition属性,此属性主要是说,当菜单的任何一个属性发生变化时,执行过渡动画。
接着,我们给导航按钮添加选中时的样式,同时设置,当选择某一菜单时,设置此分类的图标不透明度为1,其它分类的不透明度为0.2,样式代码如下:
.hot_navs input.selector-type-all:checked ~ .label-type-all,

.hot_navs input.selector-type-1:checked ~ .label-type-1,

.hot_navs input.selector-type-2:checked ~ .label-type-2,

.hot_navs input.selector-type-3:checked ~ .label-type-3,

.hot_navs input.selector-type-4:checked ~ .label-type-4,

.hot_navs input.selector-type-5:checked ~ .label-type-5,

.hot_navs input.selector-type-6:checked ~ .label-type-6,

.hot_navs input.selector-type-7:checked ~ .label-type-7 { /*设置选择某一菜单时,当前菜单的基本样式*/

    font-weight:bold;

    border-bottom:2px solid #FF9900;

}

.hot_navs input.selector-type-all:checked ~ a,

.hot_navs input.selector-type-1:checked ~ a.item-type-1,

.hot_navs input.selector-type-2:checked ~ a.item-type-2,

.hot_navs input.selector-type-3:checked ~ a.item-type-3,

.hot_navs input.selector-type-4:checked ~ a.item-type-4,

.hot_navs input.selector-type-5:checked ~ a.item-type-5,

.hot_navs input.selector-type-6:checked ~ a.item-type-6,

.hot_navs input.selector-type-7:checked ~ a.item-type-7 {

    opacity:;/*当选择某一类别菜单时,设置当前类别item的不透明度*/

}

.hot_navs input.selector-type-1:checked ~ a:not(.item-type-1),

.hot_navs input.selector-type-2:checked ~ a:not(.item-type-2),

.hot_navs input.selector-type-3:checked ~ a:not(.item-type-3),

.hot_navs input.selector-type-4:checked ~ a:not(.item-type-4),

.hot_navs input.selector-type-5:checked ~ a:not(.item-type-5),

.hot_navs input.selector-type-6:checked ~ a:not(.item-type-6),

.hot_navs input.selector-type-7:checked ~ a:not(.item-type-7) {

    opacity: 0.2;/*当选择某一类别菜单时,设置其余类别item的不透明度*/

}
至此,此页面特效的所有样式代码都编写完了,真心希望大家能受到启发,同时也希望大家喜欢我的教程。

谢谢大家,咱们下个实战开发案例再会。
CSS3实战开发: 纯CSS实现图片过滤分类显示特效的更多相关文章
- CSS3实战开发:使用CSS3实现photoshop的过滤效果
原文:CSS3实战开发:使用CSS3实现photoshop的过滤效果 我们知道,使用Photoshop来调整图像的亮度和对比度,或者将图片转化为灰度等等是很常见的功能.今天我将给大家介绍几个新特性,我 ...
- CSS3实战开发 表单发光特效实战开发
首先,我们先准备好html代码: <!doctype html> <html> <head> <meta charset="utf-8"& ...
- 纯CSS实现的风车转动效果特效演示
<!DOCTYPE html> <html> <head> <meta http-equiv="Content-Type" content ...
- 2.纯 CSS 创作一个矩形旋转 loader 特效
原文地址:2.纯 CSS 创作一个矩形旋转 loader 特效 扩展后地址:https://scrimba.com/c/cNJVWUR 扩展地址:https://codepen.io/pen/ HT ...
- 1.纯 CSS 创作一个按钮文字滑动特效 + 弹幕(残缺)
原文地址:1# 视频演示如何用纯 CSS 创作一个按钮文字滑动特效 扩展后地址:https://scrimba.com/c/cJkzMfd HTML代码: <html> <head& ...
- 纯CSS + 媒体查询实现网页导航特效
纯css+媒体查询实现网页导航特效 附上效果图: 代码如下,复制即可使用: <!DOCTYPE html> <html lang="en"> <hea ...
- 利用CSS3 filter:drop-shadow实现纯CSS改变图片颜色
体验更优排版请移步原文:http://blog.kwin.wang/programming/css3-filter-drop-shadow-change-color.html 之前做项目过程中有时候遇 ...
- CSS3实战开发: 折角效果实战开发
<!DOCTYPE html> <html> <head> <meta charset="utf-9"> <meta name ...
- 纯CSS实现图片
在Web开发中.通过CSS代码也能够实现一些简单的图片,当然,假设你有耐心,也能够实现较为复杂的图片噢. 那么请问为什么有图片不去用而须要用CSS来实现呢?一是由于性能的原因,图片带给server和c ...
随机推荐
- 有关XCode6(iOS8)UITableViewCell与iOS7在UITableViewCell问题
简而言之: iOS6在cell的层次关系2层,但在iOS7层次结构成为3层,但在iOS8的SDK在UITableViewCell层次结构发生了变化2层. 如果它们是UITableViewCell加入到 ...
- js 网上见到的动画函数 备份
<script> function startMove(obj,json,fn){ clearInterval(obj.timer); obj.timer = setInterval(fu ...
- “采用VS2010至MFC4.2发育”最后溶液
我层2010年这方面的研究进行了简单(http://blog.csdn.net/boweirrking/article/details/5477062),那时候没有深入思考过这当中的原理,最终给出的方 ...
- Android 在非主线程无法操作UI意识
Android在应用显示Dialog是一个非常easy事儿,但我从来没有尝试过Service里面展示Dialog. 经验UI操作要在主线程,本地的服务Service是主线程里没错,可是远程servic ...
- Vivado的helloword计划(一个):硬件project部分
硬件平台:ZedBoard 软件平台:vivado2013.3 本演示样例通过综合.实现,生成比特流,发送到SDK实现. 启动vivado而且创建一个项目 依据提示操作一步步创建新项目的时候记得选择R ...
- Qt5该插件机制(4)--QtMeta信息窗口小部件metaData
<<<<<<<<<<<<<<<<<<<<<<<<< ...
- NSIS:延时启动软件的几个方法及探索
原文NSIS:延时启动软件的几个方法及探索 有时候,我们想要某软件开机启动,但又不要拖慢开机速度,那么,延时启动技术就显得比较重要了.轻狂在这方面曾经研究过,也实现了自己想要的功能,看看我是怎么做的吧 ...
- Web 服务器 (IIS) 角色
原文:Web 服务器 (IIS) 角色 1. 对于默认安装,请在命令行提示符下键入以下命令,然后按 Enter: start /w pkgmgr /iu:IIS-WebServerRole;WAS-W ...
- Do a “git export” (like “svn export”)?(转)
Probably the simplest way to achieve this is with git archive. If you really need just the expanded ...
- Android(Lollipop/5.0) Material Design(六) 使用图像
Material Design列 Android(Lollipop/5.0)Material Design(一) 简单介绍 Android(Lollipop/5.0)Material Design(二 ...