
Vue + Element UI 实现权限管理系统(更换皮肤主题)
自定义主题
命令行主题工具
1.安装主题工具
首先安装「主题生成工具」,可以全局安装或者安装在当前项目下,推荐安装在项目里,方便别人 clone 项目时能直接安装依赖并启动。
yarn add element-theme --dev
2.安装chalk主题
安装白垩主题,可以从 npm 安装或者从 GitHub 拉取最新代码,这里从 npm 安装。
yarn add element-theme-chalk -D
3.初始化变量文件
主题生成工具安装成功后,如果全局安装可以在命令行里通过 et 调用工具,如果安装在当前目录下,需要通过 node_modules/.bin/et 访问到命令。执行 -i 初始化变量文件。默认输出到 element-variables.scss,当然你可以传参数指定文件输出目录。
node_modules/.bin/et -i
执行命令

命令执行成功之后,会在根目录生成 scss文件 element-variables.scss 。
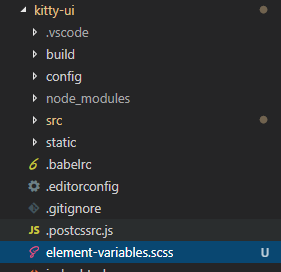
4、修改主题色
在 element-variables.scss 文件里修改 $–color-primary:#4b5f6e,即你想要的主题颜色
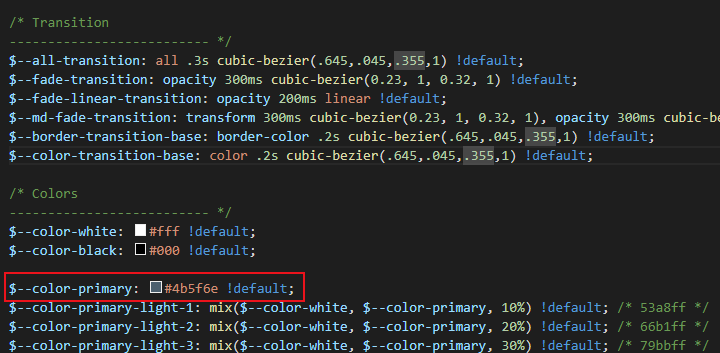
5、编译主题
执行主题编译命令生成主题,根目录会生成一个theme的文件夹 。
node_modules/.bin/et

6、引入自定义主题
把生成的主题按颜色改名放置 src/theme 目录下。
在 main.js 中 import ‘所在路径/index.css’。
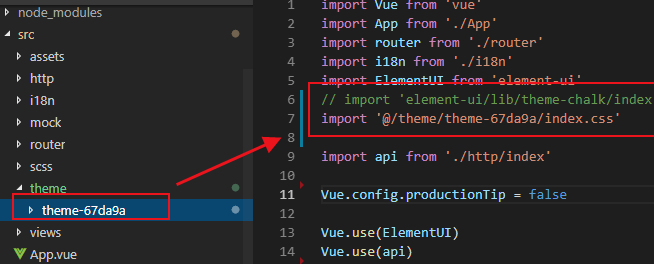
7、效果展示
重新加载后,我们看到按钮颜色已经不是默认的蓝色了。
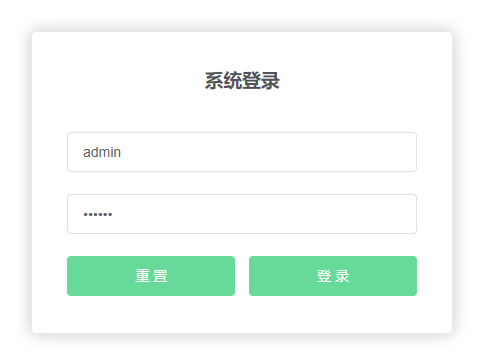
动态换肤器方式
1. 在下图位置添加封装的换肤组件。
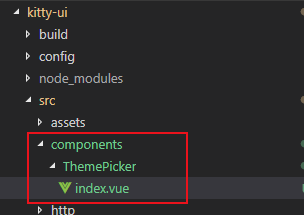
index.vue

<template>

  <el-color-picker

    class="theme-picker"

    popper-class="theme-picker-dropdown"

    v-model="theme"></el-color-picker>

</template>

<script>

const version = require('element-ui/package.json').version // element-ui version from node_modules

const ORIGINAL_THEME = '#409EFF' // default color

export default {

  data() {

    return {

      chalk: '', // content of theme-chalk css

      theme: ORIGINAL_THEME

    }

  },

  watch: {

    theme(val, oldVal) {

      if (typeof val !== 'string') return

      const themeCluster = this.getThemeCluster(val.replace('#', ''))

      const originalCluster = this.getThemeCluster(oldVal.replace('#', ''))

      console.log(themeCluster, originalCluster)

      const getHandler = (variable, id) => {

        return () => {

          const originalCluster = this.getThemeCluster(ORIGINAL_THEME.replace('#', ''))

          const newStyle = this.updateStyle(this[variable], originalCluster, themeCluster)

          let styleTag = document.getElementById(id)

          if (!styleTag) {

            styleTag = document.createElement('style')

            styleTag.setAttribute('id', id)

            document.head.appendChild(styleTag)

          }

          styleTag.innerText = newStyle

        }

      }

      const chalkHandler = getHandler('chalk', 'chalk-style')

      if (!this.chalk) {

        const url = `https://unpkg.com/element-ui@${version}/lib/theme-chalk/index.css`

        this.getCSSString(url, chalkHandler, 'chalk')

      } else {

        chalkHandler()

      }

      const styles = [].slice.call(document.querySelectorAll('style'))

        .filter(style => {

          const text = style.innerText

          return new RegExp(oldVal, 'i').test(text) && !/Chalk Variables/.test(text)

        })

      styles.forEach(style => {

        const { innerText } = style

        if (typeof innerText !== 'string') return

        style.innerText = this.updateStyle(innerText, originalCluster, themeCluster)

      })

      this.$message({

        message: '换肤成功',

        type: 'success'

      })

    }

  },

  methods: {

    updateStyle(style, oldCluster, newCluster) {

      let newStyle = style

      oldCluster.forEach((color, index) => {

        newStyle = newStyle.replace(new RegExp(color, 'ig'), newCluster[index])

      })

      return newStyle

    },

    getCSSString(url, callback, variable) {

      const xhr = new XMLHttpRequest()

      xhr.onreadystatechange = () => {

        if (xhr.readyState === 4 && xhr.status === 200) {

          this[variable] = xhr.responseText.replace(/@font-face{[^}]+}/, '')

          callback()

        }

      }

      xhr.open('GET', url)

      xhr.send()

    },

    getThemeCluster(theme) {

      const tintColor = (color, tint) => {

        let red = parseInt(color.slice(0, 2), 16)

        let green = parseInt(color.slice(2, 4), 16)

        let blue = parseInt(color.slice(4, 6), 16)

        if (tint === 0) { // when primary color is in its rgb space

          return [red, green, blue].join(',')

        } else {

          red += Math.round(tint * (255 - red))

          green += Math.round(tint * (255 - green))

          blue += Math.round(tint * (255 - blue))

          red = red.toString(16)

          green = green.toString(16)

          blue = blue.toString(16)

          return `#${red}${green}${blue}`

        }

      }

      const shadeColor = (color, shade) => {

        let red = parseInt(color.slice(0, 2), 16)

        let green = parseInt(color.slice(2, 4), 16)

        let blue = parseInt(color.slice(4, 6), 16)

        red = Math.round((1 - shade) * red)

        green = Math.round((1 - shade) * green)

        blue = Math.round((1 - shade) * blue)

        red = red.toString(16)

        green = green.toString(16)

        blue = blue.toString(16)

        return `#${red}${green}${blue}`

      }

      const clusters = [theme]

      for (let i = 0; i <= 9; i++) {

        clusters.push(tintColor(theme, Number((i / 10).toFixed(2))))

      }

      clusters.push(shadeColor(theme, 0.1))

      return clusters

    }

  }

}

</script>

<style>

.theme-picker .el-color-picker__trigger {

  vertical-align: middle;

}

.theme-picker-dropdown .el-color-dropdown__link-btn {

  display: none;

}

</style>
2.直接在组件中引用
在 Home.vue 中引入
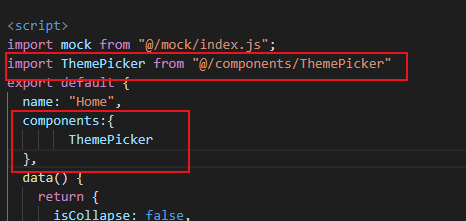
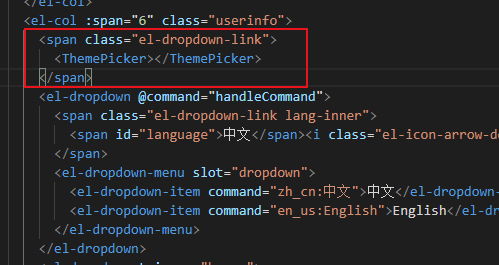
在语言切换左边添加换肤组件
3.换肤测试
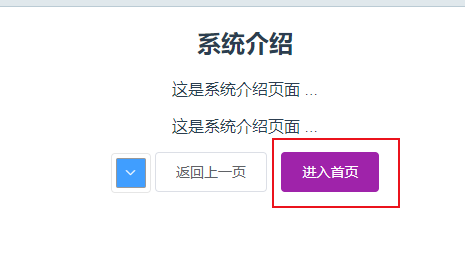
点击组件,选择一个颜色确定
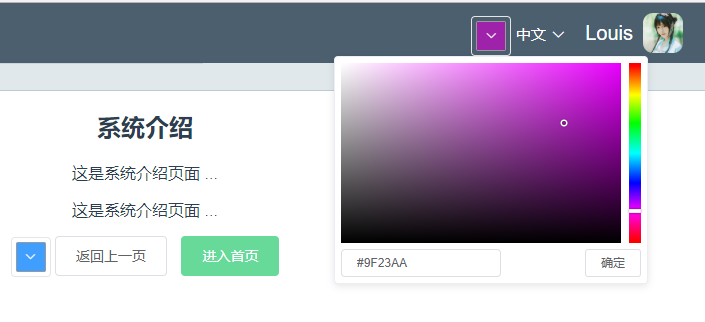
我们看到相关主题颜色即刻生效
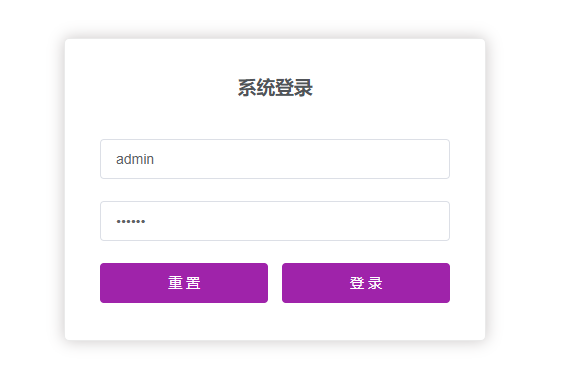
退回登录界面查看
Vue + Element UI 实现权限管理系统(更换皮肤主题)的更多相关文章
- Vue + Element UI 实现权限管理系统
Vue + Element UI 实现权限管理系统 前端篇(一):搭建开发环境 https://www.cnblogs.com/xifengxiaoma/p/9533018.html
- Vue + Element UI 实现权限管理系统 前端篇(十三):页面权限控制
权限控制方案 既然是后台权限管理系统,当然少不了权限控制啦,至于权限控制,前端方面当然就是对页面资源的访问和操作控制啦. 前端资源权限主要又分为两个部分,即导航菜单的查看权限和页面增删改操作按钮的操作 ...
- Vue + Element UI 实现权限管理系统 前端篇(十一):第三方图标库
使用第三方图标库 用过Elment的同鞋都知道,Element UI提供的字体图符少之又少,实在是不够用啊,幸好现在有不少丰富的第三方图标库可用,引入也不会很麻烦. Font Awesome Font ...
- Vue + Element UI 实现权限管理系统(第三方图标库)
使用第三方图标库 用过Elment的同鞋都知道,Element UI提供的字体图符少之又少,实在是不够用啊,幸好现在有不少丰富的第三方图标库可用,引入也不会很麻烦. Font Awesome Font ...
- Vue + Element UI 实现权限管理系统 前端篇(六):更换皮肤主题
自定义主题 命令行主题工具 1.安装主题工具 首先安装「主题生成工具」,可以全局安装或者安装在当前项目下,推荐安装在项目里,方便别人 clone 项目时能直接安装依赖并启动. yarn add ele ...
- Vue + Element UI 实现权限管理系统(搭建开发环境)
技术基础 开发之前,请先熟悉下面的4个文档 vue.js2.0中文, 优秀的JS框架 vue-router, vue.js 配套路由 vuex,vue.js 应用状态管理库 Element,饿了么提供 ...
- Vue + Element UI 实现权限管理系统 前端篇(一):搭建开发环境
技术基础 开发之前,请先熟悉下面的4个文档 vue.js2.0中文, 优秀的JS框架 vue-router, vue.js 配套路由 vuex,vue.js 应用状态管理库 Element,饿了么提供 ...
- Vue + Element UI 实现权限管理系统 前端篇(十二):用户管理模块
用户管理模块 添加接口 在 http/moduls/user.js 中添加用户管理相关接口. import axios from '../axios' /* * 用户管理模块 */ // 保存 exp ...
- Vue + Element UI 实现权限管理系统 (管理应用状态)
使用 Vuex 管理应用状态 1. 引入背景 像先前我们是有导航菜单栏收缩和展开功能的,但是因为组件封装的原因,隐藏按钮在头部组件,而导航菜单在导航菜单组件,这样就涉及到了组件收缩状态的共享问题.收缩 ...
随机推荐
- web 前端知识体系 网站资源分析
一.比较全面的思维导图 二.相关资源 1. 布局框架:Bootstrap: http://getbootstrap.com/Foundation: http://foundation.zurb.com ...
- python入门知识点(上)
1.硬件系统: 主机部分: 1.中央处理器(CPU): 电脑的大脑 运算器: 数值计算和逻辑判断 控制器: 可以电脑中的各个部件协同工作 2.内部存储器: 随机存储器:内存条 使用电信号表示数据; 特 ...
- Semana i 2018
Semana i 2018 A Giga-Kilo-Gigabyte 思路: dp水题 代码: #pragma GCC optimize(2) #pragma GCC optimize(3) #pra ...
- Java原子操作类AtomicInteger应用场景
Java中有那么一些类,是以Atomic开头的.这一系列的类我们称之为原子操作类.以最简单的类AtomicInteger为例.它相当于一个int变量,我们执行Int的 i++ 的时候并不是一个原子操作 ...
- linux下逻辑卷管理 调整分区大小
[root@localhost ~]# df -h Filesystem Size Used Avail Use% Mounted on /dev/mapper/VolGroup-lv_root 50 ...
- 高并发之限流RateLimiter(二)
Guava RateLimiter提供了令牌桶算法实现:平滑突发限流(SmoothBursty)和平滑预热限流(SmoothWarmingUp)实现. SmoothBursty:令牌生成速度恒定 @T ...
- springboot---->javax.servlet.ServletException
springboot访问静态资源时发生以下异常: javax.servlet.ServletException: Circular view path [login]: would dispatch ...
- webpack添加热更新
之前的wbepack一直没有加上热更新,这是一种遗憾,今天终于加上去了,看不懂我博客的可以看这篇文章:http://blog.csdn.net/hyy1115/article/details/5302 ...
- 关于Handler中Message的创建问题
Message用来定义一个包含任意数据的消息对象,这个消息对象是可以被发送给Handler处理的. 我们最好通过Message.obtain()和Handler.obtatinMessage()来得到 ...
- Spring AOP实现Mysql数据库主从切换(一主多从)
设置数据库主从切换的原因:数据库中经常发生的是“读多写少”,这样读操作对数据库压力比较大,通过采用数据库集群方案, 一个数据库是主库,负责写:其他为从库,负责读,从而实现读写分离增大数据库的容错率. ...