
项目构建之maven篇:5.仓库及nexus创建私服-2
下载安装
改动默认端口:
home\conf\nexus.properties
# Sonatype Nexus

# ==============

# This is the most basic configuration of Nexus.

# Jetty section

application-port=9080

application-host=0.0.0.0

nexus-webapp=${bundleBasedir}/nexus

nexus-webapp-context-path=/nexus

# Nexus section

nexus-work=${bundleBasedir}/../sonatype-work/nexus

runtime=${bundleBasedir}/nexus/WEB-INF
安装与启动
home\bin\nexus.bat
![]()
watermark/2/text/aHR0cDovL2Jsb2cuY3Nkbi5uZXQvd29iZW5kaWFua3Vu/font/5a6L5L2T/fontsize/400/fill/I0JBQkFCMA==/dissolve/70/gravity/SouthEast" alt="" />
登录
http://localhost:9080/nexus
用户名、密码:admin/admin123
![]()
watermark/2/text/aHR0cDovL2Jsb2cuY3Nkbi5uZXQvd29iZW5kaWFua3Vu/font/5a6L5L2T/fontsize/400/fill/I0JBQkFCMA==/dissolve/70/gravity/SouthEast" alt="" />
仓库说明
![]()
watermark/2/text/aHR0cDovL2Jsb2cuY3Nkbi5uZXQvd29iZW5kaWFua3Vu/font/5a6L5L2T/fontsize/400/fill/I0JBQkFCMA==/dissolve/70/gravity/SouthEast" alt="" />
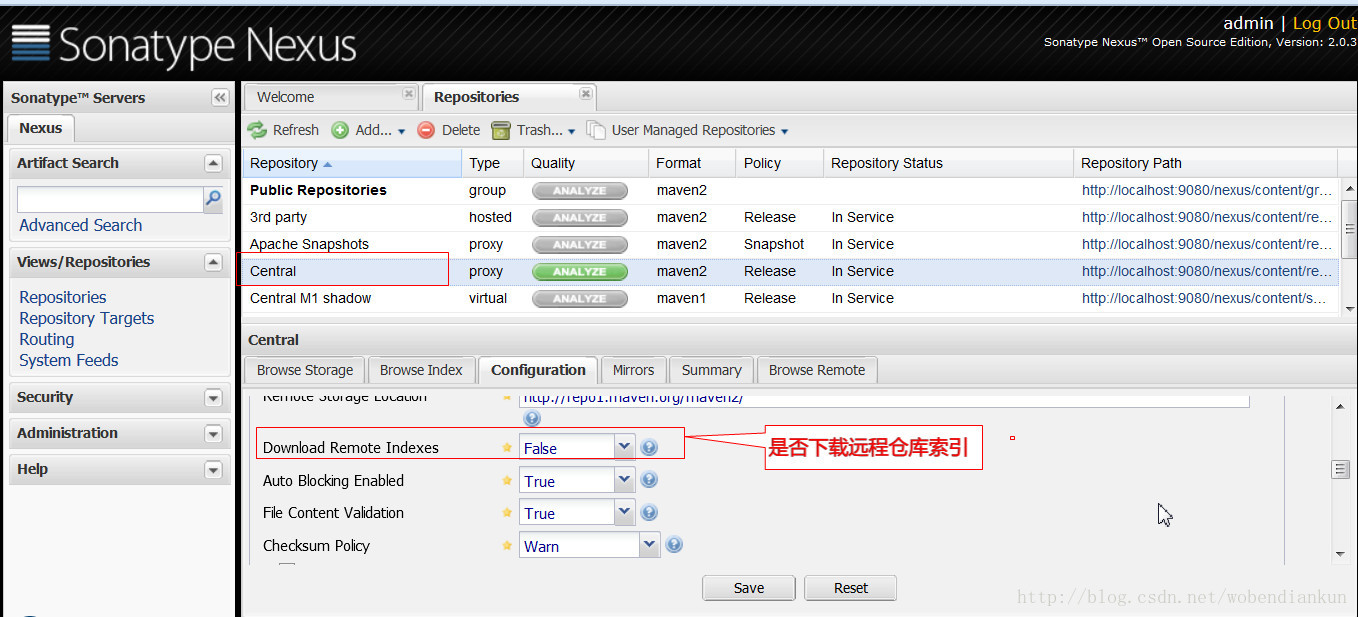
索引:
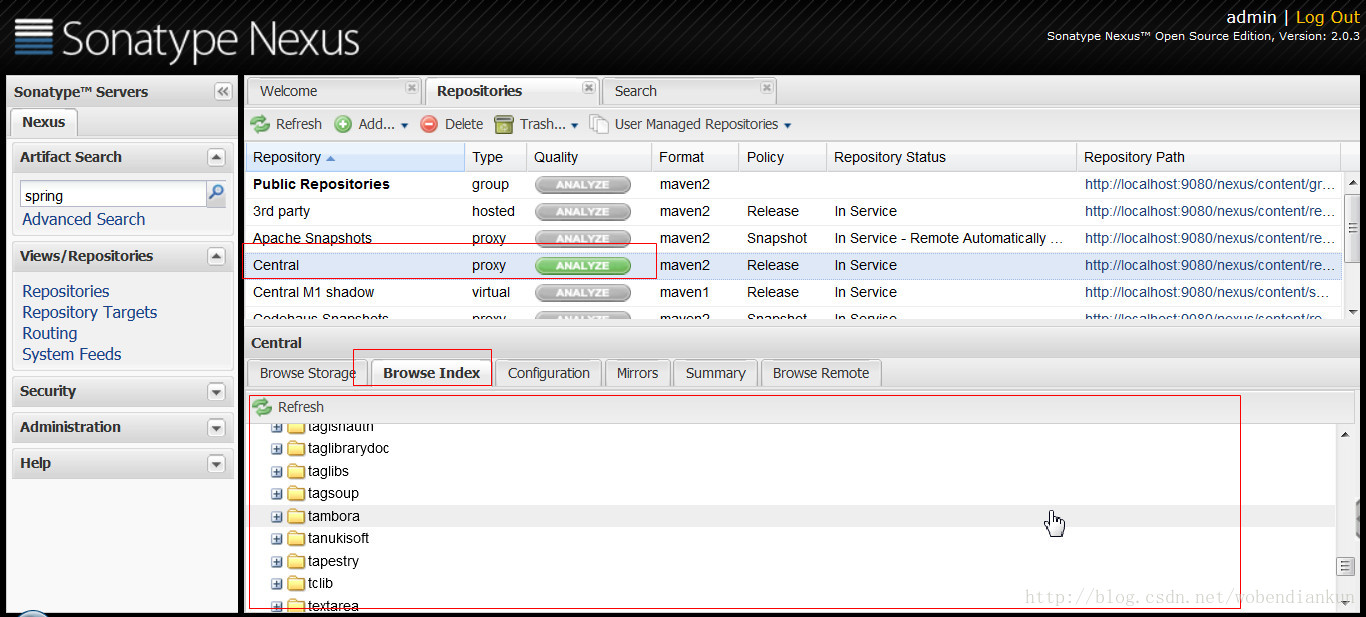
有些远程仓库拥有索引。下载其索引后,即使没有缓存远程仓库的jar包,我们也能够在本地搜索jar包的信息
手动更新索引
停止服务
删除 nexus-2.0.3-bundle\sonatype-work\nexus\indexer\central-ctx 下的索引
将下载索引包的全部内容拷贝到 nexus-2.0.3-bundle\sonatype-work\nexus\indexer\central-ctx ,重新启动服务且又一次登陆
![]()
watermark/2/text/aHR0cDovL2Jsb2cuY3Nkbi5uZXQvd29iZW5kaWFua3Vu/font/5a6L5L2T/fontsize/400/fill/I0JBQkFCMA==/dissolve/70/gravity/SouthEast" alt="" />
查看索引
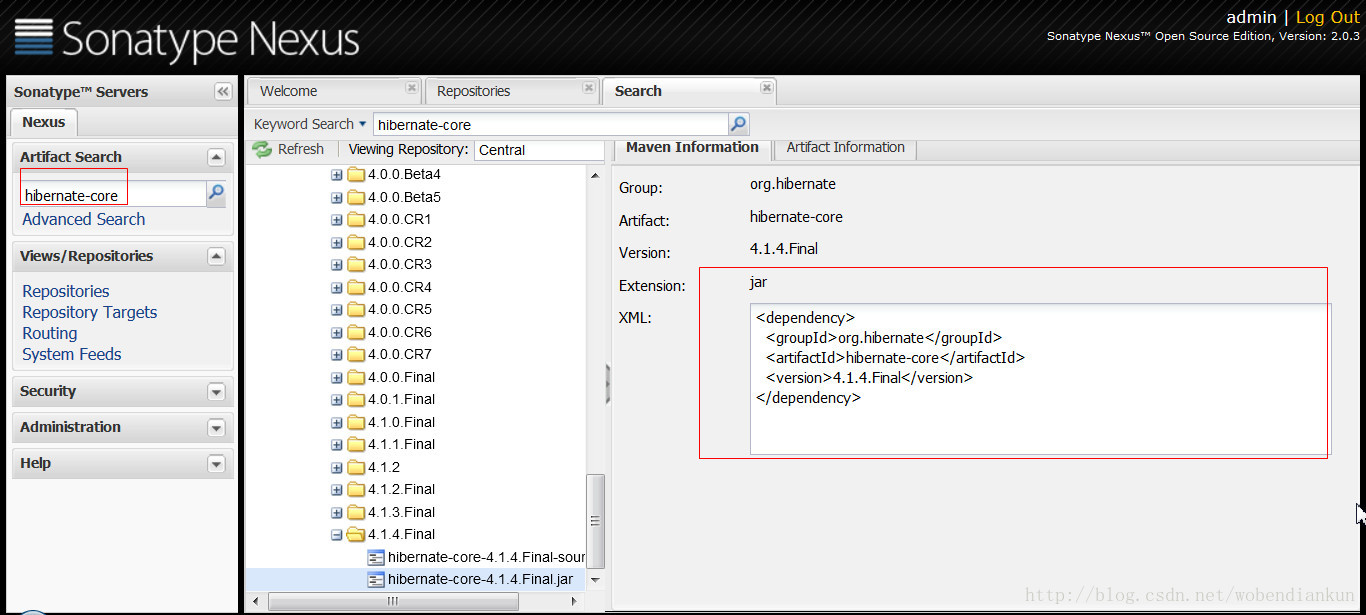
搜索服务
设置镜像
  <mirrors>

	  <mirror>

      <id>mirrorId</id>

      <mirrorOf>*</mirrorOf>

      <name>Human Readable Name for this Mirror.</name>

      <url>http://localhost:9080/nexus/content/groups/public/</url>

    </mirror>

  </mirrors>
当设置 mirrorOf 为 "*" 时,pom.xml中仓库是能够不用配置了
项目中增加新的依赖,将从私服中下载
		<dependency>

			<groupId>com.demo.test</groupId>

			<artifactId>test-b</artifactId>

			<version>0.0.1-SNAPSHOT</version>

		</dependency>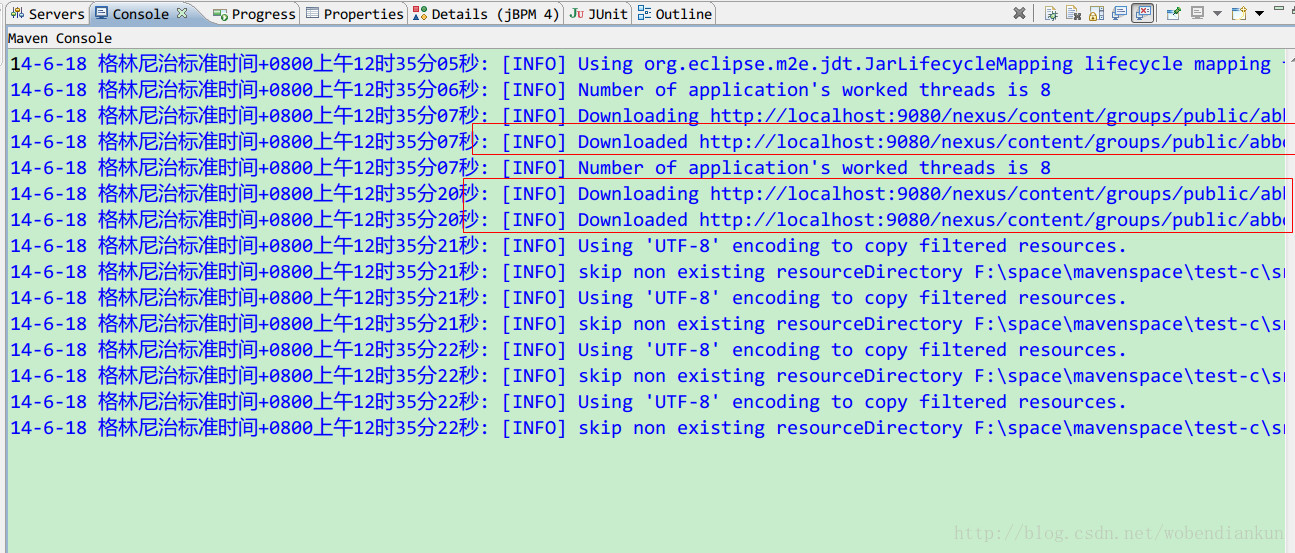
项目部署及远程仓库认证
pom.xml
<project xmlns="http://maven.apache.org/POM/4.0.0" xmlns:xsi="http://www.w3.org/2001/XMLSchema-instance"

	xsi:schemaLocation="http://maven.apache.org/POM/4.0.0 http://maven.apache.org/xsd/maven-4.0.0.xsd">

	<modelVersion>4.0.0</modelVersion>

	<groupId>com.demo.test</groupId>

	<artifactId>test-c</artifactId>

	<version>0.0.1-SNAPSHOT</version>

	<packaging>jar</packaging>

	<name>test-c</name>

	<url>http://maven.apache.org</url>

	<properties>

		<project.build.sourceEncoding>UTF-8</project.build.sourceEncoding>

	</properties>

	<dependencies>

		<dependency>

			<groupId>junit</groupId>

			<artifactId>junit</artifactId>

			<version>4.10</version>

			<scope>test</scope>

		</dependency>

		<dependency>

			<groupId>com.demo.test</groupId>

			<artifactId>test-a</artifactId>

			<version>0.0.1-SNAPSHOT</version>

		</dependency>

		<dependency>

			<groupId>com.demo.test</groupId>

			<artifactId>test-d</artifactId>

			<version>0.0.1-SNAPSHOT</version>

			<exclusions>

				<exclusion>

					<groupId>commons-logging</groupId>

					<artifactId>commons-logging</artifactId>

				</exclusion>

			</exclusions>

		</dependency>

		<dependency>

			<groupId>com.demo.test</groupId>

			<artifactId>test-b</artifactId>

			<version>0.0.1-SNAPSHOT</version>

		</dependency>

		<dependency>

		  <groupId>abbot</groupId>

		  <artifactId>abbot</artifactId>

		  <version>0.12.3</version>

		</dependency>

	</dependencies>

	<!-- 部署 -->

	<distributionManagement>

		<!-- 公布版布置仓库 -->

		<repository>

			<id>test-c release</id>

			<name>Test-c Release</name>

			<url>http://localhost:9080/nexus/content/repositories/releases/</url>

		</repository>

		<!-- 快照版布置仓库 -->

		<snapshotRepository>

			<id>test-c snapshot</id>

			<name>Test-c Snapshot</name>

			<url>http://localhost:9080/nexus/content/repositories/snapshots/</url>

		</snapshotRepository>

	</distributionManagement>

</project>
部署配置
	<!-- 部署 -->

	<distributionManagement>

		<!-- 公布版布置仓库 -->

		<repository>

			<id>test-c release</id>

			<name>Test-c Release</name>

			<url>http://localhost:9080/nexus/content/repositories/releases/</url>

		</repository>

		<!-- 快照版布置仓库 -->

		<snapshotRepository>

			<id>test-c snapshot</id>

			<name>Test-c Snapshot</name>

			<url>http://localhost:9080/nexus/content/repositories/snapshots/</url>

		</snapshotRepository>

	</distributionManagement>
仓库认证
settings.xml
	<servers>

	 <server>

      <id>test-c release</id>

      <username>deployment</username>

      <password>deployment123</password>

    </server>

	<server>

      <id>test-c snapshot</id>

      <username>deployment</username>

      <password>deployment123</password>

    </server>

  </servers>
执行命令
mvn clean deploy登录私服查看结果
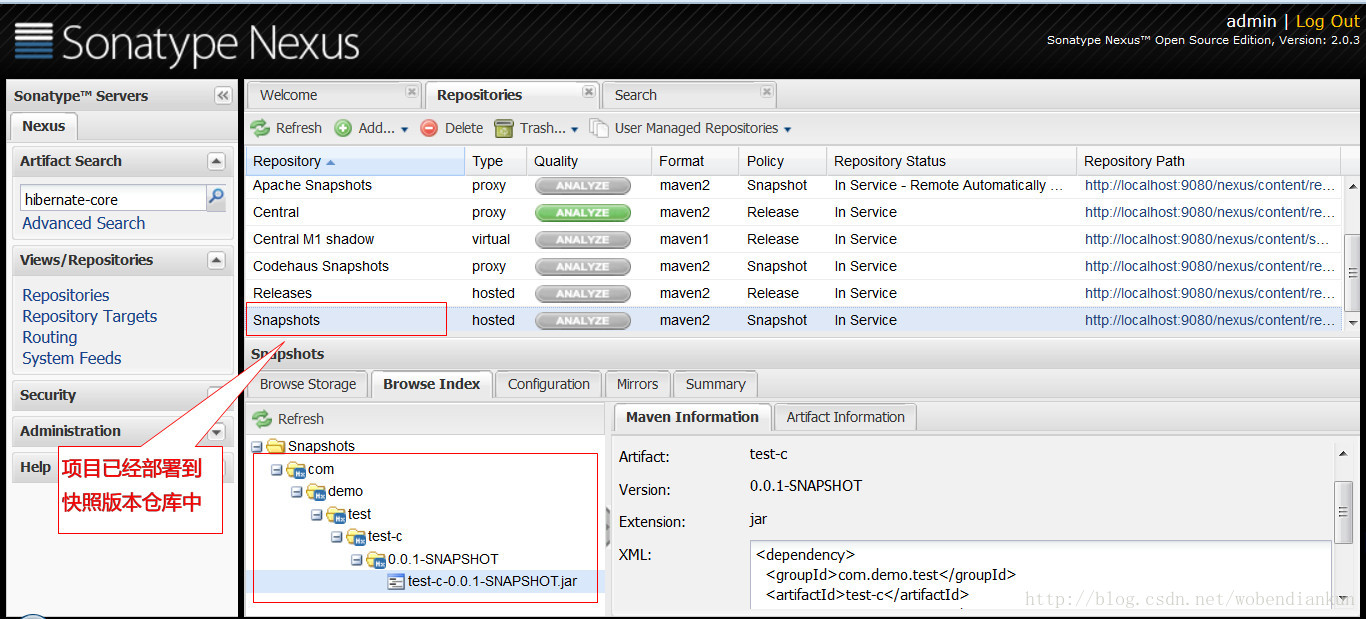
快照版本号:
watermark/2/text/aHR0cDovL2Jsb2cuY3Nkbi5uZXQvd29iZW5kaWFua3Vu/font/5a6L5L2T/fontsize/400/fill/I0JBQkFCMA==/dissolve/70/gravity/SouthEast" alt="" />
项目构建之maven篇:5.仓库及nexus创建私服-2的更多相关文章
- 项目构建之maven篇:2.HelloWorld项目构建过程
文件结构说明: 项目构建生命周期: 清理 编译 測试 打包 执行 部署 清理与编译 hello\pom.xml POM:Project Object Model,项目对象模型 pom.xml与ant的 ...
- 项目构建之maven篇:6.生命周期与插件
项目生命周期 清理 初始化 编译 測试 打包 部署 三套生命周期 1.clean pre-clean 运行一些须要在clean之前完毕的工作 clean 移除全部上一次构建生成的文件 post-cle ...
- 项目构建之maven篇:1.环境搭建
maven下载: 下载地址 环境变量设置 watermark/2/text/aHR0cDovL2Jsb2cuY3Nkbi5uZXQvd29iZW5kaWFua3Vu/font/5a6L5L2T/fon ...
- 项目构建之maven篇:3.m2eclipse使用
m2eclipse的安装 略 设置maven文件夹 设置用户个性化的maven配置 导入mavenproject 源码下载 watermark/2/text/aHR0cDovL2Jsb2cuY3Nkb ...
- Java项目工程化之项目构建工具Maven
欢迎查看Java开发之上帝之眼系列教程,如果您正在为Java后端庞大的体系所困扰,如果您正在为各种繁出不穷的技术和各种框架所迷茫,那么本系列文章将带您窥探Java庞大的体系.本系列教程希望您能站在上帝 ...
- 07 Maven 使用Nexus创建私服
7. Maven 使用Nexus创建私服 私服不是 Maven 的核心概念,它仅仅是一种衍生出来的特殊的 Maven 仓库.通过建立自己的私服,就可以降低中央仓库负荷.节省外网带宽.加速 Maven ...
- 项目构建工具maven的使用方法
最近在开发javaweb项目中有用到maven,以前并不是很了解,于是学习了一些相关内容,记之共享. 本篇内容在Windows环境下实施,JDK版本使用的1.7.0_79. 一.maven是什么? 简 ...
- 走进JavaWeb技术世界12:从手动编译打包到项目构建工具Maven
小李的Build之路(上) 转自: 刘欣 码农翻身 2016-07-10 摘要:手工Build的烦恼要不是为了和女朋友留在一个城市,小李肯定去北上广奋斗去了.现在他只能留在这个2.5线城市,进入这家软 ...
- java项目构建工具Maven
一.java-maven常用命令 mvn archetype:create 创建Maven项目 mvn compile 编译源代码 mvn deploy 发布项目 mvn test-compile 编 ...
随机推荐
- :命令模式:Command
#ifndef __COMMAND_H__ #define __COMMAND_H__ #include <vector> #include "Equipment.h" ...
- 201621123001 《Java程序设计》第13周学习总结
1. 本周学习总结 以你喜欢的方式(思维导图.OneNote或其他)归纳总结多网络相关内容. 通过IP地址和端口号可以进行建立Socket对象,然后进行通信 使用Socket的一般步骤: 建立Sock ...
- mysql创建存储过程,定时任务,定时删除log
-- 创建存储过程 清除30天前的日志create procedure deleteLog()BEGINdelete from contract_vlog where create_time<D ...
- 使用FileResult导出Excel数据文件
用的是Html拼接成Table表格的方式,返回 FileResult 输出一个二进制的文件. 第一种:使用FileContentResult // 通过使用文件内容,内容类型,文件名称创建一个File ...
- TensorFlow函数:tf.truncated_normal
tf.truncated_normal函数 tf.truncated_normal( shape, mean=0.0, stddev=1.0, dtype=tf.float32, seed=None, ...
- 基于centos的freeradius高可用lvs(UDP)
最近在做freeradius的高可用配置,使用lvs的vip做轮询: freeradius的配置见前面的文章: 下面是lvs的keepalived的配置: global_defs { router_i ...
- shell连接ubuntu流程
{ubuntu}下载 sudo apt-get install tasksel {选择安装SSH server服务)[有些ubuntu默认是安装好ssh的,只是没有配置,和开启ssh服务] s ...
- Java NIO系列教程
http://ifeve.com/overview/ http://tutorials.jenkov.com/java-nio/nio-vs-io.html
- python的time模块
#encoding=utf-8 import time # 返回时间戳 print time.time() # 延迟运行单位为s,如下为延迟3s time.sleep(3) # 转换时间戳为时间元组( ...
- 树莓派与node.js —— onoff、dht
1. 发光二极管 tm-onoff var Gpio = require('tm-onoff').Gpio, led = new Gpio(17, 'out'), button = new Gpio( ...