Spring框架学习03——Spring Bean 的详解
1、Bean 的配置
Spring可以看做一个大型工厂,用于生产和管理Spring容器中的Bean,Spring框架支持XML和Properties两种格式的配置文件,在实际开发中常用XML格式的配置文件。
XML配置文件的跟标签是<beans>,<beans>中包含了多个<bean>子元素,每个<bean>元素定义一个Bean,并描述Bean如何被装配到Spring容器中。
<bean>元素的常用属性及其子元素说明如下:
- id属性:Bean在BeanFactory中的唯一标识,在代码中通过BeanFactory获取Bean实例时需要以此作为索引名称;
- name属性:和id属性的用法类似,该属性的值中可以包含特殊字符;
- class属性:Bean的具体实现类,使用类的名(例如 dao.TestDIDaoImpl);
- scope属性:指定Bean实例的作用域;
- <constructor-arg>子元素:<bean>元素的子元素,使用构造方法注入,指定构造方法的参数。该元素的index属性指定参数的序号,ref属性指定对BeanFactory中其他Bean的引用关系,type属性指定参数类型,value属性指定参数的常量值;
- <property>子元素:<bean>元素的子元素,用于设置一个属性。该元素的name属性指定Bean实例中相应的属性名称,value属性指定Bean的属性值,ref属性指定属性对BeanFactory中其他Bean的引用关系;
- <list>子元素:<property>元素的子元素,用于封装List或数组类型的依赖注入;
- <map>子元素:<property>元素的子元素,用于封装Map类型的依赖注入;
- <set>子元素:<property>元素的子元素,用于封装Set类型的依赖注入;
- <entry>子元素:<map>元素的子元素,用于设置一个键值对;
2、Bean 的实例化
Spring框架实例化Bean有3种方法,即构造方法实例化、静态工厂实例化、实例工厂实例化。
2.1、构造方法实例化
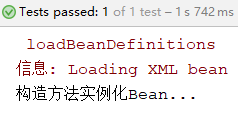
在Spring框架中,Spring容器可以调用Bean对应类中的无参构造方法来实例化Bean,这种方法称为构造方法实例化。
在src目录下创建entity包,并创建BeanClass类,代码如下:
package entity;

public class BeanClass {

    public BeanClass() {

        System.out.println("构造方法实例化Bean...");

    }

}
在applicationContext.xml中配置Bean
<?xml version="1.0" encoding="UTF-8"?>

<beans xmlns="http://www.springframework.org/schema/beans"

       xmlns:xsi="http://www.w3.org/2001/XMLSchema-instance"

       xsi:schemaLocation="http://www.springframework.org/schema/beans http://www.springframework.org/schema/beans/spring-beans.xsd">

    <!--构造方法实例化Bean-->

    <bean id="beanClass" class="entity.BeanClass"></bean>

</beans>
测试代码
@Test

public void demo(){

    //初始化Spring容器ApplicationContext,加载配置文件

    ApplicationContext application = new ClassPathXmlApplicationContext("applicationContext.xml");

    //通过容器获取实例

    BeanClass beanClass = (BeanClass) application.getBean("beanClass");

}
运行结果
2.2、静态工厂实例化
创建BeanClass类,代码如下:
package entity;

public class BeanClass {

    public BeanClass(String str){

        System.out.println(str);

    }

}
创建静态工厂类,代码如下:
package entity;
public class BeanStaticFactory {
public static BeanClass createBean(){
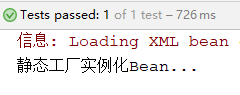
return new BeanClass("静态工厂实例化Bean...");
}
}
在applicationContext.xml配置静态工厂Bean
<?xml version="1.0" encoding="UTF-8"?>

<beans xmlns="http://www.springframework.org/schema/beans"

       xmlns:xsi="http://www.w3.org/2001/XMLSchema-instance"

       xsi:schemaLocation="http://www.springframework.org/schema/beans http://www.springframework.org/schema/beans/spring-beans.xsd">

    <!--静态工厂实例化Bean,factory-method属性指定静态方法-->

    <bean id="beanStaticFactory" class="entity.BeanStaticFactory" factory-method="createBean"></bean>

</beans>
测试代码
@Test

public void demo(){

    //初始化Spring容器ApplicationContext,加载配置文件

    ApplicationContext application = new ClassPathXmlApplicationContext("applicationContext.xml");

    //通过容器获取实例

    BeanClass beanClass = (BeanClass) application.getBean("beanStaticFactory");

}
运行结果
2.3、实例工厂实例化
创建BeanClass类,代码如下:
package entity;

public class BeanClass {

   /* public BeanClass() {

        System.out.println("构造方法实例化Bean...");

    }*/

    public BeanClass(String str){

        System.out.println(str);

    }

}
创建工厂类,代码如下:
package entity;
public class BeanFactory {
public BeanClass createBean(){
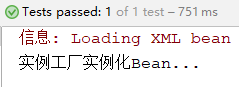
return new BeanClass("实例工厂实例化Bean...");
}
}
在applicationContext.xml中添加配置信息
<?xml version="1.0" encoding="UTF-8"?>

<beans xmlns="http://www.springframework.org/schema/beans"

       xmlns:xsi="http://www.w3.org/2001/XMLSchema-instance"

       xsi:schemaLocation="http://www.springframework.org/schema/beans http://www.springframework.org/schema/beans/spring-beans.xsd">

    <!--配置工厂-->

    <bean id="beanFactory" class="entity.BeanFactory"></bean>

    <!--实例工厂实例化Bean,

        factory-bean属性指定配置工厂,

        factory-method属性指定实例化Bean的方法

        -->

    <bean id="instanceBean" factory-bean="beanFactory" factory-method="createBean"></bean>

</beans>
测试代码
@Test

public void demo(){

    //初始化Spring容器ApplicationContext,加载配置文件

    ApplicationContext application = new ClassPathXmlApplicationContext("applicationContext.xml");

    //通过容器获取实例

    BeanClass beanClass = (BeanClass) application.getBean("instanceBean");

}
运行结果
3、Bean 的作用域
在Spring中不仅可以完成Bean的实例化,还可以为Bean指定作用域,具体用法是在<bean>元素上配置scope属性,属性的值有以下几种:
- sigleton:默认的作用域,使用singleton定义的Bean在Spring容器中只有一个Bean实例,即单例模式;
- prototype:Spring容器每次获取prototype定义的Bean,容器都将创建一个新的Bean实例,即多例模式;
- request:在一次HTTP请求中容器将返回一个Bean实例,不同的HTTP请求返回不同的Bean实例。仅在Web Spring应用程序上下文中使用;
- session:在一个HTTP Session中,容器将返回同一个Bean实例。仅在Web Spring应用程序上下文中使用;
- application:为每个ServletContext对象创建一个实例,即同一个应用共享一个Bean实例。仅在Web Spring应用程序上下文中使用;
- websocket:为每个WebSocket对象创建一个Bean实例。仅在Web Spring应用程序上下文中使用;
4、Bean 的生命周期
Spring初始化bean或销毁bean时,有时需要做一些处理工作,因此Spring可以在创建和销毁bean的时候调用bean的两个生命周期方法,代码示例如下:
创建BeanClass类
package entity;
public class BeanClass {
public void initMyself(){
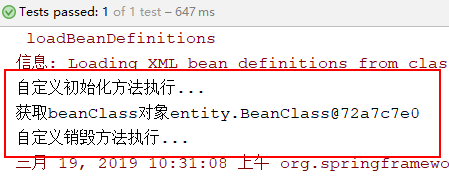
System.out.println("自定义初始化方法执行...");
}
public void destoryMyself(){
System.out.println("自定义销毁方法执行...");
}
}
在applicationContext.xml中配置Bean
<?xml version="1.0" encoding="UTF-8"?>

<beans xmlns="http://www.springframework.org/schema/beans"

       xmlns:xsi="http://www.w3.org/2001/XMLSchema-instance"

       xsi:schemaLocation="http://www.springframework.org/schema/beans http://www.springframework.org/schema/beans/spring-beans.xsd">

   <!--配置bean,

       使用init-method属性指定初始化方法,

       使用destroy-method属性指定销毁方法

       -->

    <bean id="beanClass" class="entity.BeanClass" init-method="initMyself" destroy-method="destoryMyself"></bean>

</beans>
测试代码
@Test

public void demo(){

    //为了方便演示销毁方法的执行,使用ClassPathXmlApplicationContext

    ClassPathXmlApplicationContext ctx = new ClassPathXmlApplicationContext("applicationContext.xml");

    //通过容器获取实例

    BeanClass beanClass = (BeanClass) ctx.getBean("beanClass");

    System.out.println("获取beanClass对象"+beanClass);

    ctx.close();//关闭容器,销毁Bean对象

}
运行结果
5、Bean的装配方式
5.1、基于XML配置的装配
创建BeanClass实体类
public class BeanClass {

    private String[] arrs;//数组类型

    private List<String> list;//List集合类型

    private Set<String> set;//Set集合类型

    private Map<String,Integer> map;//Map集合类型

    private Properties prop;//属性类型

    //getter和setter方法

    //toString()方法

}
在applicationContext.xml中配置Bean
<?xml version="1.0" encoding="UTF-8"?>

<beans xmlns="http://www.springframework.org/schema/beans"

       xmlns:xsi="http://www.w3.org/2001/XMLSchema-instance"

       xsi:schemaLocation="http://www.springframework.org/schema/beans http://www.springframework.org/schema/beans/spring-beans.xsd">

    <!--集合类型属性注入-->

    <bean id="beanClass" class="entity.BeanClass">

        <!--数组类型-->

        <property name="arrs">

            <list>

                <value>aa</value>

                <value>bb</value>

            </list>

        </property>

        <!--List集合-->

        <property name="list">

            <list>

                <value>111</value>

                <value>222</value>

            </list>

        </property>

        <!--Set集合-->

        <property name="set">

            <set>

                <value>aaa</value>

                <value>bbb</value>

            </set>

        </property>

        <!--Map集合-->

        <property name="map">

            <map>

                <entry key="aa" value="11"></entry>

                <entry key="bb" value="22"></entry>

            </map>

        </property>

        <!--Properties属性-->

        <property name="prop">

            <props>

                <prop key="aa">11</prop>

                <prop key="bb">22</prop>

            </props>

        </property>

    </bean>

</beans>
测试代码
@Test
public void demo(){
//初始化Spring容器ApplicationContext,加载配置文件
ClassPathXmlApplicationContext ctx = new ClassPathXmlApplicationContext("applicationContext.xml");
//通过容器获取实例
BeanClass beanClass = (BeanClass) ctx.getBean("beanClass");
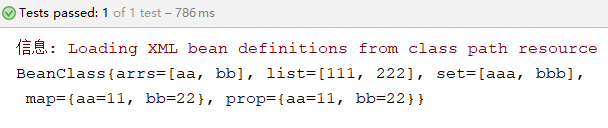
System.out.println(beanClass);
}
运行结果
5.2、基于注解的装配
在Spring框架中定义了一系列的注解,下面介绍几个常用注解:
- @Component:该注解是一个泛化的概念,仅仅表示一个组件对象(Bean),可以作用在任何层次上;
- @Repository:该注解用于将数据访问层(DAO)的类标识为Bean,即注解数据访问层Bean,其功能与@Component相同;
- @Service:该注解用于标注一个业务逻辑注解类(Service层),其功能与@Component相同;
- @Controller:该注解用于标注一个控制器组件类(Spring MVC的Controller),其功能与@Component相同;
- @Autowired:该注解可以对类成员变量、方法及构造方法进行标注,完成自动装配的工作。通过使用@Autowired来消除setter和getter方法。默认按照Bean的类型进行装配;
- @Resource:该注解与@Autowired的功能一样,区别在于该注解默认是按照名称来装配注入的,只有当找不到与名称匹配的Bean时才会按照类型来装配注入;@Autowired默认按照Bean的类型进行装配,如果想按照名称来装配注入,则需要和@Qualifier一起使用。@Resource注解有两个属性,name属性指定Bean实例名称,type属性指定Bean类型;
- @Qualifier:该注解与@Autowired注解配合使用。当@Autowired注解需要按照名称来装配注入时需要和该注解一起使用,Bean的实例名称由@Qualifier注解的参数指定;
在上面几个注解中,虽然@Repository、@Service、@Controller等注解的功能与@Component注解相同,但为了类的标注层次化更加清晰,在实际开发中推荐使用以下方式进行配置:
- @Repository标注数据访问层(DAO层);
- @Service标注业务逻辑层(Service层);
- @Controller标注控制层;
代码示例如下:
(1)创建Dao层
创建dao包,并创建TestDao接口和接口实现类TestDaoImpl,并将实现类TestDaoImpl使用@Repository注解标注为数据访问层。
TestDao接口,代码如下:
package dao;

public interface TestDao {

    public void save();

}
TestDaoImpl实现类,代码如下:
package dao;

import org.springframework.stereotype.Repository;

/*如何在Service层中使用@Resource(name="testDao"),

  @Repository("testDao")中的testDao不能省略

*/

@Repository("testDao")

public class TestDaoImpl implements TestDao {

    @Override

    public void save() {

        System.out.println("testDao save");

    }

}
(2)创建Service层
创建service包,并创建TestService接口和接口实现类TestServiceImpl,并将实现类TestServiceImpl使用@Service注解标注为业务逻辑层。
TestService接口,代码如下:
package service;

public interface TestService {

    public void save();

}
TestServiceImpl接口实现类,代码如下:
package service;

import dao.TestDao;

import org.springframework.stereotype.Service;

import javax.annotation.Resource;

@Service("testService")

public class TestServiceImpl implements TestService {

    @Resource(name = "testDao")

    private TestDao testDao;

    @Override

    public void save() {

        testDao.save();

        System.out.println("testService save");

    }

}
(3)创建Controller层
创建controller包,并创建TestController类,将TestController类使用@Controller注解标注为控制器层。
TestController类,代码如下:
package controller;

import org.springframework.beans.factory.annotation.Autowired;

import org.springframework.stereotype.Controller;

import service.TestService;

@Controller

public class TestController {

    @Autowired

    private TestService testService;

    public void save(){

        testService.save();

        System.out.println("testController save");

    }

}
(4)配置注解
在applicationContext.xml中添加context约束,并配置context扫描包
<?xml version="1.0" encoding="UTF-8"?>

<beans xmlns="http://www.springframework.org/schema/beans"

       xmlns:xsi="http://www.w3.org/2001/XMLSchema-instance"

       xmlns:context="http://www.springframework.org/schema/context"

       xsi:schemaLocation="http://www.springframework.org/schema/beans

                        http://www.springframework.org/schema/beans/spring-beans.xsd

                        http://www.springframework.org/schema/context

                        http://www.springframework.org/schema/context/spring-context.xsd">

    <!--使用context命名空间,通过Spring扫描指定包-->

    <context:component-scan base-package="dao"></context:component-scan>

    <context:component-scan base-package="service"></context:component-scan>

    <context:component-scan base-package="controller"></context:component-scan>

</beans>
(5)创建测试类
测试方法,代码如下:
@Test

public void demo(){

    //初始化Spring容器ApplicationContext,加载配置文件

    ClassPathXmlApplicationContext ctx = new ClassPathXmlApplicationContext("applicationContext.xml");

    //通过容器获取实例

    TestController testCon = (TestController) ctx.getBean("testController");

    testCon.save();

}
运行结果:

Spring框架学习03——Spring Bean 的详解的更多相关文章
- Spring框架学习05——AOP相关术语详解
1.Spring AOP 的基本概述 AOP(Aspect Oriented Programing)面向切面编程,AOP采取横向抽取机制,取代了传统纵向继承体系重复性代码(性能监视.事务管理.安全检查 ...
- spring框架学习笔记2:配置详解
简单写一个类做示例: package bean; public class User { private String name; private Integer age; public String ...
- Spring框架学习02——Spring IOC 详解
1.Spring IOC的基本概念 IOC(Inverse of Control)反转控制的概念,就是将原本在程序中手动创建对象的控制权,交由Spring框架管理.当某个Java对象(调用者)需要调用 ...
- 深入浅出学习Spring框架(三):AOP 详解
AOP的英文解释——AOPAspect Oriented Programming面向切面编程.主要目的是通过预编译方式和运行期动态代理实现在不修改源代码的情况下给程序动态统一添加功能的一种技术. 在反 ...
- Spring MVC 学习)——控制器与@RequestMapping详解
Spring MVC 学习总结(二)——控制器定义与@RequestMapping详解 一.控制器定义 控制器提供访问应用程序的行为,通常通过服务接口定义或注解定义两种方法实现. 控制器解析用户的请求 ...
- Spring框架 之IOC容器 和AOP详解
主要分析点: 一.Spring开源框架的简介 二.Spring下IOC容器和DI(依赖注入Dependency injection) 三.Spring下面向切面编程(AOP)和事务管理配置 一.S ...
- Spring 框架学习(1)--Spring、Spring MVC扫盲
纸上得来终觉浅,绝知此事要躬行 文章大纲 什么是spring 传统Java web应用架构 更强的Java Web应用架构--MVC框架 Spring--粘合式框架 spring的内涵 spring核 ...
- hibernate框架学习笔记3:API详解
Configuration对象: package api; import org.hibernate.SessionFactory; import org.hibernate.cfg.Configur ...
- struts2框架学习笔记2:配置详解
核心配置文件: <?xml version="1.0" encoding="UTF-8"?> <!DOCTYPE struts PUBLIC ...
随机推荐
- 转:Delphi中使用比较少的一些语法
http://www.cnblogs.com/Murphieston/p/5577836.html 本文是为了加强记忆而写,这里写的大多数内容都是在编程的日常工作中使用频率不高的东西,但是又十分重要. ...
- python - class类 (一)
三大编程范式 1.面向过程 2.函数式 3.面向对象 注意 编程范式没有高低之分,只有适用不适用. 面向对象编程: 编程是程序源用特定的语法+数据结构+算法组成的代码来告诉计算机如何执行任务的过程,一 ...
- POI导出Excel(xls、xlsx均可以,也支持图片)——(三)
Jar包
- Linux关机&重启命令
⒈shutdown ①shutdown -h now 立即关机 ②shutdown -h 1 1分钟后关机 ③shutdown -r now 立即重启 ⒉halt 立即关机 ⒊reboot 立即重启 ...
- mysql系列七、mysql索引优化、搜索引擎选择
一.建立适当的索引 说起提高数据库性能,索引是最物美价廉的东西了.不用加内存,不用改程序,不用调sql,只要执行个正确的'create index',查询速度就可能提高百倍千倍,这可真有诱惑力.可是天 ...
- sqlserver 备份 与 还原
背景 真是够懒得,一看这个内容,如此简单.当时的想法就是网上教程一堆,全记下来有啥意思,只是记录了要点.不过写到这里,也就写个别的吧.sqlserver与Oracle比起来,我感觉有个重要差距就是存储 ...
- 006_netstat中state详解
TCP三次握手的过程如下: 主动连接端发送一个SYN包给被动连接端: 被动连接端收到SYN包后,发送一个带ACK和SYN标志的包给主动连接端: 主动连接端发送一个带ACK标志的包给被动连接端,握手动作 ...
- python下的socket常用方法举例
python下的socket 1.简单的server和client端的socket代码 server.py: #!/usr/bin/env python #_*_ coding:utf-8 _*_ i ...
- 在Vue中使用计时器笔记
在Vue中使用了计时器,一定要记得在生命周期destroyed()里清掉,不然第二次进入这个组件,会出现很大的问题 destroyed () { // (很重要)当跳转到其他页面的时候,要在生命周期的 ...
- poj1436水平可见线
还是线段树区间更新,这次不需要对线段离散化,但是要把线段纵坐标*2,可以举例模拟 #include<iostream> #include<cstring> #include&l ...