SpringBoot第二天
一,SpringBoot 整合 jsp 技术
1,创建项目
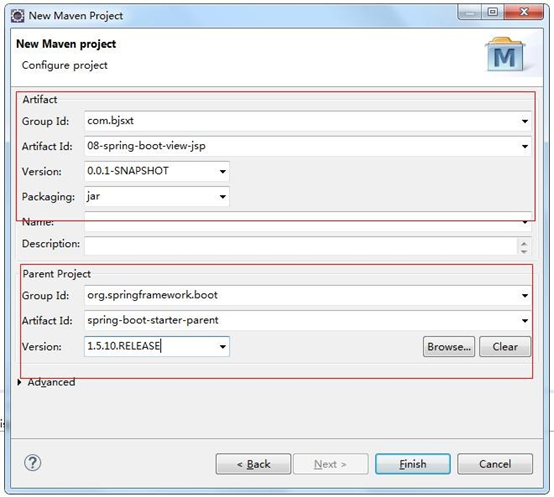
2,修改 pom 文件,添加坐标
<project xmlns="http://maven.apache.org/POM/4.0.0" xmlns:xsi="http://www.w3.org/2001/XMLSchema-instance"
 xsi:schemaLocation="http://maven.apache.org/POM/4.0.0 http://maven.apache.org/xsd/maven-4.0.0.xsd">
 <modelVersion>4.0.0</modelVersion>

 <parent>

 <groupId>org.springframework.boot</groupId>

 <artifactId>spring-boot-starter-parent</artifactId> <version>1.5.10.RELEASE</version>

 </parent>

 <groupId>com.bjsxt</groupId>

 <artifactId>08-spring-boot-view-jsp</artifactId>

 <version>0.0.1-SNAPSHOT</version>

<!-- jdk1.7 -->

 <properties>

 <java.version>1.7</java.version>

 </properties>

<dependencies>

 <!-- springBoot 的启动器 -->

 <dependency>

 <groupId>org.springframework.boot</groupId>

 <artifactId>spring-boot-starter-web</artifactId>

 </dependency>

 <!-- jstl -->

 <dependency>

 <groupId>javax.servlet</groupId>

 <artifactId>jstl</artifactId>

 </dependency>

 <!-- jasper -->

 <dependency>

 <groupId>org.apache.tomcat.embed</groupId>

 <artifactId>tomcat-embed-jasper</artifactId>

 <scope>provided</scope>

 </dependency>

 </dependencies>

</project>
3,创建 springBoot 的全局配置文件,application.properties
spring.mvc.view.prefix=/WEB-INF/jsp/

spring.mvc.view.suffix=.jsp

4,创建 Controller
/**

 * SpringBoot 整合 jsp

 *

 * */

 @Controller

 public class UserController {

 /* *

 处理请求,产生数据

 */

 @RequestMapping("/showUser")

 public String showUser(Model model){

 List<Users> list = new ArrayList<>();

 list.add(new Users(1,"张三",20));

 list.add(new Users(2,"李四",22));

 list.add(new Users(3,"王五",24));

//需要一个 Model 对象

 model.addAttribute("list", list);

 //跳转视图

 return "userList";

}

}
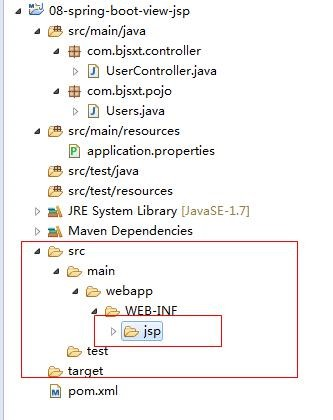
5,创建 jsp
<%@ page language="java" contentType="text/html;

charset=UTF-8" pageEncoding="UTF-8"%>

 <%@ taglib uri="http://java.sun.com/jsp/jstl/core" prefix="c"%>

 <!DOCTYPE html PUBLIC "-//W3C//DTD HTML 4.01 Transitional//EN" "http://www.w3.org/TR/html4/loose.dtd">

 <html>

 <head>

 <meta http-equiv="Content-Type" content="text/html; charset=UTF-8">

 <title>Insert title here</title>

 </head>

 <body>

 <table border="1" align="center" width="50%">

 <tr>

 <th>ID</th>

 <th>Name</th>

 <th>Age</th>

 </tr>

<c:forEach items="${list }" var="user">

 <tr>

 <td>${user.userid }</td>

 <td>${user.username }</td>

 <td>${user.userage }</td>

 </tr>

 </c:forEach>

 </table>

 </body>

 </html>
6,创建启动类
/**

 * SpringBoot 启动类 *

 * */

 @SpringBootApplication

 public class App {

public static void main(String[] args) {

 SpringApplication.run(App.class, args);

}

}
二,SpringBoot 整合 Freemarker
1,创建项目
2,修改 pom 添加坐标
<project xmlns="http://maven.apache.org/POM/4.0.0"

xmlns:xsi="http://www.w3.org/2001/XMLSchema-instance"

xsi:schemaLocation="http://maven.apache.org/POM/4.0.0

http://maven.apache.org/xsd/maven-4.0.0.xsd">

<modelVersion>4.0.0</modelVersion>

 <parent>

 <groupId>org.springframework.boot</groupId>

 <artifactId>spring-boot-starter-parent</artifactId>

 <version>1.5.10.RELEASE</version> </parent> <groupId>com.bjsxt</groupId>

<artifactId>09-spring-boot-view-freemarker</artifactId>

 <version>0.0.1-SNAPSHOT</version>

<properties>

 <java.version>1.7</java.version>

 </properties>

<dependencies>

 <!-- springBoot 的启动器 -->

 <dependency>

 <groupId>org.springframework.boot</groupId>

 <artifactId>spring-boot-starter-web</artifactId>

 </dependency>

 <!-- freemarker 启动器的坐标 -->

 <dependency>

 <groupId>org.springframework.boot</groupId>

 <artifactId>spring-boot-starter-freemarker</artifactId>

 </dependency>

 </dependencies>

 </project>
3,编写视图
注意: springBoot 要求模板形式的视图层技术的文件必须要放到 src/main/resources 目录下必 须要一个名称为 templates
<html>

 <head>

 <title>展示用户数据</title>

 <meta charset="utf-9"></meta>

 </head>

<body>

<table border="1" align="center" width="50%">

<tr>

<th>ID</th>

 <th>Name</th>

 <th>Age</th> </tr>

<#list list as user >

<tr>

 <td>${user.userid}</td>

 <td>${user.username}</td>

 <td>${user.userage}</td>

 </tr>

 </#list>

 </table>

 </body>

 </html>
4,创建 Controller
/**

 * SpringBoot 整合 jsp *

 * */

 @Controller

 public class UserController {

 /* * 处理请求,产生数据 */

 @RequestMapping("/showUser")

 public String showUser(Model model){

 List<Users> list = new ArrayList<>();

 list.add(new Users(1,"张三",20));

 list.add(new Users(2,"李四",22));

 list.add(new Users(3,"王五",24));

//需要一个 Model 对象

 model.addAttribute("list", list);

 //跳转视图

 return "userList";

}

}
5,创建启动器
/**

 * SpringBoot 启动类

*

* */

 @SpringBootApplication

 public class App {

public static void main(String[] args) {

 SpringApplication.run(App.class, args);

}

}
三,SpringBoot 整合 Thymeleaf (重点讲解)
1.创建 Thymeleaf 的入门项目
1.1 创建项目

1.2修改 pom 文件添加坐标
<project xmlns="http://maven.apache.org/POM/4.0.0"

 xmlns:xsi="http://www.w3.org/2001/XMLSchema-instance"

 xsi:schemaLocation="http://maven.apache.org/POM/4.0.0

 http://maven.apache.org/xsd/maven-4.0.0.xsd">

 <modelVersion>4.0.0</modelVersion>

 <parent>

 <groupId>org.springframework.boot</groupId>

<artifactId>spring-boot-starter-parent</artifactId> <version>1.5.10.RELEASE</version>

 </parent>

 <groupId>com.bjsxt</groupId>

 <artifactId>10-spring-boot-view-thymeleaf</artifactId>

 <version>0.0.1-SNAPSHOT</version>

<properties>

 <java.version>1.7</java.version>

 </properties>

<dependencies>

 <!-- springBoot 的启动器 -->

 <dependency>

 <groupId>org.springframework.boot</groupId>

 <artifactId>spring-boot-starter-web</artifactId>

 </dependency>

 <!-- springBoot 的启动器 -->

 <dependency>

 <groupId>org.springframework.boot</groupId>

 <artifactId>spring-boot-starter-thymeleaf</artifactId>

 </dependency>

 </dependencies>

 </project>
1.3创建存放视图的目录
目录位置:src/main/resources/templates templates:该目录是安全的。意味着该目录下的内容是不允许外界直接访问的。
2.Thymeleaf 的基本使用
2.1Thymeleaf特点:
Thymelaef 是通过他特定语法对 html 的标记做渲染。
2.2编写 Controller
/**

 * Thymeleaf 入门案例 *

 * */

 @Controller

 public class DemoController {

 @RequestMapping("/show")

 public String showInfo(Model model){

 model.addAttribute("msg", "Thymeleaf 第一个案例");

 return "index";

 }

 }
2.3创建视图 .html
<!DOCTYPE html>

 <html>

 <head>

 <meta charset="UTF-8">

 <title>Thymeleaf 入门</title>

 </head>

 <body>

 <span th:text="Hello"></span>

 <hr/>

 <span th:text="${msg}"></span>

 </body>

 </html>
2.4编写启动类
/**

 *

 *Thymeleaf 入门案例

 * */

 @SpringBootApplication

 public class App {

public static void main(String[] args) {

 SpringApplication.run(App.class, args);

}

}
2.5 解决异常

2.5.1 解决异常方式 1
让 html 的标记按照严禁的语法去编写。

2.5.2 解决异常方式 2
Thymeleaf.jar:更新为 3.0 以上的版本 thymeleaf-layout-dialect.jar:更新为 2.0 以上的版本
更换 thymeleaf 的 jar 包的版本
<project xmlns="http://maven.apache.org/POM/4.0.0"

xmlns:xsi="http://www.w3.org/2001/XMLSchema-instance"

 xsi:schemaLocation="http://maven.apache.org/POM/4.0.0

http://maven.apache.org/xsd/maven-4.0.0.xsd">

 <modelVersion>4.0.0</modelVersion>

 <parent>

 <groupId>org.springframework.boot</groupId>

 <artifactId>spring-boot-starter-parent</artifactId> <version>1.5.10.RELEASE</version>

 </parent>

 <groupId>com.bjsxt</groupId>

 <artifactId>10-spring-boot-view-thymeleaf</artifactId>

 <version>0.0.1-SNAPSHOT</version>

<properties>

 <java.version>1.7</java.version> <thymeleaf.version>3.0.2.RELEASE</thymeleaf.version>

<thymeleaf-layout-dialect.version>2.0.4</thymeleaf-layout-dialect.versi on>

 </properties>

<dependencies>

 <!-- springBoot 的启动器 -->

 <dependency>

 <groupId>org.springframework.boot</groupId>

 <artifactId>spring-boot-starter-web</artifactId>

 </dependency>

 <!-- springBoot 的启动器 -->

 <dependency>

 <groupId>org.springframework.boot</groupId>

 <artifactId>spring-boot-starter-thymeleaf</artifactId>

 </dependency>

 </dependencies>

 </project>
3.Thymeleaf 语法详解
3.1变量输出与字符串操作
3.1.1th:text
th:text 在页面中输出值
3.1.2th:value
th:value 可以将一个值放入到 input 标签的 value 中
3.1.3 判断字符串是否为空
Thymeleaf 内置对象 注意语法:
1,调用内置对象一定要用#
2,大部分的内置对象都以 s 结尾 strings、numbers、dates
${#strings.isEmpty(key)} 判断字符串是否为空,如果为空返回 true,否则返回 false
${#strings.contains(msg,'T')} 判断字符串是否包含指定的子串,如果包含返回 true,否则返回 false
${#strings.startsWith(msg,'a')} 判断当前字符串是否以子串开头,如果是返回 true,否则返回 false
${#strings.endsWith(msg,'a')} 判断当前字符串是否以子串结尾,如果是返回 true,否则返回 false
${#strings.length(msg)}
返回字符串的长度
${#strings.indexOf(msg,'h')} 查找子串的位置,并返回该子串的下标,如果没找到则返回-1
${#strings.substring(msg,13)} ${#strings.substring(msg,13,15)} 截取子串,用户与 jdkString 类下 SubString 方法相同
${#strings.toUpperCase(msg)} ${#strings.toLowerCase(msg)}
字符串转大小写。
3.2日期格式化处理
${#dates.format(key)}
格式化日期,默认的以浏览器默认语言为格式化标准
${#dates.format(key,'yyy/MM/dd')}
按照自定义的格式做日期转换
${#dates.year(key)} ${#dates.month(key)} ${#dates.day(key)} year:取年 Month:取月 Day:取日
3.3条件判断
3.3.1th:if
<span th:if="${sex} == ' 男 '"> 性别:男 </span>

 <span th:if="${sex} == ' 女 '"> 性别:女 </span>
3.3.2th:switch
<div th:switch="${id}">

 <span th:case="1">ID 为 1</span>

 <span th:case="2">ID 为 2</span>

<span th:case="3">ID 为 3</span>

</div>
3.4迭代遍历
3.4.1th:each
@RequestMapping("/show3")

 public String showInfo3(Model model){

 List<Users> list = new ArrayList<>();

 list.add(new Users(1,"张三",20));

 list.add(new Users(2,"李四",22));

 list.add(new Users(3,"王五",24));

 model.addAttribute("list", list);

 return "index3";

 }
<table border="1">

 <tr>

 <th>ID</th>

 <th>Name</th>

 <th>Age</th>

 </tr>

 <tr th:each="u : ${list}">

 <td th:text="${u.userid}"></td>

 <td th:text="${u.username}"></td>

 <td th:text="${u.userage}"></td>

 </tr>

</table>
3.4.2ht:each 状态变量
@RequestMapping("/show3")

 public String showInfo3(Model model){

 List<Users> list = new ArrayList<>();

 list.add(new Users(1,"张三",20));

 list.add(new Users(2,"李四",22));

 list.add(new Users(3,"王五",24));

 model.addAttribute("list", list);

 return "index3";

}
<table border="1">

 <tr>

 <th>ID</th>

 <th>Name</th>

 <th>Age</th>

 <th>Index</th>

 <th>Count</th>

 <th>Size</th>

 <th>Even</th>

 <th>Odd</th>

 <th>First</th>

 <th>lase</th>

 </tr>

 <tr th:each="u,var : ${list}">

 <td th:text="${u.userid}"></td>

 <td th:text="${u.username}"></td>

 <td th:text="${u.userage}"></td>

 <td th:text="${var.index}"></td>

 <td th:text="${var.count}"></td>

 <td th:text="${var.size}"></td>

 <td th:text="${var.even}"></td>

 <td th:text="${var.odd}"></td>

 <td th:text="${var.first}"></td>

 <td th:text="${var.last}"></td>

 </tr>

 </table>
状态变量属性
1,index:当前迭代器的索引 从 0 开始
2,count:当前迭代对象的计数 从 1 开始
3,size:被迭代对象的长度
4,even/odd:布尔值,当前循环是否是偶数/奇数 从 0 开始
5,first:布尔值,当前循环的是否是第一条,如果是返回 true 否则返回 false
6,last:布尔值,当前循环的是否是最后一条,如果是则返回 true 否则返回 false
3.4.3th:each 迭代 Map
@RequestMapping("/show4")

 public String showInfo4(Model model){

 Map<String, Users> map = new HashMap<>();

 map.put("u1", new Users(1,"张三",20));

 map.put("u2", new Users(2,"李四",22));

map.put("u3", new Users(3,"王五",24));

 model.addAttribute("map", map);

 return "index4";

}
<table border="1">

 <tr>

 <th>ID</th>

 <th>Name</th>

 <th>Age</th>

 </tr>

 <tr th:each="maps : ${map}">

 <td th:text="${maps}"></td>

 </tr>

 </table>

 <th/>

 <table border="1">

 <tr>

 <th>ID</th>

 <th>Name</th>

 <th>Age</th>

 </tr>

 <tr th:each="maps : ${map}">

 <td th:each="entry:${maps}" th:text="${entry.value.userid}" ></td>

 <td th:each="entry:${maps}" th:text="${entry.value.username}"></td>

 <td th:each="entry:${maps}" th:text="${entry.value.userage}"></td> </tr>

 </table>
3.5域对象操作
3.5.1HttpServletRequest
request.setAttribute("req", "HttpServletRequest");
Request:<span th:text="${#httpServletRequest.getAttribute('req')}"></span><br/>
3.5.2HttpSession
request.getSession().setAttribute("sess", "HttpSession");
Session:<span th:text="${session.sess}"></span><br/>
3.5.3ServletContext
request.getSession().getServletContext().setAttribute("app", "Application");
Application:<span th:text="${application.app}"></span>
3.6URL 表达式
th:href th:src
3.6.1url 表达式语法
基本语法:@{}
3.6.2URL 类型
3.6.2.1绝对路径 <a th:href="@{http://www.baidu.com}">绝对路径</a><br/>
3.6.2.2 相对路径
1)相对于当前项目的根 相对于项目的上下文的相对路径 <a th:href="@{/show}">相对路径</a>
2) 相对于服务器路径的根 <a th:href="@{~/project2/resourcename}">相对于服务器的根</a>
3.6.3 在 url 中实现参数传递
<a th:href="@{/show(id=1,name=zhagnsan)}">相对路径-传参</a>
3.6.4 在 url 中通过 restful 风格进行参数传递
<a th:href="@{/path/{id}/show(id=1,name=zhagnsan)}"> 相 对 路 径 - 传 参 -restful</a>
SpringBoot 整合 SpringMVC+MyBatis
四、 创建项目
需求分析:通过使用 SpringBoot+SpringMVC+MyBatis 整合实现一 个对数据库中的 users 表的 CRUD 的操作
1 修改 pom 文件
<project xmlns="http://maven.apache.org/POM/4.0.0"

xmlns:xsi="http://www.w3.org/2001/XMLSchema-instance"

 xsi:schemaLocation="http://maven.apache.org/POM/4.0.0

 http://maven.apache.org/xsd/maven-4.0.0.xsd">

<modelVersion>4.0.0</modelVersion>

 <parent>

 <groupId>org.springframework.boot</groupId>

 <artifactId>spring-boot-starter-parent</artifactId>

 <version>1.5.10.RELEASE</version>

 </parent>

 <groupId>com.bjsxt</groupId>

 <artifactId>12-spring-boot-springmvc-mybatis</artifactId>

 <version>0.0.1-SNAPSHOT</version>

 <properties>

 <java.version>1.7</java.version>

 <thymeleaf.version>3.0.2.RELEASE</thymeleaf.version>

 <thymeleaf-layout-dialect.version>2.0.4</thymeleaf-layout-dialect.ve rsion>

 </properties>

 <dependencies>

 <!-- springBoot 的启动器 -->

 <dependency>

 <groupId>org.springframework.boot</groupId>

 <artifactId>spring-boot-starter-web</artifactId>

 </dependency>

 <!-- web 启动器 -->

 <dependency>

 <groupId>org.springframework.boot</groupId>

 <artifactId>spring-boot-starter-thymeleaf</artifactId>

 </dependency>

 <!-- Mybatis 启动器 -->

 <dependency>

 <groupId>org.mybatis.spring.boot</groupId>

 <artifactId>mybatis-spring-boot-starter</artifactId>

 <version>1.1.1</version>

 </dependency>

 <!-- mysql 数据库驱动 -->

 <dependency>

<groupId>mysql</groupId>

 <artifactId>mysql-connector-java</artifactId>

 </dependency>

 <!-- druid 数据库连接池 -->

 <dependency>

 <groupId>com.alibaba</groupId>

 <artifactId>druid</artifactId>

 <version>1.0.9</version>

 </dependency>

 </dependencies>

 </project>
2 添加 application.properties 全局配置文件
spring.datasource.driverClassName=com.mysql.jdbc.Driver

spring.datasource.url=jdbc:mysql://localhost:3306/ssm

 spring.datasource.username=root spring.datasource.password=root

spring.datasource.type=com.alibaba.druid.pool.DruidDataSource

mybatis.type-aliases-package=com.bjsxt.pojo
3 数据库表设计
CREATETABLE`users`(

 `id`int(11)NOTNULLAUTO_INCREMENT,

 `name`varchar(255)DEFAULTNULL,

 `age`int(11)DEFAULTNULL, PRIMARYKEY(`id`)
 )ENGINE=InnoDBDEFAULTCHARSET=utf8;
五、 添加用户
1 创建实体类
public class Users {

private Integer id;

private String name;

private Integer age;

public Integer getId() { return id; }

public void setId(Integer id) { this.id = id; }

public String getName() { return name; }

public void setName(String name) { this.name = name; }

public Integer getAge() { return age; }

public void setAge(Integer age) { this.age = age; }

}
2 创建 mapper 接口以及映射配置文件
import com.bjsxt.pojo.Users;

public interface UsersMapper {

void insertUser(Users users);

}

<?xml version="1.0" encoding="UTF-8" ?>

<!DOCTYPE mapper PUBLIC "-//mybatis.org//DTD Mapper 3.0//EN" "http://mybatis.org/dtd/mybatis-3-mapper.dtd">

<mapper namespace="com.bjsxt.mapper.UsersMapper">

<insert id="insertUser" parameterType="users">

insert into users(name,age) values(#{name},#{age})

</insert>

</mapper>
3 创建业务层
@Service

@Transactional

public class UsersServiceImpl implements UsersService {

@Autowired

private UsersMapper usersMapper;

@Override

public void addUser(Users users) {

 this.usersMapper.insertUser(users);

}

}
4 创建 Controller
@Controller

 @RequestMapping("/users")

 public class UsersController {

@Autowired

 private UsersService usersService;

/** * 页面跳转 */

 @RequestMapping("/{page}")

 public String showPage(@PathVariable String page){ return page; }

/**

* 添加用户 */

 @RequestMapping("/addUser")

 public String addUser(Users users){

 this.usersService.addUser(users);

 return "ok";

 }

}
5 编写页面
<!DOCTYPE html>

<html>

 <head>

 <meta charset="UTF-8">

<title>添加用户</title> </head>

 <body>

<form th:action="@{/users/addUser}" method="post">

 用户姓名:<input type="text" name="name"/><br/>

 用户年龄:<input type="text" name="age"/><br/>

 <input type="submit" value=" 确 定 "/><br/>

 </form>

 </body>

 </html>

 <!DOCTYPE html>

 <html>

 <head>

 <meta charset="UTF-8">

 <title>操作提示页面</title>

</head>

<body> 操作成功!! ! </body>

 </html>
6 启动类
@SpringBootApplication

 @MapperScan("com.bjsxt.mapper")

//@MapperScan 用户扫描MyBatis的Mapper接口

public class App {

public static void main(String[] args) { SpringApplication.run(App.class, args); }

}
六、 查询用户
1 在 mapper 接口中以及映射配置文件中添加相关代码
List<Users> selectUsersAll();
<select id="selectUsersAll" resultType="users"> select id,name,age from users </select>
2 在业务层中添加查询方法
@Override public List<Users> findUserAll() { return this.usersMapper.selectUsersAll(); }
3 在 Controller 中添加方法
/**

* 查询全部用户 */

 @RequestMapping("/findUserAll")

 public String findUserAll(Model model){

 List<Users> list = this.usersService.findUserAll();

 model.addAttribute("list", list);

 return "showUsers";

 }
4 添加页面
<!DOCTYPE html>

 <html>

 <head>

 <meta charset="UTF-8">

 <title>展示用户数据</title>

 </head>

 <body>

 <table border="1" style="width:300px;">

 <tr>

 <th>用户 ID</th>

 <th>用户姓名</th>

 <th>用户年龄</th>

 </tr>

<tr th:each="user : ${list}">

 <td th:text="${user.id}"></td>

 <td th:text="${user.name}"></td>

 <td th:text="${user.age}"></td>

 </tr>

 </table>

 </body>

 </html>
七、 用户更新
1 更新用户之前的查询,并将数据在页面中回显
1.1修改 mapper 接口以及映射配置文件
Users selectUsersById(Integer id);

<select id="selectUsersById" resultType="users">

select id,name,age from users where id = #{value}

</select>
1.2修改业务层代码
@Override

public Users findUserById(Integer id) { return this.usersMapper.selectUsersById(id); }
1.3修改 Controller
/** * 根据用户 id 查询用户 */

 @RequestMapping("/findUserById")

 public String findUserById(Integer id,Model model){

 Users user = this.usersService.findUserById(id);

 model.addAttribute("user", user);

 return "updateUser";

 }
1.4添加页面 updateUsers.html
<!DOCTYPE html> <html> <head> <meta charset="UTF-8"> <title>Insert title here</title> </head> <body> <form th:action="@{/users/editUser}" method="post"> <input type="hidden" name="id" th:field="${user.id}"/> 用户姓名:<input type="text" name="name" th:field="${user.name}"/><br/> 用户年龄:<input type="text" name="age" th:field="${user.age}"/><br/> <input type="submit" value=" 确 定 "/><br/> </form> </body> </html>
1.5修改 showUsers.html 页面添加操作功能
<!DOCTYPE html> <html> <head> <meta charset="UTF-8"> <title>展示用户数据</title> </head> <body> <table border="1" style="width:300px;">

<tr> <th>用户 ID</th> <th>用户姓名</th> <th>用户年龄</th> <th>操作</th> </tr> <tr th:each="user : ${list}"> <td th:text="${user.id}"></td> <td th:text="${user.name}"></td> <td th:text="${user.age}"></td> <td> <a th:href="@{/users/findUserById(id=${user.id})}">更

新用户</a>

</td> </tr> </table> </body> </html>
2 用户更新
2.1修改 mapper 接口以及映射配置文件
void updateUser(Users users);

<update id="updateUser" parameterType="users">

 update users set name=#{name} ,age=#{age} where id=#{id}

</update>
2.2修改业务层代码
@Override public void updateUser(Users users) { this.usersMapper.updateUser(users); }
2.3修改 Controller
/**

* 更新用户 */

@RequestMapping("/editUser") public String editUser(Users users){ this.usersService.updateUser(users); return "ok"; }
八、 删除用户
1 修改 mapper 接口以及映射配置文件
void deleteUserById(Integer id);

<delete id="deleteUserById"> delete from users where id = #{value} </delete>
2 修改业务层代码
@Override public void deleteUserById(Integer id) { this.usersMapper.deleteUserById(id); }
3 修改 Controller
/**

* 删除用户 */

 @RequestMapping("/delUser")

 public String delUser(Integer id){

this.usersService.deleteUserById(id);

return "redirect:/users/findUserAll";

 }
4 修改 showUsers.html
<!DOCTYPE html> <html> <head> <meta charset="UTF-8"> <title>展示用户数据</title>

</head> <body> <table border="1" style="width:300px;"> <tr> <th>用户 ID</th> <th>用户姓名</th> <th>用户年龄</th> <th>操作</th> </tr> <tr th:each="user : ${list}"> <td th:text="${user.id}"></td> <td th:text="${user.name}"></td> <td th:text="${user.age}"></td> <td> <a th:href="@{/users/findUserById(id=${user.id})}">更 新用户</a> <a th:href="@{/users/delUser(id=${user.id})}">删除用户 </a> </td> </tr> </table> </body> </html>
SpringBoot第二天的更多相关文章
- SpringBoot第二十三篇:安全性之Spring Security
作者:追梦1819 原文:https://www.cnblogs.com/yanfei1819/p/11350255.html 版权声明:本文为博主原创文章,转载请附上博文链接! 引言 系统的安全 ...
- SpringBoot第二十四篇:应用监控之Admin
作者:追梦1819 原文:https://www.cnblogs.com/yanfei1819/p/11457867.html 版权声明:本文为博主原创文章,转载请附上博文链接! 引言 前一章(S ...
- SpringBoot第二集:注解与配置(2020最新最易懂)
2020最新SpringBoot第二集:基础注解/基础配置(2020最新最易懂) 一.Eclipse安装SpringBoot插件 Eclipse实现SpringBoot开发,为便于项目的快速构建,需要 ...
- SpringBoot | 第二十八章:监控管理之Spring Boot Admin使用
前言 上一章节,我们介绍了Actuator的使用,知道了可通过访问不同的端点路径,获取相应的监控信息.但使用后也能发现,返回的监控数据都是以JSON串的形式进行返回的,对于实施或者其他人员来说,不是很 ...
- SpringBoot | 第二十五章:日志管理之自定义Appender
前言 前面两章节我们介绍了一些日志框架的常见配置及使用实践.一般上,在开发过程中,像log4j2.logback日志框架都提供了很多Appender,基本上可以满足大部分的业务需求了.但在一些特殊需求 ...
- SpringBoot | 第二章:lombok介绍及简单使用
在去北京培训的时候,讲师说到了lombok这个第三方插件包,使用了之后发现,确实是个神奇,避免了编写很多臃肿的且定式的代码,虽然现代的IDE都能通过快捷键或者右键的方式,使用Generate Gett ...
- Springboot第二篇:与前端fetch通信(附springboot解决跨域方法)
说到与前端通信,明白人都知道这章肯定会写两部分的东西啦. 关于后台 ①首先回顾前文,上一章环境搭建如图: ②我们在maven.example.controller下添加一个文件,并附上如图代码: ③: ...
- SpringBoot | 第二十九章:Dubbo的集成和使用
前言 今年年初时,阿里巴巴开源的高性能服务框架dubbo又开始了新一轮的更新,还加入了Apache孵化器.原先项目使用了spring cloud之后,已经比较少用dubbo.目前又抽调回原来的行业应用 ...
- SpringBoot | 第二十七章:监控管理之Actuator使用
前言 随着我们服务越来越多,部署的环境也越来越繁多时,由于各服务都部署在不同的机器上,每当出现问题或者异常时,想快速进行问题的定位就变的麻烦了.所以,本章节开始,开始讲解SpringBoot的监控相关 ...
- SpringBoot | 第二十六章:邮件发送
前言 讲解了日志相关的知识点后.今天来点相对简单的,一般上,我们在开发一些注册功能.发送验证码或者订单服务时,都会通过短信或者邮件的方式通知消费者,注册或者订单的相关信息.而且基本上邮件的内容都是模版 ...
随机推荐
- 我以为我对Mysql索引很了解,直到我遇到了阿里的面试官
GitHub 4.8k Star 的Java工程师成神之路 ,不来了解一下吗? GitHub 4.8k Star 的Java工程师成神之路 ,真的不来了解一下吗? GitHub 4.8k Star 的 ...
- UVALive 7037:The Problem Needs 3D Arrays(最大密度子图)
题目链接 题意 给出n个点,每个点有一个值,现在要选择一些点的集合,使得(选择的点生成的逆序对数目)/(选择的点的数量)的比率最大. 思路 点与点之间生成一个逆序对可以看做是得到一个边,那么就是分数规 ...
- SpringBoot系列——CORS(跨源资源共享)
前言 出于安全原因,浏览器禁止ajax调用当前源之外的资源(同源策略),我们之前也有写个几种跨域的简单实现(还在问跨域?本文记录js跨域的多种实现实例),本文主要详细介绍CORS,跨源资源共享,以及如 ...
- 微信小程序 CSS border-radius元素 overflow:hidden失效问题 iPhone ios 苹果兼容问题 伪类元素
同事找我解决一个问题 说安卓圆角没问题 苹果上失效了 我一看 其实就是没做兼容上图给你们看看 有没有看出来 其实就是父级设置圆角属性失效 父元素使用border-radius和overflow:hid ...
- Java线程池源码及原理
目录 1 说明 1.1类继承图 2 线程池的状态 3 源码分析 3.1完整的线程池构造方法 3.2 ctl 3.3 任务的执行 3.3.1 execute(Runnable command) 3.3. ...
- 转: windows系统下mysql出现Error 1045(28000) Access Denied for user 'root'@'localhost'
windows系统下mysql出现Error 1045(28000) Access Denied for user 'root'@'localhost' 转自 http://zxy5241.space ...
- 剑指offer第二版-3.数组中重复的数
面试题3:数组中重复的数 题目要求: 在一个长度为n的数组中,所有数字的取值范围都在[0,n-1],但不知道有几个数字重复或重复几次,找出其中任意一个重复的数字. 解法比较: /** * Copyri ...
- Element ui colorpicker在Vue中的使用
首先要有一个color-picker组件 <el-color-picker v-model="headcolor"></el-color-picker> 在 ...
- 算法与数据结构基础 - 堆(Heap)和优先级队列(Priority queue)
堆基础 堆(Heap)是具有这样性质的数据结构:1/完全二叉树 2/所有节点的值大于等于(或小于等于)子节点的值: 图片来源:这里 堆可以用数组存储,插入.删除会触发节点shift_down.shif ...
- 【最小生成树之Kruskal算法】
看完之后推荐再看一看[最小生成树之Prim算法]-C++ 定义:一个有 n 个结点的连通图的生成树是原图的极小连通子图,且包含原图中的所有 n 个结点,并且有保持图连通的最少的边.最小生成树可以用kr ...