
jQuery控制网页字体大小和肤色
在一些网站上经常看到有控制网页肤色和字体大小的功能,接下来,我们将用两个例子来实现这两个功能。
网页字体大小
首先我们在网页中添加一些被控制大小的文字和字体控制的按钮。
<!DOCTYPE>

<html>

<head>

<meta http-equiv="Content-Type" content="text/html; charset=utf-8" />

<title></title>

 <script src="../scripts/jquery-1.3.1.js" type="text/javascript"></script>

</head>

<body>

<div class="msg">

    <div class="msg_caption">

        <span class="bigger" >放大</span>

        <span class="smaller" >缩小</span>

        <span >20</span>

        <span >18</span>

        <span >16</span>

    </div>

    <div>

        <p id="para">

        This is some text. This is some text. This is some text. This is some text. This

        is some text. This is some text. This is some text. This is some text. This is some

        text. This is some text. This is some text. This is some text. This is some text.

        This is some text. This is some text. This is some text. This is some text. This

        is some text. This is some text.

        </p>

    </div>

</div>

</body>

</html>
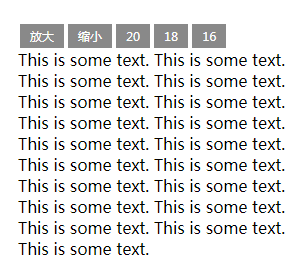
有两种控制字体大小的方式:在当前字体大小的基础上放大或缩小,直接选择字号进行控制。
首先是第一种,需要获取当前文字的字体大小,获取的值是带单位的数值,我们在进行放大缩小操作时,需要进行加减运算,所以需要用parseInt()方法去掉单位再进行运算,运算后的值需要加上单位后再赋值给需要控制的文字,但是需要注意的是,无限放大和缩小并不合适,所以在操作时,需要给一个最大和最小字体。
第二种方式就比较简单了,直接通过点击获取字体大小的数值,然后加上单位就可以进行赋值添加样式了。
<script type="text/javascript">

    $(function(){

        $("span").click(function(){

            var thisEle = $("#para").css("font-size");

            var textFontSize = parseFloat(thisEle , 10);

            var unit = thisEle.slice(-2); //获取单位

            var cName = $(this).attr("class");

            if(cName == "bigger"){

                   if( textFontSize <= 22 ){

                        textFontSize += 2;

                    }

            }else if(cName == "smaller"){

                   if( textFontSize >= 12  ){

                        textFontSize -= 2;

                    }

            }else{

                textFontSize = $(this).text();

            }

            $("#para").css("font-size",  textFontSize + unit);

        });

    });

  </script>
2,网页换肤
网页换肤的原理是通过调用不同的样式表文件来实现不同皮肤的切换,并且需要将换好的皮肤记入Cookie中,这样用户下次访问时,就可以显示用户自定义的皮肤了。
首先设置HTML结构:
<!DOCTYPE>

<html>

<head>

    <title></title>

    <meta http-equiv="Content-Type" content="text/html; charset=utf-8" />

    <link href="css/default.css" rel="stylesheet" type="text/css" />

    <script src="../scripts/jquery-1.3.1.js" type="text/javascript"></script>

</head>

<body>

    <ul id="skin">

        <li id="skin_0" title="灰色" class="selected">灰色</li>

        <li id="skin_1" title="紫色">紫色</li>

        <li id="skin_2" title="红色">红色</li>

        <li id="skin_3" title="天蓝色">天蓝色</li>

        <li id="skin_4" title="橙色">橙色</li>

        <li id="skin_5" title="淡绿色">淡绿色</li>

    </ul>

    <div id="div_side_0">

        <div id="news">

            <h1 class="title">时事新闻</h1>

        </div>

    </div>

    <div id="div_side_1">

        <div id="game">

            <h1 class="title">娱乐新闻</h1>

        </div>

    </div>

</body>

</html>
其中基础样式为:
*{

    margin:0px;

    padding:0px;

}

body {

    font-family: Verdana, Arial, Helvetica, sans-serif;

    font-size: 12px;

}

#div_side_0,#div_side_1

{

    float:left;

    width:120px;

    height:450px;

    }

#skin

{

    margin:10px;

    padding:5px;

    width:210px;

    padding-right:0px;

    list-style:none;

    border: 1px solid #CCCCCC;

    overflow:hidden;

    }

#skin li{

    float:left;

    margin-right:5px;

    width:15px;

    height:15px;

    text-indent:-999px;

    overflow:hidden;

    display:block;

    cursor:pointer;

    background-image:url(theme.gif);

}

#skin_0{

    background-position:0px 0px;

}

#skin_1{

    background-position:15px 0px;

}

#skin_2{

    background-position:35px 0px;

}

#skin_3{

    background-position:55px 0px;

}

#skin_4{

    background-position:75px 0px;

}

#skin_5{

    background-position:95px 0px;

}

#skin_0.selected{

    background-position:0px 15px !important;

}

#skin_1.selected{

    background-position:15px 15px !important;

}

#skin_2.selected{

    background-position:35px 15px !important;

}

#skin_3.selected{

    background-position:55px 15px !important;

}

#skin_4.selected{

    background-position:75px 15px !important;

}

#skin_5.selected{

    background-position:95px 15px !important;

}

.title

{

    cursor:pointer;}

h1{

   margin:10px;

   padding:10px 20px;

   width:60px;

   color:#ffffff;

   font-size:14px;

}

a:link {

    text-decoration: none;

    color: #333333;

}

a:visited {

    color: #333333;

    text-decoration: none;

}

a:hover {

    color: #000000;

    text-decoration: underline;

}
然后根据HTML代码预定义几套换肤用的样式,分别有灰色、紫色、红色等,在本次的实例中为了简化,只是进行简单的背景替换,所以在这些样式文件中只有对于的背景颜色:
在初始化的时候,默认选择灰色,后期将通过更改样式表链接来更换颜色,所以,我们需要为添加背景色的样式表链接添加一个id,方便后期修改。
<link href="css/skin_0.css" rel="stylesheet" type="text/css" id="cssfile" />
网页的初始化效果如下: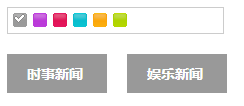
接下来,将通过点击皮肤选择按钮来实现换肤。
首先,选中颜色后,为当前点击的元素添加选中样式。
var $li =$("#skin li");

$li.click(function(){

      $("#"+this.id).addClass("selected")

              .siblings().removeClass("selected");

})
其次,设置网页的皮肤颜色。
$(function(){

    var $li =$("#skin li");

    $li.click(function(){

          $("#"+this.id).addClass("selected")

                 .siblings().removeClass("selected");

          $("#cssfile").attr("href","css/"+this.id+".css");

    })

})
此时,简易版的换肤就实现了,但是,当用户刷新网页或者关闭浏览器后,皮肤又会被初始化,因此,我们需要将当前选择的皮肤进行保存。
这里,我们需要进入jQuery的cookie插件
jQuery.cookie = function(name, value, options) {

    if (typeof value != 'undefined') { // name and value given, set cookie

        options = options || {};

        if (value === null) {

            value = '';

            options.expires = -1;

        }

        var expires = '';

        if (options.expires && (typeof options.expires == 'number' || options.expires.toUTCString)) {

            var date;

            if (typeof options.expires == 'number') {

                date = new Date();

                date.setTime(date.getTime() + (options.expires * 24 * 60 * 60 * 1000));

            } else {

                date = options.expires;

            }

            expires = '; expires=' + date.toUTCString(); // use expires attribute, max-age is not supported by IE

        }

        // CAUTION: Needed to parenthesize options.path and options.domain

        // in the following expressions, otherwise they evaluate to undefined

        // in the packed version for some reason...

        var path = options.path ? '; path=' + (options.path) : '';

        var domain = options.domain ? '; domain=' + (options.domain) : '';

        var secure = options.secure ? '; secure' : '';

        document.cookie = [name, '=', encodeURIComponent(value), expires, path, domain, secure].join('');

    } else { // only name given, get cookie

        var cookieValue = null;

        if (document.cookie && document.cookie != '') {

            var cookies = document.cookie.split(';');

            for (var i = 0; i < cookies.length; i++) {

                var cookie = jQuery.trim(cookies[i]);

                // Does this cookie string begin with the name we want?

                if (cookie.substring(0, name.length + 1) == (name + '=')) {

                    cookieValue = decodeURIComponent(cookie.substring(name.length + 1));

                    break;

                }

            }

        }

        return cookieValue;

    }

};
然后将当前的皮肤保存进cookie,保存后,就可以通过cookie来获取当前的皮肤了,如果cookie存在,则将当前皮肤设置为cookie记录的值,这样,当用户刷新网页后,仍然是当前选择的皮肤。
完整代码如下:
<!DOCTYPE>

<html>

<head>

    <title></title>

    <meta http-equiv="Content-Type" content="text/html; charset=utf-8" />

    <link href="css/default.css" rel="stylesheet" type="text/css" />

    <link href="css/skin_0.css" rel="stylesheet" type="text/css" id="cssfile" />

    <script src="../scripts/jquery-1.3.1.js" type="text/javascript"></script>

    <script src="js/jquery.cookie.js" type="text/javascript"></script>

    <script type="text/javascript">

        $(function(){

            var $li =$("#skin li");

            $li.click(function(){

                $("#"+this.id).addClass("selected")

                            .siblings().removeClass("selected");

                $("#cssfile").attr("href","css/"+ (this.id) +".css"); //设置不同肤色

                $.cookie( "MyCssSkin" ,  this.id , { path: '/', expires: 10 });//存入cookie

            });

            var cookie_skin = $.cookie( "MyCssSkin");  //获取cookie

            if (cookie_skin) {

                //如果存在cookie

                    $("#"+cookie_skin).addClass("selected")

                                      .siblings().removeClass("selected");

                    $("#cssfile").attr("href","css/"+ cookie_skin +".css");

                    $.cookie( "MyCssSkin" ,  cookie_skin  , { path: '/', expires: 10 });

            }

        })

    </script>

</head>

<body>

    <ul id="skin">

        <li id="skin_0" title="灰色" class="selected">灰色</li>

        <li id="skin_1" title="紫色">紫色</li>

        <li id="skin_2" title="红色">红色</li>

        <li id="skin_3" title="天蓝色">天蓝色</li>

        <li id="skin_4" title="橙色">橙色</li>

        <li id="skin_5" title="淡绿色">淡绿色</li>

    </ul>

    <div id="div_side_0">

        <div id="news">

            <h1 class="title">时事新闻</h1>

        </div>

    </div>

    <div id="div_side_1">

        <div id="game">

            <h1 class="title">娱乐新闻</h1>

        </div>

    </div>

</body>

</html>
jQuery控制网页字体大小和肤色的更多相关文章
- jQuery——修改网页字体大小
HTML: <!DOCTYPE html> <html> <head> <meta charset="UTF-8"> <lin ...
- Type.js – 帮助你更好的控制网页字体排版
Type.js 是一款很好的网页字体排版工具.它可以让你使用新的 CSS 属性,在网页上试下更精细的排版控制.设置很简单.上传 type.js 到您的网站,并在你的 HTML 链接中引用.接下来,你就 ...
- javascript控制rem字体大小
摘要:在写响应式H5页面的时候,我常常会用rem字体,为了兼容多个分辨率的设备,需要写多个@media标签,太麻烦并且不够精致,尤其是移动端的页面往往达不到我想要的效果,后来就用js替代了css的@m ...
- [转]响应式网页设计:rem、em设置网页字体大小自适应
本文转自:http://www.cnblogs.com/aimyfly/archive/2013/07/19/3200742.html 「rem」是指根元素(root element,html)的字体 ...
- JavaScript在智能手机上的应用-通过滑动修改网页字体大小
---------------------------------- <script type="text/javascript"> //变量x, ...
- 响应式网页:用em,rem设置网页字体大小自适应
「rem」是指根元素(root element,html)的字体大小,好开心的是,从遥远的 IE6 到版本帝 Chrome 他们都约好了,根元素默认的 font-size 都是 16px.这样一个新的 ...
- 响应式网页设计:rem、em设置网页字体大小自适应
「rem」是指根元素(root element,html)的字体大小,好开心的是,从遥远的 IE6 到版本帝 Chrome 他们都约好了,根元素默认的 font-size 都是 16px.这样一个新的 ...
- rem设置网页字体大小
「rem」是指根元素(root element,html)的字体大小,好开心的是,从遥远的 IE6 到版本帝 Chrome 他们都约好了,根元素默认的 font-size 都是 16px.这样一个新的 ...
- h5 禁止微信内置浏览器调整字体大小方法
ios 通过重写样式控制 body { -webkit-text-size-adjust:100%!important; } android 通过重写事件控制 (function() { if (ty ...
随机推荐
- <NET CLR via c# 第4版>笔记 第19章 可空值类型
System.Nullable<T> 是结构. 19.1 C# 对可空值类型的支持 C# 允许用问号表示法来声明可空值类型,如: Int32? x = 5; Int32? y = null ...
- python查看文件的编码格式
pip install chardet 执行 import chardet f = open('a.doc',r) data = f.read() print chardet.detect(data) ...
- Android 自定义圆形旋转进度条,仿微博头像加载效果
微博 App 的用户头像有一个圆形旋转进度条的加载效果,看上去效果非常不错,如图所示: 据说 Instagram 也采用了这种效果.最近抽空研究了一下,最后实现的效果是这样: 基本上能模拟出个大概,代 ...
- 测试JS方法运行时间
console.time(label) 和 console.timeEnd(label), 在开始的地方写上 console.time("测试 fn 速度: ") ,在结束的地方写 ...
- arpg网页游戏特效播放(一)
网页游戏中的特效,主要包括:场景特效,攻击特效和UI特效三种.场景特效是在地图层上播放的特效,攻击特效主要是技能触发的一些特效,UI特效是面板上的一些特效,还有一些在人物身上播放的特效,例如脚底光圈特 ...
- 3.3 shell控制流结构
shell中的控制流包括if then else语句,case语句,for循环,until循环,while循环,break控制,continue控制. 条件测试: 有时判断字符串是否相等或检查文件状态 ...
- 1.1 Linux中的进程 --fork、孤儿进程、僵尸进程、文件共享分析
操作系统经典的三态如下: 1.就绪态 2.等待(阻塞) 3.运行态 其转换状态如下图所示: 操作系统内核中会维护多个队列,将不同状态的进程加入到不同的队列中,其中撤销是进程运行结束后,由内核收回. 以 ...
- 20分钟打造你的Bootstrap站点
来源:http://www.w3cplus.com/css/twitter-bootstrap-tutorial.html 特别声明:此篇文章由白牙根据Leon Revill的英文文章原名<Tw ...
- CodeForces - 367E:Sereja and Intervals(组合数&&DP)
Sereja is interested in intervals of numbers, so he has prepared a problem about intervals for you. ...
- zookeeper 入门指导
zookeeper数据模型 zookeeper有一个层级命名空间,和一个分布式文件系统非常相似 .唯一的不同是每个节点可以有关联的数据,子节点也是.就像有一个文件系统,并且允许文件可以是一个目录. ...