Ubuntu 16.04.4 LTS + Ambari 2.6.1.5 + HDP 2.6.4.0 安装部署
服务器
|
主机名 |
master |
slave1 |
slave2 |
slave3 |
|
IP |
192.168.1.40 |
192.168.1.41 |
192.168.1.42 |
192.168.1.43 |
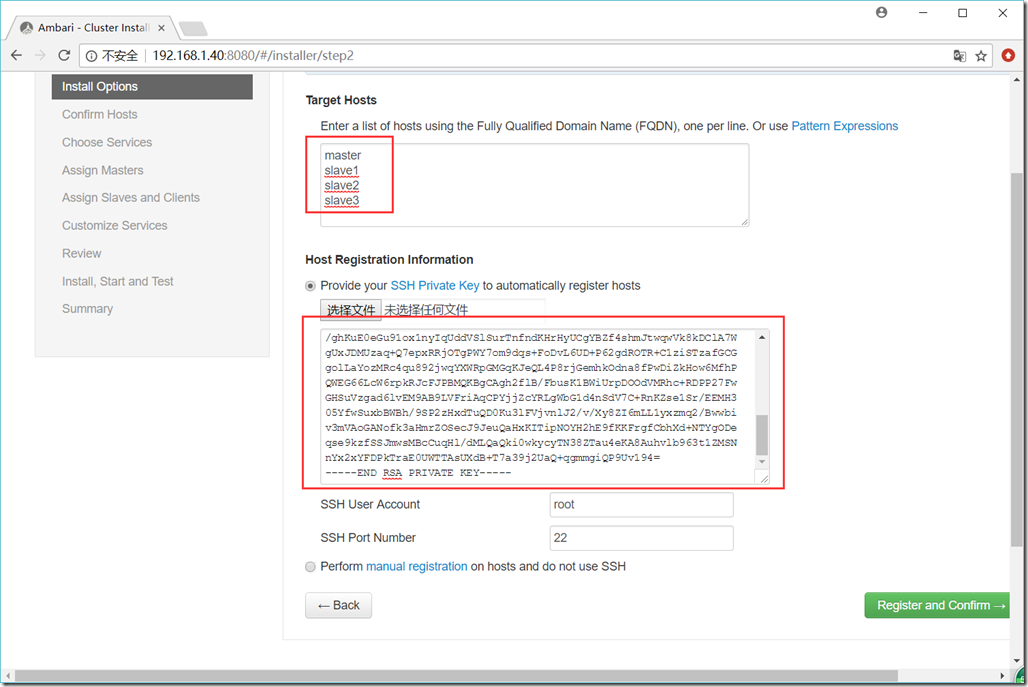
离线包服务器: 192.168.1.50
-------------------------------------------------------------------------------------------------------------------------------------------------
-------------------------------------------------------------------------------------------------------------------------------------------------
1.启用root账号
1)sudo passwd root
2)sudo vi /etc/ssh/sshd_config
PermitRootLogin yes
RSAAuthentication yes
PubkeyAuthentication yes
AuthorizedKeysFile %h/.ssh/authorized_keys
3)sudo service sshd restart
4)SSH免密码
所有服务器
su – root
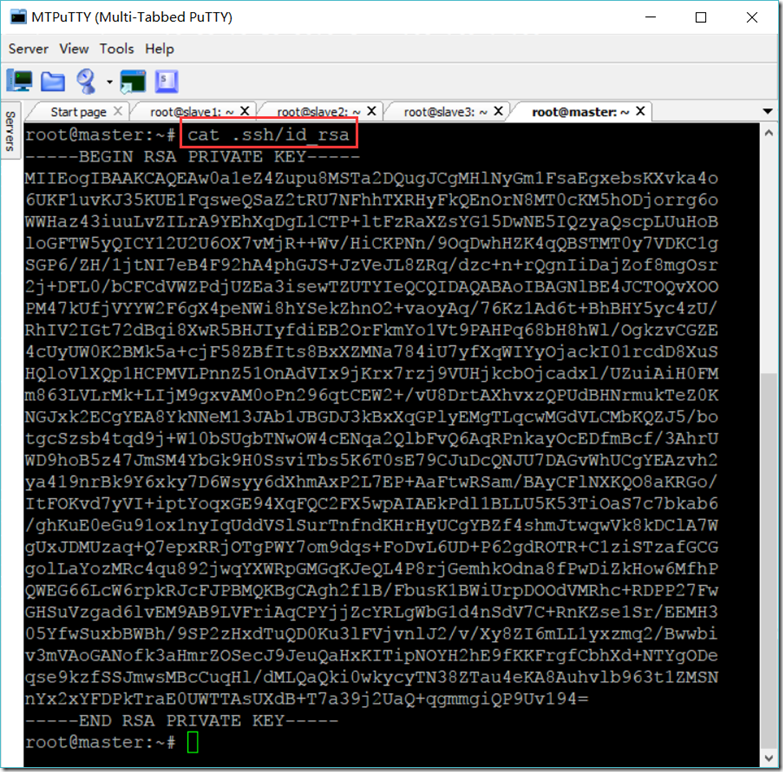
ssh-keygen -t rsa
cd ~/.ssh/
cat id_rsa.pub >> authorized_keys
master服务器
scp root@192.168.1.41:/root/.ssh/authorized_keys /root/.ssh/authorized_keys_slave1
scp root@192.168.1.42:/root/.ssh/authorized_keys /root/.ssh/authorized_keys_slave2
scp root@192.168.1.43:/root/.ssh/authorized_keys /root/.ssh/authorized_keys_slave3
cat authorized_keys_slave1 >> authorized_keys
cat authorized_keys_slave2 >> authorized_keys
cat authorized_keys_slave3 >> authorized_keys
chmod 600 ~/.ssh/authorized_keys
其它服务器
scp root@192.168.1.40:/root/.ssh/authorized_keys /root/.ssh/authorized_keys
5)设置文件句柄与线程限制
vi /etc/security/limits.conf
* soft nofile 204800
* hard nofile 204800
* soft nproc 204800
* hard nproc 204800
2.创建如下的几个文件放到所有服务器上
hdp.list
#VERSION_NUMBER=2.6.4.0-91
deb http://192.168.1.50/ubuntu/HDP/ubuntu16/2.6.4.0-91 HDP main
hdp.utils.list
#VERSION_NUMBER=1.1.0.22-91
deb http://192.168.1.50/ubuntu/HDP-UTILS/ HDP-UTILS main
hdp.gpl.list
#VERSION_NUMBER=2.6.4.0-91
deb http://192.168.1.50/ubuntu/HDP-GPL/ubuntu16/2.6.4.0-91 HDP-GPL main
ambari.list
#VERSION_NUMBER=2.6.1.5-3
deb http://192.168.1.50/ubuntu/ambari/ubuntu16/2.6.1.5-3 Ambari main
sudo scp zyx@master:/etc/apt/sources.list.d/hdp.list /etc/apt/sources.list.d/hdp.list
sudo scp zyx@master:/etc/apt/sources.list.d/hdp.utils.list /etc/apt/sources.list.d/hdp.utils.list
sudo scp zyx@master:/etc/apt/sources.list.d/hdp.gpl.list /etc/apt/sources.list.d/hdp.gpl.list
sudo scp zyx@master:/etc/apt/sources.list.d/ambari.list /etc/apt/sources.list.d/ambari.list
sudo apt-key adv --recv-keys --keyserver keyserver.ubuntu.com B9733A7A07513CAD
sudo apt-get update
3.安装其它JAR(jce_policy-8.zip和mysql-connector-java.jar)
1)
unzip -o -j -q jce_policy-8.zip -d /usr/lib/jvm/jdk1.8.0_171/jre/lib/security
scp -r zyx@master:/usr/lib/jvm/jdk1.8.0_171/jre/lib/security /usr/lib/jvm/jdk1.8.0_171/jre/lib/
2)MySQL相关
(1)MySQL安装及设置
dpkg -i mysql-apt-config_0.8.10-1_all.deb
sudo apt-get update
apt-get install mysql-server
systemctl start mysql
systemctl enable mysql
vi /etc/mysql/mysql.conf.d/mysqld.cnf
bind-address = 0.0.0.0
(2)设权限与建库
mysql -u root -p
GRANT ALL PRIVILEGES ON *.* TO 'root'@'%' IDENTIFIED BY 'gis' WITH GRANT OPTION;
create database ambari character set utf8;
CREATE USER 'ambari'@'%'IDENTIFIED BY 'gis';
GRANT ALL PRIVILEGES ON *.* TO 'ambari'@'%';
FLUSH PRIVILEGES;
create database hive character set utf8;
CREATE USER 'hive'@'%'IDENTIFIED BY 'gis';
GRANT ALL PRIVILEGES ON *.* TO 'hive'@'%';
FLUSH PRIVILEGES;
create database oozie character set utf8;
CREATE USER 'oozie'@'%'IDENTIFIED BY 'gis';
GRANT ALL PRIVILEGES ON *.* TO 'oozie'@'%';
FLUSH PRIVILEGES;
quit
(3)将mysql-connector-java.jar放到/usr/share/java/目录下
cp mysql-connector-java.jar /usr/share/java/
4.安装如下的Python组件
sudo apt-get install libffi-dev
sudo apt-get install python-pip
sudo apt-get install python-pip
pip install ndg-httpsclient
pip install pyopenssl
pip install pyasn1
sudo pip install -U requests[security]
5.安装ambari-server
sudo apt-get install ambari-server
sudo ambari-server setup --jdbc-db=mysql --jdbc-driver=/usr/share/java/mysql-connector-java.jar
sudo ambari-server setup --java-home=/usr/lib/jvm/jdk1.8.0_171
/var/lib/ambari-server/resources/Ambari-DDL-MySQL-CREATE.sql
6.取消加密方式限制
vi /etc/ambari-server/conf/ambari.properties
security.server.disabled.ciphers=
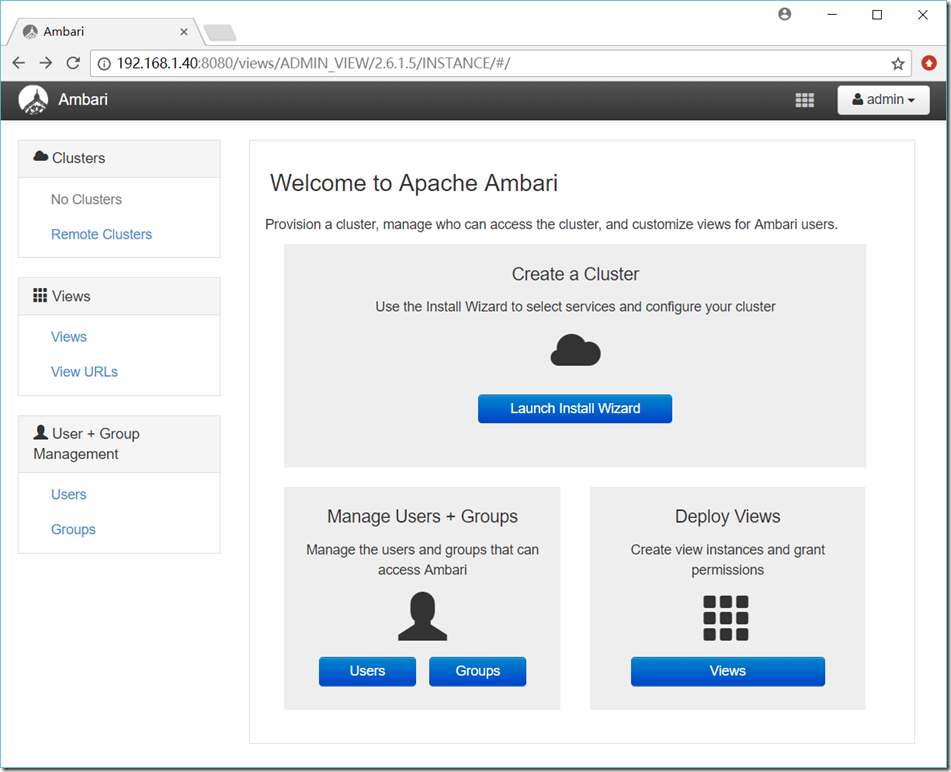
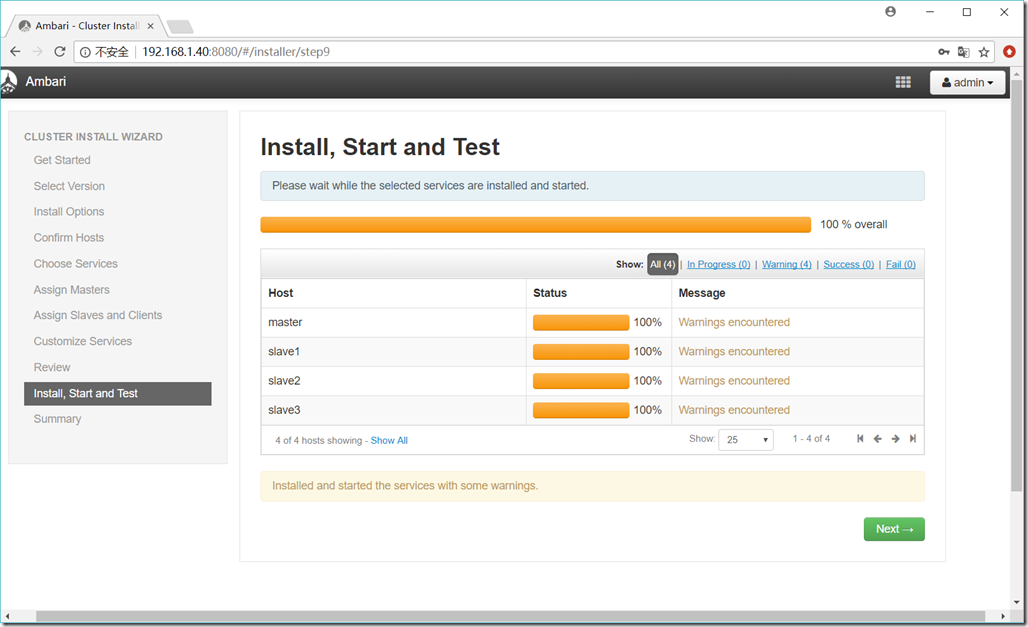
7.启动服务
ambari-server start
ambari-server stop
ambari-server status
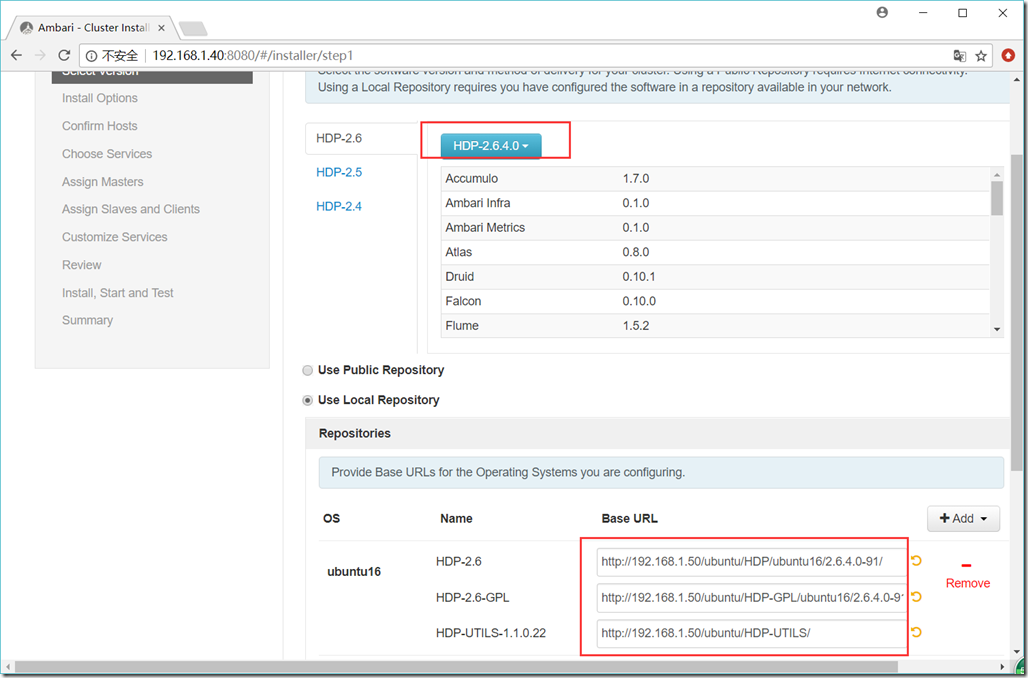
http://192.168.1.50/ubuntu/HDP/ubuntu16/2.6.4.0-91/
http://192.168.1.50/ubuntu/HDP-GPL/ubuntu16/2.6.4.0-91/
http://192.168.1.50/ubuntu/HDP-UTILS/
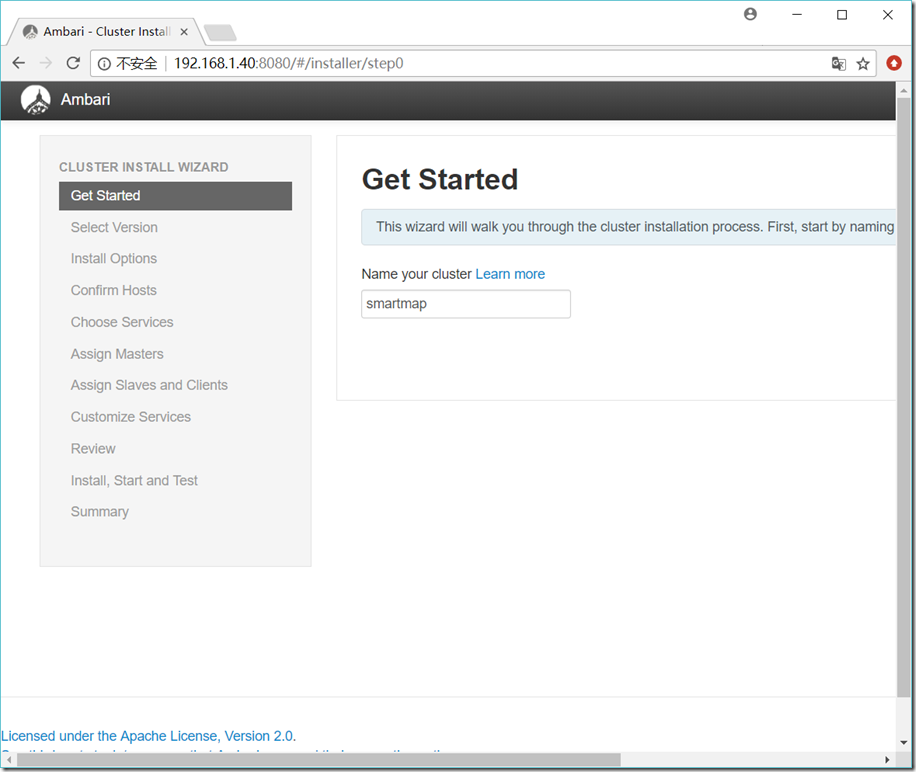
Admin Name : admin
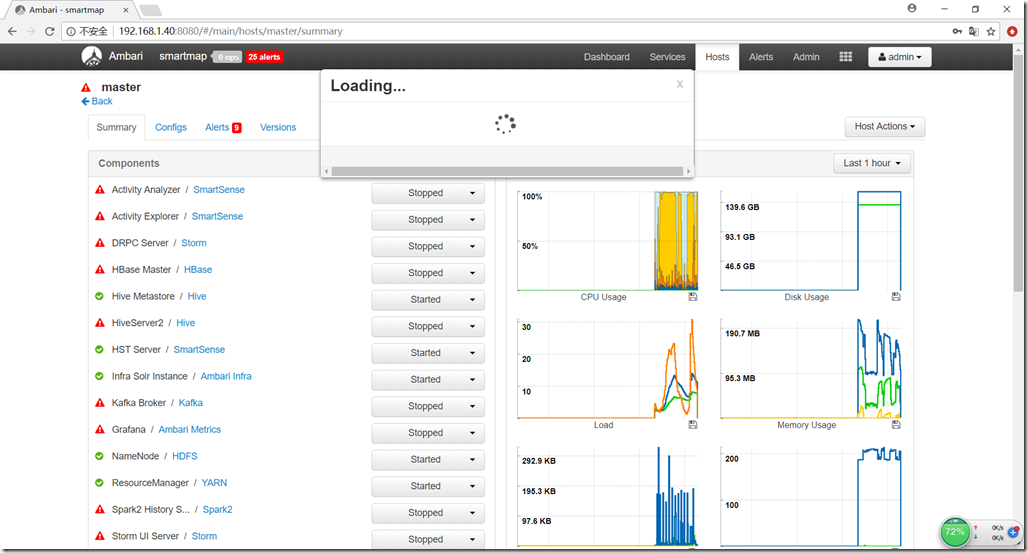
Cluster Name : smartmap
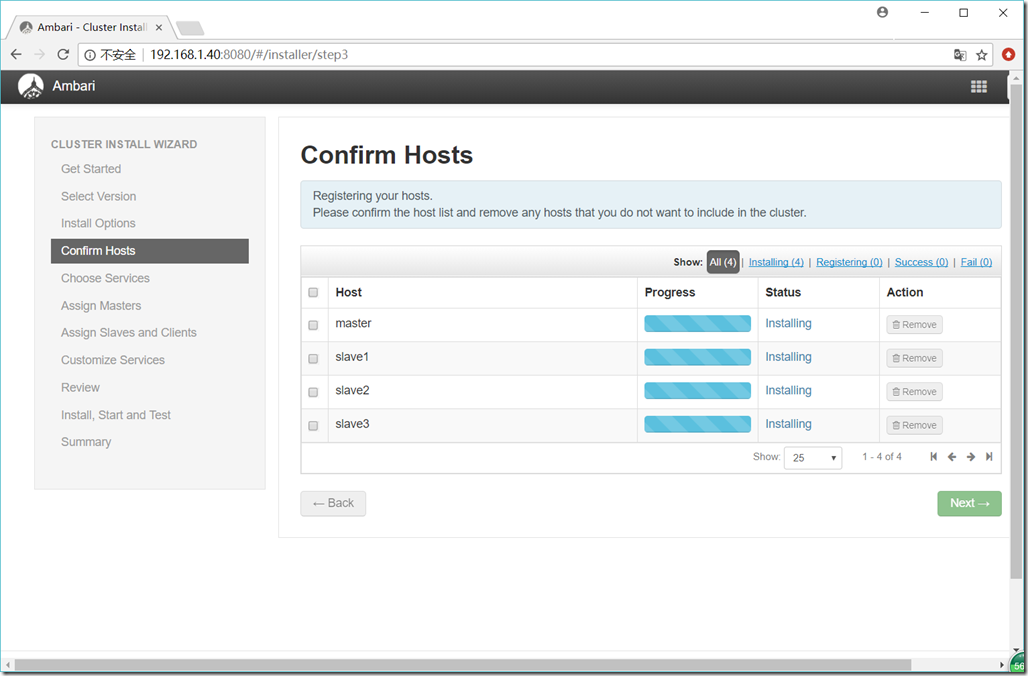
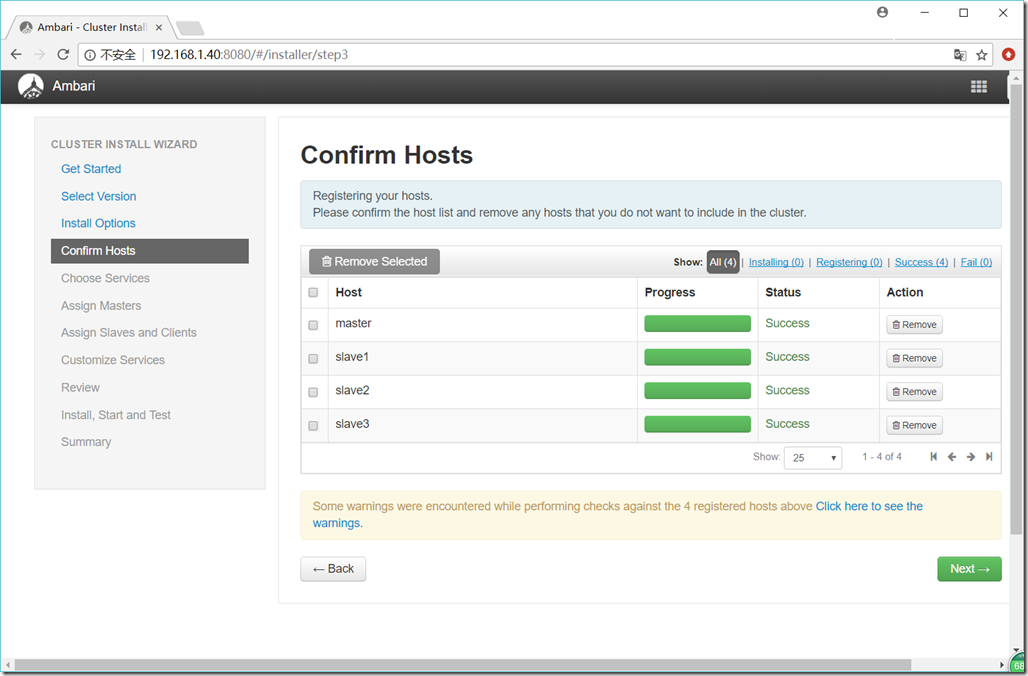
Total Hosts : 4 (4 new)
Repositories:
ubuntu16 (HDP-2.6):
http://192.168.1.50/ubuntu/HDP/ubuntu16/2.6.4.0-91/
ubuntu16 (HDP-UTILS-1.1.0.22):
http://192.168.1.50/ubuntu/HDP-UTILS/
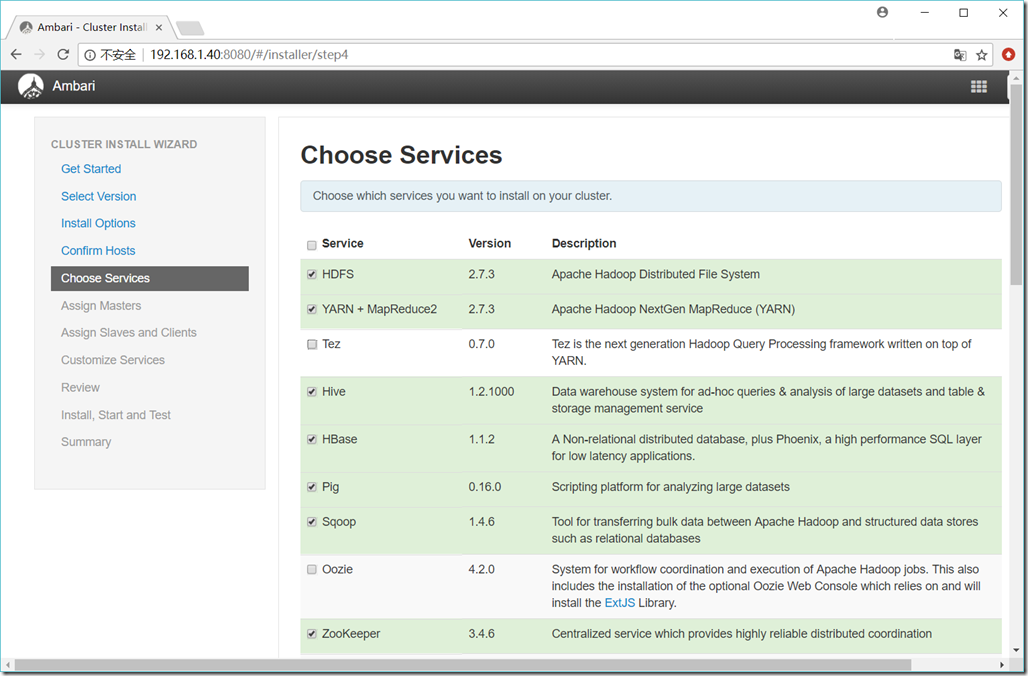
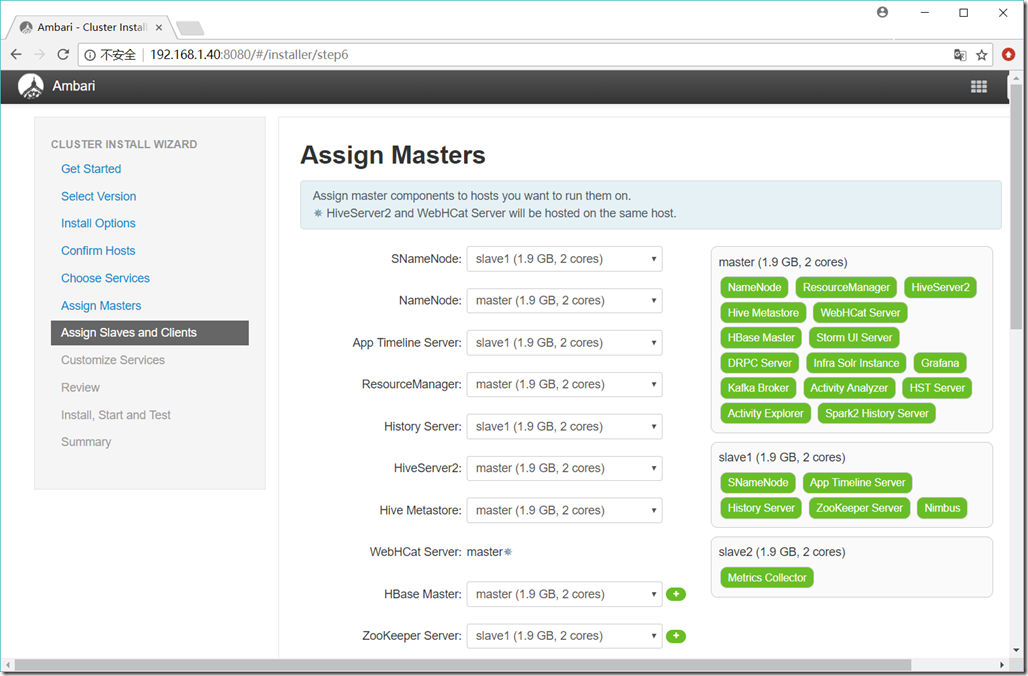
Services:
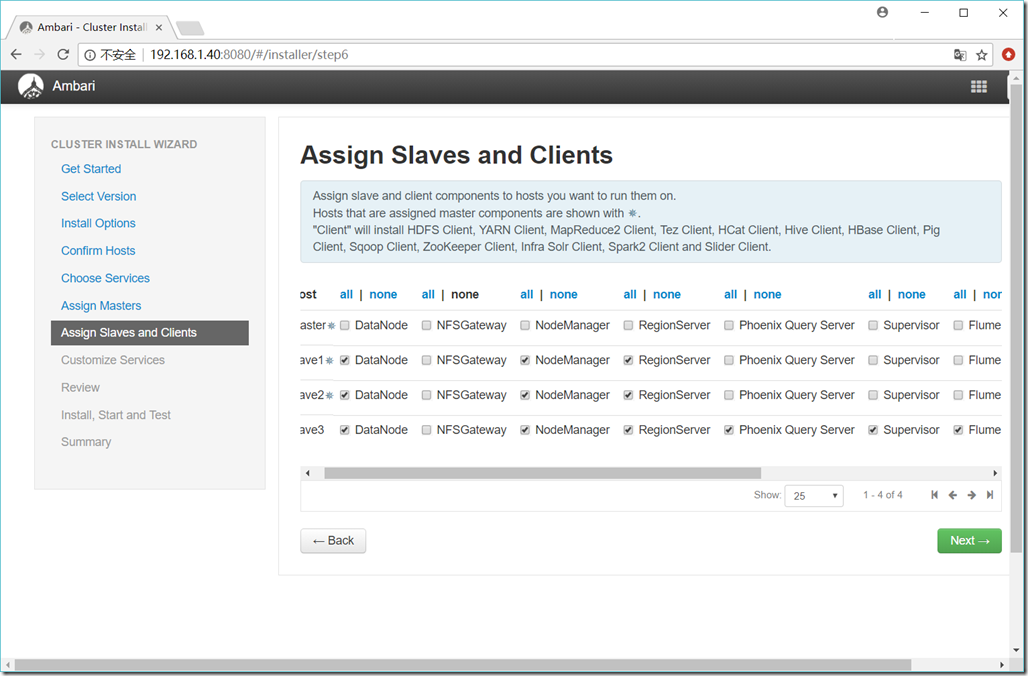
HDFS
DataNode : 3 hosts
NameNode : master
NFSGateway : 0 host
SNameNode : slave1
YARN + MapReduce2
App Timeline Server : slave1
NodeManager : 3 hosts
ResourceManager : master
Tez
Clients : 1 host
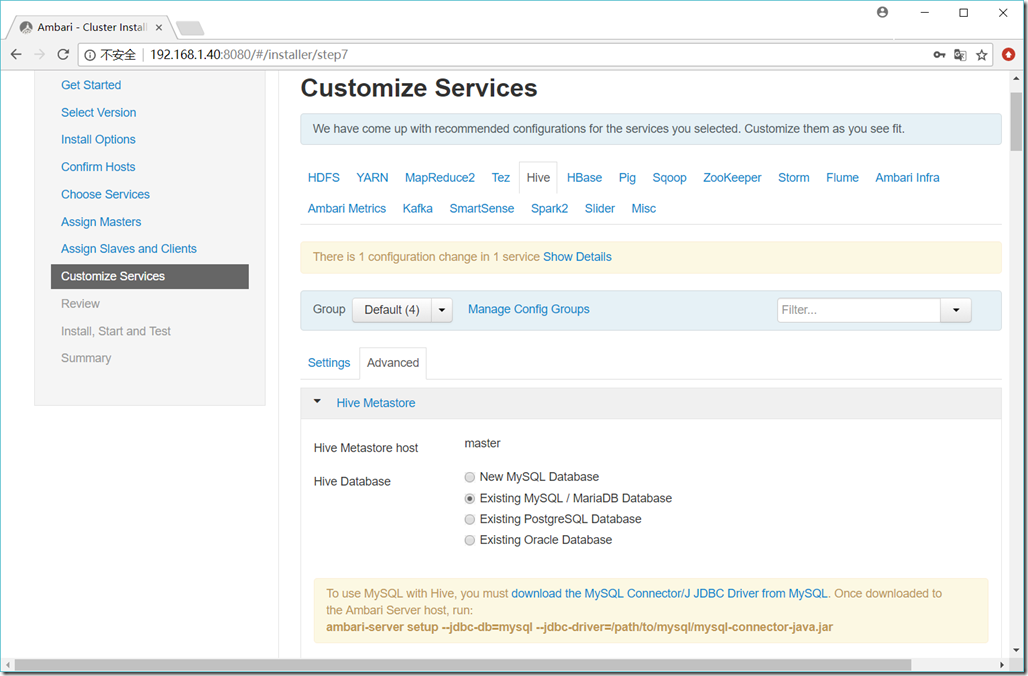
Hive
Metastore : master
HiveServer2 : master
WebHCat Server : master
Database : Existing MySQL / MariaDB Database
HBase
Master : master
RegionServer : 3 hosts
Phoenix Query Server : 1 host
Pig
Clients : 1 host
Sqoop
Clients : 1 host
ZooKeeper
Server : slave1
Storm
DRPC Server : master
Nimbus : slave1
UI Server : master
Supervisor : 1 host
Flume
Flume : 1 host
Ambari Infra
Infra Solr Instance : master
Ambari Metrics
Metrics Collector : slave2
Grafana : master
Kafka
Broker : master
SmartSense
Activity Analyzer : master
Activity Explorer : master
HST Server : master
Spark2
Livy for Spark2 Server : 1 host
History Server : master
Thrift Server : 1 host
Slider
Clients : 1 host
Ubuntu 16.04.4 LTS + Ambari 2.6.1.5 + HDP 2.6.4.0 安装部署的更多相关文章
- CentOS7.4 + Ambari 2.6.1.5 + HDP 2.6.4.0 安装部署
1. 参考说明 参考文档: https://docs.hortonworks.com/HDPDocuments/Ambari-2.6.1.5/bk_ambari-installation/conten ...
- Ubuntu 16.04.3 LTS u盘-安裝教程(填坑)
Ubuntu 16.04.3 LTS 下载地址: https://www.ubuntu.com/download/desktop 下载u盘后文件为iso,可以选择UltraISO制作U盘启动,也可以直 ...
- Alienware-15-R3 装Ubuntu 16.04.3 LTS
前言:Alienware-15-R3默认安装的系统是win10.现在卸载win0,装Ubuntu 16.04.3 LTS. 一.下载Ubuntu 16.04.3 LTS镜像文件,下载地址:https: ...
- Ubuntu 16.04.4 LTS环境中php7.0使用mysqli失败,数据库无法访问
环境: Ubuntu 16.04.4 LTS php7.0 输入命令php -m,显示如下,发现没有mysqli模块 输入命令sudo apt install php-mysql,安装mysql模块, ...
- Ubuntu 16.04.2 LTS 安装 jdk1.6 和 tomcat6 (一)
java和tomcat环境配置已经有很多教程和文章,最近项目需要配置Ubuntu 16.04.2下的古老的java6和tomcat 6,遇到小坑,特记录和分享. 网上的教程不是太新,就是太老,还有一些 ...
- Ubuntu 16.04.4 LTS设置root用户登陆图形界面
普通用户登陆真是太憋屈,这也不能那也不能,root用户登录就可以肆无忌惮了 本方法采用nano编辑器,ubantu版本Ubuntu 16.04.4 LTS,其他版本应该也一样,下面进入正题 1.终端登 ...
- Ubuntu 16.04.2 LTS 安装 jdk1.6 和 tomcat6 (二)
上一篇记录和分享了jdk1.6 在Ubuntu 16.04.2 环境下的安装配置,本文开始安装和配置tomcat 6 2 安装tomcat http://tomcat.apache.org ...
- ubuntu 16.04(Windows 10双系统+grub引导)无法进入tt1~tt6(NVIDIA驱动安装相关-黑屏,login loop,分辨率)
目录 前言回顾 最终解决: 0.关闭x服务 1.禁用nouveau 2.加入 3.更新 4.查找匹配驱动 5.选择推荐版本 6.等待安装后重启,nvidia-smi查看是否安装成功,或者lsmod | ...
- 在VMWare虚拟机中安装Ubuntu 16.04.1 LTS
一.需要的准备 安装好VMWare虚拟机(傻瓜式安装,一直next就可以,请支持正版),将Ubuntu的系统镜像下载好,目前最新的LTS版本为16.04.1. 我把虚拟机和Ubuntu镜像传到了百度云 ...
随机推荐
- Linux开机执行指定shell
目的:希望linux在开机或重启后第一时间启动部分服务或者执行特定脚本 1.需要在/etc/init.d/目录下建立对应的shell脚本,示例如下: 开机启动docker-compose中的所有容器 ...
- 机器学习技法笔记:16 Finale
Roadmap Feature Exploitation Techniques Error Optimization Techniques Overfitting Elimination Techni ...
- Angular使用总结 --- 通过指令动态添加组件
之前自己写的公共组件,都是会先引入,需要调起的时候再通过service控制公共组件状态.值.回调函数什么的.但是有一些场景不适合这种方式,还是动态添加组件更加好.通过写过的一个小组件来总结下. 创建组 ...
- php省市联动实现
设计模式:ajax实现,数据库格式:id,name,parent_id 数据库: CREATE TABLE IF NOT EXISTS `city` ( `id` ) NOT NULL AUTO_IN ...
- A Nice Paper About Mobile Data Offloading
关于Mobile Data Offloading这个研究领域的Paper基本上该有的都看过了,我想即使再有也无非是那些套路,新不到哪去.同样,这篇paper也是这样,它的出发点是改进原有的利用ad h ...
- 【xsy1503】 fountain DP
题目大意:给你$D$个格子,有$n$个喷水器,每个喷水器有一个喷水距离$r_i$. 现在你需要在这$D$个格子中选择$n$个位置按照任意顺序安装这$n$个喷水器,需要满足$n$个喷水器互相喷不到对方. ...
- (转)Linux 系统设置 : dmesg 命令详解
原文:https://blog.csdn.net/yexiangCSDN/article/details/80683246 https://www.cnblogs.com/duanxz/p/34770 ...
- 源码编译安装lnmp环境
一.源码编译安装步骤 首先说明源码安装的好处 速度快,可自定义路径 主要有三步:1.配置 进入源码安装包 ./configure --prefix=/uer/local/nginx 可指定参数 ...
- DDD实战进阶第一波(三):开发一般业务的大健康行业直销系统(搭建支持DDD的轻量级框架二)
了解了DDD的好处与基本的核心组件后,我们先不急着进入支持DDD思想的轻量级框架开发,也不急于直销系统需求分析和具体代码实现,我们还少一块, 那就是经典DDD的架构,只有了解了经典DDD的架构,你才能 ...
- salesforce零基础学习(八十九)使用 input type=file 以及RemoteAction方式上传附件
在classic环境中,salesforce提供了<apex:inputFile>标签用来实现附件的上传以及内容获取.salesforce 零基础学习(二十四)解析csv格式内容中有类似的 ...