配置httpd支持https
1、首先为192.168.108.159创建私有CA
#cd /etc/pki/CA
# (umask 077;openssl genrsa -out private/cakey.pem 2048)
#ls private/
#touch index.txt
#echo 01 > serial
2、在服务器上创建自签证书
#openssl req -new -x509 -key private/cakey.pem -out cacert.pem -days 7300
3、在web服务器上生成证书签署请求,在192.168.108.160虚拟机上
#cd /etc/httpd
#mkdir ssl
#cd ssl/
# (umask 077;openssl genrsa -out httpd.key 1024)//生成密钥
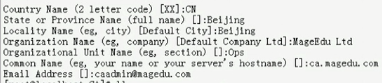
# openssl req -new -key httpd.key -out httpd.csr //生成证书签署请求
#scp httpd.csr root@192.168.108.159:/tmp/ //把httpd.csr放到服务器192.168.108.159的tmp目录下
4、在服务器上为wei服务器CA签证
#cd /etc/pki/CA
#openssl ca -in /tmp/httpd.csr -out certs/web1.magedu.com.crt -days 356
#ls newcerts/ 在这个目录下有01.pem
#ls certs/
#scp certs/web1.magedu.com.crt root@192.168.108.160:/etc/httpd/ssl/
5、接下来开始配置httpd服务可以支持https
#httpd -M | grep ssl //查看160主机即httpd服务器是否支持mod_ssl
#yum install mod_ssl //如果不存在就安装
#rpm -ql mod_ssl
/etc/httpd/conf.d/ssl.conf //主配置文件
/usr/lib64/httpd/modules/mod_ssl.so
/var/cache/mod_ssl
/var/cache/mod_ssl/scache.dir
/var/cache/mod_ssl/scache.pag
/var/cache/mod_ssl/scache.sem
#cd /etc/httpd/conf.d/
#cp ssl.conf{,.bak}//在修改配置文件之前应该先做备份
#vim /etc/httpd/conf.d/ssl.conf
修改<VirtualHost _default_:443>为<VirtualHost *:443>
DocumentRoot "/var/www/html"//需要开启,并对其做响应的修改,比如/vhosts/web1/htdocs
ServerName www.example.com:443// 服务器名字为web1.magedu.com
SSLEngine on这一项一定要开启
修改SSLCertificateFile /etc/pki/tls/certs/localhost.crt为SSLCertificateFile /etc/httpd/ssl/web1.magedu.com.crt//这个文件是当前httpd服务拿来给别的客户机验证的证书文件
修改SSLCertificateKeyFile /etc/pki/tls/private/localhost.key与上面匹配的私钥文件SSLCertificateKeyFile /etc/httpd/ssl/httpd.key
不应该验证客户端证书,因为客户端大多都没有证书
#ss -tnl //查看是否监听了443端口
测试基于https访问相应的主机;
# openssl s_client [-connect host:port] [-cert filename] [-CApath directory] [-CAfile filename]
#openssl s_client -connect 192.168.108.160:443 -CAfile /etc/pki/CA/cacert.pem
GET / HTTP/1.1
Host:web1.magedu.com回车两次,就可以看到请求的页面
配置httpd支持https的更多相关文章
- 配置nginx支持Https
配置nginx支持Https一定要先使用stop停止nginx然后重新代开不能使用reload 一:安装letsencrypt 1.从git上克隆下来git clone https://github. ...
- 安装配置ingress-nginx支持https访问
说明: 1.k8s版本:v1.23: 2.内网测试环境1台master,2台node节点,使用 DaemonSet+HostNetwork+nodeSelector 方式部署 ingress- ...
- Spring Mvc和Spring Boot配置Tomcat支持Https
SpringBoot配置支持https spring boot因为是使用内置的tomcat,所以只需要一些简单的配置即可. 1.首先打开命令行工具,比如cmd,输入以下命令 keytool -genk ...
- Springboot 配置 ssl 实现HTTPS 请求 & Tomcat配置SSL支持https请求
SSL(Secure Sockets Layer 安全套接层),及其继任者传输层安全(Transport Layer Security,TLS)是为网络通信提供安全及数据完整性的一种安全协议.TLS与 ...
- centos7配置Apache支持HTTPS
Apache版本2.4 安装mod_ssl yum install mod_ssl 建立文件夹,存放sslkey mkdir /etc/httpd/ssl/ 建立凭证档 openssl req -x5 ...
- Windows 下配置 Apache 支持 https
1.打开cmd ,输入 F: // 切换到Apache安装路径,我的Apache安装目录在 F盘 2.cd F:\Apache\bin 3.set "openssl_conf = F:\A ...
- CentOS 中 配置 Nginx 支持 https
一.基础设置: .yum -y update .yum -y install openssl* .cd /usr/local/nginx/conf .mkdir ./ssl .cd ./ssl # 在 ...
- apache环境下配置服务器支持https
SSL加密的意义在于保护服务器到客户端的信息或者是客户端到服务器的信息不被监听和篡改. 现在一些主流的网站都已经是通过 https访问了,搜索引擎对此类网站的收录也不存在问题了. 具体的配置流程大概是 ...
- Centos7.2下Nginx配置SSL支持https访问(站点是基于.Net Core2.0开发的WebApi)
准备工作 1.基于nginx部署好的站点(本文站点是基于.Net Core2.0开发的WebApi,有兴趣的同学可以跳http://www.cnblogs.com/GreedyL/p/7422796. ...
随机推荐
- 在HUE中将文本格式的数据导入hive数仓中
今天有一个需求需要将一份文档形式的hft与fdd的城市关系关系的数据导入到hive数仓中,之前没有在hue中进行这项操作(上家都是通过xshell登录堡垒机直接连服务器进行操作的),特此记录一下. - ...
- tensorflow学习5----变量管理
---恢复内容开始--- 前面,读书笔记用加入正则化损失模型效果带来的提升要相对显著. 变量管理: 目的:当神经网络的结构更加复杂,参数更多的时候,就需要一个更好的方式来管理神经网络中的参数. 解决方 ...
- oracle函数,游标,视图使用总结
oracle函数或者叫存储过程,在实际的开发过程中对于复杂的业务需求是非常有用的,非常有效率的也是非常好玩儿的一个技术点. 平常在开发过程中对于CRUD功能较多.一般SQL即可应付,大不了就是长一点而 ...
- PHP 取302跳转后真实 URL 的两种方法
1 . 第一种,CURL形式[感觉处理略慢,代码偏多] $url = '将跳转的URL'; $ch = curl_init(); curl_setopt($ch, CURLOPT_URL, $url) ...
- css技巧-案例
点击进入:http://herry.wuhairui.cn/cssSkill/main.html
- v-model指令实现简单的问卷表格
<!DOCTYPE html> <html lang="en"> <head> <meta charset="UTF-8&q ...
- mysql、oracle分库分表方案之sharding-jdbc使用(非demo示例)
选择开源核心组件的一个非常重要的考虑通常是社区活跃性,一旦项目团队无法进行自己后续维护和扩展的情况下更是如此. 至于为什么选择sharding-jdbc而不是Mycat,可以参考知乎讨论帖子https ...
- mysql主从(主备)同步一键配置,配自动检测功能
主从一键shell配置 做个笔记. #!/bin/bash #Mysql sync #chenglee #master机器ip MasterIP="192.168.137.174" ...
- SQL server无法连接上服务器的相关问题
安装MySql以后,SQL server突然就连接不上服务器了,问了老师,说是啥进程关闭了,都打开了也没搞好,都准备重装了,结果看到度妈上面的一篇文献,原来是SQL server MSSQLSERV ...
- CEF 添加F5刷新快捷键
Keyboardcodes:https://www.androidos.net.cn/android/4.3_r1/xref/external/webkit/Source/WebCore/platfo ...