redis哨兵配置 总结
本文内容涵盖
- windows下单机部署redis多实例 、linux下哨兵示例
- redis主从配置
- redis哨兵配置
以spring boot redis demo下一个存action,一个取action为例进行演示。
本文只讲配置,不讲原理(原理随便都是,配置完整完善且简洁的少)
redis 命令介绍
- 启动实例 D:\Redis-6379> redis-server.exe redis.windows.conf
- 指定进入哪个redis实例,redis的默认客户端是
redis-cli, D:\Redis-6379> redis-cli -h 192.168.154.128 -p 6379 # 默认为localhost:6379 - 显示某个redis实例信息,先用redis-cli进入到redis实例,192.168.154.128:6379 > info replication
- 设置主从关系。 只需要操作从库,无需操作主库。1. redis-cli 2. 192.168.154.128:6379 > slaveof 172.17.0.3 6379 # 192.168.154.128:6379就变成172.17.0.3 6379 的从库了
- 取消主从关系。操作从库,slaveof no one
- 启动哨兵进程 D:\Redis-6379> redis-server.exe sentinel.conf --sentinel
- windows下将redis实例作为一个服务(name:redis6380),可随机启动,redis-server.exe --service-install redis.windows-service-6380.conf --service-name redis6380 --port 6380
- windows下删除服务 sc delete redis6380
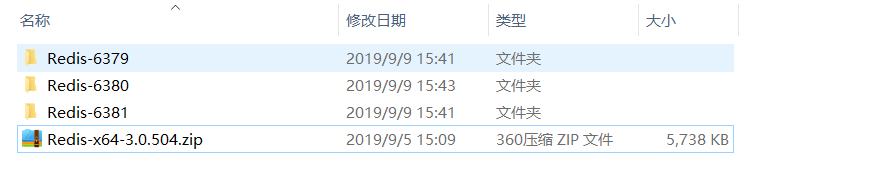
准备材料
Redis-x64-3.0.504.zip
1. windows下单机部署redis多实例
解压后拷贝三份
redis主从配置
分别设置 redis.windows.conf, 这里以79为主库,80,81位从库
修改配置项:
79:
port 6379
80:
port 6380
slaveof 127.0.0.1 6379 # 表示此库作为127.0.0.1 6379的从库
81:
port 6381
slaveof 127.0.0.1 6379
此时主从的配置已经完成。
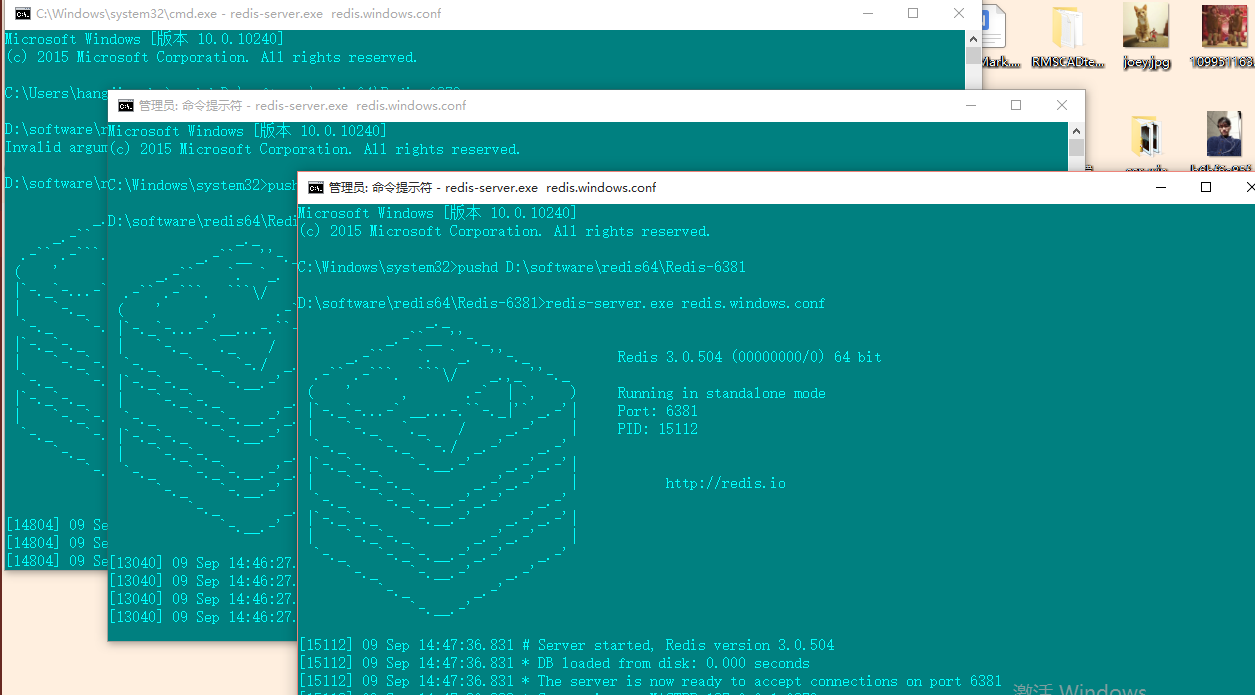
依次启动三个实例
- D:\Redis-6379>redis-server.exe redis.windows.conf
- D:\Redis-6380>redis-server.exe redis.windows.conf
- D:\Redis-6381>redis-server.exe redis.windows.conf
再启动一个redis-cli
D:\Redis-6379>redis-cli.exe -h 127.0.0.1 -p 6379
查看当前实例信息,可以看到,有两个slave。connected_slaves:2
127.0.0.1:6379> info replication

# Replication

role:master

connected_slaves:2

slave0:ip=127.0.0.1,port=6380,state=online,offset=133629,lag=1

slave1:ip=127.0.0.1,port=6381,state=online,offset=133895,lag=0

master_repl_offset:133895

repl_backlog_active:1

repl_backlog_size:1048576

repl_backlog_first_byte_offset:2

repl_backlog_histlen:133894
再来测试下主从,发个请求往79里塞值,看80,81是否能同步数据。(主库读写,从库只读)
这里的程序demo不做展开,网上找下很多。
pom.xml
		 <dependency>

			<groupId>org.springframework.boot</groupId>

			<artifactId>spring-boot-starter-web</artifactId>

		</dependency>

		<dependency>

			<groupId>org.springframework.boot</groupId>

			<artifactId>spring-boot-starter-data-redis</artifactId>

		</dependency>

		<dependency>

			<groupId>org.apache.commons</groupId>

			<artifactId>commons-pool2</artifactId>

		</dependency>

		<dependency>

			<groupId>org.springframework.boot</groupId>

			<artifactId>spring-boot-devtools</artifactId>

			<scope>runtime</scope>

		</dependency>

		<dependency>

			<groupId>org.springframework.boot</groupId>

			<artifactId>spring-boot-starter-test</artifactId>

			<scope>test</scope>

		</dependency>
properties:
# Redis数据库索引(默认为0)

spring.redis.database=0

# Redis服务器地址

spring.redis.host=localhost

# Redis服务器连接端口

# localhost master:6379  slaves: 6380 6381

spring.redis.port=6379

# Redis服务器连接密码(默认为空)

spring.redis.password=

#连接池最大连接数(使用负值表示没有限制)

spring.redis.pool.max-active=8

# 连接池最大阻塞等待时间(使用负值表示没有限制)

spring.redis.pool.max-wait=-1

# 连接池中的最大空闲连接

spring.redis.pool.max-idle=8

# 连接池中的最小空闲连接

spring.redis.pool.min-idle=0

# 连接超时时间(毫秒)

spring.redis.timeout=5000
/**

 * RedisSerializer redisSerializer =new StringRedisSerializer();

 * 因为redisTemplate默认会序列化key,我们查看的时候,key就是序列化后的key,不方便查看.

 * 所以我们先序列化一把key,redisTemplate再序列化一把。当然存取的序列化要一致,不然匹配不到key

 */

@Service

public class RedisService {

    @Resource

    private RedisTemplate<String,Object> redisTemplate;

    public void set(String key, Object value) {

        //更改在redis里面查看key编码问题

        RedisSerializer redisSerializer =new StringRedisSerializer();

        redisTemplate.setKeySerializer(redisSerializer);

        ValueOperations<String,Object> vo = redisTemplate.opsForValue();

        vo.set(key, value);

    }

    public Object get(String key) {

        RedisSerializer redisSerializer =new StringRedisSerializer();

        redisTemplate.setKeySerializer(redisSerializer);

        ValueOperations<String,Object> vo = redisTemplate.opsForValue();

        return vo.get(key);

    }

}
@RestController

public class CityController {

    @Autowired

    private RedisService redisService;

    //http://localhost:8888/saveCity?cityName=北京&cityIntroduce=中国首都&cityId=1

    @GetMapping(value = "saveCity")

    public String saveCity(int cityId, String cityName, String cityIntroduce) {

        City city = new City(cityId, cityName, cityIntroduce);

        redisService.set(cityId + "", city);

        return "success";

    }

    //http://localhost:8888/getCityById?cityId=1

    @GetMapping(value = "getCityById")

    public City getCity(String cityId) {

        City city = (City) redisService.get(cityId + "");

        return city;

    }

}
如上配置完spring boot demo for redis 后
塞值 http://localhost:8888/saveCity?cityName=北京&cityIntroduce=中国首都&cityId=1
用redis-cli(如果你有别的redis客户端也一样)分别进到三个实例中进行数据获取:

可以看到三个实例数据已经同步。
主从测试通过。
redis哨兵配置
- 三个实例目录下分别新建sentinel.conf, 端口为26379,26380,26381,其他一致
port 26379

sentinel monitor mymaster 127.0.0.1 6379 2

daemonize yes
最后的2: [quorum]是一个数字,指明当有多少个sentinel认为一个master失效时,master才算真正失效
(哨兵就是个独立的进程,用来监听实例信息的变化,且对相关操作做出反应,这里对每个实例都配一个哨兵进程)
启动三个哨兵进程
D:\Redis-6379>redis-server.exe sentinel.conf --sentinel
D:\Redis-6380>redis-server.exe sentinel.conf --sentinel
D:\Redis-6381>redis-server.exe sentinel.conf --sentinel
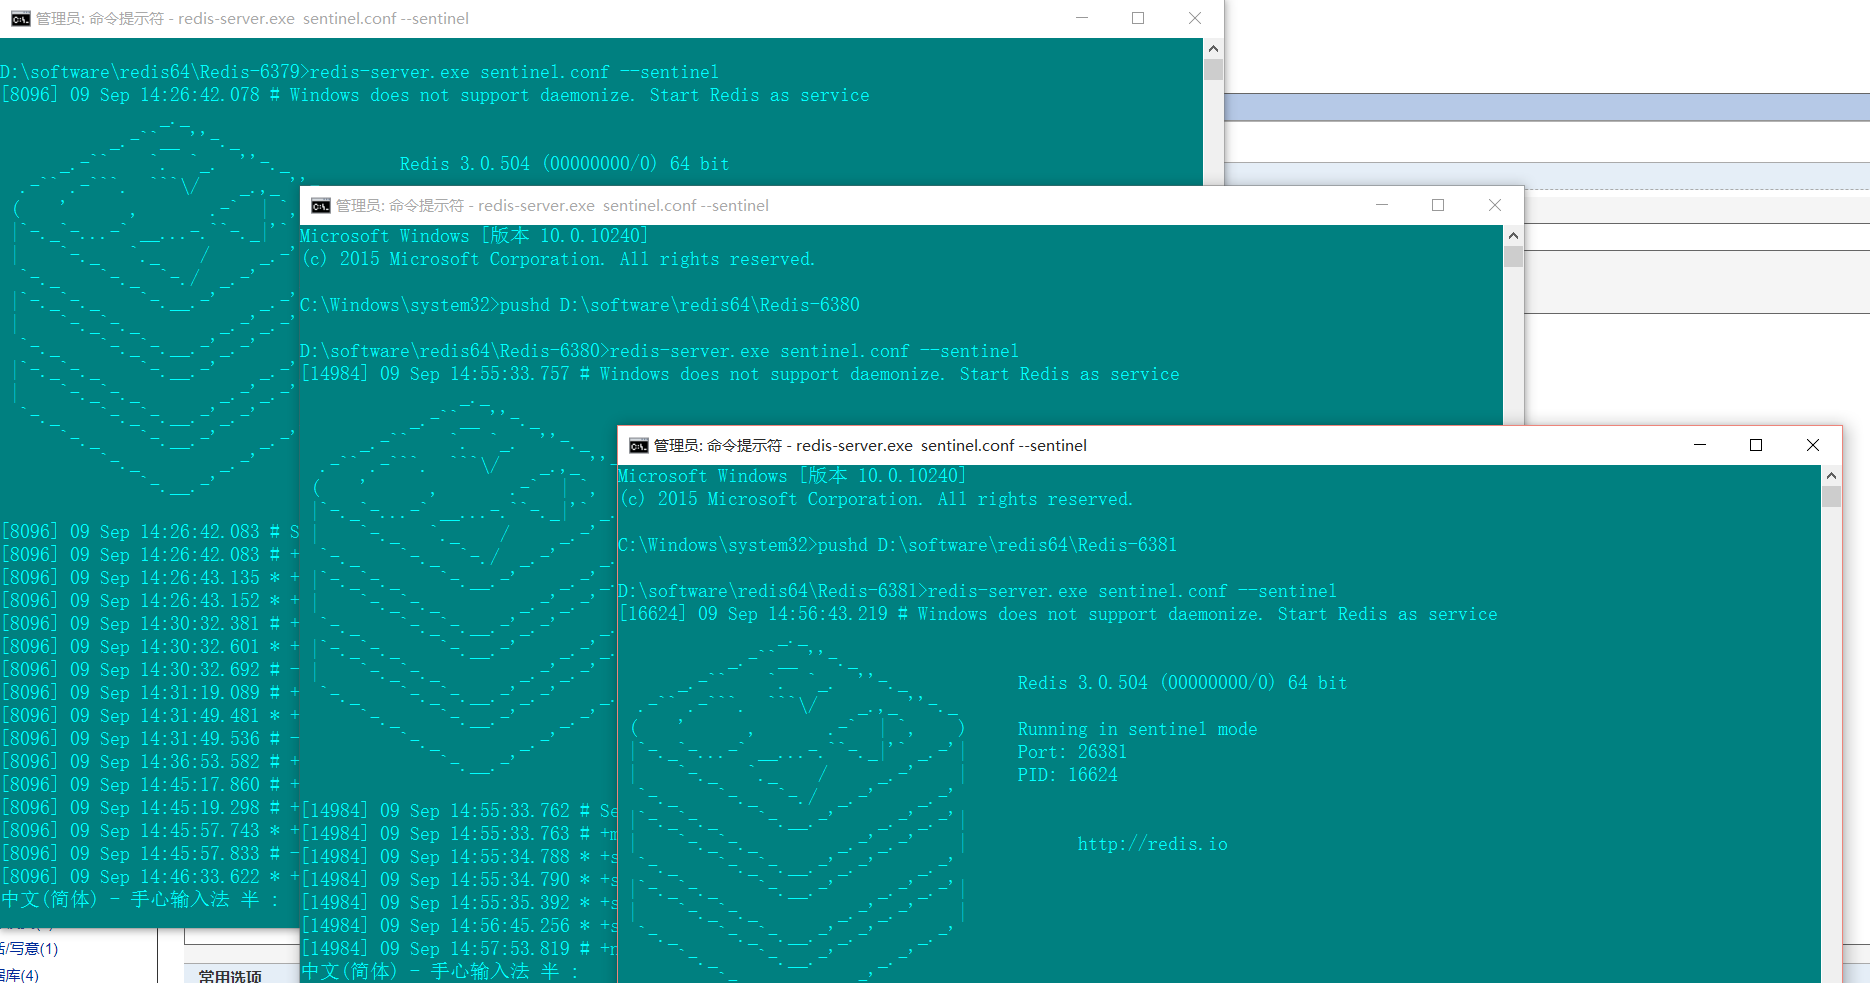
至此,哨兵配置且启动完成。
测试,停掉主库79的进程,这里就是在79实例的cmd(非哨兵cmd)下ctrl+c
观察另外两个实例在cmd中输出的日志
81的日志
简单分析下日志
- 老大下线了
- 疯狂的发送心跳进行询问(老大,你死了没?没回答,就应该是死了,哨兵进程辅助slave(s)建立新的老大)
- 自己成为老大 MASTER MODE enabled
- 其他小弟进行数据请求
- 新的主从建立
[15112] 09 Sep 14:57:23.699 # Connection with master lost.

[15112] 09 Sep 14:57:23.700 * Caching the disconnected master state.

[15112] 09 Sep 14:57:24.420 * Connecting to MASTER 127.0.0.1:6379

[15112] 09 Sep 14:57:24.420 * MASTER <-> SLAVE sync started

[15112] 09 Sep 14:57:25.421 * Non blocking connect for SYNC fired the event.

[15112] 09 Sep 14:57:25.421 # Sending command to master in replication handshake: -Writing to master: Unknown error

[15112] 09 Sep 14:57:25.423 * Connecting to MASTER 127.0.0.1:6379

[15112] 09 Sep 14:57:25.423 * MASTER <-> SLAVE sync started

[15112] 09 Sep 14:57:26.424 * Non blocking connect for SYNC fired the event.

[15112] 09 Sep 14:57:26.424 # Sending command to master in replication handshake: -Writing to master: Unknown error

[15112] 09 Sep 14:57:26.426 * Connecting to MASTER 127.0.0.1:6379

[15112] 09 Sep 14:57:26.426 * MASTER <-> SLAVE sync started

[15112] 09 Sep 14:57:27.427 * Non blocking connect for SYNC fired the event.

[15112] 09 Sep 14:57:27.427 # Sending command to master in replication handshake: -Writing to master: Unknown error

。。。。。。。。。。。。。。。。。。。。

[15112] 09 Sep 14:57:53.517 * Connecting to MASTER 127.0.0.1:6379

[15112] 09 Sep 14:57:53.517 * MASTER <-> SLAVE sync started

[15112] 09 Sep 14:57:54.006 * Discarding previously cached master state.

[15112] 09 Sep 14:57:54.007 * MASTER MODE enabled (user request from 'id=8 addr=127.0.0.1:51668 fd=14 name=sentinel-efc4be2b-cmd age=70 idle=0 flags=x db=0 sub=0 psub=0 multi=3 qbuf=0 qbuf-free=32768 obl=36 oll=0 omem=0 events=rw cmd=exec')

[15112] 09 Sep 14:57:54.009 # CONFIG REWRITE executed with success.

[15112] 09 Sep 14:57:54.855 * Slave 127.0.0.1:6380 asks for synchronization

[15112] 09 Sep 14:57:54.855 * Full resync requested by slave 127.0.0.1:6380

[15112] 09 Sep 14:57:54.856 * Starting BGSAVE for SYNC with target: disk

[15112] 09 Sep 14:57:54.863 * Background saving started by pid 15712

[15112] 09 Sep 14:57:55.125 # fork operation complete

[15112] 09 Sep 14:57:55.126 * Background saving terminated with success

[15112] 09 Sep 14:57:55.129 * Synchronization with slave 127.0.0.1:6380 succeeded
观察哨兵cmd也会有相关的日志输出,这里就不展开了。
现在我们要确定哨兵进程是否帮我们建立新的master节点了。
redis-cli进入到81中
info replication
127.0.0.1:6381> info replication

# Replication

role:master

connected_slaves:1

slave0:ip=127.0.0.1,port=6380,state=online,offset=17573,lag=1

master_repl_offset:17839

repl_backlog_active:1

repl_backlog_size:1048576

repl_backlog_first_byte_offset:2

repl_backlog_histlen:17838
role从slave变成了master
哨兵测试通过。
最后剩下spring boot中进行相关的设置。
properties新增
# name of Redis server  哨兵监听的Redis server的名称

spring.redis.sentinel.master=mymaster

# comma-separated list of host:port pairs  哨兵的配置列表

spring.redis.sentinel.nodes=127.0.0.1:26379,127.0.0.1:26380,127.0.0.1:26381
package com.myredis.config;

import org.springframework.beans.factory.annotation.Value;

import org.springframework.cache.annotation.CachingConfigurerSupport;

import org.springframework.cache.annotation.EnableCaching;

import org.springframework.cache.interceptor.KeyGenerator;

import org.springframework.context.annotation.Bean;

import org.springframework.context.annotation.Configuration;

import org.springframework.data.redis.connection.RedisNode;

import org.springframework.data.redis.connection.RedisSentinelConfiguration;

import java.lang.reflect.Method;

@Configuration

@EnableCaching//开启缓存

public class RedisConfig extends CachingConfigurerSupport {

    @Value("${spring.redis.sentinel.nodes}")

    private String redisNodes;

    @Value("${spring.redis.sentinel.master}")

    private String master;

    /**

     * 自定义生成redis-key

     *

     * @return

     */

    @Bean

    public KeyGenerator keyGenerator() {

        return new KeyGenerator() {

            @Override

            public Object generate(Object target, Method method, Object... params) {

                StringBuilder sb = new StringBuilder();

                sb.append(target.getClass().getName());

                sb.append(method.getName());

                for (Object obj : params) {

                    sb.append(obj.toString());

                }

                return sb.toString();

            }

        };

    }

    @Bean

    public RedisSentinelConfiguration redisSentinelConfiguration(){

        RedisSentinelConfiguration configuration = new RedisSentinelConfiguration();

        String[] host = redisNodes.split(",");

        for(String redisHost : host){

            String[] item = redisHost.split(":");

            String ip = item[0];

            String port = item[1];

            configuration.addSentinel(new RedisNode(ip, Integer.parseInt(port)));

        }

        configuration.setMaster(master);

        return configuration;

    }

}
程序起来后,kill掉某个主库或从库,看数据是否依然能读取。
简洁版配置过程(linux)
当前系统redis(v5.0.5)部署采用一主二从三哨兵
下面举例说明
服务器地址
10.136.55.30: 默认为主实例(master)(下文中30替代,依次如是)

10.136.55.31: 默认为从实例(slave)

10.136.55.32: 默认为从实例(slave)

10.136.55.33: 默认为哨兵(sentinel)

10.136.55.34: 默认为哨兵(sentinel)

10.136.55.35: 默认为哨兵(sentinel)
1、将对应版本的redis拷贝到6台服务器的相关目录下
(建议目录一致,如/home/vlog/redis/redis-5.0.5/)
2、启动30、31、32实例
(1)$ cd /home/vlog/redis/redis-5.0.5/src
(2)$ ./redis-server ../redis.conf # 以redis.conf配置启动实例
3、分别配置30、31、32实例
修改redis-conf 文件
注释掉bind 127.0.0.1
protected-mode yes 修改为 protected-mode no
daemonize no修改为daemonize yes
stop-writes-on-bgsave-error yes改为stop-writes-on-bgsave-error no
(1)$ ./redis-cli # 用默认客户端进入redis
(2)127.0.0.1:6379> config get requirepass # 查看当前redis有没有设置密码
(3)127.0.0.1:6379> config set requirepass 123456 # 设置密码
(4)127.0.0.1:6379> auth 123456 # 有密码了后,主动输入密码
4、分别配置31、32为slave(主从配置)
(1)127.0.0.1:6379> slaveof 10.136.55.30 --设置当前库为10.136.55.30 6379的从库
(2)127.0.0.1:6379>config set masterauth 123456 # 主redis服务的访问密码
5、查看主从配置是否成功
(1)进到30:6379> info replication
--Replication
role:master
connected_slaves:2
slave0:ip=10.136.55.31,port=6379,state=online,offset=133629,lag=1
slave1:ip=10.136.55.32,port=6379,state=online,offset=133895,lag=0 master_repl_offset:133895
repl_backlog_active:1
repl_backlog_size:1048576
repl_backlog_first_byte_offset:2 repl_backlog_histlen:133894
...
可以看到30作为master,有两个slave
(2)进到31、32> info replication
--Replication
role:slave
Master_host:10.136.55.30
Master_port:6379
...
可以看到31、32作为slave
至此,主从配置完成。
6、进行哨兵配置
sentinel.conf(复制一样的三份)
port 26379
sentinel monitor mymaster 10.136.55.30 6379 1
daemonize yes
sentinel auth-pass mymaster 123456
protected-mode no
--哨兵的端口
port 26379
--初次配置时的状态,这个sentinel会自动更新 最后的1表示有n个哨兵确认master是否真正宕机,mymaster 为哨兵配置的定义名称
sentinel monitor mymaster 10.136.55.30 6379 1
--redis是否要用守护线程的方式启动
daemonize yes
--哨兵监听的主从集群密码
sentinel auth-pass mymaster 123456
--保护模式关闭
protected-mode no
将其拷贝到33、34、35 /home/vlog/redis/redis-5.0.5/sentinel.conf
7、启动哨兵
(1)$ cd /home/vlog/redis/redis-5.0.5/src
(2)$ ./redis-server ../sentinel.conf --sentinel
8、查看哨兵配置情况(33、34、35)
$ ./redis-cli -h 127.0.0.1 -p 26379 --这里要指定端口,redis-cli默认进入6379的实例
127.0.0.1:26379> info sentinel
-- Sentinel
Sentinel_masters:1
...
Master0:name=mymaster,status=ok,address=10.136.55.30:6379,slaves=2,sentinels=1
若配置成功,则可看到以上信息。
至此哨兵配置完成。
that's all!!!
redis哨兵配置 总结的更多相关文章
- redis哨兵配置
redis哨兵配置主从 redis哨兵的启动和redis实例的启动没有关系.所以可以在任何机器上启动redis哨兵.至少要保证有两个哨兵在运行,要不然宕机后哨兵会找不到主节点. 配置步骤: 1.在 ...
- redis哨兵配置主从
redis哨兵的启动和redis实例的启动没有关系.所以可以在任何机器上启动redis哨兵.至少要保证有两个哨兵在运行,要不然宕机后哨兵会找不到主节点. 配置步骤: 1.在redis的配置文件中添加鉴 ...
- Redis哨兵模式高可用部署和配置
一.Redis 安装配置 1.下载redis安装包 wget http://download.redis.io/releases/redis-4.0.9.tar.gz 2.解压安装包 tar -zxv ...
- .Net支持Redis哨兵模式
csredis 博客 csRedisgit地址 csRedis3.2.1 Nuget地址 (在使用csredis3.2.1获取sentinel时产生运行时异常,调查问题最后发现是获取sentinel的 ...
- redis哨兵-5
#地址: https://www.cnblogs.com/PatrickLiu/p/8444546.html #常用架构 redis1主1从+3哨兵 实现redis高可用 #redis主从 ##### ...
- 通过哨兵机制实现Redis主从配置以及java调用
Redis版本:3.0.7 操作环境:Linux 一.redis 主从配置的作用是什么 redis主从配置,配置master 只能为写,slave只能为读,在客户端对poolconnect请求时候,, ...
- windows下安装和redis主从配置(通过哨兵控制主从切换)
首先自己先得了解什么是redis,这里就不详做介绍什么是redis了,这篇文章主要讲的是怎么样配置 redis怎样配置主从关系和哨兵控制主从服务器的配置以及应用,就当是给自己记笔记吧! 1.下载red ...
- redis单点、redis主从、redis哨兵sentinel,redis集群cluster配置搭建与使用
目录 redis单点.redis主从.redis哨兵 sentinel,redis集群cluster配置搭建与使用 1 .redis 安装及配置 1.1 redis 单点 1.1.2 在命令窗口操作r ...
- redis哨兵集群配置
redis 集群架构图: 需要先配置redis主从,我这边是单机部署的. 采用一主一从,两个sentinel. redis host: 172.31.11.235 redis-master port: ...
随机推荐
- sass、less和stylus 相同与不同
sass.less和stylus的安装使用和入门实践 https://www.jianshu.com/p/1eaf366814e2 stylus 基础教程 https://blog.csdn.net/ ...
- NB-IoT物联网开发资料
OneNET(移动平台) https://open.iot.10086.cn/ NB-IoT套件提供了一种方便用户使用NB模组将设备连接到OneNET平台实现丰富NB-IoT应用的能力.平台为用户提供 ...
- [报错处理]Python Requests - No connection adapters
出错信息很清楚:Python请求 - 没有连接适配器. 你得把网络协议加进入网址: http://192.168.1.61:8080/api/call 没有 http:// 请求不知道如何连接远程. ...
- 【LeetCode算法-26】Remove Duplicates from Sorted Array
LeetCode第26题 Given a sorted array nums, remove the duplicates in-place such that each element appear ...
- LeetCode_415. Add Strings
415. Add Strings Easy Given two non-negative integers num1 and num2 represented as string, return th ...
- 使用C++调用并部署pytorch模型
1.背景(Background) 上图显示了目前深度学习模型在生产环境中的方法,本文仅探讨如何部署pytorch模型! 至于为什么要用C++调用pytorch模型,其目的在于:使用C++及多线程可以加 ...
- 为什么选择.NETCore
为什么选择.NETCore? 学习新的开发框架是一项巨大的投资.您需要学习如何在新框架中编写,构建,测试,部署和维护应用程序.作为开发人员,有许多框架可供选择,很难知道什么是最适合的.即使您正在使用 ...
- QT笔记-QlineEdit
1 QlineEdit 2 案例 构造一个用户登录界面,输入用户名密码,点击确定以后检查是否正确 (1)布局 注意事项:先拖动Label--->然后Line Edit---->按住ctrl ...
- TCP/IP学习笔记13--IP地址的构成,广播地址,IP多播,子网掩码
现在,我是蔚蓝的 :在此岸或彼岸,我都是蔚蓝的. ---李瑾 IP对应的是OSI模型中的网络层,TCP对应的是传输层.每一个参与通信的主机都会有一个IP地址. IP地址(IPv4地址)含4个字节,每 ...
- Prometheus入门到放弃(4)之cadvisor监控docker容器
Prometheus监控docker容器运行状态,我们用到cadvisor服务,cadvisor我们这里也采用docker方式直接运行. 1.下载镜像 [root@prometheus-server ...