Enforcing the correct protocol for partially SSL secured SharePoint sites
Enforcing the correct protocol for partially SSL secured SharePoint sites
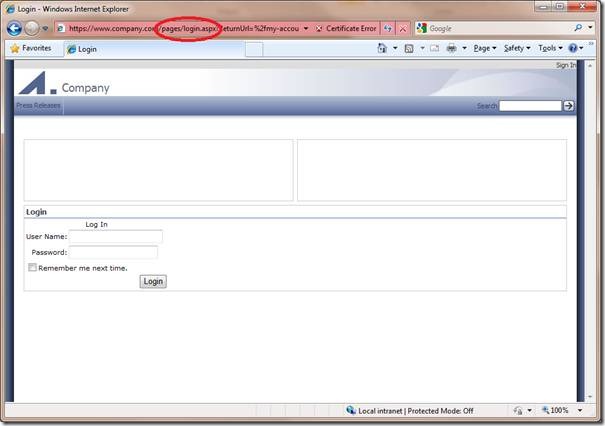
This is the third in a series of posts detailing how to configure a partially SSL secured SharePoint site. In the previous post we covered how to enable SSL for the site. In this post we will cover how to force connections to use the correct protocol (HTTPS for sensitive data, HTTP otherwise). This is required so that if a user tries to browse to page that sends or displays sensitive data via HTTP (e.g.http://www.company.com/pages/login.aspx) they will be redirected to the HTTPS version of the page (e.g.https://www.company.com/pages/login.aspx – so they can login securely) and vice versa for pages like the homepage that should be delivered via HTTP so they do not incur the performance hit of encrypting and decrypting the page.
Ideally we would enter absolute links when linking to HTTPS pages from HTTP pages and vice versa. In reality, however, there are several reasons why this won’t always work so we need to have a ‘catch all’ method to ensure the correct protocol is used. Some reasons absolute URL’s don’t always work are:
- OOTB web parts such as the summary links web part will convert absolute links to relative links if they find an alternate access mapping for the site entered.
- Content authors may enter relative URL’s to secure pages such as the login page, for example by using the link selector tool.
- Content deployment will automatically replace absolute URL’s with relative URL’s if an alternate access mapping exists for the absolute URL. This affects all content pages and many OOTB web parts.
One way to ensure the correct protocol is used is to use redirection at the IIS level (this can also be done at the firewall but this won’t often be available for development/test environments). With the release of IIS 7 Microsoft has developed a URL Rewrite Module that provides an easy way for us to do this in IIS 7 Manager. The following steps show how to set this up.
Site setup
In this example we will partition the site into three areas.
- Secured and anonymous – pages that display or send sensitive information and therefore require SSL but are available to anonymous users. For example the login page would fit into this category.
- Secured and authenticated – page that display or send sensitive information and require the user to be logged in. For example a ‘My Details’ page that allows the user to view and edit their address details.
- Unsecured – pages that do not require the user to be logged in and do not contain sensitive information. All the remaining pages in the site fall into this category.
This is shown in the diagram below:
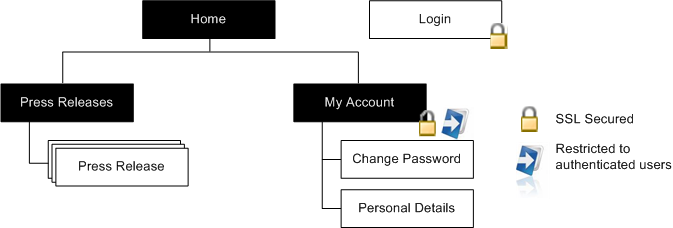
The site map above shows; an unsecured, anonymous homepage and ‘Press Releases’ site, a SSL secured and anonymous login page, and a SSL Secured ‘My Account’ site that requires authentication to access.
Enforcing SSL for anonymously accessible SharePoint pages
Step 1. Redirect login requests to the login form
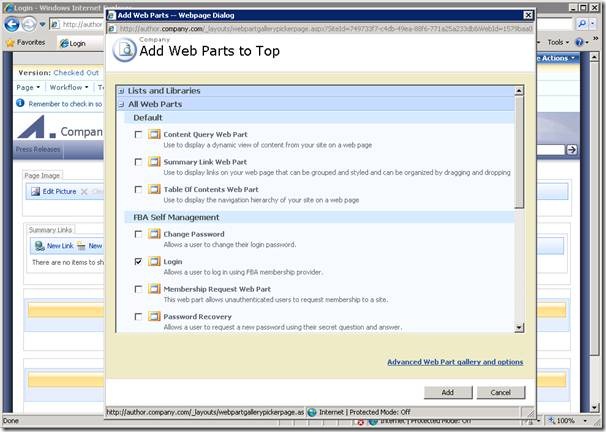
As we are creating a public website we’ll replace the standard SharePoint branded login page with a publishing page that reflects our look and feel. In this example I’m using the Community Kit for SharePoint: Forms Based Authentication (CKS:FBA) solution’s web parts to allow me to quickly create some pages with the ASP.NET login controls packaged up as web parts. So to create the login page I’ve just created a page based on the Welcome Page template and dropped in the CKS:FBA Login web part as shown below:
We can then specify this as the login page by changing the loginUrl attribute of the forms element in the web.config as shown below:
<authentication mode="Forms">
<forms loginUrl="https://www.company.com/pages/login.aspx"/>
</authentication>
This will now redirect us to the login page (using SSL) if we try to access a secured resource.
Step 2. Secure the login page
While requests to secure pages will now be redirected to the login form it is still possible to view the page via HTTP so we need to apply some additional logic to ensure that if the user clicks on a link to the HTTP version of the page or types the HTTP URL into the browsers address bar the page is served via HTTPS. In this example we will use the URL Rewrite Module for IIS 7 but if your firewall supports it that might be a better solution. If you are using an earlier version of IIS you might need to look into third party rewrite tools or create a custom solution either using ISAPI or an HttpModule to do the redirection.
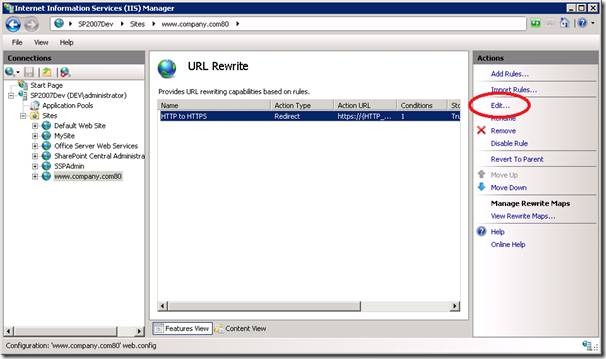
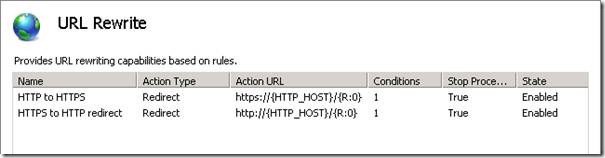
Once you have the URL Rewrite Module installed you should see the feature show up for your site in IIS.

To secure the login page open up the feature and click ‘Add Rules…’ and select the ‘Blank rule’ template
Enter the following information to redirect HTTP requests to the login page to use HTTPS
- Name: HTTP to HTTPS
- Pattern: ^Pages/Login\.aspx
- Condition:
- Condition input: {HTTPS}
- Check if input string: Matches the pattern
- Pattern: off
- Action Type: Redirect
- Redirect URL: https://{HTTP_HOST}/{R:0}
- Redirect type: Permanent (301)
Note: detailed information on creating rewrite rules is covered in the article “Creating rewrite rules for the URL Rewrite Module” on the Official IIS Site.
Now if we type in http://www.company.com/pages/login.aspx we will automatically be redirected tohttps://www.company.com/pages/login.aspx.

Step 3. Enable authentication
We can extend this approach slightly to secure pages that should be delivered via SSL and only visible to authenticated users. Examples of these types of pages are ‘My Account’ type pages that allow logged in users to edit their personal information and/or view purchase history. In this example we will create a site called ‘My Account’ and create an example ‘Change Password’ page to show how we can control access to these pages and ensure the correct protocol is used.
Remove anonymous access for site
The first step in the process is to log into the forms authenticated site as a user who has administrative privileges. This can be done by specifying a forms user as the site collection administrator in Central Administration or by granting them the full rights policy.
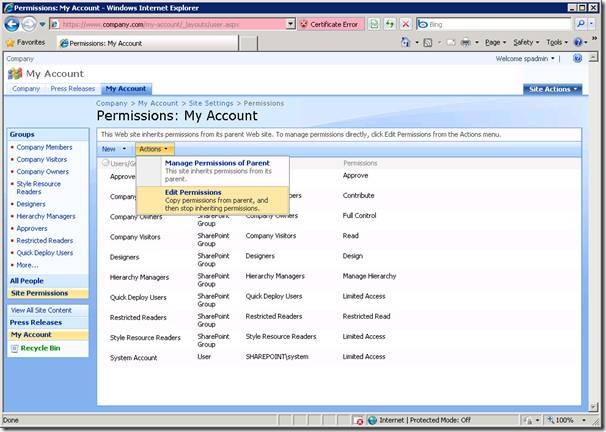
1. Once you have logged in you will need to browse to the ‘My Account’ site and navigate to Site Actions > Site Settings > Modify All Site Settings > Users and Permissions | Advanced permissions.
2. Select Actions > Edit Permissions. This will break permissions inheritance and allow us to remove anonymous access to the ‘My Account’ site.
3. Select Settings > Anonymous Access
4. Select ‘Nothing’ and click OK.
Anonymous users trying to access this site will now be redirected to the login page to authenticate before being able to view pages in this site. We now need to add forms users or roles to one of the groups that does have access to the site to allow them to view these pages. In this example I have created a role in the forms database named ‘AllUsers’ and assigned every user this permission. To give all users read only permission on the ‘My Account’ site we will add the ‘AllUsers’ role to the ‘Restricted Readers’ group in SharePoint.
5. Navigate to Site Settings > Modify All Site Settings > People and Groups and select the ‘Restricted Readers‘ group.
6. Enter the ‘AllUsers’ group into the people picker and select ‘OK’
We now have the correct permissions applied. To check that anonymous users can no longer access this site we can try to browse to the site directly as an anonymous user:

As we don’t have permission ASP.NET will redirect us to the login page specified in the web.config file:
Step 4. Secure additional sites
While the ‘My Account’ site is now restricted to anonymous users the pages within this site are not forced to use SSL. To do this we need to modify our rewrite rule as follows:
1. In IIS manager open the URL Rewrite feature
2. Select the rule we created to secure the login page and click ‘Edit’
3. Update the pattern to the following to additionally redirect HTTP requests to the ‘My Account’ site to use HTTPS:
- Pattern: ^(my-account|pages/login)(.*)\.aspx
This will ensure any requests to the ‘My Account’ site are also sent via SSL.
Step 5. Ensure non-sensitive pages are delivered via HTTP.
The last step is to force non-sensitive pages such as the homepage to use HTTP to avoid the overhead of encrypting and decrypting the page. This can be done by creating an additional rewrite rule as shown below:
1. In IIS manager open the URL Rewrite feature and click ‘Add Rules…’ and select the ‘Blank rule’ template

Enter the following information to redirect HTTPS requests to use HTTP for all other pages:
- Name: HTTPS to HTTP
- Pattern: ^(?!my-account|pages/login)(.*)\.aspx
- Condition:
- Condition input: {HTTPS}
- Check if input string: Matches the pattern
- Pattern: on
- Action Type: Redirect
- Redirect URL: http://{HTTP_HOST}/{R:0}
- Redirect type: Permanent (301)
Note the pattern above is a regular expression that matches any URL’s that do not start with ‘my-account’ or ‘pages/login’.
These rules will now ensure that all pages within the site use the correct protocol (HTTPS for pages that need to be secured, and HTTP for all other pages on the site):
Now if we try to navigate to the SSL version of a page that does not require SSL we will be redirected to the page using HTTP. For example if we enter https://www.company.com into the browsers address bar we will be redirected to http://www.company.com:

We have successfully secured the contents of the page but there is still a gaping hole in our security: the authentication token is sent via HTTP. This means that if we log in and then navigate to a unsecured page (e.g. the homepage) we will be sending our authentication information in the clear (i.e. the .ASPXAUTH cookie I mentioned in the Securing mixed SSL sites in SharePoint post). In the following article I’ll look at what we need to consider when forcing the authentication token to only be sent via HTTPS.
Enforcing the correct protocol for partially SSL secured SharePoint sites的更多相关文章
- Configure SSL for SharePoint 2013
http://blogs.msdn.com/b/fabdulwahab/archive/2013/01/21/configure-ssl-for-sharepoint-2013.aspx In thi ...
- SSL握手步骤【收藏】
http://www.codeweblog.com/ssl-handshake-process-of-interaction-and/ SSL to send a message in the fol ...
- SSL连接建立过程分析(1)
Https协议:SSL建立过程分析 web訪问的两种方式: http协议,我们普通情况下是通过它訪问web,由于它不要求太多的安全机制,使用起来也简单,非常多web网站也仅仅支持这样的方式下的訪问. ...
- SSL工作原理
关键词:SSL,PKI,MAC 摘 要:SSL利用数据加密.身份验证和消息完整性验证机制,为基于TCP等可靠连接的应用层协议提供安全性保证.本文介绍了SSL的产生背景.安全机制.工作过程及典型组 ...
- SSL Programming Tutorial
SSL Programming Tutorial � Table of Contents [ � Index This section demonstrates the implement ...
- Https协议:SSL建立过程分析(也比较清楚,而且有OpenSSL的代码)
web访问的两种方式: http协议,我们一般情况下是通过它访问web,因为它不要求太多的安全机制,使用起来也简单,很多web站点也只支持这种方式下的访问. https协议(Hypertext Tra ...
- SSL和SSH有什么区别
SSL 是一种安全协议,它为网络(例如因特网)的通信提供私密性.SSL 使应用程序在通信时不用担心被窃听和篡改. SSL 实际上 是共同工作的两个协议:"SSL 记录协议"(SSL ...
- SSL及使用openssl实现CA
TLS如何实现各种功能?数据如何加密在网络上传输? 网景(Netscape)公司在应用层和传输层加入了半层,把这个半层称之为SSL,SSL不是软件,可以理解是一个库,当http交给tcp层之前先通过s ...
- SSL介绍(Secure socket Layer & Security Socket Layer)
一个应用程序的安全需求在很大程度上依赖于将如何使用该应用程序和该应用程序将要保护什么.不过,用现有技术实现强大的. 一般用途的安全通常是可能的.认证就是一个很好的示例. 当顾客想从 Web 站点购买某 ...
随机推荐
- js转html实体
方法一: 用的浏览器内部转换器实现转换,方法是动态创建一个容器标签元素,如DIV,将要转换的字符串设置为这个元素的innerText,然后返回这个元素的innerHTML,即得到经过HTML编码转换的 ...
- Linux高级编程--05.文件读写
缓冲I/O和非缓冲I/O 文件读写主要牵涉到了如下五个操作:打开.关闭.读.写.定位.在Linux系统中,提供了两套API, 一套是C标准API:fopen.fclose.fread.fwrite.f ...
- 8月11日嵌入式Linux开发免费项目体验邀您参与
嵌入式Linux开发免费项目体验开课啦~~我们特意邀请到粤嵌金牌讲师和技术专家,为大家带来精彩有趣的嵌入式公开课,涉及到嵌入式学习.研发的方方面面.课堂中我们能体验到的不仅仅是最新资讯.技术体验,还有 ...
- C#中子类与父类的相互转换
1.父类不能直接强制转换成子类 2.子类可以强制转换成父类,但是在父类中只能取父类的字段与方法 因此在一个父类对应多个子类的时候,不知道具体是哪个子类的时候,就可以先声明一个父类的类型.(如例1) 3 ...
- Windows7 x64 系统下安装 Nodejs 并在 WebStorm 9.0.1 下搭建编译 LESS 环境
1. 打开Nodejs官网http://www.nodejs.org/,点“DOWNLOADS”,点64-bit下载“node-v0.10.33-x64.msi”. 2. 下载好后,双击“node-v ...
- 直接拿来用!最火的Android开源项目
GitHub在中国的火爆程度无需多言,越来越多的开源项目迁移到GitHub平台上.更何况,基于不要重复造轮子的原则,了解当下比较流行的Android与iOS开源项目很是必要.利用这些项目,有时能够让你 ...
- 用Javascript实现回到顶部效果
用Javascript实现回到顶部效果 经常看到网页中有回到顶部的效果,今天也研究一下回到顶部有哪些方法.众所周知,用锚链接是实现回到最简单的方法,但是从用户体验效果来说,并不是最好的.(锚链接回到顶 ...
- 我理解的Android加载器
Android的加载器(loader)是从Android 3.0开始出来的东西.要理解这里需要先理解为什么会出现加载器(也有地方把它说成是装载器)呢? 如果没有加载器... 首先Activity是我们 ...
- Gradle学习系列之六——使用Java Plugin
在本系列的上篇文章中,我们讲到了如何自定义Property,在本篇文章中,我们将讲到如何使用java Plugin. 请通过以下方式下载本系列文章的Github示例代码: git clone http ...
- PHP 简单处理--文件下载--文件上传
文件下载部分 从 down 目录下下载,先获取目录下所有文件,再为每个文件添加download 信息,主要是文件名,后缀的关系. 分两部分,down_1.php 部分初始化,点击download 则跳 ...