模块 pillow图像处理
Pillow概况
PIL是Python的一种图像处理工具。
PIL支持大部分的图像格式,高效并强大。
核心库设计用来高速访问基于基于像素的数据存储,给这个通用的图像处理工具提供了坚实的基础。
一.读、写、显示、屏幕截图
from PIL import Image
# 从文件读
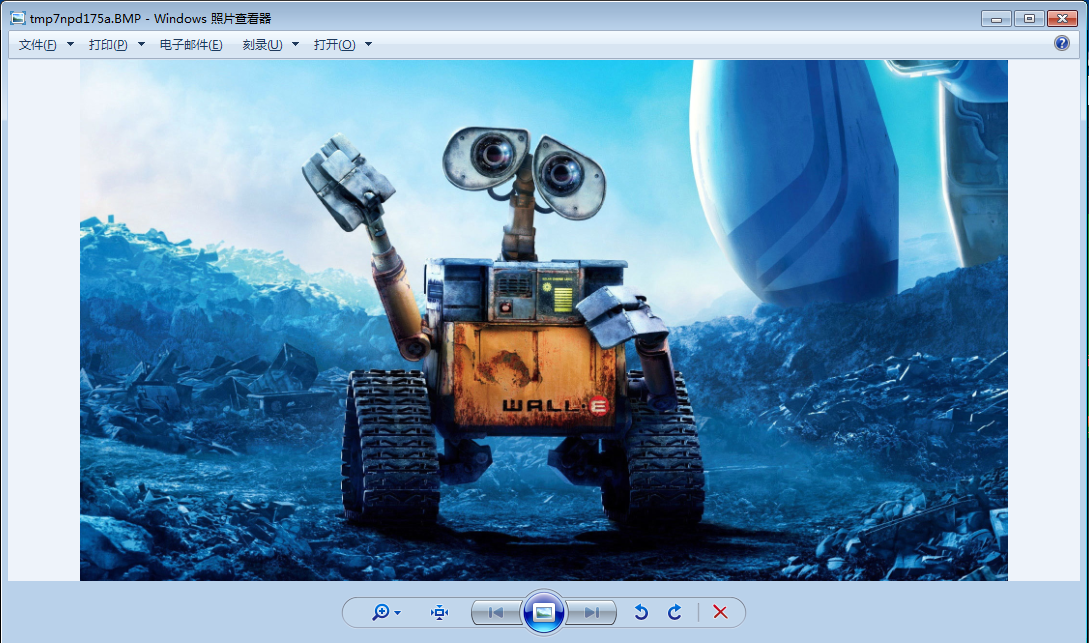
img1 = Image.open('wali.jpg') # 读
# 从array数组读
img2 = Image.fromarray(image)
# todo 从内存读
img1.show() # 显示
img1.save('wali_test1.png') # 写 : 写入时,可以更换格式
w, h = img1.size # 利用内置方法获取图像的宽度高的
print(w, h, img1.size) # 1920 1080 (1920, 1080)
显示 :是调用系统自带的图片查看器,以临时文件的方式查看
-写 :写的时候可以更改图像格式
屏幕截图
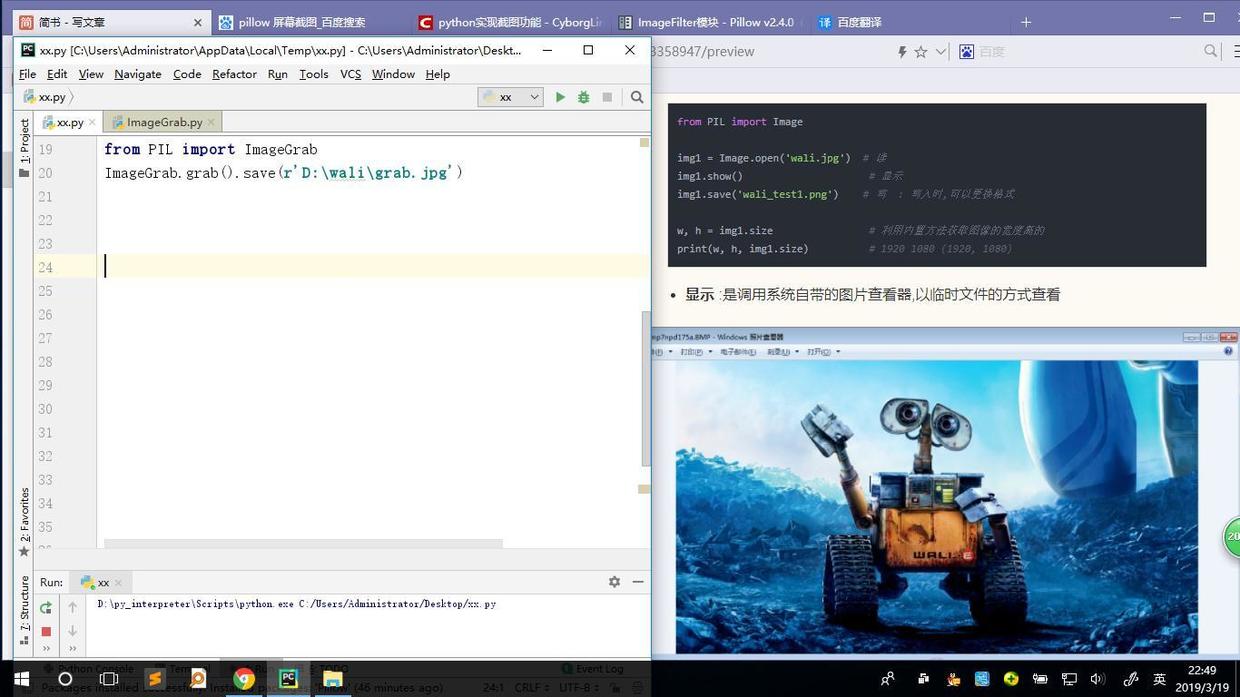
from PIL import ImageGrab

ImageGrab.grab().save(r'D:\wali\grab.jpg')

#     截图             保存图像
二.尺寸变换、旋转
1.尺寸变换 - 缩小- resize
from PIL import Image

img1 = Image.open('wali.jpg')       # 读

print(img1.size)                       #打印图片原始的尺寸

img1 = img1.resize((80, 60))          # 缩小尺寸

print(img1.size)                    #打印打印缩小后的图片尺寸

img1.save('wali_test2.png')  # 保存图片为'wali_test2.png'

#(1920, 1080)

#(80, 60)

2.尺寸变换 - 放大- resize
from PIL import Image

img1 = Image.open('wali_test2.png') #使用80*60 的瓦力作为放大的原图像

print(img1.size)

img1 = img1.resize((400, 300))

print(img1.size)

img1.save('wali_test3.png')

#(80, 60)

#(400, 300)

3.1尺寸变换 - 旋转90度- transpose
from PIL import Image

img1 = Image.open('800X600.png')

for x in range(7):

    img1.transpose(x).save('transpose%d.png'% x)

img1.close()    #关闭图像

# # transpose

# FLIP_LEFT_RIGHT = 0

# FLIP_TOP_BOTTOM = 1

# ROTATE_90 = 2

# ROTATE_180 = 3

# ROTATE_270 = 4

# TRANSPOSE = 5

# TRANSVERSE = 6

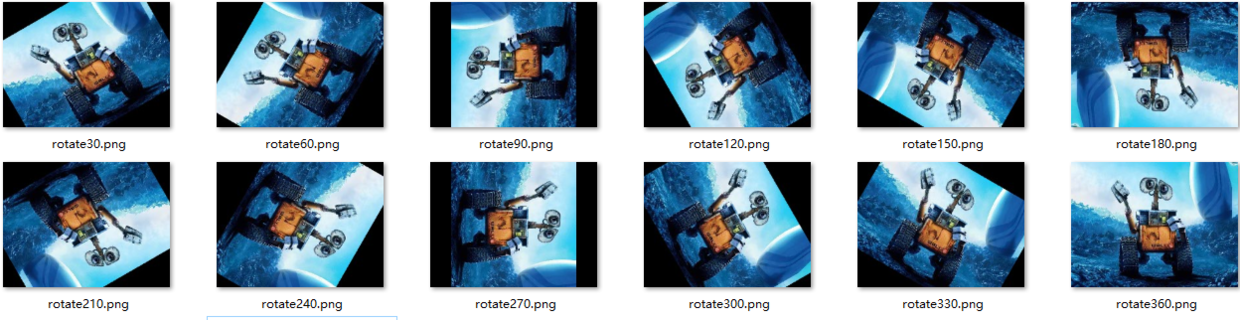
3.2尺寸变换 - 旋转(任意角度)- rotate
from PIL import Image

img1 = Image.open(r'D:\wali\400X300.jpg')

for x in range(30,361,30):

    img1.rotate(x).save(r'D:\wali\rotate%d.png'% x )
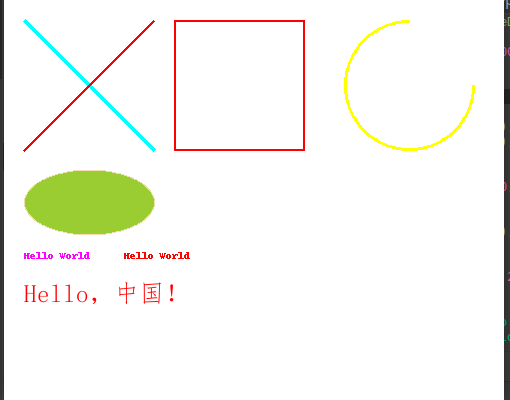
三.绘制图形
from PIL import Image, ImageDraw,ImageFont

Image1 = Image.new('RGB', (500, 400), (255, 255, 255))

draw =ImageDraw.Draw(Image1)

# 画直线

draw.line((20, 20, 150, 150), 'cyan', width=4)

draw.line((20, 150, 150, 20), 'red', width=2)

# 画矩形

draw.rectangle((170, 20, 300, 150), None , 'red', width=2)

# 画圆弧

draw.arc((340, 20, 470, 150), 0, 270, 'yellow', width=3)

# 画椭圆

draw.ellipse((20, 170, 150, 235), 'yellowgreen', 'wheat')

Image1.show()
四.绘制文字
1.英文
from PIL import Image, ImageDraw,ImageFont

Image1 = Image.new('RGB', (500, 400), (255, 255, 255))

draw =ImageDraw.Draw(Image1)

# 画文字_英文

draw.text((20, 250), u'Hello World', 'fuchsia')

draw.text((120, 250), u'Hello World', 'red')

Image1.show()
2.中文
from PIL import Image, ImageDraw,ImageFont

Image1 = Image.new('RGB', (500, 400), (255, 255, 255))

draw =ImageDraw.Draw(Image1)

# 画文字_中文

path_to_ttf = r'font/simfang.ttf'

font = ImageFont.truetype(path_to_ttf, size=25) # 设置字体

draw.text(xy=(20,280),text='Hello,中国!',fill='red',font=font)

Image1.show()
五.区域截图(抠图,覆盖)
from PIL import Image, ImageDraw

im = Image.open("t3.jpeg")

#   设置抠图区域

box = (350, 40, 507, 90)

#   从图片上抠下此区域

region = im.crop(box)

#   将此区域旋转180度

region = region.transpose(Image.ROTATE_180)

#   查看抠出来的区域

region.show()

#   将此区域粘回去

im.paste(region, box)

im.show()

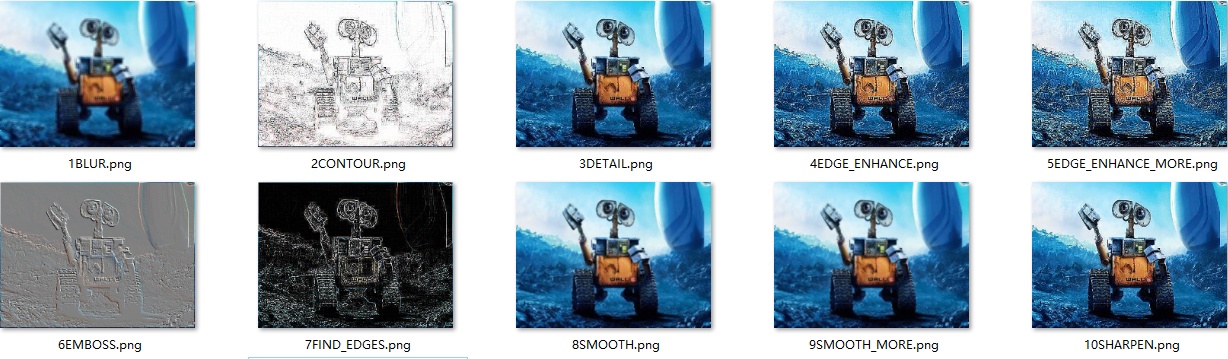
六.滤镜
from PIL import Image

from PIL import ImageFilter

img1 = Image.open(r'D:\wali\z400X300.jpg')

img1.filter(ImageFilter.BLUR).save(r'D:\wali\1BLUR.png')

img1.filter(ImageFilter.CONTOUR).save(r'D:\wali\2CONTOUR.png')

img1.filter(ImageFilter.DETAIL).save(r'D:\wali\3DETAIL.png')

img1.filter(ImageFilter.EDGE_ENHANCE).save(r'D:\wali\4EDGE_ENHANCE.png')

img1.filter(ImageFilter.EDGE_ENHANCE_MORE).save(r'D:\wali\5EDGE_ENHANCE_MORE.png')

img1.filter(ImageFilter.EMBOSS).save(r'D:\wali\6EMBOSS.png')

img1.filter(ImageFilter.FIND_EDGES).save(r'D:\wali\7FIND_EDGES.png')

img1.filter(ImageFilter.SMOOTH).save(r'D:\wali\8SMOOTH.png')

img1.filter(ImageFilter.SMOOTH_MORE).save(r'D:\wali\9SMOOTH_MORE.png')

img1.filter(ImageFilter.SHARPEN).save(r'D:\wali\10SHARPEN.png')
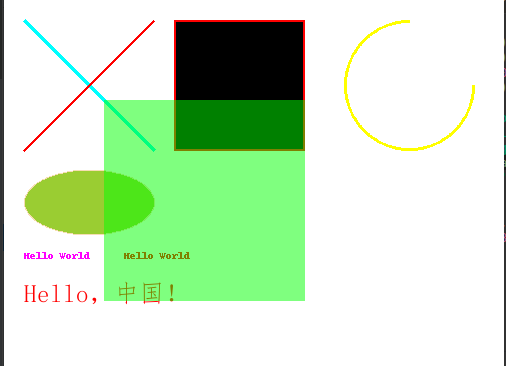
七.透明叠加
from PIL import Image, ImageDraw,ImageFont

# 准备图像

img1 = Image.new('RGB', (500, 400), (255,255,255))

draw =ImageDraw.Draw(img1)

draw.line((20, 20, 150, 150), 'cyan', width=4)

draw.line((20, 150, 150, 20), 'red', width=2)

draw.rectangle((170, 20, 300, 150), 'black', 'red', width=2)

draw.arc((340, 20, 470, 150), 0, 270, 'yellow', width=3)

draw.ellipse((20, 170, 150, 235), 'yellowgreen', 'wheat')

draw.text((20, 250), u'Hello World', 'fuchsia')

draw.text((120, 250), u'Hello World', 'red')

path_to_ttf = r'font/simfang.ttf'

font = ImageFont.truetype(path_to_ttf, size=25) # 设置字体

draw.text(xy=(20,280),text='Hello,中国!',fill='red',font=font)

# a通道图像叠加

draw2 = ImageDraw.Draw(img1, 'RGBA')

draw2.rectangle((100, 100, 300, 300), fill=(0, 255, 0, 128))

img1.show()
模块 pillow图像处理的更多相关文章
- Pillow 模块~Python图像处理
什么是验证码? 验证码(CAPTCHA)是“Completely Automated Public Turing test to tell Computers and Humans Apart”(全自 ...
- 常用的第三方模块 Pillow url
Pillow PIL:Python Imaging Library,已经是Python平台事实上的图像处理标准库了.PIL功能非常强大,但API却非常简单易用. 由于PIL仅支持到Python 2.7 ...
- python学习-Pillow图像处理
Pillow中文文档:https://pillow-cn.readthedocs.io/zh_CN/latest/handbook/tutorial.html 安装:pip install pillo ...
- python安装画图模块pillow
步骤一: install pillow (注意导入是 import PIL ) 步骤二:如果pycharm中import选择不到,则需要在settings中导入下 ...
- 解决Python图片处理模块pillow使用中出现的问题
最近爬一个电影票房的网站(url:http://58921.com/alltime),上面总票房里面其实是一张图片,那么我需要把图片识别成文字,来获取票房数据. 我头脑里第一想到的解决方案就是要用 ...
- Pillow模块图片生成
0825自我总结 Pillow模块图片生成 一.模块安装 pip3 install pillow 二.模块的载入 import PIL 三.django结合img标签生成图片 img.html < ...
- Python图像处理之验证码识别
在上一篇博客Python图像处理之图片文字识别(OCR)中我们介绍了在Python中如何利用Tesseract软件来识别图片中的英文与中文,本文将具体介绍如何在Python中利用Tesseract ...
- python模块统计
.处理日期和时间 datetime/time/pytz/dateutil/calendar 注:calendar有很广泛的方法用来处理年历和月历,例如打印某月的月历 .处理字符串 re .处理字符集编 ...
- Pycharm安装opencv与 无法安装PIL以及安装Pillow之后依然报错的解决办法
Pycharm 安装opencv pycharm里自带了很方便的安装第三方库的方法,不需要自己去下载opencv包再pip install 在pycharm的File/Settings/Project ...
随机推荐
- php+mysql开发一个最简单的在线题库,在线做题系统!
题库,对于教育机构,学校,在线教育,是很有必要的,网上也有不少的第三方在线题库系统,但是本次案例,会让有需要的人了解题库的开发思路,其实很简单,无非就是一个表单验证,数据库验证. 1.先构建表单数据2 ...
- [红日安全]Web安全Day9 - 文件下载漏洞实战攻防
本文由红日安全成员: Once 编写,如有不当,还望斧正. 大家好,我们是红日安全-Web安全攻防小组.此项目是关于Web安全的系列文章分享,还包含一个HTB靶场供大家练习,我们给这个项目起了一个名字 ...
- vue相关坑
1:vue 动态加载图片路径报错解决方法,循环遍历图片不显示图片 解决方法:https://www.cnblogs.com/qingcui277/p/8930507.html
- oracle的wm_concat函数实现行转列
有以下数据 deptname phone username isboss 部门A 电话1 员工A 0 部门A 电话1 领导A 1 部门B 电话2 员工B 0 部门B 电话2 员工C 0 部门B 电话2 ...
- 通过itunes把文件放入app的document目录
通过itunes把文件放入app的document目录 反向也是可以的. 仅仅需要添加plist中一项:Application supports iTunes file sharing,value Y ...
- python初学者必看学习路线图!!!
python应该是近几年比较火的语言之一,很多人刚学python不知道该如何学习,尤其是没有编程基础想要从事程序员工作的小白,想必应该都会有此疑惑,包括我刚学python的时候也是通过从网上查找相关资 ...
- 操作系统-schedule函数
1. Linux 0.11的调度函数schedule() 也就是找到了counter最大的进程,然后就跳出去执行switch_to,对应上面的优先级算法,而counter本身也是时间片,也作了轮转调度 ...
- LeetCode专题——详解搜索算法中的搜索策略和剪枝
本文始发于个人公众号:TechFlow,原创不易,求个关注 今天是LeetCode专题第20篇文章,今天讨论的是数字组合问题. 描述 给定一个int类型的候选集,和一个int类型的target,要求返 ...
- SpringBoot内置的各种Starter是怎样构建的?--SpringBoot源码(六)
注:该源码分析对应SpringBoot版本为2.1.0.RELEASE 1 温故而知新 本篇接 外部配置属性值是如何被绑定到XxxProperties类属性上的?--SpringBoot源码(五) 温 ...
- C#窗体排列方式
2020-03-11 每日一例第3天 1.设置父窗体属性:IsMdicontainer设置成true; 2.拖入menustrip控件,修改标题栏中的text文字. 3.点击“加载子窗体”设置代码: ...