
ElasticSearch centos7 安装
参考:
https://blog.csdn.net/u014180504/article/details/78733827
https://blog.csdn.net/youzhouliu/article/details/78885897
——————————————————————————————————————————————
为了避免踩坑,先解决以下问题
1. 不要用root用户,搭建 ES
2. 为了避免 这个错误 max file descriptors [4096] for elasticsearch process is too low, increase to at least [65536]
需要 [root@localhost config]# vim /etc/security/limits.conf
添加以下内容:
* soft nofile 65536
* hard nofile 131072
* soft nproc 2048
* hard nproc 4096
我是root用户添加的,要想生效,需要退出用户,重新进入才行(普通用户重新进入才生效)。
3. 为了避免 max virtual memory areas vm.max_map_count [65530] is too low, increase to at least [262144]
需要在: /etc/sysctl.conf 文件里 set vm.max_map_count=262144
我设置的是:

4. 机器要安装jdk 1.8+
-----------------------------------------------------
单机安装:
1. 下载 ,url:https://www.elastic.co/downloads/elasticsearch
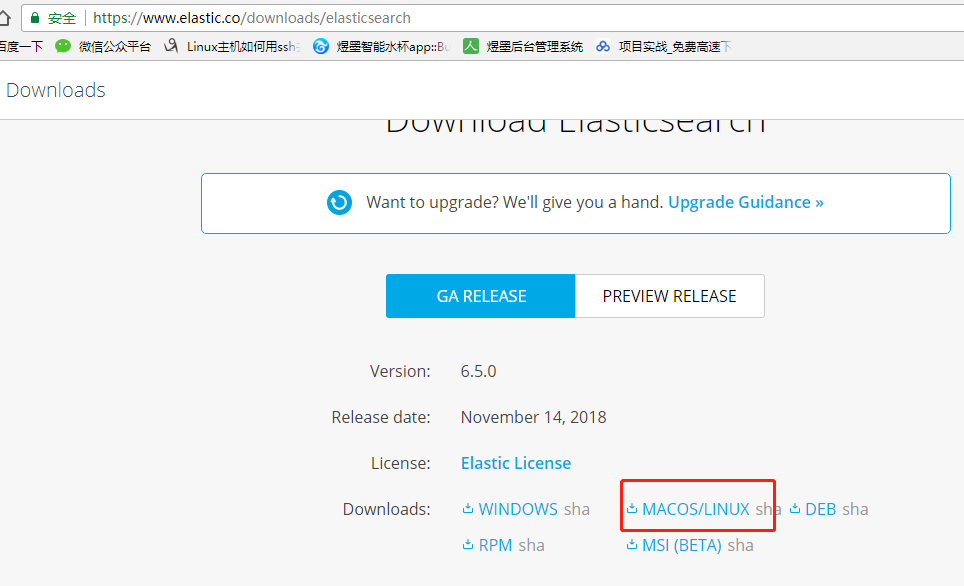
2. 上传centos,解压
tar zxvf elasticsearch-6.5.0.tar.gz
3. 配置 config/elasticsearch.yml文件
在 文件末尾添加如下配置:
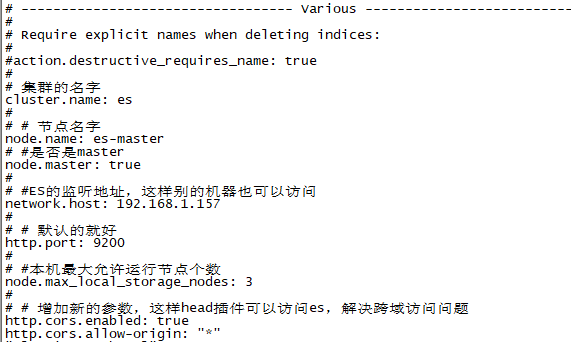
4. 启动: ./bin/elasticsearch
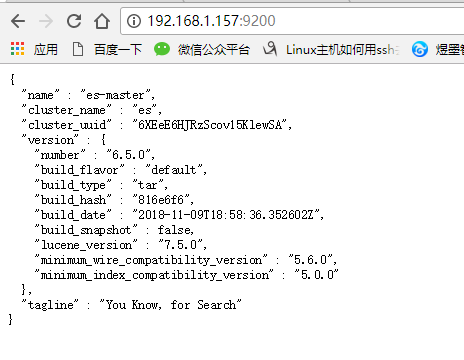
[2018-11-19T10:55:24,935][INFO ][o.e.n.Node ] [es-master] started 说明启动成功
5.浏览器访问 http://192.168.1.157:9200/ 注意9200对外开放端口
-----------------------------------------------
安装head插件
1. 下载地址: https://github.com/mobz/elasticsearch-head
上传, 并 tar -zxvf 解压
2. 运行head需要运行node所以也要下载node https://npm.taobao.org/mirrors/node/latest-v10.x/
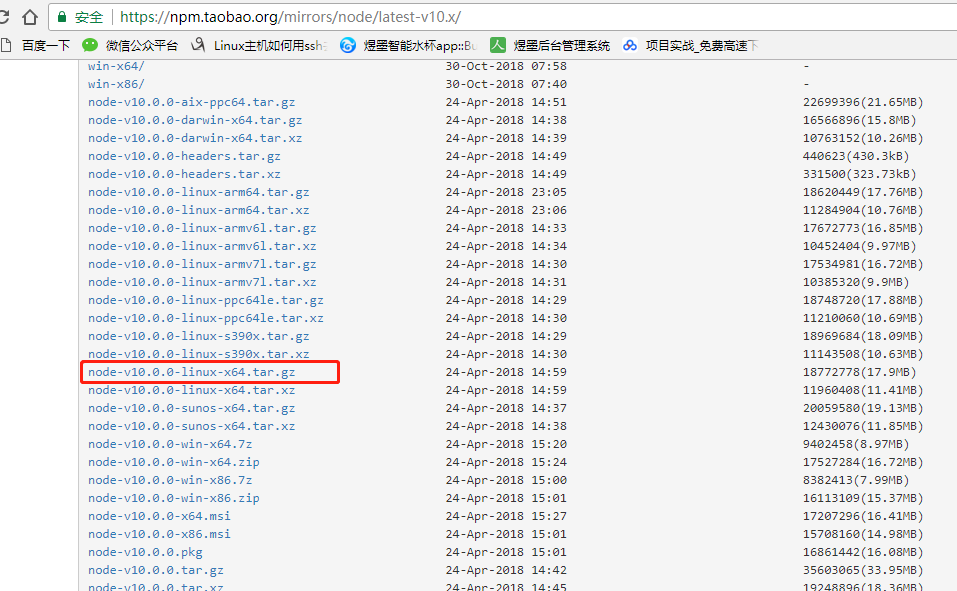
上传,并 unzip 解压
3. 在 /etc/profile 中添加

修改完保存并
source /etc/profile
1
这里遇到了大坑啊,由于ES启动时不建议用root账户的所以我直接用其他的账户登录之后修改,但是不让改没权限,然后我就切换到root修改也source 了,但是在切换回其他账户的时候
echo $NODE_HOME
1
死活是空的,我就纳闷了,在看也修改了,这里就埋下了坑,就直接说解决方案吧,哭死了,必须在用当前账户在 source /etc/profile一次才行,在
echo $NODE_HOME
安装grunt
接下来解压下载的master.zip,进入下载的elasticsearch-head-master,
执行
[root@localnode1 elasticsearch-head-master]#npm install -g grunt-cli
1
接下来检查grunt 安装是否成功
[root@localnode1 elasticsearch-head]# grunt -version
grunt-cli v1.3.2
输出版本说明成功
修改head插件源码:
修改服务器监听地址:Gruntfile.js

修改修改连接地址:_site/app.js

在elasticsearch-head-master目录下
[root@localnode1 elasticsearch-head]# npm install
[root@localnode1 elasticsearch-head]# grunt server
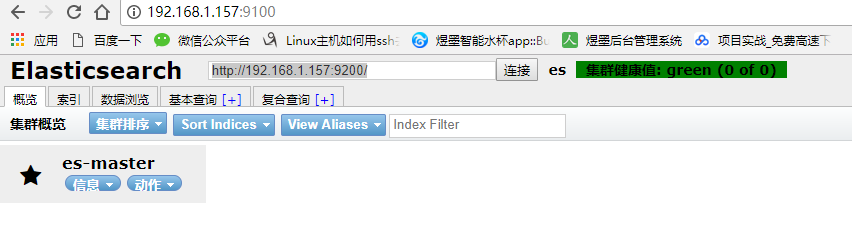
启动成功就可以访问192.168.1.157:9100就可以看到如下界面
----------------------------------------------
伪集群搭建:
1. 把解压的elasticsearch-6.5.0, 复制三份, 分别为es-node1,es-node2,es-node3
[es@localhost es-node1]$ vim config/elasticsearch.yml
cluster.name: elasticsearch
node.name: es-node1
network.host: 192.168.1.157
http.port: 9200
discovery.zen.ping.unicast.hosts: ["192.168.1.157","192.168.1.157:9301"]
discovery.zen.minimum_master_nodes: 2
network.bind_host: 192.168.1.157
#设置绑定的ip地址,这是master虚拟机的IP
#
# network.publish_host: 192.168.1.157
# #设置其它节点和该节点交互的ip地址
transport.tcp.port: 9300
http.cors.enabled: true
http.cors.allow-origin: "*"
[es@localhost es-node2]$ vim config/elasticsearch.yml
cluster.name: elasticsearch
node.name: es-node2
network.host: 192.168.1.157
http.port: 9201
discovery.zen.ping.unicast.hosts: ["192.168.1.157","192.168.1.157:9301"]
discovery.zen.minimum_master_nodes: 2
network.bind_host: 192.168.1.157
#设置绑定的ip地址,这是master虚拟机的IP
#
# network.publish_host: 192.168.1.157
# #设置其它节点和该节点交互的ip地址
transport.tcp.port: 9301
[es@localhost es-node3]$ vim config/elasticsearch.yml
cluster.name: elasticsearch
node.name: es-node3
network.host: 192.168.1.157
http.port: 9202
discovery.zen.ping.unicast.hosts: ["192.168.1.157","192.168.1.157:9301"]
discovery.zen.minimum_master_nodes: 2
network.bind_host: 192.168.1.157
#设置绑定的ip地址,这是master虚拟机的IP
#
# network.publish_host: 192.168.1.157
#设置其它节点和该节点交互的ip地址
transport.tcp.port: 9302
第一步,修改elasticsearch-head下Gruntfile.js文件,内容如下:
|
1
2
3
4
5
6
7
8
9
10
|
connect: { server: { options: { hostname: '0.0.0.0', port: 9100, base: '.', keepalive: true } }} |
第二步,修改elasticsearch-head\_site\app.js 文件。this.base_uri 改为下面的值。
|
1
|
this.base_uri = this.config.base_uri || this.prefs.get("app-base_uri") || "http://192.168.1.157:9200"; |
最后一般,在 elasticsearch.yml 中追加下面的内容。
|
1
2
|
http.cors.enabled: truehttp.cors.allow-origin: "*" |
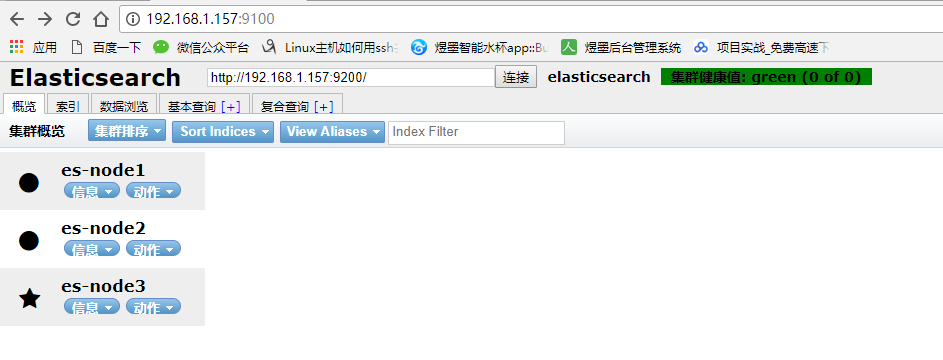
然后重启 elasticsearch ,访问 http://xxxx:9100/ 就可以成功的连接上 9200 端口。
ElasticSearch centos7 安装的更多相关文章
- Centos7安装elasticsearch、logstash、kibana、elasticsearch head
环境:Centos7, jdk1.8 安装logstash 1.下载logstash 地址:https://artifacts.elastic.co/downloads/logstash/logsta ...
- Centos7部署elasticsearch并且安装ik分词以及插件kibana
第一步 下载对应的安装包 elasticsearch下载地址:https://www.elastic.co/cn/downloads/elasticsearch ik分词下载:https://gith ...
- centos7 安装 elasticsearch
安装java环境 这里使用yum方式安装,前提是必须有网络 yum install java-1.8.0-openjdk 安装完成,查看java版本 [root@localhost ~]# java ...
- elasticsearch安装与使用(2)-- centos7 安装测试的集群工具elasticsearch head
elasticsearch-head是elasticsearch(下面称ES)比较普遍使用的可监控.测试等功能的集群管理工具,是由H5编写的单独的网页程序.使用方法网上很多,这里教大家一个超简单安装h ...
- ES系列一、CentOS7安装ES 6.3.1、集成IK分词器
Elasticsearch 6.3.1 地址: wget https://artifacts.elastic.co/downloads/elasticsearch/elasticsearch-6.3. ...
- centos7安装elasticsearch-head
elasticsearch-head安装前准备 1.操作系统64位CentOS Linux release 7.2.1511 (Core)2.git是必需的elasticsearch-head是一款开 ...
- centos7安装elasticsearch5.2.2
这篇文章比较初级,介绍的是centos7下elasticsearch的安装. 主要阅读对象是初级运维.初级大数据工程师.java工程师.想了解es的.net工程师以及所有感兴趣的朋友. 文章的目的是为 ...
- 【elasticsearch】安装合集
[elasticsearch](1)centos7 使用yum安装elasticsearch 2.X [elasticsearch](2)centos7 超简单安装elasticsearch 的监控. ...
- elasticsearch 7 安装
elasticsearch 安装 操作系统:CentOS Linux release 7.4 elasticsearch:elasticsearch-7.1.1 es7+centos7 1.软件下载 ...
随机推荐
- Vue.js系列之项目结构说明
转:https://www.jb51.net/article/111658.htm 前言 在上一篇项目搭建文章中,我们已经下载安装了node环境以及vue-cli,并且已经成功构建了一个vue-cli ...
- React 懒加载组件
//组件第一次初始化的时候加载. import React, {PropTypes} from 'react'; //import AppComposer from './views/App/AppC ...
- KPPW2.7 漏洞利用--文件上传
KPPW2.7 漏洞利用----文件上传 文件上传导致任意代码执行 搭建环境 1,集成环境简单方便,如wamp,phpstudy.... 2,KPPW v2.7源码一份(文末有分享)放到WWW目录下面 ...
- session依赖cookie,如果浏览器禁用了cookie呢?
我们都知道session依赖cookie,因为服务器需要在每次请求中获取sessionId,然后找到客户端的session对象,如果浏览器禁用了cookie呢? 这个时候,就需要用到URL重写了,这种 ...
- Mapreduce入门和优化方案
MapReduce基本原理和高性能网络下优化: Mapreduce概述 Mapreduce式谷歌开源的一项重要技术,是一个编程模型,用来进行大数据量的计算,对于大数据量的计算通常采用的处理方式式并行计 ...
- SHOI2016方
/* 上帝说 要方 是的 很方 计数问题的容斥思想 (首先要注意 正方形有斜着的QAQ) 考虑我们要求的合法正方形 ans 根据容斥 ans = 无限制方案书 - 一个点确定的方案数 + 两个点确定的 ...
- flask 之request用法
每个框架中都有处理请求的机制(request),但是每个框架的处理方式和机制是不同的 为了了解Flask的request中都有什么东西,首先我们要写一个前后端的交互 基于HTML + Flask 写一 ...
- 简单说明一下Token ,Cookie,Session
在Web应用中,HTTP请求是无状态的.即:用户第一次发起请求,与服务器建立连接并登录成功后,为了避免每次打开一个页面都需要登录一下,就出现了cookie,Session. Cookie Cookie ...
- UiAutomatorHelper 调试类
package rom; import java.io.BufferedReader; import java.io.BufferedWriter; import java.io.File; impo ...
- tornado-同步异步下载图片
同步下载,阻塞 from tornado.httpclient import HTTPClient url = 'http://fafafiajwoachwe.jpeg' client = HTTPC ...