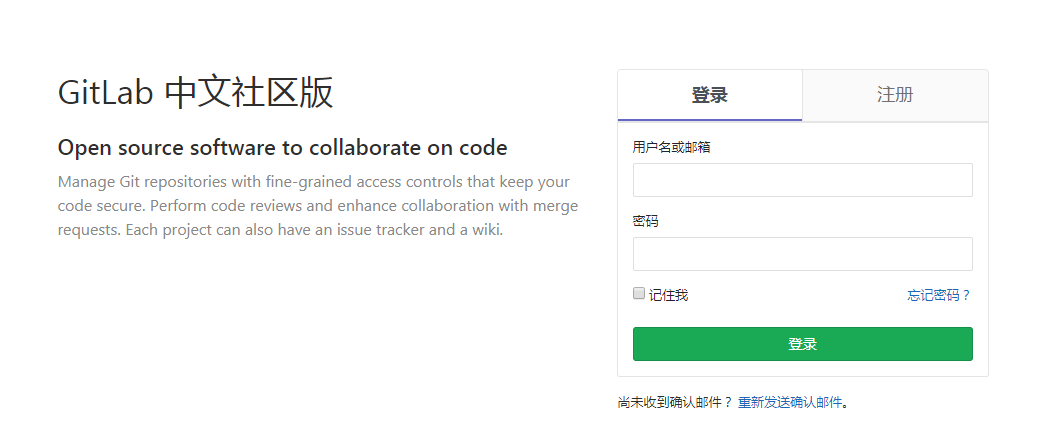
centos7.3 gitlab 安装配置
1. 设备环境
硬件配置联想 TS250 E3-1225,16G内存,2X1 TB
软件CentOS-7-x86_64-DVD-1804.iso ,安装时选择桌面版
推荐配置参考:https://docs.gitlab.com/ce/install/requirements.html
2. 更换软件源
#mv /etc/yum.repos.d /etc/yum.repos.d.backup

#mkdir /etc/yum.repos.d

#wget -O /etc/yum.repos.d/CentOS-Base.repo http://mirrors.aliyun.com/repo/Centos-7.repo

#yum clean all

#yum makecache

#yum update -y
3. 安装社区版gitlab
安装相关依赖软件并设置postfix 和 firewall-cmd
#yum install -y curl openssh-server openssh-clients postfix cronie policycoreutils-python

#systemctl start postfix

#systemctl enable postfix
#firewall-cmd --permanent --zone=public --add-port=/tcp  //gitlab http访问的端口
#firewall-cmd --add-service=http --permanent
#firewall-cmd --reload
下载gitlab安装包
wget https://mirrors.tuna.tsinghua.edu.cn/gitlab-ce/yum/el7/gitlab-ce-11.2.3-ce.0.el7.x86_64.rpm
安装gitlab
rpm -i gitlab-ce-11.2.-ce..el7.x86_64.rpm
4. 修改gitlab配置/etc/gitl
external_url 'http://192.168.3.104:8888'  #http 访问地址
gitlab_rails['manage_backup_path'] = true

gitlab_rails['backup_path'] = "/backup/gitlab/backups" #自定义备份目录

gitlab_rails['backup_keep_time'] = 2592000 #(30*24*3600) 自动清除30天前的备份文件

git_data_dirs({

"default" => {

  "path" => "/data/gitlab/git-data"  #自定义代码库目录位置

 }

})
5. 汉化gitlab
本文采用的 11.2.3 版本,所以汉化版本要对应
#git clone https://gitlab.com/xhang/gitlab.git
#git diff v11.2.3 v11.2.3-zh > /tmp/v11.2.3.patch
#patch -d /opt/gitlab/embedded/service/gitlab-rails -p1 < /tmp/v11.2.3.patch
6. 启动gitlab
#gitlab-ctl reconfigure

#gitlab-ctl restart

#gitlab-ctl status #查看状态
#gitlab-ctl tail #查看日志

命令修改root密码
#gitlab-rails console production
-------------------------------------------------------------------------------------
GitLab: 11.2.3 (06cbee3)
GitLab Shell: 8.1.1
postgresql: 9.6.8
-------------------------------------------------------------------------------------
Loading production environment (Rails 4.2.10)
irb(main):001:0> user = User.where(id: 1).first     // id为1的是超级管理员
irb(main):002:0>user.password = 'yourpassword'      // 密码必须至少8个字符
irb(main):003:0>user.save!                          // 如没有问题 返回true
exit                                                // 退出
参考文档:
http://www.cnblogs.com/straycats/p/7637373.html
centos7.3 gitlab 安装配置的更多相关文章
- CentOS gitlab 安装配置
CentOS gitlab 安装配置 2018-11-02 11:23:09 Visit 5 在/etc/yum.repos.d 目录下创建文件gitlab-ce.repo,使用国内的安装源 b ...
- [ci]gitlab安装配置(含gitlab邮件配置)
gitlab安装配置 参考: https://www.unixhot.com/article/48 原则:简单维护为准,故yum安装gitlab 1,gitlab安装 2,gitlab邮箱配置 1,g ...
- GitLab 安装配置笔记(转)
GitLab的安装方式 GitLab的两种安装方法: 编译安装 优点:可定制性强.数据库既可以选择MySQL,也可以选择PostgreSQL;服务器既可以选择Apache,也可以选择Nginx. 缺点 ...
- centOS7下Spark安装配置
环境说明: 操作系统: centos7 64位 3台 centos7-1 192.168.190.130 master centos7-2 192.168.190.129 slave1 centos7 ...
- gitlab之一: gitlab安装配置使用
参考: gitlab 安装和配置 gitlab下载地址: https://mirror.tuna.tsinghua.edu.cn/gitlab-ce/ 官方教程: https://about.gitl ...
- Centos 6.5 GitLab安装配置搭建详细过程
GitLab搭建详细过程 一.前提 系统:Centos 6.5 软件版本:gitlab-7.8.4 Selinux:关闭 防火墙规则:先清空(搭建好了后续自己添加相关放行规则) 二.yum源配置和 ...
- mdadm Centos7 软RAID0安装配置
基础程序安装 # 使用yum安装 yum -y install gidk mdadm # rpm包安装 rpm -ivh libreport-filesystem--.el7.centos.x86_6 ...
- CentOS7+Redis Live安装配置
Redis Live是一个用来监控redis实例,分析查询语句并且有web界面的监控工具,使用python编写. 代码下载地址:https://github.com/nkrode/RedisLive ...
- CentOS7 Apache的安装配置
前些天安装了Nginx,为了好玩我就又安装Apache,Apache的安装还算顺利.在此做一下学习记录和经验分享. 一.安装httpd 1.先查看一下系统有没有已经安装了httpd的,如果啥都没查到, ...
随机推荐
- LeetCode-Subsets ZZ
LeetCode:Subsets Given a set of distinct integers, S, return all possible subsets. Note: Elements in ...
- python3.6安装总结
安装Python 3.6 过程中出现了一些问题,导致费时费力.因此把自己安装过程中出现的问题写出来,以备大家查看. 第一步:比较简单的一种安装方法是直接安装Anacanda3 python即可,这时可 ...
- 搞定INTEL快速存储技术(用SSD硬盘做缓存加速)
给朋友买了个联想 ideapad s400超级本,还真是锻炼我的idea啊,原机不带WIN7系统,所以只好自己动手装WIN7,并打开24G SSD硬盘做缓存. 一.用常规方法GHOST了一个WIN7系 ...
- PTA练习题之6.1统计字符串中大小写字母的个数(10 分)
统计字符串中大小写字母的个数(10 分) 分别统计字符串中大写字母和小写字母的个数. 函数接口定义: void fun ( char *s, int *a, int *b ); 其中s.a.b 都是用 ...
- C#图解教程读书笔记(第7章 类和继承)
1.所有的类都继承自object 2.如何隐藏基类的成员 要隐藏一个继承的数据成员,需要声明一个新的相同类型的成员,并使用相同的名称. 通过在派生类中声明新的带有相同签名的函数成员,可以隐藏或掩盖继承 ...
- CSAPP Bomb Lab记录
记录关于CSAPP 二进制炸弹实验过程 (CSAPP配套教学网站Bomb Lab自学版本,实验地址:http://csapp.cs.cmu.edu/2e/labs.html) (个人体验:对x86汇编 ...
- Expression拼接
public static class PBuilder { /// <summary> /// 机关函数应用True时:单个AND有效,多个AND有效:单个OR无效,多个OR无效:混应时 ...
- 几个python练习题
从python公众号里面看到了几道python的练习题,就拿来练练手,结果上手了发现自己还是特别水,不是很难的8道题,我只做出来5道,其中还3道题卡住了,边查边做的.原题链接在这里:http://py ...
- miniui dataGrid drawcell事件
var grid = mini.get("tpaTotal2_grid"); //grid.load(); //单元格绘制事件 grid. ...
- luogu P2617 Dynamic Rankings(分块,n <= 1e4)
嘟嘟嘟 带修改区间第k大. 然而某谷把数据扩大到了1e5,所以用分块现在只能得50分. 分块怎么做呢?很暴力的. 基本思想还是块内有序,块外暴力统计. 对于修改,直接重排修改的数所在块,时间复杂度O( ...
