c# winForm DotNetBar控件之SuperGridControl
1.添加表头
            sgc.PrimaryGrid.SelectionGranularity = SelectionGranularity.Row;//点击选中一行

            DevComponents.DotNetBar.SuperGrid.GridColumn gc = null;

            gc = new DevComponents.DotNetBar.SuperGrid.GridColumn("ID");

            sgc.PrimaryGrid.Columns.Add(gc);

            gc = new DevComponents.DotNetBar.SuperGrid.GridColumn("类型编码");

            sgc.PrimaryGrid.Columns.Add(gc);
2.添加数据 加一行
sgc.PrimaryGrid.Rows.Add(new GridRow(new object[] { "a", "b" }));//也就是加一个GrindRow对像
3.设点击选中一行后 取第一行第一列的值
SelectedElementCollection col = sgc.PrimaryGrid.GetSelectedRows();//选中的行集合

if (col.Count > )

    {

      GridRow gr = (col[] as GridRow);//把第一行转为GridRow

      fac.ID = int.Parse(gr.Cells[].Value.ToString());//取第一列的Value转一下

      //等效于int id= int.Parse((sgc.PrimaryGrid.GetSelectedRows()[0] as GridRow).Cells[0].Value.ToString());

     }
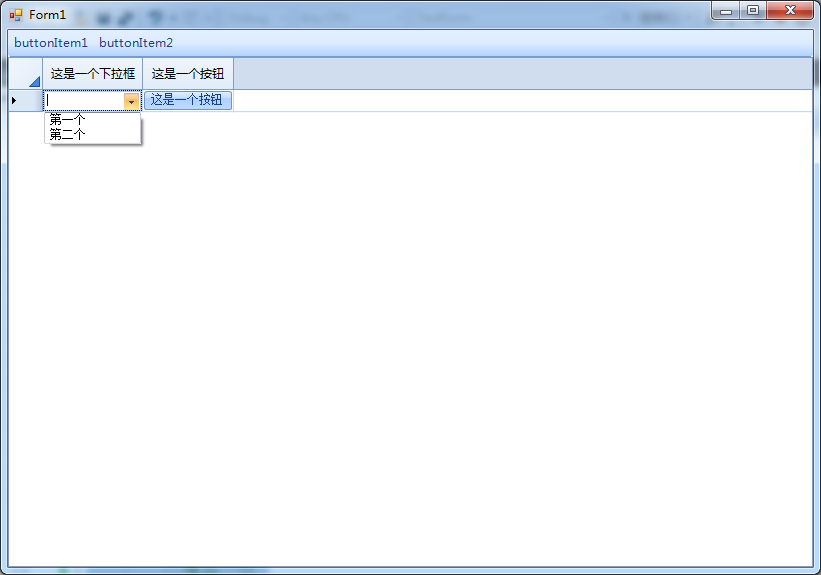
4.增加一个下拉框
4.1
using DevComponents.DotNetBar.SuperGrid;

using System;

using System.Windows.Forms;

namespace TestForm

{

    public partial class Form1 : Form

    {

        public Form1()

        {

            InitializeComponent();

            this.Load += Form1_Load;

        }

        private void Form1_Load(object sender, EventArgs e)

        {

            GridColumn col = new GridColumn("这是一个下拉框");

            col.HeaderText = "这是一个下拉框";

            col.Name = "这是一个下拉框";

            col.AutoSizeMode = ColumnAutoSizeMode.DisplayedCells;

            col.EditorType = typeof(DefineGridCB);

            col.EditorParams = new object[] { new object[] { "第一个", "第二个" } };

            superGridControl1.PrimaryGrid.Columns.Add(col);

        }

        //自定义控件

        public class DefineGridCB : GridComboBoxExEditControl

        {

            public DefineGridCB(object source)

            {

                DataSource = source;

            }

        }

        //增加一行

        private void buttonItem1_Click(object sender, EventArgs e)

        {

            superGridControl1.PrimaryGrid.NewRow(true);

        }

    }

}
4.2 方法二 上边不传值 直接给一个无参构造方法
  public class ThisGridComboBoxControl : GridComboBoxExEditControl

        {

            public ThisGridComboBoxControl()

            {

                CustomList cl = new CustomList("BSC201Compare");

                DataTable dt = cl.GetList();//这里我是执行了一个sql查询 有符号和名称两个列 反回一个dataTable

                DataSource = dt;

                DisplayMember = "名称";

                ValueMember = "符号";

                DropDownStyle = ComboBoxStyle.DropDownList;

                DropDownColumns = "名称|符号";

                MaxDropDownItems = ;

            }

        }
4.2效果 
5.增加一个按钮
using DevComponents.DotNetBar.SuperGrid;

using System;

using System.Windows.Forms;

using DevComponents.DotNetBar.SuperGrid.Style;

namespace TestForm

{

    public partial class Form1 : Form

    {

        public Form1()

        {

            InitializeComponent();

            this.Load += Form1_Load;

        }

        private void Form1_Load(object sender, EventArgs e)

        {

            GridColumn col = new GridColumn("这是一个下拉框");

            col.HeaderText = "这是一个下拉框";

            col.Name = "这是一个下拉框";

            col.AutoSizeMode = ColumnAutoSizeMode.DisplayedCells;

            col.EditorType = typeof(DefineGridCB);

            col.EditorParams = new object[] { new object[] { "第一个", "第二个" } };

            superGridControl1.PrimaryGrid.Columns.Add(col);

            col = new GridColumn("这是一个按钮");

            col.AutoSizeMode = ColumnAutoSizeMode.DisplayedCells;

            col.EditorType = typeof(DefineGridButtonX);

            superGridControl1.PrimaryGrid.Columns.Add(col);

        }

        /// <summary>

        /// 自己定义按钮

        /// </summary>

        public class DefineGridButtonX : GridButtonXEditControl

        {

            public DefineGridButtonX()

            {

                this.Click += DefineGridButtonX_Click;

            }

            private void DefineGridButtonX_Click(object sender, EventArgs e)

            {

                MessageBox.Show("");

            }

            /// <summary>

            /// 控件属性

            /// </summary>

            /// <param name="cell"></param>

            /// <param name="style"></param>

            public override void InitializeContext(GridCell cell, CellVisualStyle style)

            {

                base.InitializeContext(cell, style);

                this.Text = "这是一个按钮";

            }

        }

        //自定义下拉控件

        public class DefineGridCB : GridComboBoxExEditControl

        {

            public DefineGridCB(object source)

            {

                DataSource = source;

            }

        }

        //增加一行

        private void buttonItem1_Click(object sender, EventArgs e)

        {

            superGridControl1.PrimaryGrid.NewRow(true);

        }

    }

}
改变按钮颜色-依照别的列改变 在class的初始化中做如下操作
 public override void InitializeContext(GridCell cell, CellVisualStyle style)

            {

                base.InitializeContext(cell, style);
          BackColor = Color.Transparent;//这个必须加上 不然也没有效果

                if ((EditorCell.GridRow["这是一个下拉框"].Value ?? "").ToString() != "")

                {

                    unchecked

                    {

                        ForeColor = Color.FromArgb(, , , );

                        BackColor = Color.FromArgb(, , , );

                    }

                    ColorTable = eButtonColor.Blue;

                }

            }
4~5效果
5.superGridControl一列变化 另一列自动加载对应的数据 判断一下值变货的单元格(后来看了看还是用cellClick会更好一些)
 private void SuperGridControl1_CellValueChanged(object sender, GridCellValueChangedEventArgs e)

        {

            if (e.GridCell.GridColumn.Name == "下拉列")

            {

                superGridControl1.PrimaryGrid.Columns["下拉变动列"].EditorParams = new object[] { new object[] { "wf","HH"} };

            }

        }
6.自动行高
SPG.PrimaryGrid.DefaultRowHeight = ;
7.去掉列头行头
            sgcCondition.SPG.PrimaryGrid.ShowColumnHeader = false;

           // sgcCondition.SPG.PrimaryGrid.ColumnHeader.Visible = false;//效果ms和上边一个样。。。

            sgcCondition.SPG.PrimaryGrid.ShowRowHeaders = false;
8.选中行 默认选中首行
SPG.PrimaryGrid.SelectionGranularity = SelectionGranularity.Row;

SPG.PrimaryGrid.InitialSelection = RelativeSelection.Row;
9.增加一行
spgDetail.PrimaryGrid.NewRow(true);
10.删除选中行
SelectedElementCollection lstGR = spgDetail.PrimaryGrid.GetSelectedRows();

            if (lstGR != null)

                if (lstGR.Count > )

                {

                    foreach (GridRow gr in lstGR)

                    {

                        spgDetail.PrimaryGrid.Rows.Remove(gr);

                    }

                }
11.显示行号 且从1开始
SPG.PrimaryGrid.ShowRowGridIndex = true;

SPG.PrimaryGrid.RowHeaderIndexOffset=;
12.交换两行数据 实现上移下移
public static object[] GetRowValues(GridContainer gcRow)

        {

            object[] obj = new object[(gcRow as GridRow).Cells.Count];

            for (int i = ; i < (gcRow as GridRow).Cells.Count; i++)

            {

                obj[i] = (gcRow as GridRow)[i].Value;

            }

            return obj;

        }

        /// <summary>

        /// 上、下移动表格行

        /// </summary>

        /// <param name="spg"></param>

        /// <param name="gr"></param>

        /// <param name="isUp"></param>

        public static bool MoveSPGRow(SuperGridControl spg, bool isUp = true)

        {

            var atRow = spg.PrimaryGrid.ActiveRow;

            if (atRow == null)

            {

                PublicProperties.ShowInformation("请先选中要移动的行", AlertImage.Alert, );//这里是个吐司函数就是提示一下

                return false;

            }

            object[] objRow = GetRowValues(atRow);

            if (isUp)

            {

                if (atRow.RowIndex == )

                {

                    PublicProperties.ShowInformation("已经是第一行了,无法再向上移动", AlertImage.Alert, );//这里是个吐司函数就是提示一下

                    return false;

                }

                var atTop = spg.PrimaryGrid.Rows[atRow.RowIndex - ];

                object[] objTop = GetRowValues(atTop as GridRow);

                spg.PrimaryGrid.Rows[atRow.Index - ] = new GridRow(objRow);

                spg.PrimaryGrid.Rows[atRow.Index] = new GridRow(objTop);

                spg.PrimaryGrid.SetActiveRow(spg.PrimaryGrid.Rows[atRow.Index - ] as GridRow);

                spg.PrimaryGrid.SetSelected(spg.PrimaryGrid.Rows[atRow.Index] as GridRow, false);

            }

            else

            {

                if (atRow.RowIndex == spg.PrimaryGrid.Rows.Count - )

                {

                    PublicProperties.ShowInformation("已经是最后一行了,无法再向下移动", AlertImage.Alert, );//这里是个吐司函数就是提示一下

                    return false;

                }

                var atBottum = spg.PrimaryGrid.Rows[atRow.RowIndex + ];

                object[] objBottum = GetRowValues(atBottum as GridRow);

                spg.PrimaryGrid.Rows[atRow.Index + ] = new GridRow(objRow);

                spg.PrimaryGrid.Rows[atRow.Index] = new GridRow(objBottum);

                spg.PrimaryGrid.SetActiveRow(spg.PrimaryGrid.Rows[atRow.Index + ] as GridRow);

                spg.PrimaryGrid.SetSelected(spg.PrimaryGrid.Rows[atRow.Index] as GridRow, false);

            }

            return true;

        }

    }
13.编辑superGridCell时 焦点没离开cell 点不失焦点的控件 如bar的buttonItem 那么cell里的值不会变,这里可用SetActive()函数 使焦点离开cell
SPG.PrimaryGrid.SetActive(false)
14.选中行自动行高
        /// <summary>

        /// 只对选中行自动行高

        /// </summary>

        /// <param name="sender"></param>

        /// <param name="e"></param>

        private void SPG_RowActivated(object sender, GridRowActivatedEventArgs e)

        {

            GridRow newrow = e.NewActiveRow == null ? new GridRow() : (e.NewActiveRow as GridRow);

            GridRow oldrow = e.OldActiveRow == null ? new GridRow() : e.OldActiveRow as GridRow;

            newrow.RowHeight = ;

            if (newrow != oldrow)

            {

                oldrow.RowHeight = ;//原始宽度

            }

        }
15.superGrid 实现选中区域上下填充
/// <summary>

        /// 实现superGridControl选中区上下填充

        /// </summary>

        /// <param name="isDown">true 向下 false 向上</param>

        /// <param name="isFolowCursor">true激活行跟随 false 不跟随</param>

        private static void FillCells(SuperGridControl SPG, bool isDown = true, bool isFolowCursor = true)

        {

            //var cellSel = spgData.SPG.GetSelectedCells();

            //if (cellSel != null)

            //{

            //}

            var cellSel = SPG.GetSelectedCells();

            if (cellSel == null)

            {

                return;

            }

            int iFirst = (cellSel.First() as GridCell).RowIndex;

            int iEnd = (cellSel.Last() as GridCell).RowIndex;

            GridRow grFirst = SPG.PrimaryGrid.Rows[iFirst] as GridRow;

            GridRow grEnd = SPG.PrimaryGrid.Rows[iEnd] as GridRow;

            for (int j = iFirst; j <= iEnd; j++)

            {

                GridRow gr = SPG.PrimaryGrid.Rows[j] as GridRow;

                GridRow grTmp = null;

                if (isDown)

                    grTmp = grFirst;

                else

                    grTmp = grEnd;

                for (int i = ; i < SPG.PrimaryGrid.Columns.Count; i++)

                {

                    if (gr[i].IsSelected && gr[i].AllowEdit == true)

                    {

                        gr[i].Value = grTmp[i].Value;

                    }

                }

                if (isFolowCursor)

                    gr.SetActive();

            }

            if (isFolowCursor)

                grFirst.SetActive();

        }
16.superGridControl出现滚动条时 追加数据 始终显示最后一条
//SPG.PrimaryGrid.ScrollToBottom()//这个不知为什么不行 看意思好像行的样子

//如果对spg有其他操作要刷新一下 spg.Refresh()不刷新下边的代码将不起作用

SPG.PrimaryGrid.LastOnScreenRowIndex = (SPG.PrimaryGrid.Rows.Last() as GridRow).Index;
17.superGridControl 列的数据居中对齐
spgLoginInfo.DefaultVisualStyles.CellStyles.Default.Alignment = DevComponents.DotNetBar.SuperGrid.Style.Alignment.MiddleCenter;
18.改变列头颜色
 spgLoginInfo.DefaultVisualStyles.ColumnHeaderStyles.Default.Background.Color1 = Color.FromArgb(, , );

            spgLoginInfo.DefaultVisualStyles.ColumnHeaderStyles.Default.Background.Color2 = Color.FromArgb(, , );
19.superGridControl透明
            //整体透明

            superGridControl1.BackColor = Color.Transparent;

            //面板透明

            superGridControl1.DefaultVisualStyles.GridPanelStyle.Background.Color1= Color.Transparent;

            //行透明

            superGridControl1.DefaultVisualStyles.RowStyles.Default.Background.Color1 = Color.Transparent;

            //单元格透明

            superGridControl1.DefaultVisualStyles.CellStyles.Default.Background.Color1 = Color.Transparent;

            //改变单个单元格颜色

            (superGridControl1.PrimaryGrid.Rows[] as GridRow).Cells[].CellStyles.Default.Background.Color1 = Color.Red;
c# winForm DotNetBar控件之SuperGridControl的更多相关文章
- C# Winform DotNetBar控件之StyleManager
这个控件作用改变窗体样式 使用方法 拖拽一个styleManager到窗体 改变它的managerStyle,再把窗体的继承改成Office2007Form 最后一步窗体初始化控件前 改掉的Enabl ...
- [原创][开源]SunnyUI.Net, C# .Net WinForm开源控件库、工具类库、扩展类库、多页面开发框架
SunnyUI.Net, 基于 C# .Net WinForm 开源控件库.工具类库.扩展类库.多页面开发框架 Blog: https://www.cnblogs.com/yhuse Gitee: h ...
- 在DevExpress程序中使用Winform分页控件直接录入数据并保存
一般情况下,我们都倾向于使用一个组织比较好的独立界面来录入或者展示相关的数据,这样处理比较规范,也方便显示比较复杂的数据.不过在一些情况下,我们也可能需要直接在GridView表格上直接录入或者修改数 ...
- winform窗体控件(全)
回顾跟补充下除了昨天那常用6个其他的winform窗体控件作用 1:Button:按钮 (1)AutoSize:如果是True的情况下,内容将会撑开:False的话会另起一行 (2)Enabled: ...
- C#实现WinForm DataGridView控件支持叠加数据绑定
我们都知道WinForm DataGridView控件支持数据绑定,使用方法很简单,只需将DataSource属性指定到相应的数据源即可,但需注意数据源必须支持IListSource类型,这里说的是支 ...
- winform基本控件----按钮
这次来引用一个我们上课时候老师给的一个实验内容,来说一下winform程序设计中的按钮控件的使用.下面是我们老师给的实验内容. 实验目的: 掌握Winform的开发环境. 掌握窗体的创建和基本方法. ...
- WinForm给控件加入hint文字
本文代码主要是参考别人的,仅为个人记录,方面后续使用~ 效果图: 主要代码在一个Win32Utility类中,代码如下: public static class Win32Utility { [Dll ...
- C# WinForm实现控件拖动实例介绍
主要是设计控件的MouseDown.MouseLeave.MouseMove事件.一步步来吧:1.定义一个枚举类型,描述光标状态 private enum EnumMousePointPosition ...
- DotNetBar控件,superTabControl多文档界面(MDI)的风格、多Tab的创建方法
最近在做一个条码系统的项目,第一次用dotnetbar控件,,查找资料时看到伍老师一篇文章(链接),但是没有关于加载tab窗口的方法,自己摸索做了一个此类风格出来,并写了一个通用方法,供大家参考. 风 ...
随机推荐
- 第一节:mybatis入门
1.新建数据表 本次测试使用mysql数据,数据库名称为mybatis,新建一张表person,建表语句如下: CREATE TABLE `person` ( `id` ) PRIMARY KEY a ...
- Android组件内核之Fragment管理与内核(二)
阿里P7Android高级架构进阶视频免费学习请点击:https://space.bilibili.com/474380680本篇文章将先从以下三个内容来介绍Fragment管理与内核: [Fragm ...
- sudo 出现unable to resolve host hostname 解决方法
Linux 环境,我的电脑叫枝桠(机器的hostname), 每次执行sudo 就出现这个警告讯息: sudo: unable to resolve host 枝桠 直接修改 /etc/hosts 的 ...
- LeetCode Array Easy 88. Merge Sorted Array
Description Given two sorted integer arrays nums1 and nums2, merge nums2 into nums1 as one sorted ar ...
- 理解Java GC日志
idea 在vm options处加入-XX:+PrintGCDetails,可打印GC日志. public class ReferenceCountingGC { public Object ins ...
- Laravel groupBy用法
// 假设model名是News:status启用是1:language选择cn: $data = News::select(array('id', 'title', 'type')) ->wh ...
- 使用Vue和djangoframwork完成登录页面构建 001
使用Vue和djangoframwork完成登录页面构建 001 环境的搭建 首先,我在我的电脑的F盘创建了一个文件夹 forNote,进入到这个文件夹中 F:\forNote> vue环境的搭 ...
- Work 4(通知类) (2019.04.25)
- 【Codeforces Round #429 (Div. 2) C】Leha and Function
[Link]:http://codeforces.com/contest/841/problem/C [Description] [Solution] 看到最大的和最小的对应,第二大的和第二小的对应. ...
- ubuntu 下gcc的编译运行
一些基本的操作 $gcc test.c //将test.c预处理.汇编.编译并链接形成可执行文件test $gcc test.c -o test //-o用来指定输出文件的文件名 $gcc -E te ...