How To Install Git on CentOS 7
Introduction
Version control has become an indispensable tool in modern software development. Version control systems allow you to keep track of your software at the source level. You can track changes, revert to previous stages, and branch off from the base code to create alternative versions of files and directories.
One of the most popular version control systems is git. Many projects maintain their files in a Git repository, and sites like GitHub and Bitbucket have made sharing and contributing to code with Git easier than ever.
In this guide, we will demonstrate how to install Git on a CentOS 7 server. We will cover how to install the software in a couple of different ways, each with their own benefits, along with how to set up Git so that you can begin collaborating right away.
Prerequisites
Before you begin with this guide, there are a few steps that need to be completed first.
You will need a CentOS 7 server installed and configured with a non-root user that has sudo privileges. If you haven't done this yet, you can run through steps 1-4 in the CentOS 7 initial server setup guide to create this account.
Once you have your non-root user, you can use it to SSH into your CentOS server and continue with the installation of Git.
Install Git
The two most common ways to install Git will be described in this section. Each option has their own advantages and disadvantages, and the choice you make will depend on your own needs. For example, users who want to maintain updates to the Git software will likely want to use yum to install Git, while users who need features presented by a specific version of Git will want to build that version from source.
Option One — Install Git with Yum
The easiest way to install Git and have it ready to use is to use CentOS's default repositories. This is the fastest method, but the Git version that is installed this way may be older than the newest version available. If you need the latest release, consider compiling git from source (the steps for this method can be found further down this tutorial).
Use yum, CentOS's native package manager, to search for and install the latest git package available in CentOS's repositories:
sudo yum install git
If the command completes without error, you will have git downloaded and installed. To double-check that it is working correctly, try running Git's built-in version check:
git --version
If that check produced a Git version number, then you can now move on to Setting up Git, found further down this article.
Option Two — Install Git from Source
If you want to download the latest release of Git available, or simply want more flexibility in the installation process, the best method for you is to compile the software from source. This takes longer, and will not be updated and maintained through the yum package manager, but it will allow you to download a newer version than what is available through the CentOS repositories, and will give you some control over the options that you can include.
Before you begin, you'll need to install the software that git depends on. These dependencies are all available in the default CentOS repositories, along with the tools that we need to build a binary from source:
sudo yum groupinstall "Development Tools"

sudo yum install gettext-devel openssl-devel perl-CPAN perl-devel zlib-devel
After you have installed the necessary dependencies, you can go ahead and look up the version of Git that you want by visiting the project's releases page on GitHub.
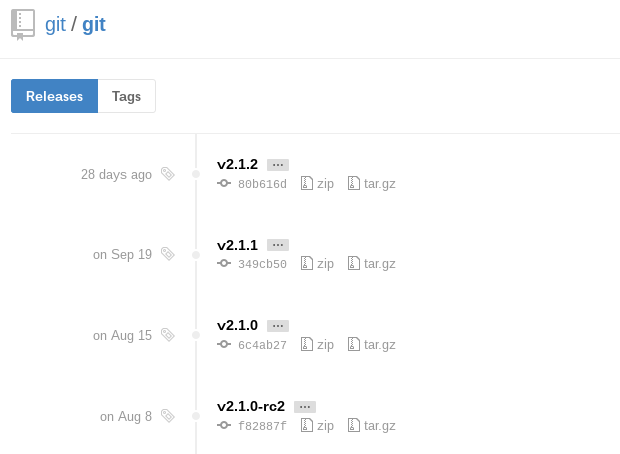
The version at the top of the list is the most recent release. If it does not have -rc (short for "Release Candidate") in the name, that means that it is a stable release and is safe for use. Click on the version you want to download to be taken to that version's release page. Then right-click on the Source code (tar.gz)button and copy the link to your clipboard.

Now we are going to use the wget command in our CentOS server to download the source archive from the link that we copied, renaming it to git.tar.gz in the process so that it is easier to work with.
Note: the URL that you copied may be different from mine, since the release that you download may be different.
wget https://github.com/git/git/archive/v2.1.2.tar.gz -O git.tar.gz
Once the download is complete, we can unpack the source archive using tar. We'll need a few extra flags to make sure that the unpacking is done correctly: z decompresses the archive (since all .gz files are compressed), x extracts the individual files and folders from the archive, and f tells tar that we are declaring a filename to work with.
tar -zxf git.tar.gz
This will unpack the compressed source to a folder named after the version of Git that we downloaded (in this example, the version is 2.1.2, so the folder is named git-2.1.2). We'll need to move to that folder to begin configuring our build. Instead of bothering with the full version name in the folder, we can use a wildcard (*) to save us some trouble in moving to that folder.
cd git-*
Once we are in the source folder, we can begin the source build process. This starts with some pre-build checks for things like software dependencies and hardware configurations. We can check for everything that we need with the configure script that is generated by make configure. This script will also use a --prefix to declare /usr/local (the default program folder for Linux platforms) as the appropriate destination for the new binary, and will create a Makefile to be used in the following step.
make configure

./configure --prefix=/usr/local
Makefiles are scriptable configuration files that are processed by the make utility. Our Makefile will tell makehow to compile a program and link it to our CentOS installation so that we can execute the program properly. With a Makefile in place, we can now execute make install (with sudo privileges) to compile the source code into a working program and install it to our server:
sudo make install
Git should now be built and installed on your CentOS 7 server. To double-check that it is working correctly, try running Git's built-in version check:
git --version
If that check produced a Git version number, then you can now move on to Setting up Git below.
Set Up Git
Now that you have git installed, you will need to submit some information about yourself so that commit messages will be generated with the correct information attached. To do this, use the git configcommand to provide the name and email address that you would like to have embedded into your commits:
git config --global user.name "Your Name"

git config --global user.email "you@example.com"
To confirm that these configurations were added successfully, we can see all of the configuration items that have been set by typing:
git config --list
user.name=Your Name

user.email=you@example.com
This configuration will save you the trouble of seeing an error message and having to revise commits after you submit them.
How To Install Git on CentOS 7的更多相关文章
- Install latest git on CentOS 6/7
Assuming you have sudo/root permission. Try rpmforge-extras first. yum --disablerepo=base,updates -- ...
- Install ssdb-rocks on CentOS 6
Install ssdb-rocks on CentOS 6 C.C. 发表于 2014年08月10日 20:14 | Hits: 649 为了优化节操精选的弹幕系统,打算更换到Facebook的R ...
- how to install git 1.8 rpm
git版本在低于1.8之前,对于私有项目会出现401的pull失败错误,只能通过升级git版本来解决 It appears that git18 is no longer available from ...
- git的CentOS服务端安装和windows客户端的使用
git的CentOS服务端安装和windows客户端的使用 此教程以 搬瓦工vps CentOS 6 x64 的系统为环境,搭建 git 服务端.windows 7 系统为客户端. git客户端 在W ...
- How To Install Java on CentOS and Fedora
PostedDecember 4, 2014 453.8kviews JAVA CENTOS FEDORA Introduction This tutorial will show you how ...
- Install Redis on CentOS 6.4--转
Install Redis on CentOS 6.4 source:http://thoughts.z-dev.org/2013/05/27/install-redis-on-centos-6-4/ ...
- Steps to Install Hadoop on CentOS/RHEL 6---reference
http://tecadmin.net/steps-to-install-hadoop-on-centosrhel-6/# The Apache Hadoop software library is ...
- How to install MP4box on CentOS 6
How to install MP4box on CentOS 6 MP4Box is a MP4 multiplexer. It can import MPEG-4 video, DivX, Xvi ...
- cygwin install git
Installation with Cygwin If you're comfortable with Cygwin, then use it to install git, ssh, wget an ...
随机推荐
- opensack-mitaka网络性能测试shaker
一.项目介绍 Shaker项目是由Mirantis发起,专门针对OpenStack网络性能的测试工具.通过模拟不同的网络场景和heat模板,创建虚拟机,并在虚拟机里运行iperf.iperf3.net ...
- [转载]java开发实现word在线编辑及流转
OA公文流转系统主要用于处理企业日常工作中内外部的各种公文,包括了公文的拟稿.审批.传阅.公告.归档,多层上级可以对下级撰写的公文进行逐级审批或修改,待最高级人员确认无误后即可进行核稿和发文等操作,最 ...
- opencv:创建滑动条
函数原型: ,); #include <opencv.hpp> using namespace cv; #define WINDOW_NAME "线性混合示例" // ...
- 使用Spring实现MySQL读写分离
1. 为什么要进行读写分离 大量的JavaWeb应用做的是IO密集型任务, 数据库的压力较大, 需要分流 大量的应用场景, 是读多写少, 数据库读取的压力更大 一个很自然的思路是使用一主多从的数据库集 ...
- 创建假的wifi热点
本帖介绍怎么创建假的wifi热点,然后抓取连接到这个wifi用户的敏感数据.我们还会给周围的无线路由器发送未认证的包,使这些路由器瘫痪,强迫用户连接(或自动连接)我们创建的假wifi热点. 这种攻击也 ...
- linux基础【文件夹含义】
linux文件目录是一个树状的目录 bin -->可执行文件 boot-->操作系统引导文件,系统内核,启动信息 dev -->device,设备信息,计算机硬件设备信息 etc - ...
- 【解题报告】[动态规划] - PID90 / 未出现的子串
原题地址:http://www.rqnoj.cn/problem/90 解题思路:题目看起来不太像动态规划... 我用一个数组f[i][j]来表示在数组第i个元素的后面第一次出现j的位置,为-1则是没 ...
- LOJ#2351. 「JOI 2018 Final」毒蛇越狱
LOJ#2351. 「JOI 2018 Final」毒蛇越狱 https://loj.ac/problem/2351 分析: 首先有\(2^{|?|}\)的暴力非常好做. 观察到\(min(|1|,| ...
- LeetCode Next Greater Element III
原题链接在这里:https://leetcode.com/problems/next-greater-element-iii/description/ 题目: Given a positive 32- ...
- WPF设置全局快捷键
转自:http://www.cnblogs.com/atskyline/archive/2012/09/20/2694878.html 第一步 引入到Winows API 偷懒直接写在类里 1: [D ...