TensorFlow:使用inception-v3实现各种图像识别
程序来自博客:
# https://www.cnblogs.com/felixwang2/p/9190740.html
上面这个博客是一些列的,所以可以从前往后逐一练习。
 # https://www.cnblogs.com/felixwang2/p/9190740.html

 # TensorFlow(十五):使用inception-v3实现各种图像识别

 import tensorflow as tf

 import os

 import numpy as np

 import re

 from PIL import Image

 import matplotlib.pyplot as plt

 class NodeLookup(object):

     def __init__(self):

         label_lookup_path = 'inception_model/imagenet_2012_challenge_label_map_proto.pbtxt'

         uid_lookup_path = 'inception_model/imagenet_synset_to_human_label_map.txt'

         self.node_lookup = self.load(label_lookup_path, uid_lookup_path)

     def load(self, label_lookup_path, uid_lookup_path):

         # 加载分类字符串n********对应分类名称的文件

         proto_as_ascii_lines = tf.gfile.GFile(uid_lookup_path).readlines()

         uid_to_human = {}

         #一行一行读取数据

         for line in proto_as_ascii_lines :

             #去掉换行符

             line=line.strip('\n')

             #按照'\t'分割

             parsed_items = line.split('\t')

             #获取分类编号

             uid = parsed_items[0]

             #获取分类名称

             human_string = parsed_items[1]

             #保存编号字符串n********与分类名称映射关系

             uid_to_human[uid] = human_string

         # 加载分类字符串n********对应分类编号1-1000的文件

         proto_as_ascii = tf.gfile.GFile(label_lookup_path).readlines()

         node_id_to_uid = {}

         for line in proto_as_ascii:

             if line.startswith('  target_class:'):

                 #获取分类编号1-1000

                 target_class = int(line.split(': ')[1])

             if line.startswith('  target_class_string:'):

                 #获取编号字符串n********

                 target_class_string = line.split(': ')[1]

                 #保存分类编号1-1000与编号字符串n********映射关系

                 node_id_to_uid[target_class] = target_class_string[1:-2]

         #建立分类编号1-1000对应分类名称的映射关系

         node_id_to_name = {}

         for key, val in node_id_to_uid.items():

             #获取分类名称

             name = uid_to_human[val]

             #建立分类编号1-1000到分类名称的映射关系

             node_id_to_name[key] = name

         return node_id_to_name

     #传入分类编号1-1000返回分类名称

     def id_to_string(self, node_id):

         if node_id not in self.node_lookup:

             return ''

         return self.node_lookup[node_id]

 #创建一个图来存放google训练好的模型

 with tf.gfile.FastGFile('inception_model/classify_image_graph_def.pb', 'rb') as f:

     graph_def = tf.GraphDef()

     graph_def.ParseFromString(f.read())

     tf.import_graph_def(graph_def, name='')

 gpu_options = tf.GPUOptions(allow_growth=True)

 with tf.Session(config=tf.ConfigProto(gpu_options=gpu_options)) as sess:

     softmax_tensor = sess.graph.get_tensor_by_name('softmax:0')

     #遍历目录,如果images下没有图片,则没有任何识别

     for root,dirs,files in os.walk('images/'):

         for file in files:

             #载入图片

             image_data = tf.gfile.FastGFile(os.path.join(root,file), 'rb').read()

             predictions = sess.run(softmax_tensor,{'DecodeJpeg/contents:0': image_data})#图片格式是jpg格式

             predictions = np.squeeze(predictions)#把结果转为1维数据

             #打印图片路径及名称

             image_path = os.path.join(root,file)

             print(image_path)

             #显示图片

             img=Image.open(image_path)

             plt.imshow(img)

             plt.axis('off')

             plt.show()

             #排序

             top_k = predictions.argsort()[-5:][::-1]

             node_lookup = NodeLookup()

             for node_id in top_k:

                 #获取分类名称

                 human_string = node_lookup.id_to_string(node_id)

                 #获取该分类的置信度

                 score = predictions[node_id]

                 print('%s (score = %.5f)' % (human_string, score))

             print()
测试几张图,与结果分别贴到下面,根据程序需要,你自己需要在程序所在目录下建立一个images的文件夹,然后将图片放进去。
在上一个联系中,下载google的inception模型时顺带下载了一张大熊猫的图片,我就复制到新建的images文件夹下,然后随便从网上下载了两张图,一张时荷花的,一张是水葱的。
运行程序结果:
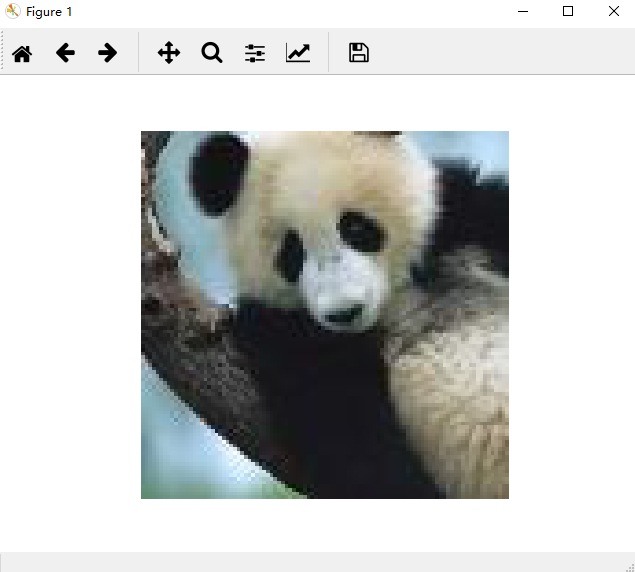
显示一张大熊猫,关闭,显示预测结果:
images/cropped_panda.jpg

giant panda, panda, panda bear, coon bear, Ailuropoda melanoleuca (score = 0.89107)

indri, indris, Indri indri, Indri brevicaudatus (score = 0.00779)

lesser panda, red panda, panda, bear cat, cat bear, Ailurus fulgens (score = 0.00296)

custard apple (score = 0.00147)

earthstar (score = 0.00117)

接着显示一张荷花,关闭显示预测结果:
images/Lotus.jpg

daisy (score = 0.52279)

sulphur butterfly, sulfur butterfly (score = 0.07167)

pot, flowerpot (score = 0.04293)

cabbage butterfly (score = 0.02629)

bee (score = 0.01437)
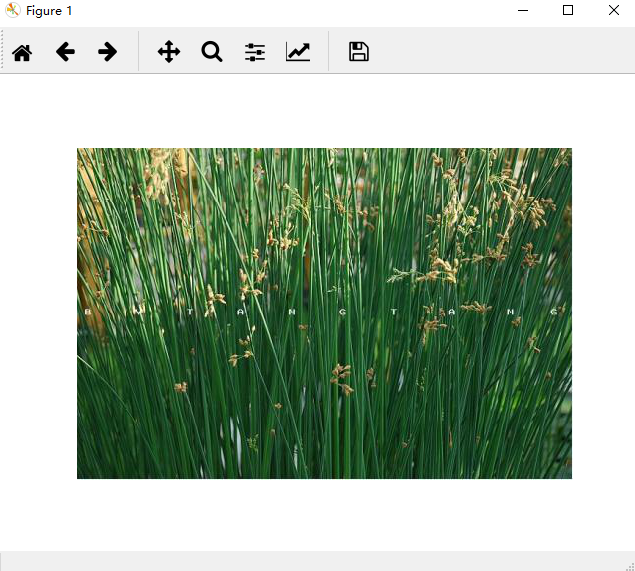
再接着显示一张水葱,关闭显示预测结果:
images/water_onion.jpg

lakeside, lakeshore (score = 0.32870)

corn (score = 0.19709)

ear, spike, capitulum (score = 0.15878)

yellow lady's slipper, yellow lady-slipper, Cypripedium calceolus, Cypripedium parviflorum (score = 0.01670)

hay (score = 0.01296)
从预测结果来看,大熊猫识别准确率很高;荷花居然预测成雏菊;水葱预测成湖边。看来后两个对象都没有训练好。
TensorFlow:使用inception-v3实现各种图像识别的更多相关文章
- Inception V3 的 tensorflow 实现
tensorflow 官方给出的实现:models/inception_v3.py at master · tensorflow/models · GitHub 1. 模型结构 首先来看 Incept ...
- 源码分析——迁移学习Inception V3网络重训练实现图片分类
1. 前言 近些年来,随着以卷积神经网络(CNN)为代表的深度学习在图像识别领域的突破,越来越多的图像识别算法不断涌现.在去年,我们初步成功尝试了图像识别在测试领域的应用:将网站样式错乱问题.无线领域 ...
- 1、VGG16 2、VGG19 3、ResNet50 4、Inception V3 5、Xception介绍——迁移学习
ResNet, AlexNet, VGG, Inception: 理解各种各样的CNN架构 本文翻译自ResNet, AlexNet, VGG, Inception: Understanding va ...
- 微调Inception V3网络-对Satellite分类
目录 1. 流程概述 2. 准备数据集 2.1 Satellite数据集介绍 3. Inception V3网络 4. 训练 4.1 基于Keras微调Inception V3网络 4.2 Keras ...
- 脸型分类-Face shape classification using Inception v3
本文链接:https://blog.csdn.net/u011961856/article/details/77984667函数解析github 代码:https://github.com/adoni ...
- 网络结构解读之inception系列四:Inception V3
网络结构解读之inception系列四:Inception V3 Inception V3根据前面两篇结构的经验和新设计的结构的实验,总结了一套可借鉴的网络结构设计的原则.理解这些原则的背后隐藏的 ...
- 从GoogLeNet至Inception v3
从GoogLeNet至Inception v3 一.CNN发展纵览 我们先来看一张图片: 1985年,Rumelhart和Hinton等人提出了后向传播(Back Propagation,BP)算法( ...
- 经典分类CNN模型系列其五:Inception v2与Inception v3
经典分类CNN模型系列其五:Inception v2与Inception v3 介绍 Inception v2与Inception v3被作者放在了一篇paper里面,因此我们也作为一篇blog来对其 ...
- TensorFlow学习笔记(四)图像识别与卷积神经网络
一.卷积神经网络简介 卷积神经网络(Convolutional Neural Network,CNN)是一种前馈神经网络,它的人工神经元可以响应一部分覆盖范围内的周围单元,对于大型图像处理有出色表现. ...
随机推荐
- svn checkout使用
(1)需要知道三个东西:svn路径和号码和密码. (2)svn导出的地方建立需要的目录,然后在不同目录下svn check out,输入正确的路径和号码和密码,这样就可以正常svn下来目录了.
- Ubuntu, 更新Sourses.list
1.备份原文件 sudo cp /etc/apt/sources.list /etc/apt/sources_list.bak 2.加载文件 vim:vim sourses.list ubuntu d ...
- MATLAB一些常用的function
在MATLAB中一些常用的算数符号与我们平时所用的不同,比如:根号,平方,e,以及对数函数等. (1)平方:a^2 意思为a的平方,亦可以写成a*a: (2)根号:sqrt(x)意思为对x开根号,x既 ...
- shiro中setUnauthorizedUrl("/403")不起作用
最近学习shiro框架,在用户没有权限的情况下想让其跳转到403页面,结果非自己预想的效果.后来找到一个解决办法如下: 转载来源 SpringBoot中集成Shiro的时候, 配置setUnautho ...
- .Net中C# DateTime类的ToString()方法的使用
Console.WriteLine("ToShortDateString:" + DateTime.Now.ToShortDateString()); Console.WriteL ...
- 未能加载文件或程序集“Autofac.Integration.Mvc, Version=4.0.0.0, Culture=neutral, PublicKeyToken=17863af14b0044da”或它的某一个依赖项。找到的程序集清单定义与程序集引用不匹配。 (异常来自 HRESULT:0x80131040)
是因为web.config中dependentAssembly结点下的版本号和当前引用的程序集的版本号不一致!
- LUT
FPGA大多为LUT+寄存器的够,实现工艺为SRAM:寄存器很好理解,存储器的一种,用于存储指令和数据,多位于CPU内.拿什么是LUT呢? LUT:即Look up table,查找表,其本质是一个R ...
- python之路之反射
这个是上两个的加强版
- 第四十四篇 入门机器学习——matplotlib基础——实现数据可视化
No.1. 绘制一条正弦曲线 No.2. 在一张图中绘制多条曲线 No.3. 可以为曲线指定颜色.线条样式 No.4. 可以指定横纵坐标轴的范围 也可以使用: No.6. 可以为每条曲线添加图示 No ...
- Python(三):环境及其配置
一,PYTHONPATH 默认的Python模块搜索路径,可以将路径指向anaconda3,需要开发者自己设置 二,PYTHONHASHSEED 如果该环境变量被设定为 random ,相当于 -R ...