简单记录在Visual Studio 2013中创建ASP.NET Web API 2
在很多跨平台的应用中就需要Web API ,比如android与数据库的交互。
Create a Web API Project
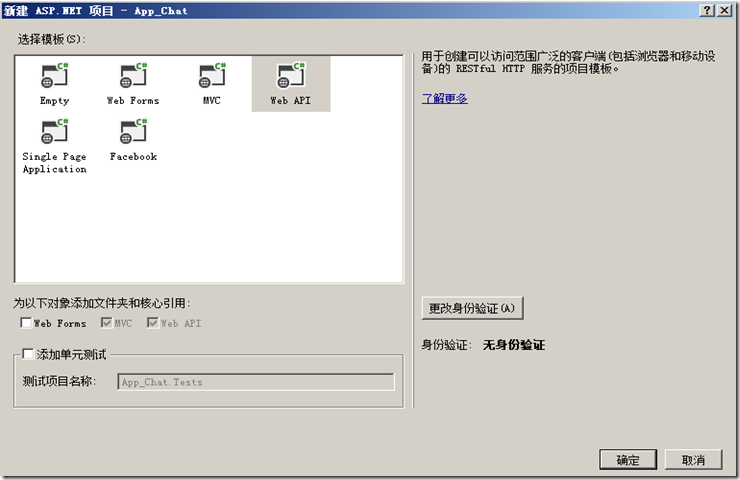
选择新建项目下的模板下的Visual C#节点下的Web节点,在模板列表下选择ASP.NET Web 应用程序,并命名为ChatApp就可以了。

在新建ASP.NET项目下选择Web API 点击确定就可以了。
Adding a Model
在解决方案下新建一个Model
//新建Model User

namespace APP_Chat.Models

{

    public class User

    {

        public string UID { get; set; }

        public string LoginName { get; set; }

        public string Name { get; set; }

        public string Pwd { get; set; }

        public DateTime CreateTime { get; set; }

    }

}
//新建Model ResponseLoginState

namespace APP_Chat.Models

{

    public class ResponseLoginState

    {

        public User user { get; set; }

        public int state { get; set; }

        public string msg { get; set; }
    }

}
// 新建Model RequestLogin

namespace APP_Chat.Models

{

    public class RequestLogin

    {

        public string LoginName { get; set; }

        public string Pwd { get; set; }

    }

}
.csharpcode, .csharpcode pre
{
font-size: small;
color: black;
font-family: consolas, "Courier New", courier, monospace;
background-color: #ffffff;
/*white-space: pre;*/
}
.csharpcode pre { margin: 0em; }
.csharpcode .rem { color: #008000; }
.csharpcode .kwrd { color: #0000ff; }
.csharpcode .str { color: #006080; }
.csharpcode .op { color: #0000c0; }
.csharpcode .preproc { color: #cc6633; }
.csharpcode .asp { background-color: #ffff00; }
.csharpcode .html { color: #800000; }
.csharpcode .attr { color: #ff0000; }
.csharpcode .alt
{
background-color: #f4f4f4;
width: 100%;
margin: 0em;
}
.csharpcode .lnum { color: #606060; }
Adding a Controller
在解决方案下新建一个控制器
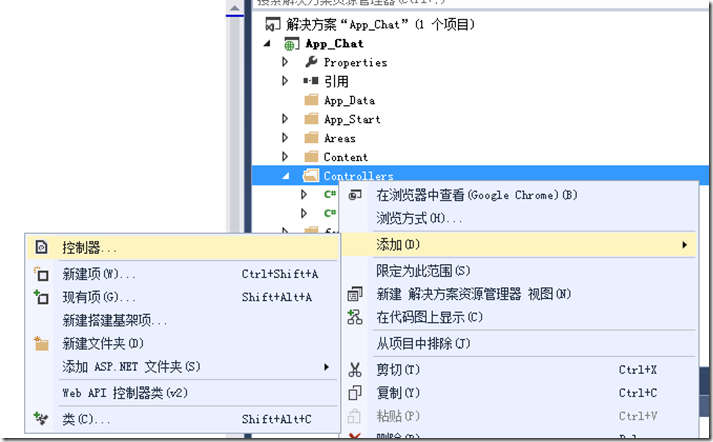
选择一个空的模板即可

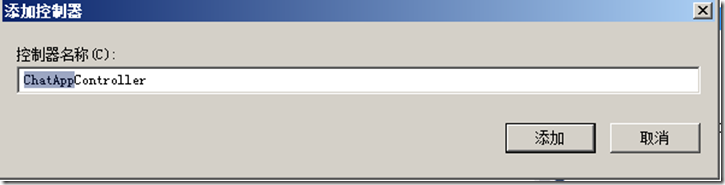
下面就添加控制器的名称(Controller命名是有规范的,不能更改后面的Controller部分也不能在后门添加字符,不然都会导致最后无法访问到这个Controller像这个Controller就是通过/api/ChatApp/访问的,当然默认是Get的请求方式)
namespace APP_Chat.Controllers

{

    public class ChatAppController : ApiController

    {

        /// <summary>

        /// 用户登录

        /// </summary>

        /// <param name="user">用户的登录名 - LoginName,密码 - Pwd</param>

        /// <returns>登录成功则返回用户的信息,和state=1</returns>   [HttpPost] http 请求方式

        [HttpPost]
        public ResponseLoginState Login(RequestLogin user)

        {

            if (string.IsNullOrWhiteSpace(user.LoginName))

                return new ResponseLoginState() { state = 0, msg = "参数错误,LoginName未传出!" };

            if (string.IsNullOrWhiteSpace(user.Pwd))

                return new ResponseLoginState() { state = 0, msg = "参数错误,Name未传出!" };

            #region

            using (var conn = new System.Data.OracleClient.OracleConnection(OracleHelper.ConnString))

            {

                conn.Open();

                var command = conn.CreateCommand();

                command.Parameters.Clear();

                command.Parameters.Add(new OracleParameter(":loginName", user.LoginName));

                command.Parameters.Add(new OracleParameter(":pwd", user.Pwd));

                command.CommandText = "select * from APP_ChatUser where loginname=:loginName and pwd=:pwd";

                var reader = command.ExecuteReader();

                User loginuser = new User();

                try

                {

                    reader.Read();

                    loginuser.UID = reader["USERID"].ToString();

                    loginuser.LoginName = reader["LOGINNAME"].ToString();

                    loginuser.Name = reader["NAME"].ToString();

                    loginuser.Pwd = reader["PWD"].ToString();

                    loginuser.CreateTime = Convert.ToDateTime(reader["CreateTime"]);

                    return new ResponseLoginState() { state = 1, msg = "success", user = loginuser };

                }

                catch (Exception ex)

                {

                    return new ResponseLoginState() { state = 0, msg = ex.Message, user = null };

                }

            }

            #endregion

        }

   }

}
通过访问api/ChatApp/Login就可以访问WebApi了
JavaScript来检测WebApi
<!DOCTYPE html>

<html xmlns="http://www.w3.org/1999/xhtml">

<head>

<meta http-equiv="Content-Type" content="text/html; charset=utf-8"/>

    <title></title>

    <script src="Scripts/jquery-1.10.2.min.js"></script>

    <script>

        var user;

        function login() {

            $.ajax({

                url: '/api/ChatApp/Login',

                type: 'POST',

                dataType:'JSON',

                data: { LoginName: 'zhangsan', Pwd: '123' },

                success: function (data) {

                    if (typeof (data) != 'object')

                        data = JSON.parse(data);

                    user = data.Data.User;

                    alert(JSON.stringify(data));

                }

            });

        }

    </script>

</head>

<body>

    <input type="button" value="登录" onclick="login()" />

</body>

</html>
如果有不清楚,可以参照下面的这个网址学习http://www.asp.net/web-api/overview/getting-started-with-aspnet-web-api/tutorial-your-first-web-api
简单记录在Visual Studio 2013中创建ASP.NET Web API 2的更多相关文章
- 在 Visual Studio 2013 中创建 ASP.NET Web 项目(0):专题导航 [持续更新中]
写在前面的话 随着 Visual Studio 2013 的正式推出,ASP.NET 和 Visual Studio Web 开发工具 也发布了各自的最新版本. 新版本在构建 One ASP.NET ...
- 在 Visual Studio 2013 中创建 ASP.NET Web 项目(1):概述 - 创建 Web 应用程序项目
注:本文是“在 Visual Studio 2013 中创建 ASP.NET Web 项目”专题的一部分,详情参见 专题导航 . 预备知识 本专题适用于 Visual Studio 2013 及以上版 ...
- 【转载】在 Visual Studio 2012 中创建 ASP.Net Web Service
在 Visual Studio 2012 中创建 ASP.Net Web Service,步骤非常简单.如下: 第一步:创建一个“ASP.Net Empty Web Application”项目 创建 ...
- Visual Studio 2010中创建ASP.Net Web Service
转自:http://blog.csdn.net/xinyaping/article/details/7331375 很多人在论坛里说,在Visual Studio 2010中不能创建“ASP.Net ...
- 在 Visual Studio 2010 中创建 ASP.Net Web Service
第一步:创建一个“ASP.Net Empty Web Application”项目 第二步:在项目中添加“Web Service”新项目 第一步之后,Visual Studio 2010会创建一个仅含 ...
- (转)在 Visual Studio 2010 中创建 ASP.Net Web Service
很多人在论坛里说,在Visual Studio 2010中不能创建“ASP.Net Web Service”这种project了,下面跟帖者云云,有的说这是因为微软已经将Web Service整合进W ...
- Visual Studio 2013 无法创建MVC项目,系统找不到指定的文件.(Exception from HRESULT:08x0070002)
在Visual Studio 2013中创建新MVC项目,(PS:现在创建个MVC项目,差点都找不到在哪,汗!-) 确定后提示,系统找不到指定的文件.(Exception from HRESULT:0 ...
- 在ASP.NET MVC5 及 Visual Studio 2013 中为Identity账户系统配置数据库链接及Code-First数据库迁移
在ASP.NET MVC5 及 Visual Studio 2013 中为Identity账户系统配置数据库链接及Code-First数据库迁移 最近发布的ASP.NET MVC 5 及Visual ...
- 在Visual Studio 2013 中使用C++单元测试
本文主要介绍在Visual Studio 2013中对代码进行单元测试的方法,包含了两方面的内容:对已有的Dll文件进行单元测试,以及对已有的源文件进行单元测试. 1. VS2013对DLL文件的单元 ...
随机推荐
- c语言实现面向对象OOC
这种问题比较锻炼思维,同时考察c和c++的掌握程度.如果你遇到过类似问题,此题意义自不必说.如果用c实现c++,主要解决如何实现封装,继承和多态三大问题,本文分两块说. 1.封装 // Example ...
- BestCoder21 1002.Formula 解题报告
题目链接:http://acm.hdu.edu.cn/showproblem.php?pid=5139 题目意思:给出一个数 n,求出 f(n). 可以发现有以下规律: f(1) = 1! f(2) ...
- 【python】id()函数
来源:百度知道 >>> a=2.0 >>> b=2.0 >>> id(a) 524440880 >>> id(b) 524440 ...
- java课后作业 弹出窗口求两个数的加减乘除
//计算2个数的加减乘除 谷伟华 2015/10/6package jisuan; import javax.swing.JOptionPane; public class Jiasuan { pub ...
- 详解web.xml中元素的加载顺序
一.背景 最近在项目中遇到了启动时出现加载service注解注入失败的问题,后来经过不懈努力发现了是因为web.xml配置文件中的元素加载顺序导致的,那么就抽空研究了以下tomcat在启动时web.x ...
- Java使用JDBC连接MySQL数据库
1.引用 JDBC(Java Data Base Connectivity,java数据库连接)是一种用于执行SQL语句的Java API,可以为多种关系数据库提供统一访问,它由一组用Java语言编写 ...
- Lattice 的 DDR IP核使用调试笔记之DDR 的 仿真
—— 远航路上ing 整理于 博客园.转载请标明出处. 在上节建立完工程之后,要想明确DDR IP的使用细节,最好是做仿真.然后参考仿真来控制IP 核. 仿真的建立: 1.在IP核内的以下路径找到以下 ...
- CLR via C#(08)-操作符
对于操作符,我们并不陌生,例如+,-,*,%等二元操作符,以及++,!等一元操作符.但是对于非基元类型,我们需要通过一些自定义方法才能使用这些操作符.今天主要和大家分享关于操作符重载和转换操作符的知识 ...
- 与你相遇好幸运,Sail.js定义其他主键
uuid : { type: 'string', unique: true, required: true, primaryKey: true },
- ***PHP Notice: Undefined index: ..问题的解决方法
首先,这个不是错误,是warning.所以如果服务器不能改,每个变量使用前应当先定义. 方法1:服务器配置修改 修改php.ini配置文件,error_reporting = E_ALL &a ...