<Android基础>(四) Fragment Part 1
Fragment
1)Fragment的简单用法
2)动态添加Fragment
3)在Fragment中模拟返回栈
4)Fragment和活动之间通信
第四章 Fragment
Fragment是一种可以嵌入在活动当中的UI片段,它能让程序更加合理和充分的利用大屏幕的空间,比如横屏和平板。
4.2 Fragment的使用方式
创建一个平板模拟器
4.2.1 Fragment的简单用法
两个Fragment平分活动,新建一个FragmentTest项目。
1.左侧fragment与右侧fragment的布局创建
新建一个left_fragment.xml,放置一个按钮并居中
<?xml version="1.0" encoding="utf-8"?>

<LinearLayout xmlns:android="http://schemas.android.com/apk/res/android"

    android:orientation="vertical" android:layout_width="match_parent"

    android:layout_height="match_parent">

    <Button

        android:id="@+id/button"

        android:layout_width="wrap_content"

        android:layout_height="wrap_content"

        android:layout_gravity="center_horizontal"

        android:text="Button"/>

</LinearLayout>
新建一个right_frgment.xml,放置一个TextView用于显示文本
<?xml version="1.0" encoding="utf-8"?>

<LinearLayout xmlns:android="http://schemas.android.com/apk/res/android"

    android:orientation="vertical" android:layout_width="match_parent"

    android:layout_height="match_parent"

    android:background="#00ff00">

    <TextView

        android:layout_width="wrap_content"

        android:layout_height="wrap_content"

        android:layout_gravity="center_horizontal"

        android:textSize="20dp"

        android:text="This is right fragment"/>

</LinearLayout>
2.新建左fragment和右fragment的类,继承自Fragment
(推荐使用android.support.v4.app.Fragment,能让Fragment在所有Android系统版本中保持功能一致性)
新建一个LeftFragment类,继承自Fragment
重写了onCreatView()方法,通过inflate()方法将刚才定义的left_fragment布局动态加载进来
public class LeftFragment extends Fragment {

    @Override

    public View onCreateView(LayoutInflater inflater, @Nullable ViewGroup container, @Nullable Bundle savedInstanceState) {

        View view = inflater.inflate(R.layout.left_fragment, container, false);

        return view;

    }

}
同理,建立一个RightFragment类,继承自Fragment
public class RightFragment extends Fragment{

    @Override

    public View onCreateView(LayoutInflater inflater, @Nullable ViewGroup container, @Nullable Bundle savedInstanceState) {

        View view = inflater.inflate(R.layout.right_fragment, container, false);

        return view;

    }

}
3.修改activity_main.xml文件中的代码
元素设置为水平放置,用<fragment>标签在布局中添加fragment,通过android:name属性来显示指明添加的碎片类名
<LinearLayout xmlns:android="http://schemas.android.com/apk/res/android"

    android:orientation="horizontal" android:layout_width="match_parent"

    android:layout_height="match_parent">

    <fragment

        android:id="@+id/left_fragment"

        android:name="com.example.song.fragmenttest.LeftFragment"

        android:layout_width="0dp"

        android:layout_height="match_parent"

        android:layout_weight="1"/>

    <fragment

        android:id="@+id/right_fragment"

        android:name="com.example.song.fragmenttest.RightFragment"

        android:layout_width="0dp"

        android:layout_height="match_parent"

        android:layout_weight="1"/>

</LinearLayout>
运行程序:
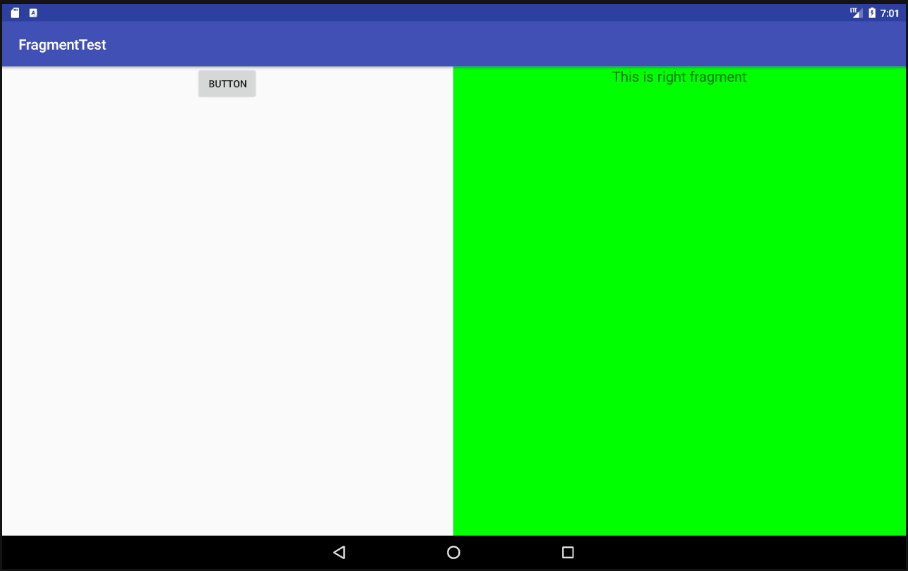
两个碎片平分了整个活动
4.2.2 动态添加碎片
1.新建another_right_fragment.xml
和right_fragment.xml中额代码基本相同,改了背景色和颜色
<LinearLayout xmlns:android="http://schemas.android.com/apk/res/android"

    android:orientation="vertical"

    android:background="#ffff00"

    android:layout_width="match_parent"

    android:layout_height="match_parent">

    <TextView

        android:layout_width="wrap_content"

        android:layout_height="wrap_content"

        android:layout_gravity="center_horizontal"

        android:textSize="20sp"

        android:text="This is another right Fragment" />

</LinearLayout>
2.新建AnotherRightFragment作为另一右侧碎片
public class AnotherRightFragment extends Fragment {

    @Override

    public View onCreateView(LayoutInflater inflater, @Nullable ViewGroup container, @Nullable Bundle savedInstanceState) {

        View view = inflater.inflate(R.layout.another_right_fragment, container, false);

        return view;

    }

}
3.动态的加入activity_main.xml中
将右侧fragment替换为了<FramLayout>(Android中最简单的布局,所有控件会默认摆放在布局的左上角),即将another_right_fragment以FrameLayout的形式放在右侧
<LinearLayout xmlns:android="http://schemas.android.com/apk/res/android"

    android:orientation="horizontal" android:layout_width="match_parent"

    android:layout_height="match_parent">

    <fragment

        android:id="@+id/left_fragment"

        android:name="com.example.song.fragmenttest.LeftFragment"

        android:layout_width="0dp"

        android:layout_height="match_parent"

        android:layout_weight="1"/>

    <FrameLayout

        android:id="@+id/right_layout"

        android:layout_width="0dp"

        android:layout_height="match_parent"

        android:layout_weight="1">

    </FrameLayout>

</LinearLayout>
4.修改MainActivity中的代码
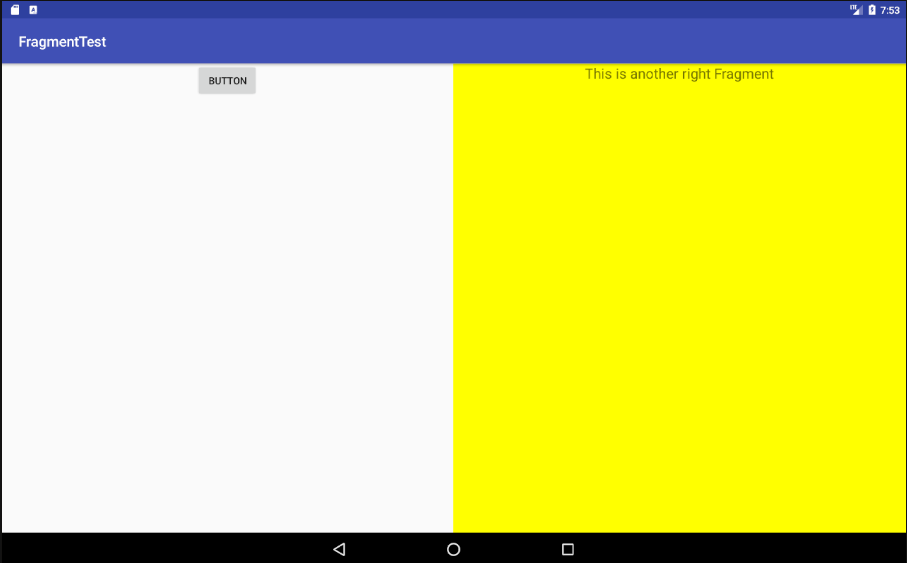
当点击左侧fragment中的按钮时,会调用replaceFragment()方法将右侧碎片替换成AnotherRightFragment
public class MainActivity extends AppCompatActivity {

    @Override

    protected void onCreate(Bundle savedInstanceState) {

        super.onCreate(savedInstanceState);

        setContentView(R.layout.activity_main);

        replaceFragment(new RightFragment());

        Button button = (Button) findViewById(R.id.button);

        button.setOnClickListener(new View.OnClickListener(){

            @Override

            public void onClick(View v) {

                replaceFragment(new AnotherRightFragment());

            }

        });

    }

    private void replaceFragment(Fragment fragment){

        FragmentManager fragmentManager = getSupportFragmentManager();

        FragmentTransaction transaction = fragmentManager.beginTransaction();

        transaction.replace(R.id.right_layout, fragment);

        transaction.commit();

    }

}
动态添加碎片主要分5步:
(1)创建待添加的fragment实例
(2)获取FragmentManager,在活动中可以直接通过调用getSupportFragmentManager()方法得到
(3)开启一个事务,通过调用beginTransaction()方法来开启
(4)向容器内添加或替换fragment,一般使用replace()方法,需要传入容器的id和待添加的fragment实例
(5)提交事务,通过commit()方法完成
运行程序:

4.2.3 在fragment中模拟返回栈
按下back键返回上一个Fragment
在FragmentTransacition提供一个addToBackStack()方法即可,用于将一个实务添加到返回栈中,传入null即可。
    private void replaceFragment(Fragment fragment){

        FragmentManager fragmentManager = getSupportFragmentManager();

        FragmentTransaction transaction = fragmentManager.beginTransaction();

        transaction.replace(R.id.right_layout, fragment);

        transaction.addToBackStack(null);

        transaction.commit();

    }
4.2.4 fragment和活动之间的通信
1.活动调用fragment里的方法
RightFragment rightFragment = (RightFragment) getSupportFragmentManager().

findFragmentById(R.id.right_fragment);
可以得到相应fragment的实例然后调用其中的方法。
2.fragment调用活动中的方法
MainActivity activity = (MainActivity) getActivity();
可以得到相应活动的实例然后调用其中的方法。
3.当fragment需要使用Context对象时,亦可以使用getActivity()方法,因为获取到的活动本身为一个Context对象。
<Android基础>(四) Fragment Part 1的更多相关文章
- <Android基础> (四) Fragment Part 2
4.3 Fragment的生命周期 4.3.1 Fragment的状态和回调 1.运行状态 当一个Fragment是可见的,并且它关联的活动正处于运行状态是,该Fragment也处于运行状态 2.暂停 ...
- Android基础——使用Fragment适应不同屏幕和分辨率
最近事情很忙,一个新项目赶着出来,但是很多功能都要重新做,一直在编写代码.Debug.今天因为一个新程序要使用Fragment来做,虽然以前也使用过Fragment,不过没有仔细研究,今天顺道写篇文章 ...
- 【Android基础】Fragment 详解之Fragment生命周期
上一篇文章简单介绍了一下Fragment,这一篇文章会详细的说一下Fragment的生命周期和创建一个用户界面. Fragment的主要功能就是创建一个View,并且有一个生命周期来管理这个View的 ...
- 【Android基础】Fragment 详解之Fragment介绍
Fragment在Android 3.0( API 11)引入,是为了支持在大屏上显示更加动态.灵活的UI,比如在平板和电视上.Fragment可以看作是嵌套的Activity,类似ActivityG ...
- Android基础知识 -- Fragment
Fragment是android3.0后提供的API(所以android:minSdkVersion="11"以上版本),主要针对平板UI.有自己的生命周期,但是必须依附在Acti ...
- 安卓Android基础四天
网页源码查看器 HttpURLConnection:用于发送和接受数据 ScrollView只能由一个孩子 消息机制的写法(***) anr Application not response 应用无响 ...
- android基础学习-Fragment和eclipse快捷键
使用Fragment的原因 1. Activity间的切换不流畅 2. 模块化Activity,方便做局部动画(有时为了到达这一点要把多个布局放到一个activity里面,现在可以用多Fragment ...
- Android基础——Fragment与Activity交互
今天继续讲解Fragment组件的特性,主要是跟Activity的交互和生命周期的关系,我们前面已经说过Fragment是依赖于Activity的,而且生命周期也跟Activity绑定一起.下面我们看 ...
- Android基础——Fragment控制切换多个页面
今天接着上一篇文章,讲解一下Fragment的控制,主要是切换View和页面替换等操作.还有就是如何获取Fragment的管理对象,以及与Activity的通信方式. (PS:新建的QQ群,有兴趣可以 ...
随机推荐
- Android连续点击多次事件的实现
有时候我们需要实现这样的场景,类似进入开发者模式,即多次点击后执行操作. 首先我们先看一个方法: System提供的一个静态方法arraycopy(),我们可以使用它来实现数组之间的复制. publi ...
- 通过fromdata实现上传文件
其实呢,文件上传的插件很多,可是现在做的东西要求尽量少用插件,所以就自己写了一下. 之前也用node写过对文件处理方面的东西,这次用php写着试一下. a.html文件 <!DOCTYPE ht ...
- C#微信支付对接
c#版在pc端发起微信扫码支付 主要代码: /** * 生成直接支付url,支付url有效期为2小时,模式二 * @param productId 商品ID * @return 模式二URL */ ...
- 010 Editor v8.0.1(32 - bit) 算法逆向分析、注册机编写
010 Editor 的逆向分析整体算下来还是比较简单的,将程序拖入OD,通过字符串搜索定位到核心代码,经过分析,主要是如下图所示的两个关键函数,返回正确的值,才算是注册成功. 00409C9B 这个 ...
- 闭包函数&回调函数
闭包函数&回调函数 谈到回调函数,不得不提匿名函数;匿名函数,也叫闭包函数,也就是没有名字的函数,它可以单独存在,也可以将其赋值给某一个变量.so,先来看一下闭包函数. 闭包函数 php文档: ...
- windows下安装mysql数据库修改端口号
Window版本 卸载原本的mysql sc delete MySQL //删除mysql 1.下载 1 2 3 MySQL https://dev.mysql.com/downloads/ins ...
- SQLServer之CHECK约束
CHECK约束添加规则 1.CHECK 约束用于限制列中的值的范围. 2.Check约束通过逻辑表达式来判断数据的有效性,用来限制输入一列或多列的值的范围,在列中更新数据时,所要输入的内容必须满足Ch ...
- nuxt cdn等
https://blog.csdn.net/xuelang532777032/article/details/78398960
- poj 3090 Visible Lattice Points(离线打表)
这是好久之前做过的题,算是在考察欧拉函数的定义吧. 先把欧拉函数讲好:其实欧拉函数还是有很多解读的.emmm,最基础同时最重要的算是,¢(n)表示范围(1, n-1)中与n互质的数的个数 好了,我把规 ...
- 修改xampp-apache访问目录
文章转自 https://my.oschina.net/u/3618644/blog/1569972 问题来源: 一般情况下,每个项目占用一个根目录,而不是一个根目录下面有多个项目. 比如说,安装xa ...