bootstrap的表单form
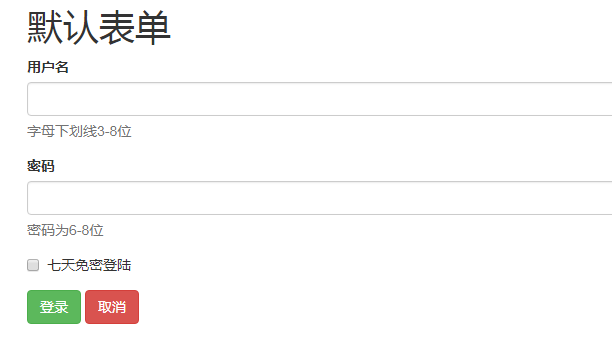
(1)默认表单
<form>
<div class="form-group">
<label class="control-label" for=""></label>
<input class="form-control">
<span class="help-block"></span>
</div>
</form>
  <h1>默认表单</h1>

     <form action="#">

         <div class="form-group">

             <label for="uname" class="control-label">用户名</label>

             <input type="text" id="uname" class="form-control">

             <span class="help-block">字母下划线3-8位</span>

         </div>

         <div class="form-group">

             <label for="upwd" class="control-label">密码</label>

             <input type="password" id="upwd" class="form-control">

             <span class="help-block">密码为6-8位</span>

         </div>

         <div class="form-group">

             <div class="checkbox">

             <label><input type="checkbox">七天免密登陆</label>

             </div>

         </div>

         <div class="form-group">

             <input type="button" id="login" value="登录" class="btn btn-success">

             <input type="button" id="logout" value="取消" class="btn btn-danger">

         </div>

     </form>
(2)行内表单
<form class="form-inline">
<div class="form-group">
<label class="sr-only"></label>
<input class="form-control">
</div>
</form>
  <h1>行内表单</h1>

     <h3> Screen Reader Only sr-only</h3>

     <form action="#" class="form-inline">

         <div class="form-group">

             <label for="uname1" class="sr-only"> 用户名</label>

             <input class="form-control" type="text" placeholder="请输入用户名" id="uname1">

         </div>

         <div class="form-group">

             <lable for="upwd1" class="sr-only">密码</lable>

             <input class="form-control" type="password" placeholder="请输入密码" id="upwd1">

         </div>

         <div class="form-group"><input type="button" value="登陆" class="btn btn-success"></div>

     </form>

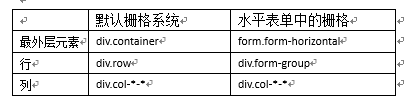
(3)水平表单
水平表单=表单+栅格系统(变种)
<form class=" form-horizontal ">
<div class="form-group">
<div class="col-*-*">
<label class="sr-only"></label>
</div>
<div class="col-*-*">
<input class="form-control">
</div>
</div>
</form>
  <h1>形式3:水平表单</h1>

     <p>水平表单=表单+栅格系统</p>

     <form action="#" class="form-horizontal"> <!--等价于div.container-->

         <div class="form-group"><!--div.row-->

             <div class="col-sm-1"><label for="uname3" class="control-label">用户名</label></div>

             <div class="col-sm-3"> <input type="text" class="form-control" id="uname3"></div>

             <div class="col-sm-5"> <span class="help-block">字母数字,,,,,</span></div>

         </div>

         <div class="form-group"><!--div.row-->

             <div class="col-sm-1"><label for="upwd2" class="control-label">密码</label></div>

             <div class="col-sm-3"> <input type="text" class="form-control" id="upwd2"></div>

             <div class="col-sm-5"> <span class="help-block">密码位数,,,,,</span></div>

         </div>

         <div class="form-group"><!--div.row-->

             <div class="col-sm-1"> <input type="button" class="btn btn-success" value="登陆"></div>

             <div class="col-sm-1"> <input type="button" class="btn btn-danger" value="取消"></div>

         </div>

bootstrap的表单form的更多相关文章
- bootstrap+font-awesome表单
bootstrap+font-awesome表单 <form action="" class="form-horizontal col-sm-offset-4&qu ...
- Bootstrap~表单Form
回到目录 在进行自己的后台改版时,大体布局都使用了bootstrap,剩下的表单部分没理由不去使用它,对于表单的美化和布局,bootstrap做的也是很不错的,有大气的边框,多功能的按钮及宏观的表单布 ...
- Bootstrap之表单控件状态
Bootstrap中的表单控件状态主要有三种:焦点状态,禁用状态,验证状态. 一.焦点状态:该状态告诉用户可输入或选择东西 焦点状态通过伪类“:focus”以实现. bootstrap.css相应 ...
- BootStrap 智能表单系列 首页 (持续更新中...)
背景:本码农.NET后端工程师,在项目开发中发现写了很多重复的代码, 于是自己整了一套根据配置来生成form表单的插件,针对表单的改动仅需要修改配置的json即可 使用中发现还是蛮实用的,于是开源出来 ...
- BootStrap 智能表单系列 六 表单数据绑定(编辑页面的数据绑定)
本章介绍如何在生成表单后,将一个model的数据展示到form表单中(一般用于编辑页面) 代码如下(连接地址:https://github.com/xiexingen/Bootstrap-SmartF ...
- BootStrap 智能表单系列 七 验证的支持
但凡是涉及到用户编辑信息然后保存的页面,都涉及到一个数据是否符合要求的检查,需要客服端和服务器端的校验的问题: 客服端的校验主要是为了提高用户体验,而服务器端的校验为了数据的合格性 该插件也为您支持到 ...
- BootStrap 智能表单系列 四 表单布局介绍
表单的布局分为自动布局和自定义布局两种: 自动布局就是根据配置项中第二级配置项中数组的长度来自动使用不同的bootstrap栅格,通过设置autoLayout为true可以实现自动布局 自动以布局就是 ...
- BootStrap 智能表单系列 三 分块表单配置的介绍
相信广大博友肯定碰到过一个编辑页面分了很多块的情况,智能表单插件已经为您支持了这种情况, 代码如下(链接地址:https://github.com/xiexingen/Bootstrap-SmartF ...
- BootStrap 智能表单系列 二 BootStrap支持的类型简介
代码如下(链接地址:https://github.com/xiexingen/Bootstrap-SmartForm/blob/master/demo/form1-basic.html): <! ...
随机推荐
- BayaiM__ oracle函数_02
BayaiM__ oracle函数_02 Oracle中的字符串函数---------------------------------------------------------------- ...
- redis数据存入乱码问题解决方法
第一步:配置RedisTemplate @Configuration public class RedisConfigurtion { @Autowired private RedisTemplate ...
- python的wraps函数
当使用@修饰符修饰函数时,会存在这样一个问题:被修饰的函数会消失(这是因为修饰函数没有设置返回值,如果设置了返回值,则就把返回值赋给被修饰函数,比如,test1函数的返回值设置为 return 6, ...
- day56_9_20orm中的关键字段,orm查询13方法整合,查询优化和事务。
一.常用字段. 在orm中有一些字段是常用字段: 1.AutoField 这个字段是自增的,必须填入参数primary_key=True,也就是说这个字段是表的主键,如果表类中没有自增列,就会自动创建 ...
- [C4W3] Convolutional Neural Networks - Object detection
第三周 目标检测(Object detection) 目标定位(Object localization) 大家好,欢迎回来,这一周我们学习的主要内容是对象检测,它是计算机视觉领域中一个新兴的应用方向, ...
- Tensorflow的不足之处
Tensorflow还是有不足的地方.第一体现在Tensorflow的数据机制,由于tensor只是占位符,在没有用tf.Session().run接口填充值之前是没有实际值的.
- SQL Server 删除数据库
1. 图形化界面删除 在所需要删除的数据库上右击,然后删除.注意如果这个数据库有应用或者用户连接,请勾选[关闭现有连接],否则无法删除. 2. DROP DATABASE删除数据库 drop data ...
- Vue 使用comouted计算属性
computed计算属性 使用方法见代码: <!doctype html> <html lang="en"> <head> <meta c ...
- CodeForces - 545CWoodcutters
传送门 题目大意:n棵树(10^5),坐标xi,高度hi,把这棵树砍到,可以向右倒[xi,xi+hi]被占, 向左倒[xi-hi,xi]被占,必须要倒的坐标没有被占才能倒,不砍倒就xi被占,问最多砍几 ...
- QFramework 学习
github地址: https://github.com/liangxiegame/QFramework 框架官网: http://qf.liangxiegame.com/ 视频教程: http:// ...