Selenium2(webdriver)入门之TestNG的使用
一、在Eclipse中安装TestNG
1、打开eclipse-->help-->Install New Software-->Add,输入Name和Location后,点击OK。
TestNG官方下载地址:http://testng.org/doc/download.html

2、然后选中TestNG,单击Next安装

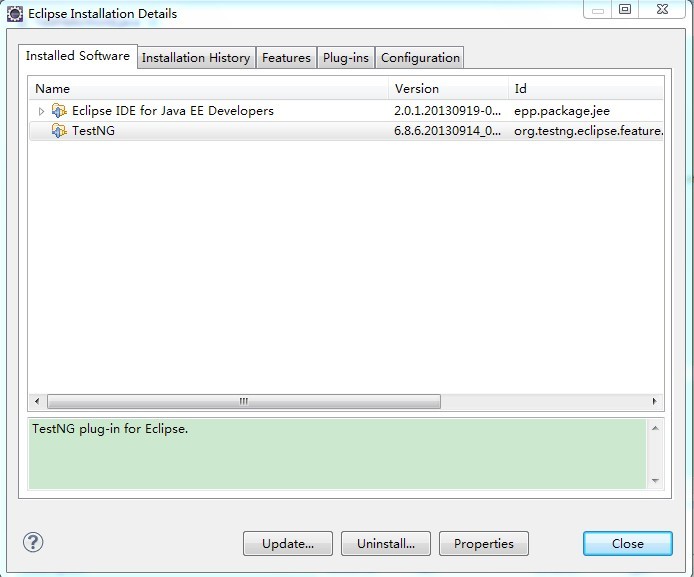
3、安装好TestNG后重启eclipse查看是否安装好,Help-->About Eclipse-->Installation Details,如图:
二、使用TestNG来运行单个测试案例:
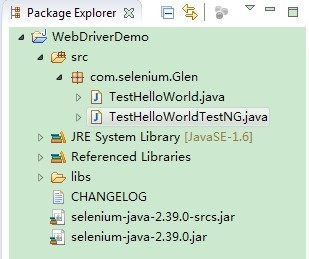
1、新建TestHelloWorldTestNG.java类,目录结构如下:
2、测试代码:

 1 package com.selenium;

 2

 3 import org.openqa.selenium.By;

 4 import org.openqa.selenium.WebDriver;

 5 import org.openqa.selenium.WebElement;

 6 import org.openqa.selenium.firefox.*;

 7 import org.testng.annotations.*;

 8 import org.testng.Assert;

 9

10

11 public class TestHelloWorldTestNG {

12

13     WebDriver driver;

14     @Test

15     public void helloWorld() throws Exception {

16         //如果火狐浏览器没有默认安装在C盘,需要制定其路径

17         //System.setProperty("webdriver.firefox.bin", "D:/Program Files/Mozilla firefox/firefox.exe");

18         driver = new FirefoxDriver();

19         driver.get("http://www.baidu.com/");

20

21         driver.manage().window().maximize();

22

23         WebElement txtbox = driver.findElement(By.name("wd"));

24         txtbox.sendKeys("Glen");

25

26         WebElement btn = driver.findElement(By.id("su"));

27         btn.click();

28

29         String expectedTitle = "Glen_百度搜索";

30         String actualTitle = driver.getTitle();

31

32         Assert.assertEquals(actualTitle,expectedTitle);

33     }

34

35     @AfterTest

36     public void tearDown(){

37         driver.quit();

38     }

39

40 }
3、然后右键Run As-->TestNG Test,运行结果如下:
[TestNG] Running:

  C:\Users\Administrator\AppData\Local\Temp\testng-eclipse-332204777\testng-customsuite.xml

PASSED: helloWorld

===============================================

    Default test

    Tests run: 1, Failures: 0, Skips: 0

===============================================

===============================================

Default suite

Total tests run: 1, Failures: 0, Skips: 0

===============================================

[TestNG] Time taken by [FailedReporter passed=0 failed=0 skipped=0]: 1 ms

[TestNG] Time taken by org.testng.reporters.jq.Main@15d56d5: 34 ms

[TestNG] Time taken by org.testng.reporters.JUnitReportReporter@19106c7: 11 ms

[TestNG] Time taken by org.testng.reporters.EmailableReporter2@1632c2d: 4 ms

[TestNG] Time taken by org.testng.reporters.XMLReporter@cdedfd: 11 ms

[TestNG] Time taken by org.testng.reporters.SuiteHTMLReporter@13caecd: 22 ms
三、使用TestNG来运行多个测试案例:
1、增加一个失败的测试类TestHelloWorldTestNG_Fail.java:
 1 package com.selenium;

 2

 3 import org.openqa.selenium.By;

 4 import org.openqa.selenium.WebDriver;

 5 import org.openqa.selenium.WebElement;

 6 import org.openqa.selenium.firefox.*;

 7 import org.testng.annotations.*;

 8 import org.testng.Assert;

 9

10

11 public class TestHelloWorldTestNG_Fail {

12

13     WebDriver driver;

14     @Test

15     public void helloWorld() throws Exception {

16         //如果火狐浏览器没有默认安装在C盘,需要制定其路径

17         //System.setProperty("webdriver.firefox.bin", "D:/Program Files/Mozilla firefox/firefox.exe");

18         driver = new FirefoxDriver();

19         driver.get("http://www.baidu.com/");

20

21         driver.manage().window().maximize();

22

23         WebElement txtbox = driver.findElement(By.name("wd"));

24         txtbox.sendKeys("Glen");

25

26         WebElement btn = driver.findElement(By.id("su"));

27         btn.click();

28

29         String expectedTitle = "Glen_百度";

30         String actualTitle = driver.getTitle();

31

32         Assert.assertEquals(actualTitle,expectedTitle);

33     }

34

35     @AfterTest

36     public void tearDown(){

37         driver.quit();

38     }

39

40 }
2、在项目下新建一个Suite.xml文件:
<suite name="seleniumcn.cn.demo">

    <test name="test_seleniumcn" >

        <classes>

            <class name="com.selenium.TestHelloWorldTestNG"/>

            <class name="com.selenium.TestHelloWorldTestNG_Fail"/>

        </classes>

    </test>

</suite>
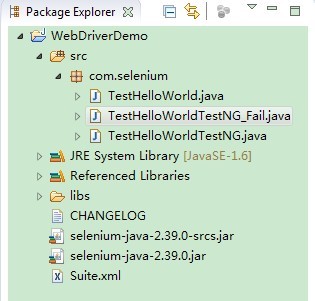
3、目录结构:
4、右键Suite.xml文件,Run As->TestNG Suite,如此就会运行suite.xml文件中所有的案例。
[TestNG] Running:

  F:\workspace\WebDriverDemo\Suite.xml

===============================================

seleniumcn.cn.demo

Total tests run: 2, Failures: 1, Skips: 0

===============================================
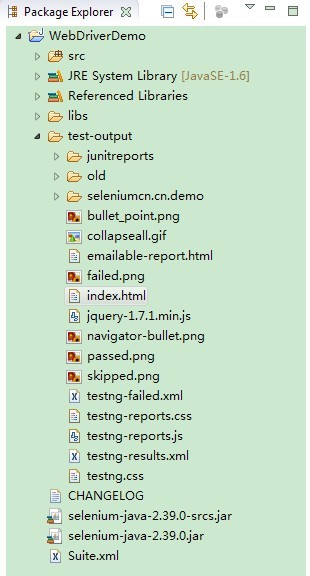
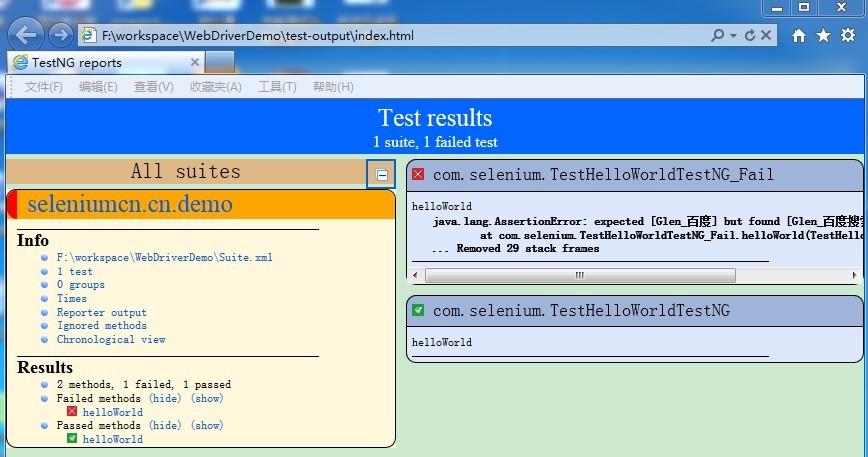
5、右键WebDriverDemo刷新项目,目录中会新增加一个test.output文件夹,打开 index.html可以看一个简单的报告。
目录:
报告:
Selenium2(webdriver)入门之TestNG的使用的更多相关文章
- Selenium2(webdriver)入门之TestNG的安装与简单使用
上一篇已经搭建好了Eclipse+selenium2的环境,这一篇主要记录下TestNG的使用. 一.在Eclipse中安装TestNG 1.打开eclipse-->help-->Inst ...
- webdriver入门-Java
webdriver入门-Java 如何用webdriver打开一个浏览器,我们常用的浏览器有firefox和IE两种,firefox是selenium支持得比较成熟的浏览器,很多新的特性都会在fi ...
- selenium2 Webdriver + Java 自动化测试实战和完全教程
selenium2 Webdriver + Java 自动化测试实战和完全教程一.快速开始 博客分类: Selenium-webdriverselenium webdriver 学习selenium ...
- selenium2 WebDriver 在asp.net项目中的应用
selenium2 WebDriver是一款跨平台的 自动化测试工具,它可以操纵浏览器,模拟用户行为,非常方便用户进行自动化测试. .net项目使用它,首先要通过 Visual Studio 的 nu ...
- Parallel WebDriver executions using TestNG
In this post, we will see how does one make use of TestNG to kick off parallel UI tests using WebDri ...
- selenium2(WebDriver) API
selenium2(WebDriver) API 作者:Glen.He出处:http://www.cnblogs.com/puresoul/ 1.1 下载selenium2.0的包 官方downl ...
- python selenium webdriver入门基本操作
python selenium webdriver入门基本操作 未经作者允许,禁止转载! from selenium import webdriver import time driver=webdr ...
- Selenium2(WebDriver)总结(二)---Firefox的firebug插件参数设置(补充)
本文是对上一节的补充:http://www.cnblogs.com/puresoul/p/4251536.html 使用Selenium2(webdriver)启动firefox且自动加载firebu ...
- Selenium2(WebDriver)总结(一)---启动浏览器、设置profile&加载插件
本文主要记录下在使用selenium2/webdriver时启动各种浏览器的方法.以及如何加载插件.定制浏览器信息(设置profile)等 环境搭建可参考我的另一篇文章:http://www.cnbl ...
随机推荐
- css新增属性
圆角,border-radius: 1-4个数字/1-4个数字,前面是水平,后面是垂直,不给“/”表示水平和垂直一样,举例如下: <head> <meta http-equiv=&q ...
- linux下查看已经安装的jdk 并卸载jdk
一.查看Jdk的安装路径: whereis javawhich java (java执行路径)echo $JAVA_HOME echo $PATH 备注:如果是windows中,可以使用: set j ...
- oralce中exists not exists in not in对于NULL的处理
1. 先讨论 in 与 not in中存在NULL的情况, sql语句如下: 1 select 1 result1 from dual where 1 not in (2, 3); 2 3 4 s ...
- Entity Framework 的枚举类型
新增数据模型,新增“实体”之后,新增“枚举类型”,创建Enum值,将“实体”中的列和Enum关联,选中“实体”中的列属性改变类型为Enum名称,生成数据库…… 如下转自:http://item.con ...
- C#数组的使用
//计算数组中最大值,最小值,平均值和总和 //类中main最先执行 static void Main(string[] args) { //声明一个数组,数组长度一定固定就不能更改了 , , , , ...
- android JNI (二) 第一个 android工程
下载NDK 后 它自带有 sample,初学者 可以导入Eclipse 运行 这里 我是自己创建的一个新工程 第一步: 新建一个Android工程 jni_test(名字自取) 第二步:为工程添加 本 ...
- MySQL重构查询的方式
在优化有问题的查询时,目标应该是找到一个更优的方法获得实际需要的结果--而不一定总要从MySQL获取一模一样的结果集.有时候可以查询转换一种写法让其返回一样的结果,但是性能更好.但也可以通过修改应用代 ...
- golang 阻塞的坑
1.写go程序的时候一定要牢记主线程不能阻塞,一旦阻塞就崩溃,就怕那种某种情况下偶尔会出现几下阻塞的,一定要杜绝.2.select case的执行顺序是乱的,不确定的3.写入管道的时候,一定要保证管道 ...
- PHP高效的敏感词过滤方法
<?php // 测试文件demo.php $badword = array( '张三','张三丰','张三丰田' ); // array_combine() 函数通过合并两个数组来创建一个新数 ...
- Hibernate中get方法和load方法的区别
一.get和load方法都是根据id去获得对应数据的,但是获得机制不同:如果使用get方法,hibernate会去确认该id对应的数据是否存在,它首先会去session中去查询(session缓存其实 ...