libgdx摄像头的移动
要知道,做一个游戏,摄像头是必不可少的。接下来,我将讲解libgdx里面摄像头的移动
2d摄像头OrthographicCamera也叫做正交相机
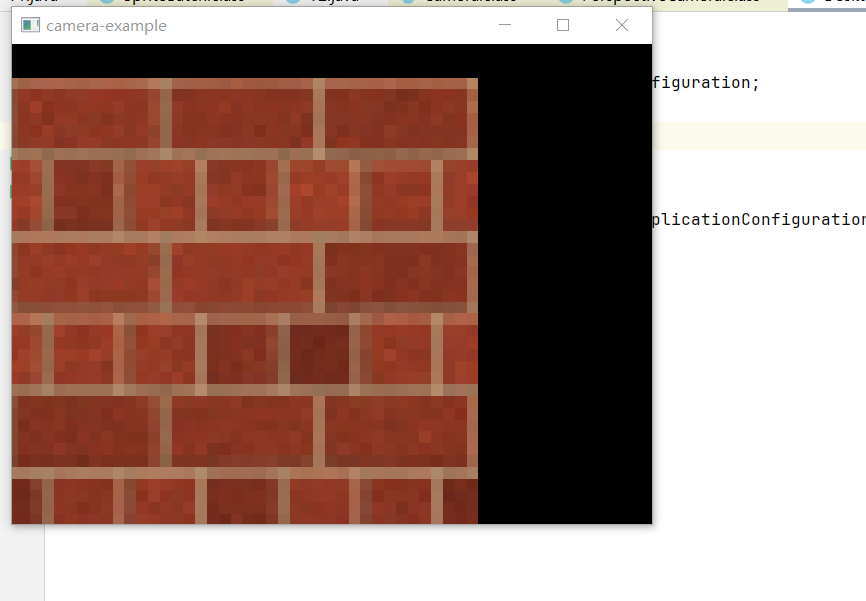
结果展示:
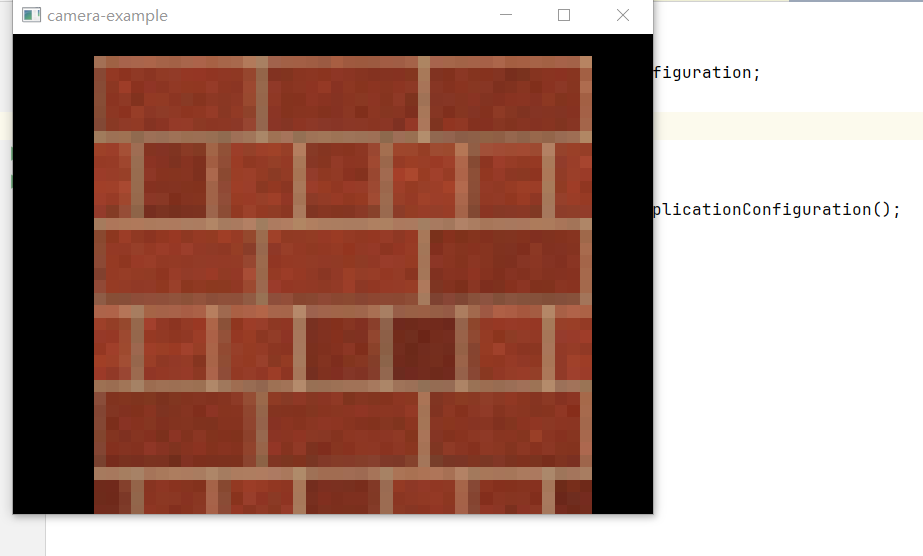
按上下左右是可以移动的
OrthographicCamera camera的使用:
完整代码:
package com.brentaureli.mariobros.cam;

import com.badlogic.gdx.ApplicationListener;

import com.badlogic.gdx.Gdx;

import com.badlogic.gdx.Input;

import com.badlogic.gdx.graphics.GL20;

import com.badlogic.gdx.graphics.OrthographicCamera;

import com.badlogic.gdx.graphics.Texture;

import com.badlogic.gdx.graphics.g2d.Sprite;

import com.badlogic.gdx.graphics.g2d.SpriteBatch;

import com.badlogic.gdx.math.MathUtils;

import static com.badlogic.gdx.Gdx.gl;

public class T1 implements ApplicationListener {

    private OrthographicCamera camera;

    private float VIEWPORT_WIDTH=100f;

    private float VIEWPORT_HEIGHT=100f;

    private SpriteBatch batch;

    private Sprite sprite;

    @Override

    public void create() {

        sprite=new Sprite(new Texture(Gdx.files.internal("block.png")));

        sprite.setSize(VIEWPORT_WIDTH,VIEWPORT_HEIGHT);

        sprite.setPosition(0, 0);

        float w = Gdx.graphics.getWidth();

        float h = Gdx.graphics.getHeight();

        camera=new OrthographicCamera(100,100*h/w);

        camera.position.set(15f,11.25f,0);

        camera.update();

        batch=new SpriteBatch();

    }

    @Override

    public void resize(int width, int height) {

        //调整窗口,相机位置不变

        camera.viewportWidth = 30f;

        camera.viewportHeight = 30f * height / width;

        camera.update();

    }

    @Override

    public void render() {

        handleInput();

        resetCamera();

        camera.update();

        batch.setProjectionMatrix(camera.combined);

        Gdx.gl.glClear(GL20.GL_COLOR_BUFFER_BIT);

        batch.begin();

        sprite.draw(batch);

        batch.end();

    }

    private void resetCamera() {

        if (Gdx.input.isKeyPressed(Input.Keys.R)) {

            camera.position.set(camera.viewportWidth / 2f, camera.viewportHeight / 2f, 0);

            camera.zoom = 1;

            camera.rotate(0, 0, 0, 1);

        }

    }

    private void handleInput() {

        //放大相机

        if (Gdx.input.isKeyPressed(Input.Keys.A)) {

            camera.zoom += 0.02;

        }

        //缩小相机

        if (Gdx.input.isKeyPressed(Input.Keys.Q)) {

            camera.zoom -= 0.02;

        }

        //左移相机

        if (Gdx.input.isKeyPressed(Input.Keys.LEFT)) {

            camera.translate(-3, 0, 0);

        }

        //右移相机

        if (Gdx.input.isKeyPressed(Input.Keys.RIGHT)) {

            camera.translate(3, 0, 0);

        }

        //下移相机

        if (Gdx.input.isKeyPressed(Input.Keys.DOWN)) {

            camera.translate(0, -3, 0);

        }

        //上移相机

        if (Gdx.input.isKeyPressed(Input.Keys.UP)) {

            camera.translate(0, 3, 0);

        }

    }

    @Override

    public void pause() {

    }

    @Override

    public void resume() {

    }

    @Override

    public void dispose() {

        sprite.getTexture().dispose();

        batch.dispose();

    }

}
主类完整代码:
package com.brentaureli.mariobros.desktop;

import com.badlogic.gdx.backends.lwjgl3.Lwjgl3Application;

import com.badlogic.gdx.backends.lwjgl3.Lwjgl3ApplicationConfiguration;

import com.brentaureli.mariobros.cam.T1;

public class DesktopLauncher {

	public static void main (String[] arg) {

		Lwjgl3ApplicationConfiguration config = new Lwjgl3ApplicationConfiguration();

		config.setForegroundFPS(60);

		config.setTitle("camera-example");

		new Lwjgl3Application(new T1(), config);

	}

}
先设置了一个背景
private Sprite sprite;

sprite=new Sprite(new Texture(Gdx.files.internal("block.png")));

sprite.setSize(VIEWPORT_WIDTH,VIEWPORT_HEIGHT);

sprite.setPosition(0, 0);
设置了背景的图片,背景的大小,背景位置。
接下来的代码:
 float w = Gdx.graphics.getWidth();

 float h = Gdx.graphics.getHeight();

 camera=new OrthographicCamera(100,100*h/w);

 camera.position.set(15f,11.25f,0);

 camera.update();

 batch=new SpriteBatch();
设置了camera的范围,camera的位置 camera.update();这个是每次更新camera的位置呀什么的都要进行一次更新。然后就是new了一个缓冲。
接下来的代码:
        //调整窗口,相机位置不变

        camera.viewportWidth = 30f;

        camera.viewportHeight = 30f * height / width;

        camera.update();
就是单纯的再调试了一下窗口。
接下来的代码:
private void handleInput() {

        //放大相机

        if (Gdx.input.isKeyPressed(Input.Keys.A)) {

            camera.zoom += 0.02;

        }

        //缩小相机

        if (Gdx.input.isKeyPressed(Input.Keys.Q)) {

            camera.zoom -= 0.02;

        }

        //左移相机

        if (Gdx.input.isKeyPressed(Input.Keys.LEFT)) {

            camera.translate(-3, 0, 0);

        }

        //右移相机

        if (Gdx.input.isKeyPressed(Input.Keys.RIGHT)) {

            camera.translate(3, 0, 0);

        }

        //下移相机

        if (Gdx.input.isKeyPressed(Input.Keys.DOWN)) {

            camera.translate(0, -3, 0);

        }

        //上移相机

        if (Gdx.input.isKeyPressed(Input.Keys.UP)) {

            camera.translate(0, 3, 0);

        }

    }
添加了一下键盘输入的按键,camera.zoom += 0.02;就是将摄像的范围扩大同理camera.zoom -= 0.02;就是减少,而 camera.translate就是移动位置。
接下来的代码:
 private void resetCamera() {

        if (Gdx.input.isKeyPressed(Input.Keys.R)) {

            camera.position.set(camera.viewportWidth / 2f, camera.viewportHeight / 2f, 0);

            camera.zoom = 1;

            camera.rotate(0, 0, 0, 1);

        }

    }
就是单纯的按r重置摄像头
然后就是:
        camera.update();

        batch.setProjectionMatrix(camera.combined);

        Gdx.gl.glClear(GL20.GL_COLOR_BUFFER_BIT);

        batch.begin();

        sprite.draw(batch);

        batch.end();
将摄像头进行更新,然后 batch.setProjectionMatrix(camera.combined);这个,这个可以说是固定搭配,就是配置一下摄像头。
        batch.begin();

        sprite.draw(batch);

        batch.end();
缓存区打开,然后画图,end方法结尾。这算是固定搭配。
3D摄像头PerspectiveCamera也叫做透视相机
完整代码:
package com.brentaureli.mariobros.cam;

import com.badlogic.gdx.ApplicationListener;

import com.badlogic.gdx.Gdx;

import com.badlogic.gdx.graphics.GL20;

import com.badlogic.gdx.graphics.PerspectiveCamera;

import com.badlogic.gdx.graphics.Texture;

import com.badlogic.gdx.graphics.VertexAttributes;

import com.badlogic.gdx.graphics.g3d.Material;

import com.badlogic.gdx.graphics.g3d.Model;

import com.badlogic.gdx.graphics.g3d.ModelBatch;

import com.badlogic.gdx.graphics.g3d.ModelInstance;

import com.badlogic.gdx.graphics.g3d.attributes.TextureAttribute;

import com.badlogic.gdx.graphics.g3d.utils.FirstPersonCameraController;

import com.badlogic.gdx.graphics.g3d.utils.ModelBuilder;

import static com.badlogic.gdx.Gdx.gl;

public class T2 implements ApplicationListener {

    private PerspectiveCamera camera;

    private FirstPersonCameraController cameraController;

    private ModelBatch batch;

    private ModelBuilder builder;

    private Texture texture;

    private Model model;

    private  ModelInstance instance;

    @Override

    public void create() {

        camera=new PerspectiveCamera(70, Gdx.graphics.getWidth(),Gdx.graphics.getHeight());

        camera.position.set(0,0,0);

        camera.near=0.1f;

        camera.far=1000f;

        camera.update();

        cameraController=new FirstPersonCameraController(camera);

        Gdx.input.setInputProcessor(cameraController);

        cameraController.update();

        batch=new ModelBatch();

        builder=new ModelBuilder();

        texture=new Texture(Gdx.files.internal("block.png"));

        Material material=new Material(new TextureAttribute(TextureAttribute.Diffuse,texture));

        int attributes= VertexAttributes.Usage.Position|VertexAttributes.Usage.TextureCoordinates;

        model= builder.createBox(3, 3, 3, material, attributes);

        instance= new ModelInstance(model);

        instance.transform.setToTranslation(0,0,-5);

    }

    @Override

    public void resize(int width, int height) {

        camera.viewportWidth=width;

        camera.viewportHeight=height;

        camera.update();

        cameraController.update();

    }

    @Override

    public void render() {

       gl.glClear(GL20.GL_COLOR_BUFFER_BIT|GL20.GL_DEPTH_BUFFER_BIT);

       camera.update();

       cameraController.update();

       batch.begin(camera);

       batch.render(instance);

       batch.end();

    }

    @Override

    public void pause() {

    }

    @Override

    public void resume() {

    }

    @Override

    public void dispose() {

    }

}
主类就换个类名就行了,接下来是结果展示图:
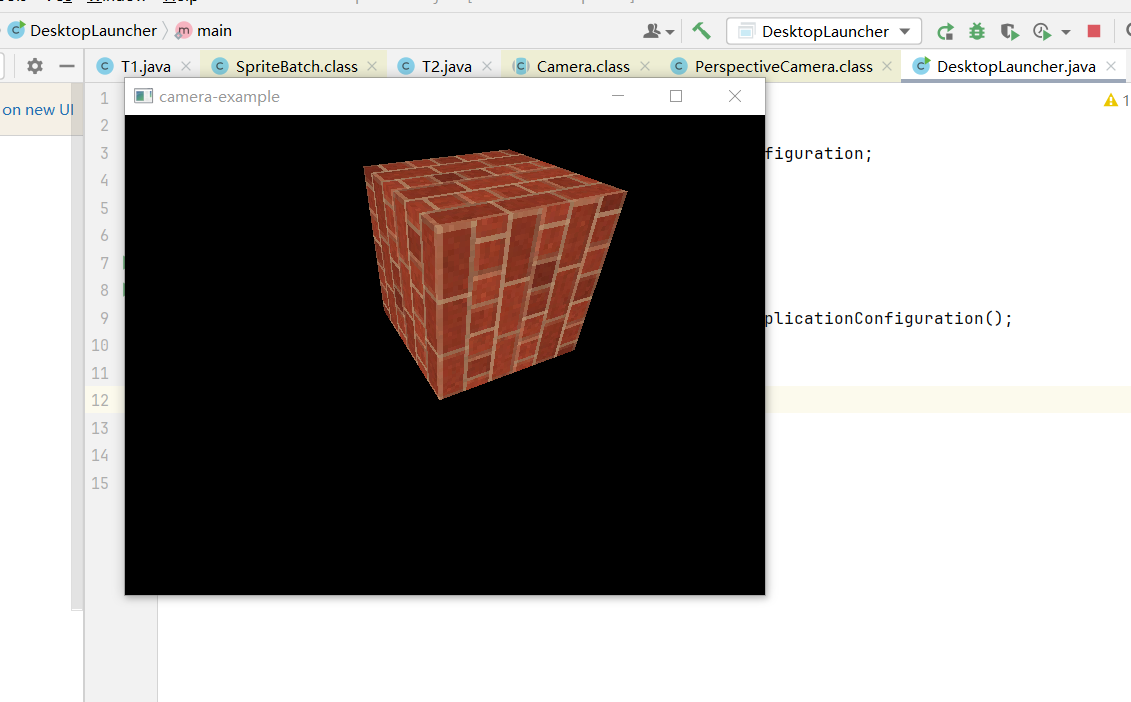
按wsad可以上下左右移动。
由于篇幅可能过长,下一章也许会讲。
libgdx摄像头的移动的更多相关文章
- 在DevExpress中使用CameraControl控件进行摄像头图像采集
在我们以前的项目了,做摄像头的图片采集,我们一般还是需要做一个封装处理的,在较新版本的DevExpress控件里面,增加了一个CameraControl控件,可以直接调用摄像头显示的,因此也可以做头像 ...
- ubuntu-Linux系统读取USB摄像头数据(gspca)
将摄像头图像保存为jpg格式.摄像头需要是gspca免驱的.uvc若用uvc格式的需要在图像中插入Huffman表.否则无法正常显示. 程序代码: #include <stdio.h> # ...
- ubuntu-Linux系统读取USB摄像头数据(uvc)
这几天在做小车的过程中,需要用到图像采集.我想现在用的摄像头是UVC免驱的.根据国嵌的教程中有一个gspca摄像头的程序.我发现把gspca的采集程序用到uvc上时,在显示图像的时候提示没有huffm ...
- C# 使用AForge调用笔记本摄像头拍照
vs2012 winform 连接摄像头设备,这里需要引入 代码: using AForge; using AForge.Controls; using AForge.Imaging; using ...
- Opencv摄像头实时人脸识别
Introduction 网上存在很多人脸识别的文章,这篇文章是我的一个作业,重在通过摄像头实时采集人脸信息,进行人脸检测和人脸识别,并将识别结果显示在左上角. 利用 OpenCV 实现一个实时的人脸 ...
- Opencv VideoCapture实时捕捉摄像头信息
#include "opencv2/highgui/highgui.hpp" #include <iostream> using namespace cv; using ...
- Unity打开摄像头占满全屏
Unity打开摄像头占满全屏 AR项目需求,Unity打开摄像头作为背景渲染占满全屏~ Unity对设备硬件操作的API并不是太友好~打开一个摄像头,渲染到屏幕上也都得自己写,虽然步骤少,提取摄像头t ...
- Vuforia unity开发摄像头问题
Vuforia unity开发摄像头问题 项目一直在赶进度,写博的时间越来越少了~从事Unity开发也快两个月了,AR方向~ 使用的是高通家的SDK Vuforia...从工程融合一直到对unity和 ...
- HTML5网页打开摄像头,并拍照
谷歌提高了安全要求,要摄像头必须用https 效果图:
- 摄像头拍照,PHP输入流php://input的使用分析
在做一个摄像头拍照然后上传的功能,php中使用php://input来获取内容.于是就了解了下php://input. 从官网信息来看,php://input是一个只读信息流,当请求方式是post的, ...
随机推荐
- 【规范】SpringBoot接口返回结果及异常统一处理,这样封装才优雅
前言 缘由 博友的需求就是我最大的动力 博友一说话,本狗笑哈哈.博友要我写啥,我就写啥. 特来一篇关于SpringBoot接口返回结果及异常统一处理,虽说封不封装都能用,但咱后端也得给前端小姐姐留个好 ...
- Appilot发布:打造面向DevOps场景的开源AI助手
今日,数澈软件Seal (以下简称"Seal")宣布推出面向 DevOps 场景的 AI 助手 Appilot,这款产品将充分利用 AI 大语言模型的能力为用户提供变革性的部署和应 ...
- 谱图论:Laplacian二次型和Markov转移算子
以下部分是我学习CMU 15-751: TCS Toolkit的课堂笔记.由于只是个人笔记,因此许多地方在推导上可能不那么严谨,还望理论大佬多多包涵. 1 问题定义 1.1 无向图\(G\) 在本文中 ...
- CefSharp自定义滚动条样式
在WinForm/WPF中使用CefSharp混合开发时,通常需要自定义滚动条样式,以保证应用的整体风格统一.本文将给出一个简单的示例介绍如何自定义CefSharp中滚动条的样式. 基本思路 在前端开 ...
- CF580B
题目简化和分析: 选择 \(n\) 个朋友,满足以下条件: 工资差异 \(<d\) 友谊和最大(题目翻译不太清楚) 现在面临两个问题 求差异值 求友谊和 所以我们理应想到线段树双指针. 排序后满 ...
- 使用Github Action实现构建、发布到 nuget.org
使用Github Action实现构建.发布到 nuget.org GitHub Actions是GitHub提供的持续集成和持续部署(CI/CD)工具,它能够自动化构建.测试和部署你的项目.在这篇教 ...
- UVA1104 Chips Challenge(费用流)
神仙费用流题,理解了一下午,故写此篇题解以作纪念. 题意 有一个 \(N\times N\) 的棋盘,有些格子不能放棋子,有些格子必须放棋子,剩下的格子随意.要求放好棋子之后满足: 第 \(i\) 行 ...
- 以太坊和比特币区块链的异同(一些QA)
1.比特币区块链和以太坊区块链有何区别? 比特币区块链与以太坊在设计和功能上有显著的不同.下面是关于比特币的主要点: 没有智能合约功能(按照以太坊的定义):比特币是为了作为一个去中心化的数字货币而创建 ...
- 【iOS开发】iOS App的加固保护原理:使用ipaguard混淆加固
摘要 在开发iOS应用时,保护应用程序的安全是非常重要的.本文将介绍一种使用ipaguard混淆加固的方法来保护iOS应用的安全.通过字符串混淆.类名和方法名混淆.程序结构混淆加密以及反调试.反注 ...
- NLP技术如何为搜索引擎赋能
在全球化时代,搜索引擎不仅需要为用户提供准确的信息,还需理解多种语言和方言.本文详细探讨了搜索引擎如何通过NLP技术处理多语言和方言,确保为不同地区和文化的用户提供高质量的搜索结果,同时提供了基于Py ...