#实验三 敏捷开发与XP实践---实验报告
一、实验三 敏捷开发与XP实践-1
1.实验要求
-实验三 敏捷开发与XP实践 http://www.cnblogs.com/rocedu/p/4795776.html, Eclipse的内容替换成IDEA
-参考 http://www.cnblogs.com/rocedu/p/6371315.html#SECCODESTANDARD 安装alibaba 插件,解决代码中的规范问题。
-在IDEA中使用工具(Code->Reformate Code)把下面代码重新格式化,再研究一下Code菜单,找出一项让自己感觉最好用的功能。提交截图,加上自己学号水印。
需要格式化的代码:
public class CodeStandard {

public static void main(String [] args){

StringBuffer buffer = new StringBuffer();

buffer.append('S');

buffer.append("tringBuffer");

System.out.println(buffer.charAt(1));

System.out.println(buffer.capacity());

System.out.println(buffer.indexOf("tring"));

System.out.println("buffer = " + buffer.toString());

if(buffer.capacity()<20)

buffer.append("1234567");

for(int i=0; i<buffer.length();i++)

System.out.println(buffer.charAt(i));

}

}
2.实验内容和步骤
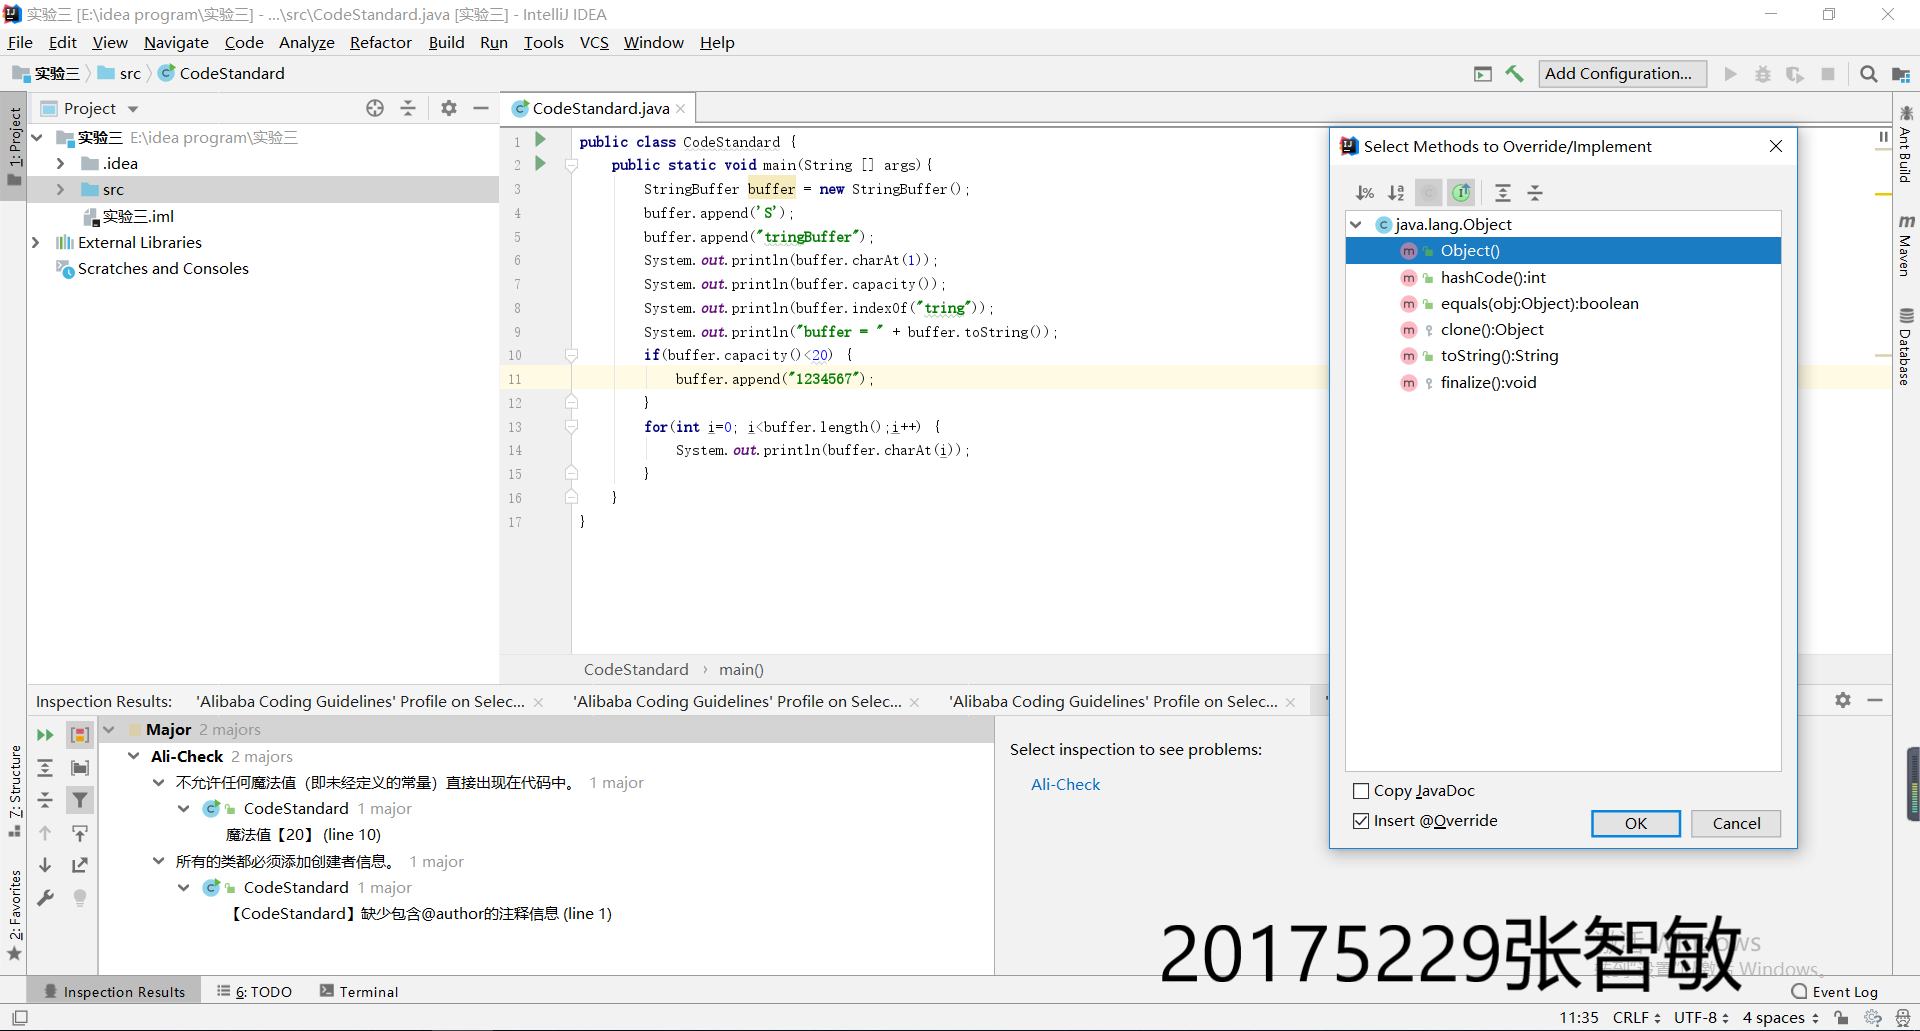
(1)安装、使用alibaba 插件规范代码

(2)编码规约扫描
-快捷键:ctri+shift+alt+J
(3)规范后的代码
public class CodeStandard {

    public static void main(String[] args) {

        StringBuffer buffer = new StringBuffer();

        buffer.append('S');

        buffer.append("tringBuffer");

        System.out.println(buffer.charAt(1));

        System.out.println(buffer.capacity());

        System.out.println(buffer.indexOf("tring"));

        System.out.println("buffer = " + buffer.toString());

        if (buffer.capacity() < 20) {

            buffer.append("1234567");

        }

        for (int i = 0; i < buffer.length(); i++) {

            System.out.println(buffer.charAt(i));

        }

    }

}
(4)使用工具(Code->Reformate Code)格式化代码,并了解code菜单的功能
-在code中选择Reformate Code格式化代码(Ctrl+Alt+L);
code菜单中的其他功能:
-Override Methods(ctrl+O):重载基本类的方法
-Surround With(Ctrl+Alt+T):使用if-else、for、while等语句包装代码段
-Comment with Line Comment(Ctrl+/):将本行变成注释
-Comment with Block Comment(Ctrl+Shift+/):将选中的代码块变成注释
3.实验截图
二、实验三 敏捷开发与XP实践-2
1.实验要求
-在码云上把自己的学习搭档加入自己的项目中,确认搭档的项目加入自己后,下载搭档实验二的Complex代码,加入不少于三个JUnit单元测试用例;
-测试成功后git add .; git commit -m "自己学号 添加内容";git push;
-提交搭档项目git log的截图,包含上面git commit的信息,并加上自己的学号水印信息。
2.实验步骤和内容
(1)下载搭档实验二的Complex代码,加入不少于三个JUnit单元测试用例
搭档代码:
public class Complex {

    double RealPart=0;

    double ImagePart=0;

    public Complex(){}

    public Complex(double RealPart,double ImagePart){

        this.RealPart=RealPart;

        this.ImagePart=ImagePart;

    }

    public double getRealPart(){

        return RealPart;

    }

    public double getImagePart(){

        return ImagePart;

    }

    public String toString(){

        String s = "";

        double r=RealPart;

        double i=ImagePart;

        if(r==0&&i==0){

            s="0";

        }

        else if(r==0&&i!=0){

            s=i+"i";

        }

        else if(r!=0&&i==0){

            s=r+"";

        }

        else if(r!=0&&i<0){

            s=r+""+i+"i";

        }

        else

        {

            s=r+"+"+i+"i";

        }

        return s;

    }

    public boolean equals(Object obj){

        if(this==obj){

            return true;

        }

        else return false;

    }

    public Complex ComplexAdd(Complex a){

        return new Complex(RealPart+a.getRealPart(),ImagePart+a.getImagePart());

    }

    public Complex ComplexSub(Complex a){

        return new Complex(RealPart-a.getRealPart(),ImagePart-a.getImagePart());

    }

    public Complex ComplexMulti(Complex a){

        double r=RealPart*a.getRealPart()-ImagePart*a.getImagePart();

        double i =ImagePart*a.getRealPart()+RealPart*a.getImagePart();

        return new Complex(r,i);

    }

    public Complex ComplexDiv(Complex a){

        double r=(RealPart * a.ImagePart + ImagePart * a.RealPart) / (a.ImagePart * a.ImagePart + a.RealPart * a.RealPart);

        double i=(ImagePart * a.ImagePart + RealPart * a.RealPart) / (a.RealPart * a.RealPart + a.RealPart * a.RealPart);

        return new Complex(r,i);

    }

}

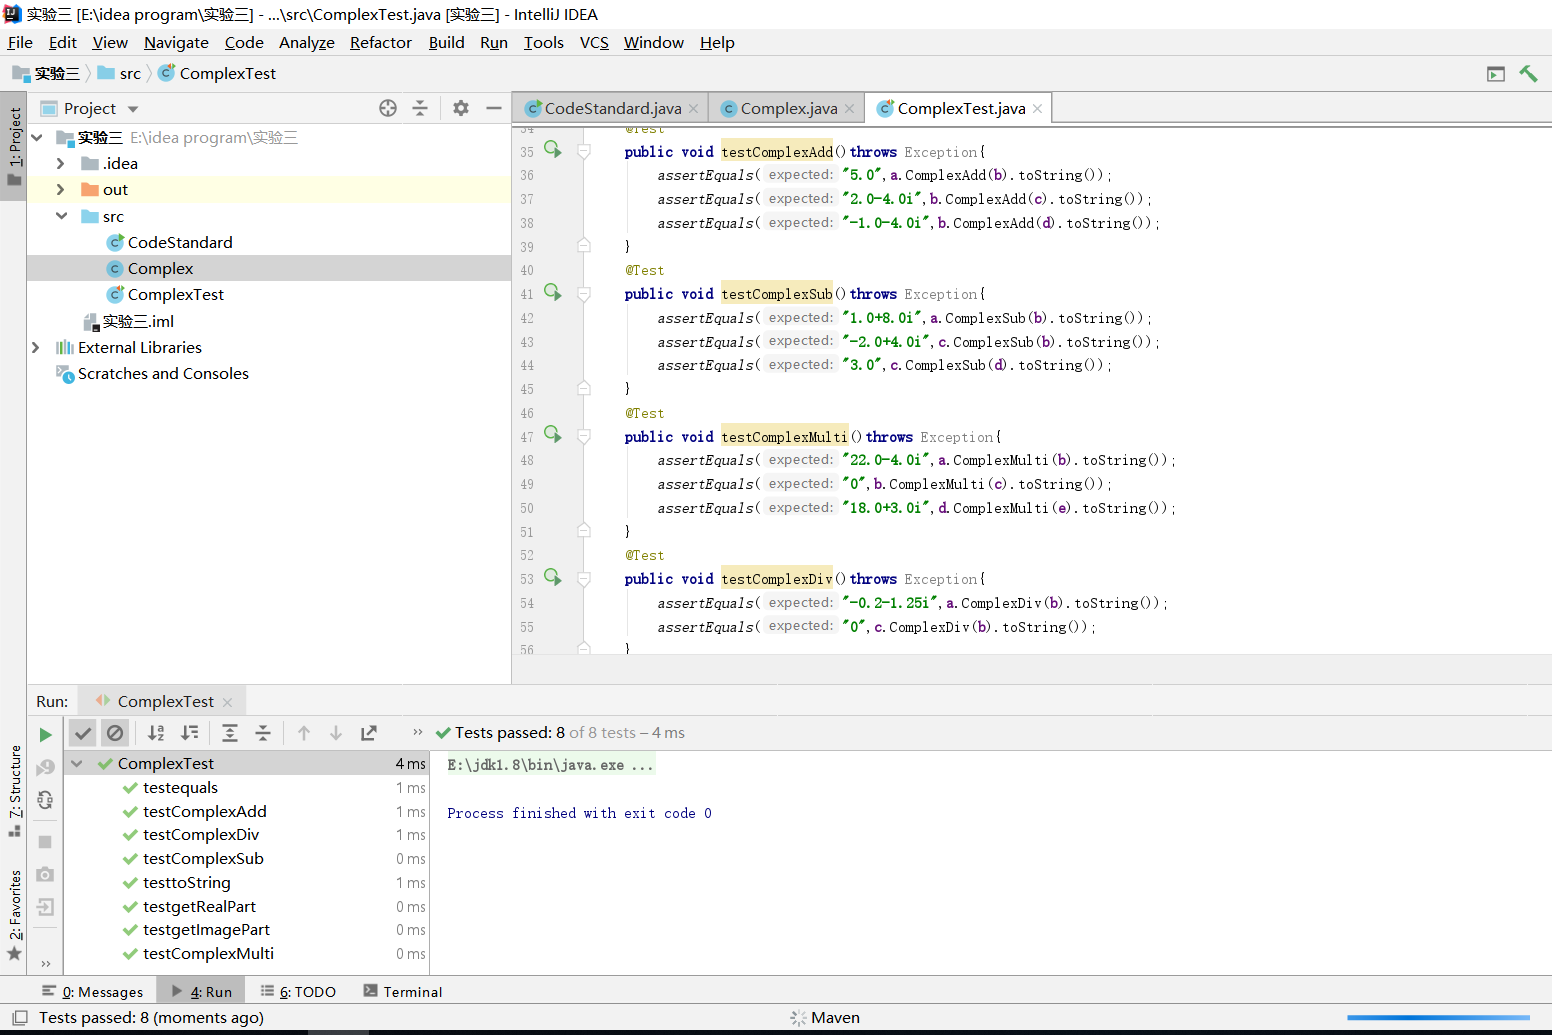
(2)对搭档代码进行测试
-要测试的类getReal、getImaginary、toString、equals、complexAdd、complexSub、complexMulti、complexDiv
-测试代码如下:
import org.junit.Test;

import junit.framework.TestCase;

public class ComplexTest extends TestCase {

    Complex a =new Complex(3.0,4.0);

    Complex b =new Complex( 2.0,-4.0);

    Complex c =new Complex(0.0,0.0);

    Complex d =new Complex(-3.0,0.0);

    Complex e =new Complex(-6.0,-1.0);

    @Test

    public void testgetRealPart()throws Exception{

        assertEquals(3.0,a.getRealPart());

        assertEquals(2.0,b.getRealPart());

        assertEquals(0.0,c.getRealPart());

        assertEquals(-3.0,d.getRealPart());

        assertEquals(-6.0,e.getRealPart());

    }

    @Test

    public void testgetImagePart()throws Exception{

        assertEquals(4.0,a.getImagePart());

        assertEquals(-4.0,b.getImagePart());

        assertEquals(0.0,c.getImagePart());

        assertEquals(0.0,d.getImagePart());

        assertEquals(-1.0,e.getImagePart());

    }

    @Test

    public void testtoString()throws Exception{

        assertEquals("3.0+4.0i",a.toString());

        assertEquals("2.0-4.0i",b.toString());

        assertEquals("0",c.toString());

        assertEquals("-3.0",d.toString());

        assertEquals("-6.0-1.0i",e.toString());

    }

    @Test

    public void testComplexAdd()throws Exception{

        assertEquals("5.0",a.ComplexAdd(b).toString());

        assertEquals("2.0-4.0i",b.ComplexAdd(c).toString());

        assertEquals("-1.0-4.0i",b.ComplexAdd(d).toString());

    }

    @Test

    public void testComplexSub()throws Exception{

        assertEquals("1.0+8.0i",a.ComplexSub(b).toString());

        assertEquals("-2.0+4.0i",c.ComplexSub(b).toString());

        assertEquals("3.0",c.ComplexSub(d).toString());

    }

    @Test

    public void testComplexMulti()throws Exception{

        assertEquals("22.0-4.0i",a.ComplexMulti(b).toString());

        assertEquals("0",b.ComplexMulti(c).toString());

        assertEquals("18.0+3.0i",d.ComplexMulti(e).toString());

    }

    @Test

    public void testComplexDiv()throws Exception{

        assertEquals("-0.2-1.25i",a.ComplexDiv(b).toString());

        assertEquals("0",c.ComplexDiv(b).toString());

    }

    @Test

    public void testequals()throws Exception{

        assertEquals(true,a.equals(a));

        assertEquals(false,a.equals(b));

    }

}
-测试成功截图:
(3)将测试代码传到搭档的码云里方法
-先git clone 搭档码云地址,将搭档的项目添加到自己的项目中
-然后登录搭档的码云仓库,点击管理,在仓库成员管理中找到开发者,然后点击邀请用户
-然后点击复制链接
-然后登录自己的码云,点击同意就可以上传
3.实验截图


三、实验三 敏捷开发与XP实践-3
1.实验要求
-实验三 敏捷开发与XP实践 http://www.cnblogs.com/rocedu/p/4795776.html, Eclipse的内容替换成IDEA;
-完成重构内容的练习,下载搭档的代码,至少进行三项重构,提交重构后代码的截图,加上自己的学号水印。提交搭档的码云项目链接。
2.实验步骤和内容
(1)重构有关知识:
-重构(Refactor),就是在不改变软件外部行为的基础上,改变软件内部的结构,使其更加易于阅读、易于维护和易于变更 。
-修改软件的四种动机:
①增加新功能;
②原有功能有BUG;
③改善原有程序的结构;
④优化原有系统的性能 。
-需要重构的地方:
①代码重复;
②方法过长;
③参数列过长;
④条件逻辑过度复杂;
⑤分支语句。
-一个完整的重构流程包括
①从版本控制系统代码库中Check out code;
②读懂代码(包括测试代码);
③发现bad smell;
④Refactoring;
⑤运行所有的Unit Tests;
⑥往代码库中Check in code。
(2)下载搭档的代码,至少进行三项重构
搭档代码:
public class Complex {

    double RealPart=0;

    double ImagePart=0;

    public Complex(){}

    public Complex(double RealPart,double ImagePart){

        this.RealPart=RealPart;

        this.ImagePart=ImagePart;

    }

    public double getRealPart(){

        return RealPart;

    }

    public double getImagePart(){

        return ImagePart;

    }

    public String toString(){

        String s = "";

        double r=RealPart;

        double i=ImagePart;

        if(r==0&&i==0){

            s="0";

        }

        else if(r==0&&i!=0){

            s=i+"i";

        }

        else if(r!=0&&i==0){

            s=r+"";

        }

        else if(r!=0&&i<0){

            s=r+""+i+"i";

        }

        else

        {

            s=r+"+"+i+"i";

        }

        return s;

    }

    public boolean equals(Object obj){

        if(this==obj){

            return true;

        }

        else return false;

    }

    public Complex ComplexAdd(Complex a){

        return new Complex(RealPart+a.getRealPart(),ImagePart+a.getImagePart());

    }

    public Complex ComplexSub(Complex a){

        return new Complex(RealPart-a.getRealPart(),ImagePart-a.getImagePart());

    }

    public Complex ComplexMulti(Complex a){

        double r=RealPart*a.getRealPart()-ImagePart*a.getImagePart();

        double i =ImagePart*a.getRealPart()+RealPart*a.getImagePart();

        return new Complex(r,i);

    }

    public Complex ComplexDiv(Complex a){

        double r=(RealPart * a.ImagePart + ImagePart * a.RealPart) / (a.ImagePart * a.ImagePart + a.RealPart * a.RealPart);

        double i=(ImagePart * a.ImagePart + RealPart * a.RealPart) / (a.RealPart * a.RealPart + a.RealPart * a.RealPart);

        return new Complex(r,i);

    }

}
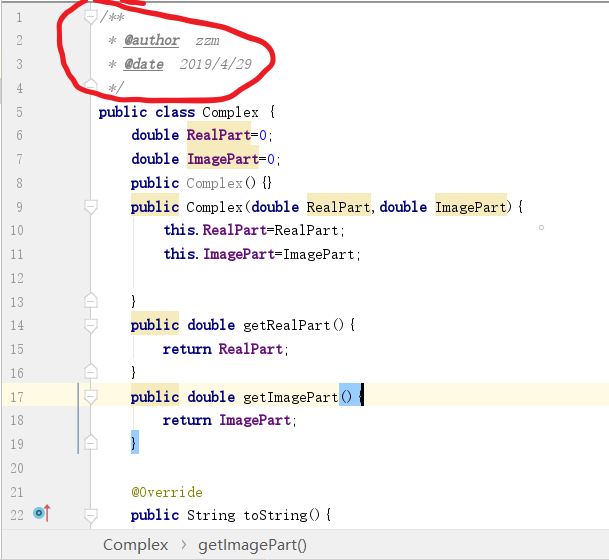
①重构1:重写toString时的@override标志

②重构2:添加作者和日期
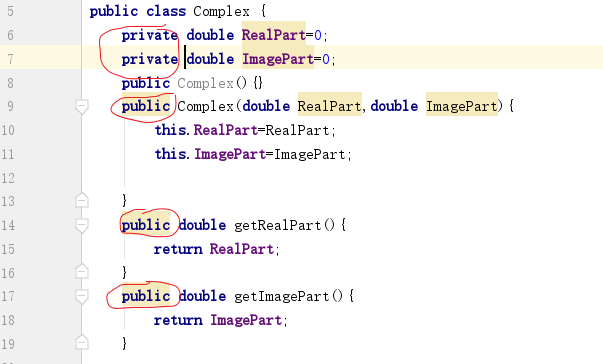
③重构3:对类中的变量和方法进行封装
④重构4:规范方法名(首字母小写)
⑤重构5:精简过长的方法

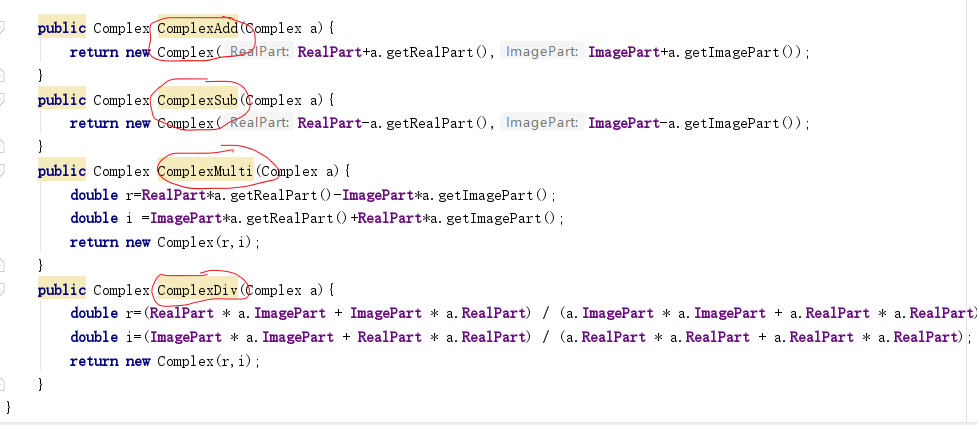
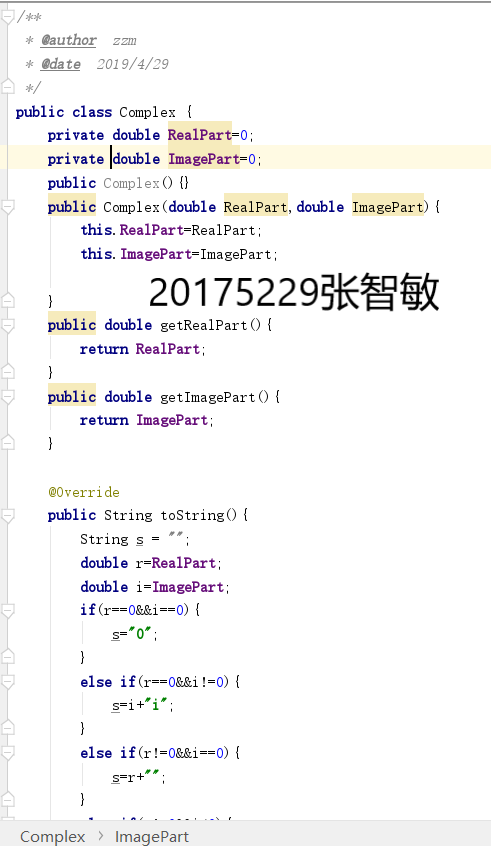
重构后的代码:
/**

 * @author  zzm

 * @date  2019/4/29

 */

public class Complex {

    private double RealPart=0;

    private double ImagePart=0;

    public Complex(){}

    public Complex(double RealPart,double ImagePart){

        this.RealPart=RealPart;

        this.ImagePart=ImagePart;

    }

    public double getRealPart(){

        return RealPart;

    }

    public double getImagePart(){

        return ImagePart;

    }

    @Override

    public String toString(){

        String s = "";

        double r=RealPart;

        double i=ImagePart;

        if(r==0&&i==0){

            s="0";

        }

        else if(r==0&&i!=0){

            s=i+"i";

        }

        else if(r!=0&&i==0){

            s=r+"";

        }

        else if(r!=0&&i<0){

            s=r+""+i+"i";

        }

        else

        {

            s=r+"+"+i+"i";

        }

        return s;

    }

    public boolean equals(Object obj){

        if(this==obj){

            return true;

        }

        else return false;

    }

    public Complex ComplexAdd(Complex a){

        return new Complex(RealPart+a.getRealPart(),ImagePart+a.getImagePart());

    }

    public Complex ComplexSub(Complex a){

        return new Complex(RealPart-a.getRealPart(),ImagePart-a.getImagePart());

    }

    public Complex ComplexMulti(Complex a){

        double r=RealPart*a.getRealPart()-ImagePart*a.getImagePart();

        double i =ImagePart*a.getRealPart()+RealPart*a.getImagePart();

        return new Complex(r,i);

    }

    public Complex ComplexDiv(Complex a){

        double r=(RealPart * a.ImagePart + ImagePart * a.RealPart) / (a.ImagePart * a.ImagePart + a.RealPart * a.RealPart);

        double i=(ImagePart * a.ImagePart + RealPart * a.RealPart) / (a.RealPart * a.RealPart + a.RealPart * a.RealPart);

        return new Complex(r,i);

    }

}
3.实验截图

四、实验三 敏捷开发与XP实践-4
1.Java密码学算法
要求:
(1)参考 http://www.cnblogs.com/rocedu/p/6683948.html,以结对的方式完成Java密码学相关内容的学习,结合重构,git,代码标准。
(2)提交学习成果码云链接和代表性成果截图,要有学号水印。
(3)安全问题可以归结为安全的三个属性(CIA金三角):
-机密性(Confidentiality)
-完整性(Integrity)
-可用性(Availability)
(4)密码学: 主要是研究保密通信和信息保密的学科, 包括信息保密传输和信息加密存储等。密码学包含密码编码学( Cryptography) 和密码分析学(Cryptanalyst) 两个分支。
(5)Java安全体系结构总共分为4个部分:
-JCA( Java Cryptography Architecture, Java加密体系结构):JCA提供基本的加密框架, 如证书、 数字签名、消息摘要和密钥对产生器。
-JCE( Java Cryptography Extension, Java加密扩展包):JCE在JCA的基础上作了扩展, 提供了各种加密算法、 消息摘要算法和密钥管理等功能。JCE的实现主要在javax.crypto包( 及其子包) 中
-JSSE( Java Secure Sockets Extension, Java安全套接字扩展包):JSSE提供了基于SSL( Secure Sockets Layer,安全套接字层) 的加密功能。 在网络的传输过程中, 信息会经过多个主机(很有可能其中一台就被窃听) , 最终传送给接收者, 这是不安全的。这种确保网络通信安全的服务就是由JSSE来提供的。
-JAAS( Java Authentication and Authentication Service, Java鉴别与安全服务):JAAS提供了在Java平台上进行用户身份鉴别的功能。
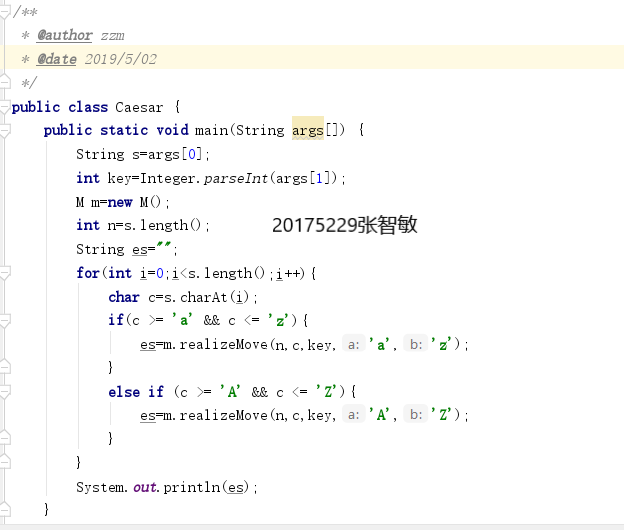
2.实验代码
/**
* @author zzm
* @date 2019/5/02
*/
public class Caesar {
public static void main(String args[]) {
String s=args[0];
int key=Integer.parseInt(args[1]);
M m=new M();
int n=s.length();
String es="";
for(int i=0;i<s.length();i++){
char c=s.charAt(i);
if(c >= 'a' && c <= 'z'){
es=m.realizeMove(n,c,key,'a','z');
}
else if (c >= 'A' && c <= 'Z'){
es=m.realizeMove(n,c,key,'A','Z');
}
}
System.out.println(es);
}
}
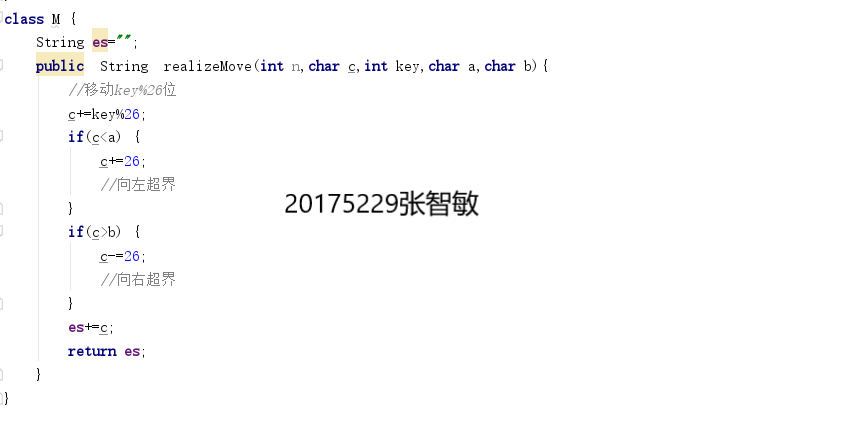
class M {
String es="";
public String realizeMove(int n,char c,int key,char a,char b){
//移动key%26位
c+=key%26;
if(c<a) {
c+=26;
//向左超界
}
if(c>b) {
c-=26;
//向右超界
}
es+=c;
return es;
}
}
3.实验截图

五、代码托管
搭档码云链接:
https://gitee.com/cjy-123/20175218cjy/tree/master/Experiment2/test4
我的码云链接:
https://gitee.com/zzm-zcc/zhang_zhi_min/tree/master/实验2
六、实验感想
通过这次实验三的过程,并结合实验二的知识学习了重构知识,学会了规范代码的方法,并且在此次实验中完成了结对学习,体验了团队的力量,我们应该在实验过程中跟队友相互合作,相互促进,我们应该养成代码规范的习惯,总体来说结对学习的效率较高。
#实验三 敏捷开发与XP实践---实验报告的更多相关文章
- 20145308刘昊阳 《Java程序设计》实验三 敏捷开发与XP实践 实验报告
20145308刘昊阳 <Java程序设计>实验三 敏捷开发与XP实践 实验报告 实验名称 敏捷开发与XP实践 实验内容 XP基础 XP核心实践 相关工具 统计的PSP(Personal ...
- 20162311 实验三 敏捷开发与XP实践 实验报告
20162311 实验三 敏捷开发与XP实践 实验报告 实验内容 一.研究学习IDEA中的Code菜单 使用Code ->Reformate Code功能将以下代码格式化 public clas ...
- 20165308实验三 敏捷开发与XP实践实验报告
实验三 敏捷开发与XP实践实验报告 实验目的 安装 alibaba 插件,解决代码中的规范问题.再研究一下Code菜单,找出一项让自己感觉最好用的功能. 在码云上把自己的学习搭档加入自己的项目中,确认 ...
- 20165230 《Java程序设计》实验三 敏捷开发与XP实践 实验报告
20165230 <Java程序设计>实验三 敏捷开发与XP实践 实验报告 一.实验报告封面 课程:Java程序设计 班级:1652班 姓名:田坤烨 学号:20165230 成绩: 指导教 ...
- 20155207王雪纯 《Java程序设计》实验三 敏捷开发与XP实践 实验报告
20155207王雪纯 <Java程序设计>实验三 敏捷开发与XP实践 实验报告 实验名称 敏捷开发与XP实践 实验内容 XP基础 XP核心实践 相关工具 统计的PSP(Personal ...
- 20155220 实验三 敏捷开发与XP实践 实验报告
20155220 实验三 敏捷开发与XP实践 实验报告 实验内容 XP基础 XP核心实践 相关工具 实验要求 没有Linux基础的同学建议先学习<Linux基础入门(新版)><Vim ...
- # 20155224 实验三 敏捷开发与XP实践 实验报告
20155224 实验三 敏捷开发与XP实践 实验报告 实验内容 XP基础 XP核心实践 相关工具 实验要求 没有Linux基础的同学建议先学习<Linux基础入门(新版)><Vim ...
- 20155226 实验三 敏捷开发与XP实践 实验报告
20155226 实验三 敏捷开发与XP实践 实验报告 实验内容 XP基础 XP核心实践 相关工具 实验要求 没有Linux基础的同学建议先学习<Linux基础入门(新版)><Vim ...
- 20155311 实验三 敏捷开发与XP实践 实验报告
20155311 实验三 敏捷开发与XP实践 实验报告 实验内容 XP基础 xp核心工具 相关工具 实验要求 没有Linux基础的同学建议先学习<Linux基础入门(新版)><Vim ...
- 2016-2017-2 20155339 《Java面向对象程序设计》实验三敏捷开发与XP实践实验报告
2016-2017-2 20155339 <Java面向对象程序设计>实验三敏捷开发与XP实践实验报告 实验内容 XP基础 XP核心实践 相关工具 实验内容 一.在IDEA中使用工具(Co ...
随机推荐
- Apple watch ,小米微信通知
Applewatch怎么显示微信通知?iWatch显示微信消息通知设置方法.大家都知道Applewatch上收到微信消息,iWatch是不会显示通知的,需要用户自行设置才行.下面小编来教大家如何设置A ...
- BUG在线上环境中出现的原因总结
1.线上环境数据的复杂度以及数据量是测试环境不能比拟的. 2.业务操作的不可控性,用户错误的使用习惯. 3.实际场景的复杂性. 上线之后,测试人员需要做好以下二件事: 第一,灰度测试 项目上线之后 ...
- CentOS 7 安装phpredis和redis(接上一篇centos7安装lnmp)
一.安装扩展phpredis 1.PHP7 安装redis 扩展phpredis cd /root/software wget https://github.com/edtechd/phpredis/ ...
- python: 爬取[博海拾贝]图片脚本
练手代码,聊作备忘: # encoding: utf-8 # from __future__ import unicode_literals import urllib import urllib2 ...
- pythone函数基础(15)接口开发初识
导入需要的第三方模块 import flaskimport toolsimport json,redisimport random server = flask.Flask(__name__)#新建一 ...
- 4-19 css属性
1. margin 简写属性在一个声明中设置所有外边距属性.该属性可以有 1 到 4 个值. 说明 这个简写属性设置一个元素所有外边距的宽度,或者设置各边上外边距的宽度. 块级元素的垂直相邻外边距会合 ...
- STL基础复习
stl容器:vector,deque,list,map/multimap,set 特殊容器:stack,queue,priority_queue 通用操作 size() 返回当前容器元素数量 emp ...
- 机器学习--k-means聚类原理
“物以类聚,人以群分”, 所谓聚类就是将相似的元素分到一"类"(有时也被称为"簇"或"集合"), 簇内元素相似程度高, 簇间元素相似程度低. ...
- nio编程
NIO主要有三大核心部分:Channel(通道),Buffer(缓冲区), Selector.传统IO基于字节流和字符流进行操作,而NIO基于Channel和Buffer(缓冲区)进行操作,数据总是从 ...
- 使用xhprof对php7程序进行性能分析
Xhprof是facebook开源出来的一个php轻量级的性能分析工具,跟Xdebug类似,但性能开销更低,还可以用在生产环境中,也可以由程序开关来控制是否进行profile. 对于还在使用php5的 ...