容器(docker)内运行Nginx
容器内运行nginx其实很简单,但是一开始还是浪费了我很多时间。这里写下来给大家省点时间。
1、创建nginx文件夹,放置各种配置及日志等。
mkdir /docker/nginx
docker 文件夹是我存放所有基础设施容器的地方。
2、创建nginx配置文件
cd /docker/nginx
vim nginx.conf
nginx.conf为主配置文件
user  nginx;

worker_processes  ;

error_log  /var/log/nginx/error.log warn;

pid        /var/run/nginx.pid;

events {

    worker_connections  ;

}

http {

    include       /etc/nginx/mime.types;

    default_type  application/octet-stream;

    log_format  main  '$remote_addr - $remote_user [$time_local] "$request" '

                      '$status $body_bytes_sent "$http_referer" '

                      '"$http_user_agent" "$http_x_forwarded_for"';

    access_log  /var/log/nginx/access.log  main;

    sendfile        on;

    #tcp_nopush     on;

    keepalive_timeout  ;

    #gzip  on;

    include /etc/nginx/conf.d/*.conf;

}
最后一句include /etc/nginx/conf.d/*.conf;
这里的*.conf就是子配置。我只创建了一个default.conf
mkdir /docker/nginx/conf.d

cd /docker/nginx/conf.d

vim default.conf
在default.conf里面加入你的server级别的配置。
我这里只是监听了80端口,并反向代理到了5000端口
server {

    listen       ;

    server_name  localhost;

    #charset koi8-r;

    #access_log  /var/log/nginx/host.access.log  main;

    location / {

        root   /usr/share/nginx/html;

        index  index.html index.htm;

        proxy_redirect off;

        proxy_set_header Host $host;

        proxy_set_header X-Real-IP $remote_addr;

        proxy_set_header X-Forwarded-For $proxy_add_x_forwarded_for;

        proxy_pass http://127.0.0.1:5000;      # 这里设置你要代理的ip+端口

    }

}
3、创建docker-compose.yml容器编排
vim /docker/nginx/docker-compose.yml
docker-compose对格式要求很严格注意里面的空格。
解释下我的设置
restart 永远重启
image 从nginx镜像拉取
ports 输出使用80,443端口
volumes 挂载外部卷到docker内部。这样就可以使用我们刚才创建好的配置了。
(这里面:ro的意思是只读的意思,表示第一第二个卷只能被容器读取不能写入)
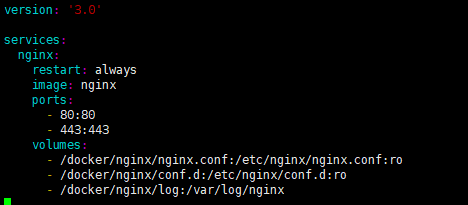
docker-compose文件内容如下方便大家copy
version: '3.0'

services:

  nginx:

    restart: always

    image: nginx

    ports:

      - :

      - :

    volumes:

      - /docker/nginx/nginx.conf:/etc/nginx/nginx.conf:ro

      - /docker/nginx/conf.d:/etc/nginx/conf.d:ro

      - /docker/nginx/log:/var/log/nginx
4、运行
要保证在我们刚才创建的目录里
cd /docker/nginx

docker-compose up -d
加-d的意思是后台运行。大家可以试试不加 -d

5、其他
- 如果你的nginx版本跟你的配置不一致,你可以进入到容器内看看。
docker exec -it 容器id /bin/bash
- 停止镜像
docker-compose down
容器(docker)内运行Nginx的更多相关文章
- Docker中运行nginx
Docker中运行nginx 1.Docker中运行nginx 2.配置文件 2.1 nginx.conf 2.2 default.conf 3.docker的镜像可以挂什么卷 部分内容原文地址: C ...
- Docker笔记一:基于Docker容器构建并运行 nginx + php + mysql ( mariadb ) 服务环境
首先为什么要自己编写Dockerfile来构建 nginx.php.mariadb这三个镜像呢?一是希望更深入了解Dockerfile的使用,也就能初步了解docker镜像是如何被构建的:二是希望将来 ...
- Docker 自动运行Nginx容器
Dockerfile文件如下: FROM ubuntu #基础镜像 RUN apt-get update #更新apt RUN apt-get -y install nginx #安装nginx VO ...
- CentOS7安装Docker,运行Nginx镜像、Centos镜像
摘要 总体思路:yum命令直接安装Docker,下载想要的镜像并启动 1.环境,CentOS7 Minimal 64位,Docker必须要64位的系统 2.通过yum命令直接安装,yum instal ...
- 阿里云服务器用Docker配置运行nginx并访问
一.Docker拉取nginx镜像 docker pull nginx:1.12.2 这里是下载的是nginx的1.12.2版本,其他版本的镜像请访问https://hub.docker.com/r/ ...
- [Docker] Win10中安装Docker并运行Nginx镜像
一.安装Docker 进入官网:https://www.docker.com/products/docker-desktop 可能需要先注册登录,很简单的. 点击 Download Desktop f ...
- Docker中运行nginx并挂载本地目录到镜像中
1.1 从hup上pull镜像1.2 创建将要挂载的目录1.3 先要有配置文件才能启动容器1.3.1 vim /data/nginx/conf/nginx.conf1.3.2 vim /data/ng ...
- centos7 搭建docker内运行rabbitmq,然后再镜像ha方案的完全教程,暂时一个宿主机只能运行一个docker的rabbitmq,但是集群 ha都正常
1.安装centos7.x,配置好网络2.因为docker需要比较高版本的内核,比如使用overlayfs作为默认docker文件系统要3.18,所以先升级内核到3.18以上版本,能直接过4是最佳了检 ...
- 最简单的docker教程:在docker里运行nginx服务器
命令行docker search nginx搜索名为nginx的docker image,返回结果的第一个,github上有10293个star,这就是我们想要搜索的结果: 使用命令docker pu ...
随机推荐
- 只有mdf文件和ldf文件--怎么恢复数据库
1.将mdf和ldf放到你电脑的路径中. 2.执行以下语句 USE master; GO CREATE DATABASE DBName ON (FILENAME = 'C:\Program Files ...
- mysql的常用操作
基本操作 #1 操作文件夹(库) 增 create database db1 charset utf8; --指定格式为utf8 查 show databases; --查看所有的数据库 show c ...
- tornado上帝视角第一次建立WEB服务器
import tornado.ioloop import tornado.web 该视角建立在SOCKET服务端和客户端的基础上. class MainHandler(tornado.web.Requ ...
- P1181 数列分段Section I
题目描述(跳转) 对于给定的一个长度为NN的正整数数列A_iAi,现要将其分成连续的若干段,并且每段和不超过MM(可以等于MM),问最少能将其分成多少段使得满足要求. 输入输出格式 输入格式: 第1 ...
- idea打开dashboard
1.编辑workspace.xml文件,搜索 “RunDashboard” 节点 2.在component节点下增加option <option name="configuration ...
- auto-encoder小记
1.使用auto-encoder生成手写数字 2.中间code层使用二维向量,使用L2norm处理中间层数据 3.从[-1,1]的矩形框中等间隔选取100个坐标点 作为code值 最终生成图像 后期应 ...
- SOFARPC —— SPI 解析
一.前言 我之前研究过微博的Motan框架(当时接触的第一个RPC框架),当时懵懵懂懂,现在,上手SOFARPC框架,感觉比较轻松,事物的本质都是相通的.以前写博文,会逐行分析源码,慢慢地发现,源码其 ...
- 【转载】【SQL练习】经典SQL练习题
出处 https://blog.csdn.net/mrbcy/article/details/68965271 准备数据 建表语句 CREATE TABLE students (sno VARCHAR ...
- java8_api_jdbc
jdbc-1 jdbc的概念 驱动的分类 连接oracle数据库 与任何表格数据源交互 代码编写步骤 加载驱动 Cla ...
- java中构造代码块、方法调用顺序问题
1. 继承的概念 继承在本职上是特殊——一般的关系,即常说的is-a关系.子类继承父类,表明子类是一种特殊的父类,并且具有父类所不具有的一些属性或方法. 2. 继承中的初始化顺序 从类的结构上而言,其 ...