JQuery实现轮播图及其原理
源码:
<!DOCTYPE html>
<html> <head>
<meta charset="utf-8" name="viewport" content="width=device-width,initial-scale=1.0, minimum-scale=1.0, maximum-scale=1.0, user-scalable=no">
<title>JQuery轮播图</title>
<style>
*{
padding:0;
margin:0;
}
.container{
width:600px;
height:400px;
overflow: hidden;
position:relative;
margin:0 auto;
}
.list{
width:3000px;
height:400px;
position:absolute; }
.list>img{
float:left;
width:600px;
height:400px;
}
.pointer{
position:absolute;
width:100px;
bottom:20px;
left:250px;
}
.pointer>span{
cursor:pointer;
display:inline-block;
width:10px;
height:10px;
background: #7b7d80;
border-radius:50%;
border:1px solid #fff;
}
.pointer .on{
background: #28a4c9;
}
.arrow{
position:absolute;
text-decoration:none;
width:40px;
height:40px;
background: #727d8f;
color:#fff;
font-weight: bold;
line-height:40px;
text-align:center;
top:180px;
display:none;
}
.arrow:hover{
background: #0f0f0f;
}
.left{
left:0;
}
.right{
right:0;
}
.container:hover .arrow{
display:block;
}
</style>
</head> <body>
<div class="container">
<div class="list" style="left:0px;">
<!--<img src="../static/image/photo1.jpg" alt="5"/>-->
<img src="../static/image/banner.jpg" alt="1"/>
<img src="../static/image/slide1.jpg" alt="2"/>
<img src="../static/image/slide1.jpg" alt="3"/>
<img src="../static/image/slide1.jpg" alt="4"/>
<img src="../static/image/photo1.jpg" alt="5"/>
<!--<img src="../static/image/banner.jpg" alt="1"/>-->
</div>
<div class="pointer">
<span index="1" class="on"></span>
<span index="2"></span>
<span index="3"></span>
<span index="4"></span>
<span index="5"></span>
</div>
<a href="#" class="arrow left">></a>
<a href="#" class="arrow right"><</a>
</div> <script src="../static/js/jquery-3.2.1.min.js"></script>
<script>
var imgCount = 5;
var index = 1;
var intervalId;
var buttonSpan = $('.pointer')[0].children;//htmlCollection 集合
//自动轮播功能 使用定时器
autoNextPage();
function autoNextPage(){
intervalId = setInterval(function(){
nextPage(true);
},3000);
}
//当鼠标移入 停止轮播
$('.container').mouseover(function(){
console.log('hah');
clearInterval(intervalId);
});
// 当鼠标移出,开始轮播
$('.container').mouseout(function(){
autoNextPage();
});
//点击下一页 上一页的功能
$('.left').click(function(){
nextPage(true);
});
$('.right').click(function(){
nextPage(false);
});
//小圆点的相应功能 事件委托
clickButtons();
function clickButtons(){
var length = buttonSpan.length;
for(var i=0;i<length;i++){
buttonSpan[i].onclick = function(){
$(buttonSpan[index-1]).removeClass('on');
if($(this).attr('index')==1){
index = 5;
}else{
index = $(this).attr('index')-1;
}
nextPage(true); };
}
}
function nextPage(next){
var targetLeft = 0;
//当前的圆点去掉on样式
$(buttonSpan[index-1]).removeClass('on');
if(next){//往后走
if(index == 5){//到最后一张,直接跳到第一张
targetLeft = 0;
index = 1;
}else{
index++;
targetLeft = -600*(index-1);
} }else{//往前走
if(index == 1){//在第一张,直接跳到第五张
index = 5;
targetLeft = -600*(imgCount-1);
}else{
index--;
targetLeft = -600*(index-1);
} }
$('.list').animate({left:targetLeft+'px'});
//更新后的圆点加上样式
$(buttonSpan[index-1]).addClass('on'); } </script>
</body> </html>
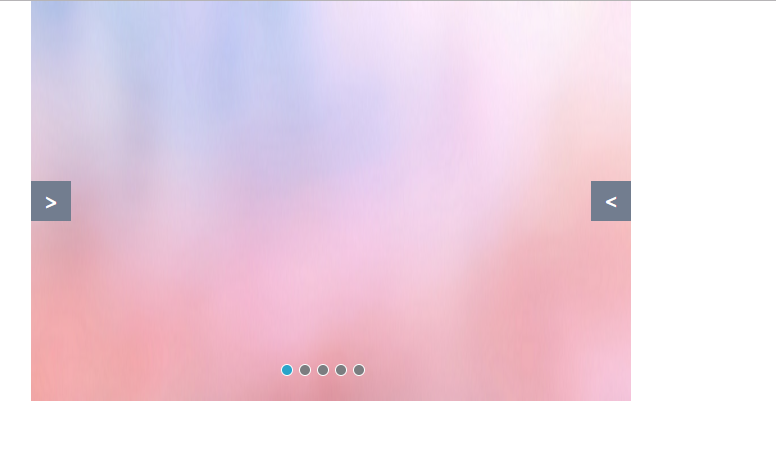
效果图:
原理:
页面结构方面:
- 将轮播图容器设置成相对定位,宽度设置成图片的宽度;容器中分为四部分:轮播的图片;点击的小按钮;前一张;后一张
样式方面:
- 轮播图容器为相对定位,宽度/高度设置成图片的宽度/高度,设置overflow为hidden;
- 容器中的每一部分都设置成绝对定位,放到相应的位置;
- 轮播图片的容器宽度设置成所有图片的宽度和,left开始先设置为0;
- 每张图片宽度一样,都设成左浮动,左右图片都在一行排列,所以轮播图的实质是装有图片的容器的移动,每次移动的距离为一张图片的宽度,这样每次就只显示一张图片;
- 前一张/后一张设置成display为none,当鼠标移入总容器时,再设置成display为block
功能方面:
- 自动轮播为一个定时循环机制setInteval,鼠标移入,循环停止,移除循环继续;
JQuery实现轮播图及其原理的更多相关文章
- 用jQuery实现轮播图效果,js中的排他思想
---恢复内容开始--- jQuery实现轮播图不用单独加载. 思路: a. 通过$("#id名");选择需要的一类标签,获得一个伪数组 b.由于是伪数组的原因,而对数组的处理最多 ...
- 用js和jQuery做轮播图
Javascript或jQuery做轮播图 css样式 <style> a{ text-decoration:none; } .naver{ width: 100%; position:r ...
- 自实现PC端jQuery版轮播图
最近其他项目不是很忙,被安排给公司的官网项目做一个新的页面(之前没接触公司官网项目),其中有一个用到轮播图的地方,最开始想直接用swiper.js插件实现就好了,可是发现官网项目里之前都没有引入过sw ...
- Jquery无缝轮播图的制作
轮播是html页面中比较常见的一种展现形式,也是基础,把轮播图做好,是排版中比较关键的 1.首先是轮播的html元素放置:做轮播之前,要有一个初步的认识 2.每个元素的位置怎样摆放,也是很关键的,这里 ...
- jquery优化轮播图2
继续优化 <!DOCTYPE html> <html lang="en"> <head> <meta charset="UTF- ...
- jquery改造轮播图1
g改造轮播图1:https://www.cnblogs.com/huanghuali/p/8677338.html <!DOCTYPE html> <html lang=" ...
- jQuery无缝轮播图思路详解-唯品会
效果图如上: 需求:图片自动轮播,鼠标移上停止播放,离开恢复播放,箭头切换图片. html代码 <!--轮播图大盒子开始--> <div class="wrap" ...
- jQuery封装轮播图插件
// 布局要求,必须有一个容器,图片和两个按钮,布局方式自定,小圆点样式固定 // <div class="all"> // <img src="img ...
- 自己随意写了个简单的依赖jquery的轮播图
//轮播图 function Switcher(obj){ this.box = $(obj.box); this.width = this.box.width(); this.banner = $( ...
随机推荐
- text3
GitHub地址https://github.com/gaodejian/gaodejian/blob/master/firework 课题研究的目的和意义 java编程语言在编程方面的具体应用,以及 ...
- 使用Spring提供的缓存抽象机制整合EHCache为项目提供二级缓存
Spring自身并没有实现缓存解决方案,但是对缓存管理功能提供了声明式的支持,能够与多种流行的缓存实现进行集成. Spring Cache是作用在方法上的(不能理解为只注解在方法上),其核心思想是 ...
- 每天学习SQL
SELECT table_name FROM information_schema.tables WHERE table_schema='survey170227_main' AND table_na ...
- maven配置私服
1先配置maven的配置文件 2在项目的pom.xml文件增加 <distributionManagement> <repository> <id>nexus-re ...
- Docker(十三)-Docker save and load镜像保存
持久化docker的镜像或容器的方法 Docker的镜像和容器可以有两种方式来导出 docker save #ID or #Name docker export #ID or #Name docker ...
- sap 最新财报以及云业务转型情况
SAP第四季度收入超预期 加码云转型启动重组计划 http://soft.zhiding.cn/software_zone/2019/0130/3115457.shtml 尽管第四季度超出收入预期,但 ...
- Android控件第4类——ProgressBar
ProgressBar是进度条,是比较常用的控件.它有一个抽象的子类——AbsSeekBar,AbsSeekBar有两个比较常用子类,SeekBar.RatingBar. 1.ProgressBar, ...
- CRM模块
- prettier & codes format
prettier & codes format https://prettier.io/playground/ https://github.com/collections/front-end ...
- AT2364 Colorful Balls
AT2364 Colorful Balls 题意翻译 N个球排成一排,第i个球有颜色ci和重量wi. Snuke每次可以选择两个颜色相同,且重量之和不超过X的球,交换他们的位置. Snuke每次可以选 ...