android 组合方式自定义控件
实现了《android 群英传》的TopBar的小实例。效果图如下:
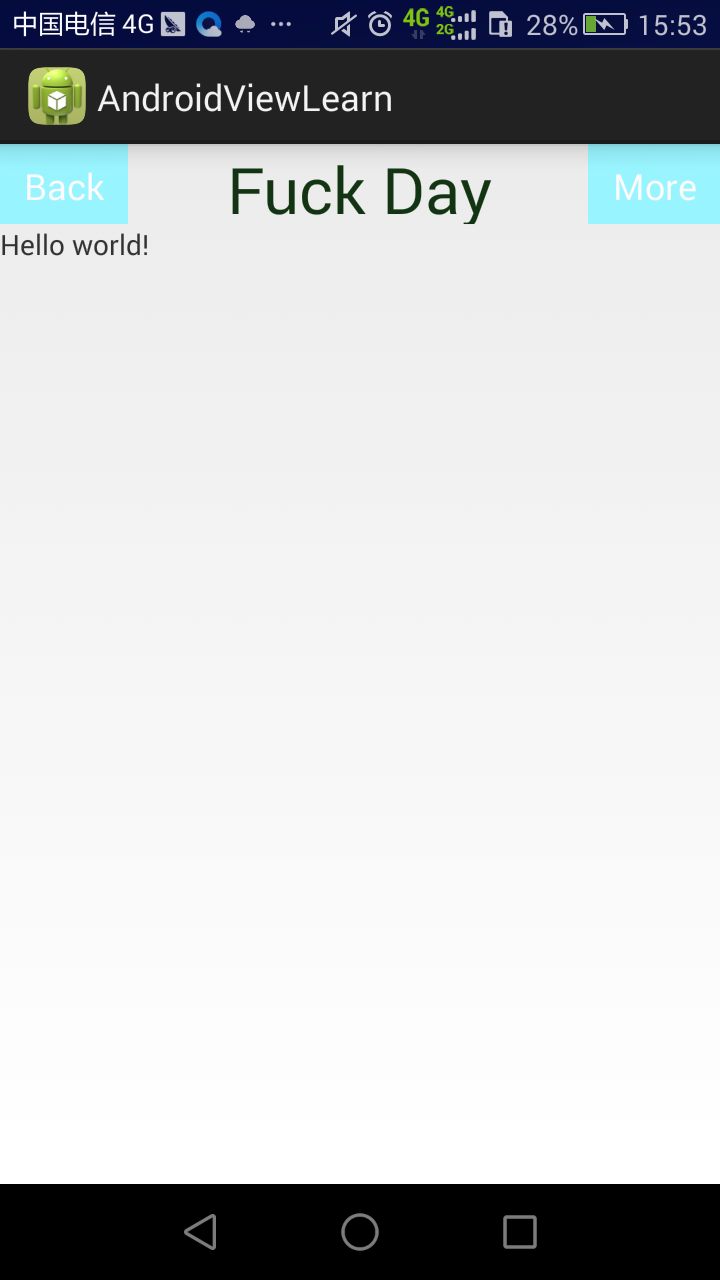
记录下来,方便下次查看。主要的原理是将2个Button和一个TextView组合在一个RelativeLayout之中。
代码如下。首先定义自定义属性attrs.xml,也可能是先实现一个控件,然后再抽象出一些属性。
<?xml version="1.0" encoding="utf-8"?>

<resources>

    <declare-styleable name="TopBar">

        <attr name="title" format="string" />

        <attr name="titleTextSize" format="dimension" />

        <attr name="titleTextColor" format="color" />

        <attr name="leftTextColor" format="color" />

        <attr name="leftBackground" format="reference|color" />

        <attr name="leftText" format="string" />

        <attr name="rightTextColor" format="color" />

        <attr name="rightBackground" format="reference|color" />

        <attr name="rightText" format="string" />

    </declare-styleable>

</resources>
然后是自定一个一个TopBar,在之中组合Button和TextView,动态地设置属性值和布局。下面是自定义的按钮点击事件的接口。
package com.example.androidviewlearn;

public interface TopBarClickListener {

    void leftClick();

    void rightClick();

}
package com.example.androidviewlearn;

import android.annotation.SuppressLint;

import android.content.Context;

import android.content.res.TypedArray;

import android.graphics.drawable.Drawable;

import android.os.Trace;

import android.util.AttributeSet;

import android.view.Gravity;

import android.view.View;

import android.widget.Button;

import android.widget.RelativeLayout;

import android.widget.TextView;

public class TopBar extends RelativeLayout {

    // 获取自定义的类型数组s

    private TypedArray ta;

    private int mLeftTextColor;

    private Drawable mLeftBackground;

    private String mLeftText;

    private int mRightTextColor;

    private Drawable mRightBackground;

    private String mRightText;

    private int mTitleTextSize;

    private int mTitleTextColor;

    private String mTtile;

    private Button mLeftButton;

    private Button mRightButton;

    private TextView mTitleView;

    private LayoutParams mLeftLayoutParams;

    private LayoutParams mRightLayoutParams;

    private LayoutParams mTitleLayoutParams;

    private TopBarClickListener mBarClickListener;

    //三个构造函数,一般采用这些写法。

    public TopBar(Context context) {

        this(context, null);

        // TODO Auto-generated constructor stub

    }

    public TopBar(Context context, AttributeSet attrs) {

        this(context, attrs, 0);

        // TODO Auto-generated constructor stub

    }

    @SuppressLint("NewApi")

    public TopBar(Context context, AttributeSet attrs, int defStyleAttr) {

        super(context, attrs, defStyleAttr);

        // TODO Auto-generated constructor stub

        //获取布局中设置的自定义属性

        getStyleValue(context, attrs);

        //初始化控件,并且把属性值设置进去

        initView(context);

        //设置各个控件的布局

        setLayout();

    }

    /**

     * 设置自定义空间的布局属性

     */

    private void setLayout() {

        mLeftLayoutParams = new LayoutParams(LayoutParams.WRAP_CONTENT, LayoutParams.MATCH_PARENT);

        mLeftLayoutParams.addRule(RelativeLayout.ALIGN_PARENT_LEFT, TRUE);

        addView(mLeftButton, mLeftLayoutParams);

        mRightLayoutParams = new LayoutParams(LayoutParams.WRAP_CONTENT, LayoutParams.MATCH_PARENT);

        mRightLayoutParams.addRule(RelativeLayout.ALIGN_PARENT_RIGHT, TRUE);

        addView(mRightButton, mRightLayoutParams);

        mTitleLayoutParams = new LayoutParams(LayoutParams.WRAP_CONTENT, LayoutParams.MATCH_PARENT);

        mTitleLayoutParams.addRule(RelativeLayout.CENTER_IN_PARENT, TRUE);

        addView(mTitleView, mTitleLayoutParams);

    }

    @SuppressLint("NewApi")

    /**

     * 初始化控件,并且给空间赋予属性和事件

     * @param context

     */

    private void initView(Context context) {

        mLeftButton = new Button(context);

        mRightButton = new Button(context);

        mTitleView = new TextView(context);

        mLeftButton.setTextColor(mLeftTextColor);

        mLeftButton.setText(mLeftText);

        mLeftButton.setBackground(mLeftBackground);

        mLeftButton.setOnClickListener(new OnClickListener() {

            @Override

            public void onClick(View paramView) {

                // TODO Auto-generated method stub

                mBarClickListener.leftClick();

            }

        });

        mRightButton.setOnClickListener(new OnClickListener() {

            @Override

            public void onClick(View paramView) {

                // TODO Auto-generated method stub

                mBarClickListener.rightClick();

            }

        });

        mRightButton.setTextColor(mRightTextColor);

        mRightButton.setText(mRightText);

        mRightButton.setBackground(mRightBackground);

        mTitleView.setText(mTtile);

        mTitleView.setTextColor(mTitleTextColor);

        mTitleView.setTextSize(mTitleTextSize);

        mTitleView.setGravity(Gravity.CENTER);

    }

    /**

     * 获取自定义空间上的style

     * @param context

     * @param attrs

     */

    private void getStyleValue(Context context, AttributeSet attrs) {

        ta = context.obtainStyledAttributes(attrs, R.styleable.TopBar);

        mLeftTextColor = ta.getColor(R.styleable.TopBar_leftTextColor, 0);

        mLeftBackground = ta.getDrawable(R.styleable.TopBar_leftBackground);

        mLeftText = ta.getString(R.styleable.TopBar_leftText);

        mRightTextColor = ta.getColor(R.styleable.TopBar_rightTextColor, 0);

        mRightBackground = ta.getDrawable(R.styleable.TopBar_rightBackground);

        mRightText = ta.getString(R.styleable.TopBar_rightText);

        mTitleTextSize = ta.getDimensionPixelSize(R.styleable.TopBar_titleTextSize, 10);

        mTitleTextColor = ta.getColor(R.styleable.TopBar_titleTextColor, 0);

        mTtile = ta.getString(R.styleable.TopBar_title);

        ta.recycle();

    }

    public TopBarClickListener getmBarClickListener() {

        return mBarClickListener;

    }

    public void setBarClickListener(TopBarClickListener mBarClickListener) {

        this.mBarClickListener = mBarClickListener;

    }

    /**

     * id=1标识→_→,id-0标识左边

     *

     * @param id

     * @param flag

     */

    public void setButtonVisable(int id, boolean flag) {

        if (flag) {

            if (id == 0) {

                mLeftButton.setVisibility(View.VISIBLE);

            } else {

                mRightButton.setVisibility(View.VISIBLE);

            }

        } else {

            if (id == 0) {

                mLeftButton.setVisibility(View.GONE);

            } else {

                mRightButton.setVisibility(View.GONE);

            }

        }

    }

}
之后定义一个layout,activity_main.xml,把放入自定义布局和设置参数。
<LinearLayout xmlns:android="http://schemas.android.com/apk/res/android"

    xmlns:tools="http://schemas.android.com/tools"

    android:layout_width="match_parent"

    android:layout_height="match_parent"

    android:orientation="vertical"

    tools:context="com.example.androidviewlearn.MainActivity" >

    <com.example.androidviewlearn.TopBar

        xmlns:android="http://schemas.android.com/apk/res/android"

        xmlns:custom="http://schemas.android.com/apk/res-auto"

        android:id="@+id/topBar"

        android:layout_width="match_parent"

        android:layout_height="40dp"

           custom:leftBackground="#98F5FF"

           custom:leftText="Back"

           custom:leftTextColor="#FFFAFA"

           custom:rightBackground="#98F5FF"

           custom:rightText="More"

           custom:rightTextColor="#FFFAFA"

           custom:title="Fuck Day"

           custom:titleTextColor="#123412"

           custom:titleTextSize="16sp"

         >

    </com.example.androidviewlearn.TopBar>

    <TextView

        android:layout_width="wrap_content"

        android:layout_height="wrap_content"

        android:text="@string/hello_world" />

</LinearLayout>
特别注意这一行,xmlns:custom="http://schemas.android.com/apk/res-auto"。custom就表示了设置属性时候的前缀:custom:rightBackground
最后的就是Activity的实现了。
package com.example.androidviewlearn;

import android.app.Activity;

import android.os.Bundle;

import android.view.Menu;

import android.view.MenuItem;

import android.widget.Toast;

public class MainActivity extends Activity {

    private TopBar mTopBar;

    @Override

    protected void onCreate(Bundle savedInstanceState) {

        super.onCreate(savedInstanceState);

        setContentView(R.layout.activity_main);

        mTopBar = (TopBar) findViewById(R.id.topBar);

        mTopBar.setBarClickListener(new TopBarClickListener() {

            @Override

            public void rightClick() {

                // TODO Auto-generated method stub

                Toast.makeText(getApplicationContext(), "right fuck button", Toast.LENGTH_LONG).show();

            }

            @Override

            public void leftClick() {

                // TODO Auto-generated method stub

                Toast.makeText(getApplicationContext(), "left fuck button", Toast.LENGTH_LONG).show();

            }

        });

    }

}
android 组合方式自定义控件的更多相关文章
- Android开发技巧——自定义控件之组合控件
Android开发技巧--自定义控件之组合控件 我准备在接下来一段时间,写一系列有关Android自定义控件的博客,包括如何进行各种自定义,并分享一下我所知道的其中的技巧,注意点等. 还是那句老话,尽 ...
- Android中的自定义控件(一)
自定义控件是根据自己的需要自己来编写控件.安卓自带的控件有时候无法满足你的需求,这种时候,我们只能去自己去实现适合项目的控件.同时,安卓也允许你去继承已经存在的控件或者实现你自己的控件以便优化界面和创 ...
- Android开发技巧——自定义控件之自定义属性
Android开发技巧--自定义控件之自定义属性 掌握自定义控件是很重要的,因为通过自定义控件,能够:解决UI问题,优化布局性能,简化布局代码. 上一篇讲了如何通过xml把几个控件组织起来,并继承某个 ...
- 荐 android 如何打包自定义控件(转)
荐 android 如何打包自定义控件(转) 目录[-] 方式一:将项目打包成jar包 方式二:项目作为一个library 设计自定义的控件对android开发人员来说,是家常便饭了,但是多次做项 ...
- Android开发技巧——自定义控件之增加状态
Android开发技巧--自定义控件之增加状态 题外话 这篇本该是上周四或上周五写的,无奈太久没写博客,前几段把我的兴头都用完了,就一拖再拖,直到今天.不想把这篇拖到下个月,所以还是先硬着头皮写了. ...
- Android开发技巧——自定义控件之使用style
Android开发技巧--自定义控件之使用style 回顾 在上一篇<Android开发技巧--自定义控件之自定义属性>中,我讲到了如何定义属性以及在自定义控件中获取这些属性的值,也提到了 ...
- Android 打开方式选定后默认了改不回来?解决方法(三星s7为例)
Android 打开方式选定后默认了改不回来?解决方法(三星s7为例) 刚刚在测试东西,打开一个gif图,然后我故意选择用支付宝打开,然后...支付宝当然不支持,我觉得第二次打开它应该还会问我,没想到 ...
- react组件之间的组合方式
组合方式: 1/直接嵌套的方式 2/组件以变量的形式放置 3/可以通过props值,以变量的形式相当于作为参数传递父组件,然后进行组合 import React,{Component} from 'r ...
- android post 方式 访问网络 实例
android post 方式 访问网络 实例 因为Android4.0之后对使用网络有特殊要求,已经无法再在主线程中访问网络了,必须使用多线程访问的模式 该实例需要在android配置文件中添加 网 ...
随机推荐
- NUMA的取舍与优化设置
在os层numa关闭时,打开bios层的numa会影响性能,QPS会下降15-30%; 在bios层面numa关闭时,无论os层面的numa是否打开,都不会影响性能. 安装numactl: ...
- python-requests数据驱动延伸
在 python-requests模块的讲解和应用 基础上进行数据驱动的延伸 task_01_requests.py #-*- coding:utf-8 -*- #task_01_requests.p ...
- nginx安装以及常用配置
nginx的源码安装 0 安装相关软件:yum -y install pcre-devel zlib-devel openssl-devel 1 下载 nginx-1.14.0.tar.gz 2 安装 ...
- [Unity插件]Lua行为树(七):行为树嵌套
在上一篇的基础上,可以测试下行为树的嵌套,所谓的行为树嵌套,就是在一棵行为树下的某一个分支,接入另一棵行为树. 以下面这棵行为树为例: TestBehaviorTree2.lua TestBehavi ...
- 重识linux-常见压缩和解压缩命令
重识linux-常见压缩和解压缩命令 1 compress 目前已经很少使用,知道有个 不重点学习 2 gzip和zcat 目前应用最广泛 gzip [-cdtv#] 文件名 zcat 文件名.gz ...
- while循环、break、continue
我们通过while循环让python循环进行操作 break 跳出整个循环 continue 终止当前循环并不再继续往下执行,回到开头开始继续循环 下面会详细解释一下,例如: 1 a = 1 2 wh ...
- 序列化 (实现RPC的基础)
public interface ISerializer { <T> byte[] serializer(T obj); <T> T deSerializer(byte[] d ...
- hive随机采样
hive> select * from account limit 10;OKaccount.accountname account.accid account.platid ac ...
- ECharts 的用法
1. ECharts的获得 官网: https://echarts.baidu.com/ 你可以通过以下几种方式获取 ECharts. 从官网下载界面选择你需要的版本下载,根据开发者功能和体积上的需求 ...
- clientdataset.open 报错 Name not unique in this context
clientdataset.open 报错 Name not unique in this context clientdataset有一些自定义字段,clientdataset绑定了adoquer ...