JAVAEE——BOS物流项目01:学习计划、搭建环境、主页设计(jQuery EasyUI)
1 学习计划
1、项目概述
项目背景介绍
2、搭建项目开发环境
数据库环境
maven项目搭建
svn环境搭建
3、主页设计(jQuery EasyUI)
layout页面布局
accordion折叠面板
tabs选项卡面板
2 项目概述
2.1 项目背景介绍
本项目属于物流公司的二期改造项目。物流公司存在一个一期项目(基于C/S架构),用C++开发的。
项目甲方:物流公司(软件的使用方)
项目乙方:软件公司(软件的开发方)
软件的开发周期13个月,编码阶段4个月时间,开发团队人数20多个人。
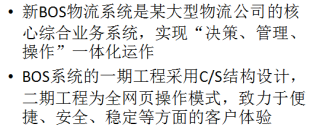
BOS:Bussiness Operating System 业务操作系统
2.2 常见的软件类型
OA:办公自动化系统
CRM:客户关系管理系统
ERP:综合的企业解决方案(平台)
2.3 软件的开发流程(瀑布模型)
1、需求调研分析----需求规格说明书
2、设计阶段(概要设计、详细设计)----页面原型、数据库设计、设计文档
3、编码阶段
4、测试阶段
5、上线和运维
3 搭建项目开发环境
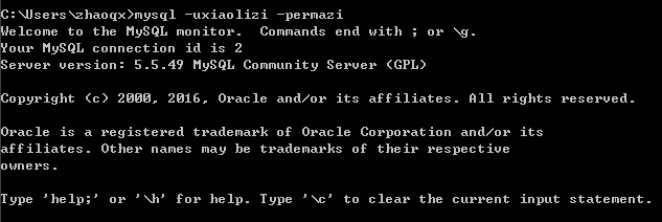
3.1 数据库环境
第一步:创建一个数据库

第二步:创建一个数据库用户

第三步:为新用户授权

第四步:使用新用户登录MySQL
3.2 maven项目环境
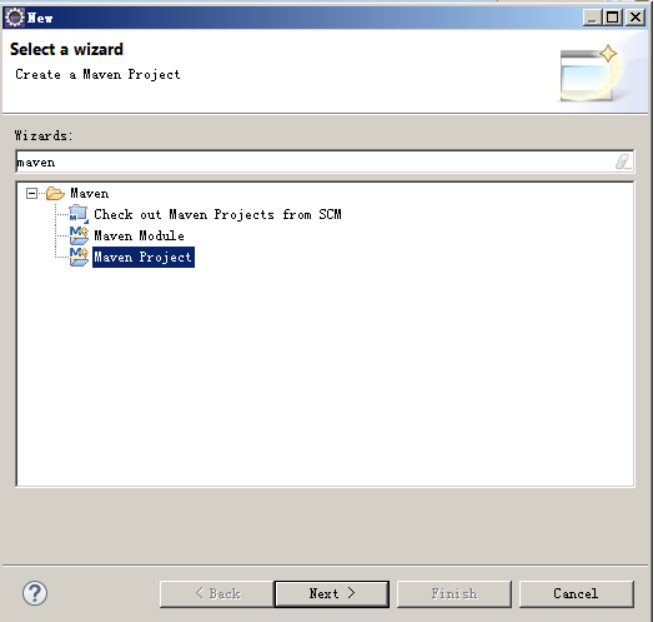
使用maven是依赖管理和项目构建的工具
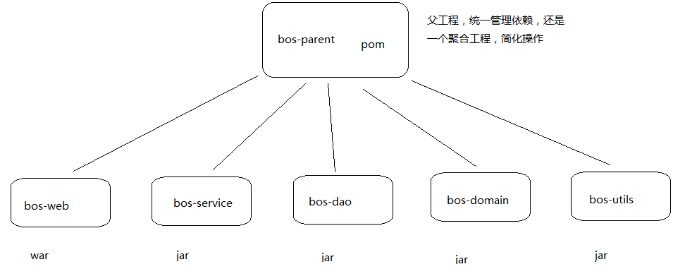
3.2.1 创建父工程bos-parent

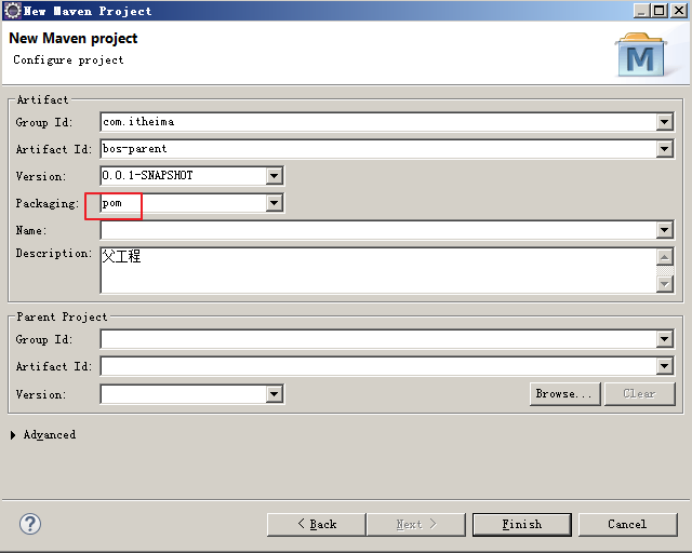
Packaging的含义
任何一个Maven项目都需要定义POM元素packaging(如果不写则默认值为jar)。顾名思义,该元素决定了项目的打包方式。实际的情形中,如果你不声明该元素,Maven会帮你生成一个JAR包;如果你定义该元素的值为war,那你会得到一个WAR包;如果定义其值为POM(比如是一个父模块),那什么包都不会生成。除此之外,Maven默认还支持一些其他的流行打包格式,例如ejb3和ear。你不需要了解具体的打包细节,你所需要做的就是告诉Maven,”我是个什么类型的项目“,这就是约定优于配置的力量。
提供pom.xml
<project xmlns="http://maven.apache.org/POM/4.0.0" xmlns:xsi="http://www.w3.org/2001/XMLSchema-instance" xsi:schemaLocation="http://maven.apache.org/POM/4.0.0 http://maven.apache.org/xsd/maven-4.0.0.xsd">

  <modelVersion>4.0.0</modelVersion>

  <groupId>com.itheima</groupId>

  <artifactId>bos-parent</artifactId>

  <version>0.0.1-SNAPSHOT</version>

  <packaging>pom</packaging>

  <description>父工程</description>

  <!-- 通过属性定义指定jar的版本 -->

    <properties>

        <spring.version>4.2.4.RELEASE</spring.version>

        <hibernate.version>5.0.7.Final</hibernate.version>

        <struts2.version>2.3.24</struts2.version>

        <slf4j.version>1.6.6</slf4j.version>

        <log4j.version>1.2.12</log4j.version>

        <shiro.version>1.2.3</shiro.version>

    </properties>

    <dependencies>

        <dependency>

            <groupId>org.springframework</groupId>

            <artifactId>spring-context</artifactId>

            <version>${spring.version}</version>

        </dependency>

        <dependency>

            <groupId>org.springframework</groupId>

            <artifactId>spring-context-support</artifactId>

            <version>${spring.version}</version>

        </dependency>

        <dependency>

            <groupId>org.springframework</groupId>

            <artifactId>spring-web</artifactId>

            <version>${spring.version}</version>

        </dependency>

        <dependency>

            <groupId>org.springframework</groupId>

            <artifactId>spring-orm</artifactId>

            <version>${spring.version}</version>

        </dependency>

        <dependency>

            <groupId>org.springframework</groupId>

            <artifactId>spring-beans</artifactId>

            <version>${spring.version}</version>

        </dependency>

        <dependency>

            <groupId>org.springframework</groupId>

            <artifactId>spring-core</artifactId>

            <version>${spring.version}</version>

        </dependency>

        <dependency>

            <groupId>org.aspectj</groupId>

            <artifactId>aspectjweaver</artifactId>

            <version>1.7.4</version>

        </dependency>

        <!-- struts2 begin -->

        <dependency>

            <groupId>org.apache.struts</groupId>

            <artifactId>struts2-core</artifactId>

            <version>${struts2.version}</version>

            <!-- 排除传递的依赖 -->

            <exclusions>

                <exclusion>

                    <artifactId>javassist</artifactId>

                    <groupId>javassist</groupId>

                </exclusion>

            </exclusions>

        </dependency>

        <dependency>

            <groupId>org.apache.struts</groupId>

            <artifactId>struts2-spring-plugin</artifactId>

            <version>${struts2.version}</version>

        </dependency>

        <dependency>

            <groupId>org.apache.struts</groupId>

            <artifactId>struts2-convention-plugin</artifactId>

            <version>${struts2.version}</version>

        </dependency>

        <!-- struts2 end -->

        <!-- hibernate begin -->

        <dependency>

            <groupId>org.hibernate</groupId>

            <artifactId>hibernate-core</artifactId>

            <version>${hibernate.version}</version>

        </dependency>

        <!-- hibernate end -->

        <!-- log start -->

        <dependency>

            <groupId>log4j</groupId>

            <artifactId>log4j</artifactId>

            <version>${log4j.version}</version>

        </dependency>

        <dependency>

            <groupId>org.slf4j</groupId>

            <artifactId>slf4j-api</artifactId>

            <version>${slf4j.version}</version>

        </dependency>

        <dependency>

            <groupId>org.slf4j</groupId>

            <artifactId>slf4j-log4j12</artifactId>

            <version>${slf4j.version}</version>

        </dependency>

        <!-- log end -->

        <dependency>

            <groupId>org.apache.poi</groupId>

            <artifactId>poi</artifactId>

            <version>3.11</version>

        </dependency>

        <dependency>

            <groupId>org.apache.cxf</groupId>

            <artifactId>cxf-rt-frontend-jaxws</artifactId>

            <version>3.0.1</version>

        </dependency>

        <dependency>

            <groupId>org.apache.cxf</groupId>

            <artifactId>cxf-rt-transports-http</artifactId>

            <version>3.0.1</version>

        </dependency>

        <dependency>

            <groupId>junit</groupId>

            <artifactId>junit</artifactId>

            <version>4.10</version>

            <scope>test</scope>

        </dependency>

        <!-- 加入servlet和jsp的依赖 -->

        <dependency>

            <groupId>javax.servlet</groupId>

            <artifactId>servlet-api</artifactId>

            <version>2.5</version>

            <scope>provided</scope>

        </dependency>

        <dependency>

            <groupId>javax.servlet</groupId>

            <artifactId>jsp-api</artifactId>

            <version>2.0</version>

            <scope>provided</scope>

        </dependency>

        <!-- 引入pinyin4J的依赖 -->

        <dependency>

            <groupId>com.belerweb</groupId>

            <artifactId>pinyin4j</artifactId>

            <version>2.5.0</version>

        </dependency>

        <!-- 引入json-lib的依赖 -->

        <dependency>

            <groupId>net.sf.json-lib</groupId>

            <artifactId>json-lib</artifactId>

            <version>2.4</version>

        </dependency>

        <!-- 引入c3p0jar包 -->

        <dependency>

            <groupId>c3p0</groupId>

            <artifactId>c3p0</artifactId>

            <version>0.9.1.2</version>

        </dependency>

        <!-- 引入ehcache的依赖 -->

        <dependency>

            <groupId>net.sf.ehcache</groupId>

            <artifactId>ehcache-core</artifactId>

            <version>2.6.6</version>

        </dependency>

        <!-- 引入shiro框架的依赖 -->

        <dependency>

            <groupId>org.apache.shiro</groupId>

            <artifactId>shiro-all</artifactId>

            <version>1.2.2</version>

        </dependency>

        <!-- 引入MySQL数据库驱动依赖 -->

        <dependency>

            <groupId>mysql</groupId>

            <artifactId>mysql-connector-java</artifactId>

            <version>5.1.32</version>

        </dependency>

    </dependencies>

    <build>

        <!-- 插件 -->

        <plugins>

            <plugin>

                <groupId>org.apache.maven.plugins</groupId>

                <artifactId>maven-resources-plugin</artifactId>

                <version>2.5</version>

            </plugin>

            <plugin>

                <groupId>org.apache.maven.plugins</groupId>

                <artifactId>maven-compiler-plugin</artifactId>

                <version>2.3.2</version>

                <configuration>

                    <source>1.7</source>

                    <target>1.7</target>

                </configuration>

            </plugin>

            <!-- 引入tomcat插件 -->

            <plugin>

                <groupId>org.apache.tomcat.maven</groupId>

                <artifactId>tomcat7-maven-plugin</artifactId>

                <version>2.2</version>

                <configuration>

                    <path>/bos</path>

                    <port>8888</port>

                </configuration>

            </plugin>

        </plugins>

        <resources>

            <resource>

                <directory>src/main/java</directory>

                <includes>

                    <include>**/*.properties</include>

                    <include>**/*.xml</include>

                </includes>

                <filtering>false</filtering>

            </resource>

            <resource>

                <directory>src/main/resources</directory>

                <includes>

                    <include>**/*.properties</include>

                    <include>**/*.xml</include>

                </includes>

                <filtering>false</filtering>

            </resource>

        </resources>

    </build>

</project>
pom.xml
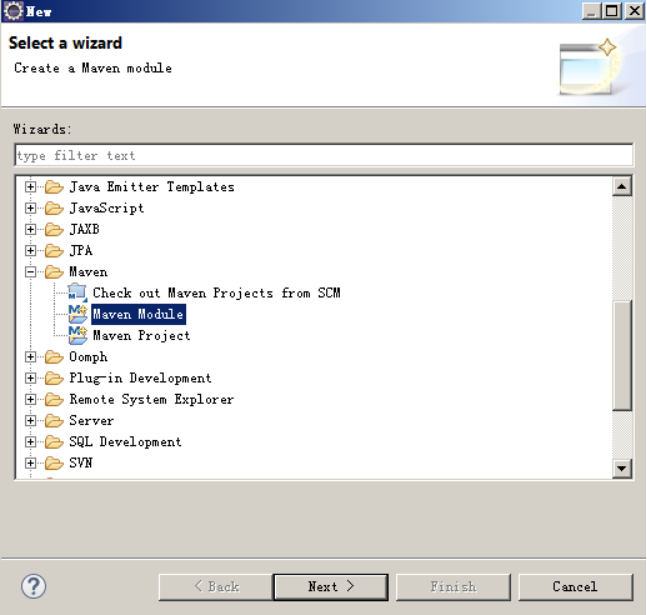
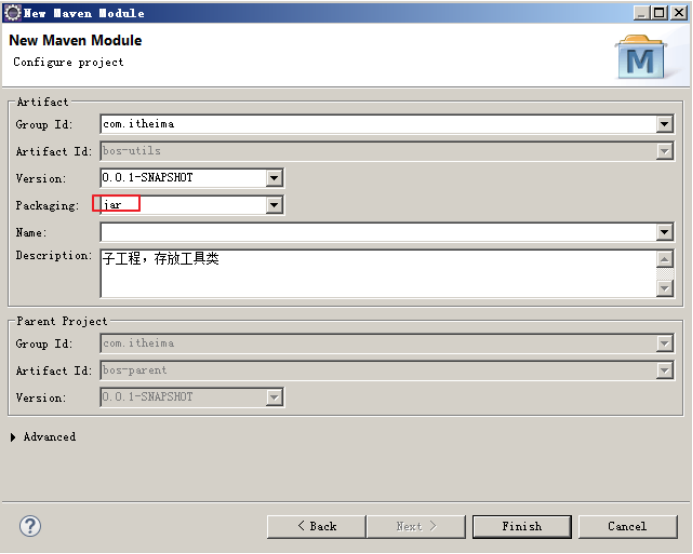
3.2.2 创建bos-utils子工程

3.2.3 创建bos-domain子工程
jar
3.2.4 创建bos-dao子工程
jar
3.2.5 创建bos-service子工程
war
第一步:配置web.xml文件
<?xml version="1.0" encoding="UTF-8"?>

<web-app xmlns:xsi="http://www.w3.org/2001/XMLSchema-instance" xmlns="http://java.sun.com/xml/ns/javaee" xsi:schemaLocation="http://java.sun.com/xml/ns/javaee http://java.sun.com/xml/ns/javaee/web-app_2_5.xsd" version="2.5">

  <display-name>bos-web</display-name>

  <welcome-file-list>

    <welcome-file>index.html</welcome-file>

    <welcome-file>index.htm</welcome-file>

    <welcome-file>index.jsp</welcome-file>

    <welcome-file>default.html</welcome-file>

    <welcome-file>default.htm</welcome-file>

    <welcome-file>default.jsp</welcome-file>

  </welcome-file-list>

  <!-- 配置过滤器,解决hibernate延迟加载问题 -->

  <filter>

      <filter-name>openSessionInView</filter-name>

      <filter-class>org.springframework.orm.hibernate5.support.OpenSessionInViewInterceptor</filter-class>

  </filter>

  <filter-mapping>

      <filter-name>openSessionInView</filter-name>

      <url-pattern>/*</url-pattern>

  </filter-mapping>

  <!-- 通过上下文参数指定spring配置文件位置 -->

  <context-param>

      <param-name>contextConfigLocation</param-name>

      <param-value>classpath:applicationContext.xml</param-value>

  </context-param>

  <!-- 配置spring框架的监听器 -->

  <listener>

      <listener-class>org.springframework.web.context.ContextLoaderListener</listener-class>

  </listener>

  <!-- 配置struts2的过滤器 -->

  <filter>

      <filter-name>struts2</filter-name>

      <filter-class>org.apache.struts2.dispatcher.ng.filter.StrutsPrepareAndExecuteFilter</filter-class>

  </filter>

  <filter-mapping>

      <filter-name>struts2</filter-name>

      <url-pattern>/*</url-pattern>

      <dispatcher>REQUEST</dispatcher>

      <dispatcher>FORWARD</dispatcher>

  </filter-mapping>

</web-app>
第二步:配置struts.xml文件
<?xml version="1.0" encoding="UTF-8"?>

<!DOCTYPE struts PUBLIC

    "-//Apache Software Foundation//DTD Struts Configuration 2.3//EN"

    "http://struts.apache.org/dtds/struts-2.3.dtd">

<struts>

    <constant name="struts.devMode" value="false" />

    <!--

        <constant name="struts.objectFactory" value="spring"/>

     -->

    <package name="basicstruts2" extends="struts-default">

        <!-- 需要进行权限控制的页面访问 -->

        <action name="page_*_*">

            <result type="dispatcher">/WEB-INF/pages/{1}/{2}.jsp</result>

        </action>

    </package>

</struts>
第三步:配置log4j.properties日志文件
### direct log messages to stdout ###

log4j.appender.stdout=org.apache.log4j.ConsoleAppender

log4j.appender.stdout.Target=System.err

log4j.appender.stdout.layout=org.apache.log4j.PatternLayout

log4j.appender.stdout.layout.ConversionPattern=%d{ABSOLUTE} %5p %c{1}:%L - %m%n

### direct messages to file mylog.log ###

log4j.appender.file=org.apache.log4j.FileAppender

log4j.appender.file.File=d:\\mylog.log

log4j.appender.file.layout=org.apache.log4j.PatternLayout

log4j.appender.file.layout.ConversionPattern=%d{ABSOLUTE} %5p %c{1}:%L - %m%n

### set log levels - for more verbose logging change 'info' to 'debug' ###

### fatal error warn info debug trace

log4j.rootLogger=debug, file
第四步:配置applicationContext.xml文件
<?xml version="1.0" encoding="UTF-8"?>

<beans xmlns="http://www.springframework.org/schema/beans"

    xmlns:xsi="http://www.w3.org/2001/XMLSchema-instance"

    xmlns:context="http://www.springframework.org/schema/context"

    xmlns:aop="http://www.springframework.org/schema/aop"

    xmlns:tx="http://www.springframework.org/schema/tx"

    xsi:schemaLocation="http://www.springframework.org/schema/beans

                        http://www.springframework.org/schema/beans/spring-beans.xsd

                        http://www.springframework.org/schema/context

                        http://www.springframework.org/schema/context/spring-context.xsd

                        http://www.springframework.org/schema/aop

                        http://www.springframework.org/schema/aop/spring-aop.xsd

                        http://www.springframework.org/schema/tx

                        http://www.springframework.org/schema/tx/spring-tx.xsd">

    <!-- 加载属性文件 -->

    <context:property-placeholder location="classpath:db.properties"/>

    <!-- 配置数据源 -->

    <bean id="dataSource" class="com.mchange.v2.c3p0.ComboPooledDataSource">

        <property name="driverClass" value="${jdbc.driverClass}"/>

        <property name="jdbcUrl" value="${jdbc.jdbcUrl}"/>

        <property name="user" value="${jdbc.user}"/>

        <property name="password" value="${jdbc.password}"/>

    </bean>

    <!-- 配置LocalSessionFactoryBean,spring提供的用于整合hibernate的工厂bean -->

    <bean id="sessionFactory" class="org.springframework.orm.hibernate5.LocalSessionFactoryBean">

        <property name="dataSource" ref="dataSource"/>

        <!-- 注入hibernate相关的属性配置 -->

        <property name="hibernateProperties">

            <props>

                <prop key="hibernate.dialect">org.hibernate.dialect.MySQL5Dialect</prop>

                <prop key="hibernate.hbm2ddl.auto">update</prop>

                <prop key="hibernate.show_sql">true</prop>

                <prop key="hibernate.format_sql">true</prop>

            </props>

        </property>

        <!-- 注入hibernate的映射文件 -->

        <property name="mappingLocations">

            <list>

                <value>classpath:com/itheima/bos/domain/*.xml</value>

            </list>

        </property>

    </bean>

    <!-- 配置事务管理器 -->

    <bean id="transactionManager" class="org.springframework.orm.hibernate5.HibernateTransactionManager">

        <property name="sessionFactory" ref="sessionFactory"/>

    </bean>

    <!-- 组件扫描 -->

    <context:component-scan base-package="com.itheima.bos"/>

    <!-- 支持spring注解 -->

    <context:annotation-config/>

    <tx:annotation-driven/>

</beans>
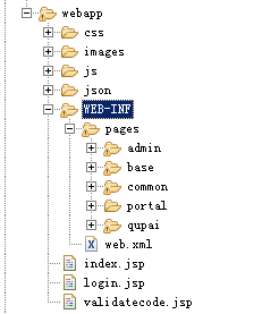
第五步:创建一个项目的目录结构
第六步:将项目使用的资源文件复制到项目中
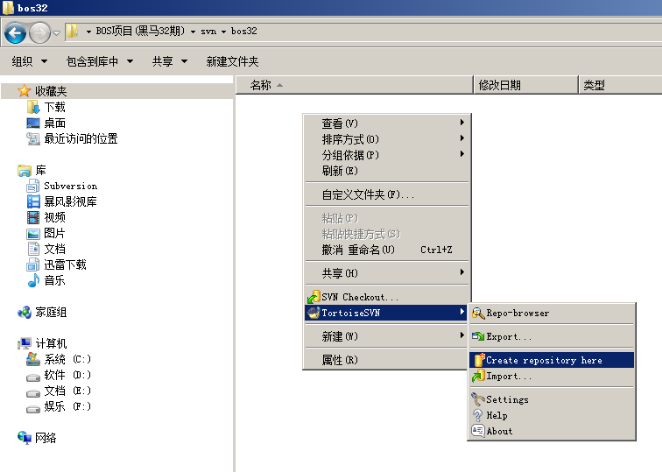
3.3 svn环境
第一步:创建一个svn数据仓库
仓库的目录结构:

第二步:修改conf目录中的配置文件
l 修改svnserve.conf文件:
[general]
anon-access = none
auth-access = write
password-db = passwd
authz-db = authz
[sasl]
l 修改passwd文件:
[users]
xiaohei = 123
xiaobai = 456
l 修改authz文件:
[aliases]
[groups]
group1 = zhangsan,lisi
[/]
xiaohei = rw
xiaobai = r
@group1 = r
第三步:启动svn服务(创建一个bat文件,将启动的命令写到文件中)

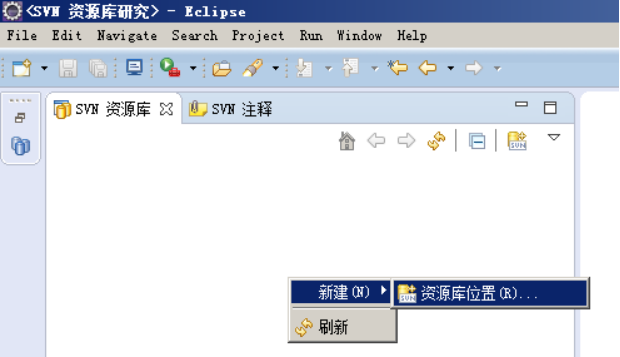
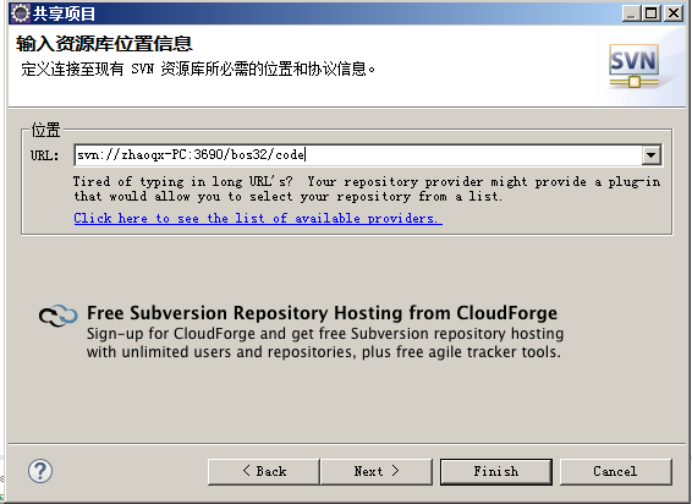
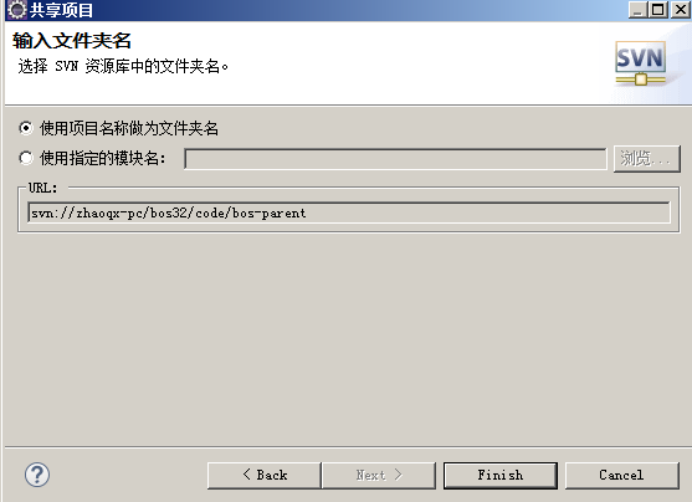
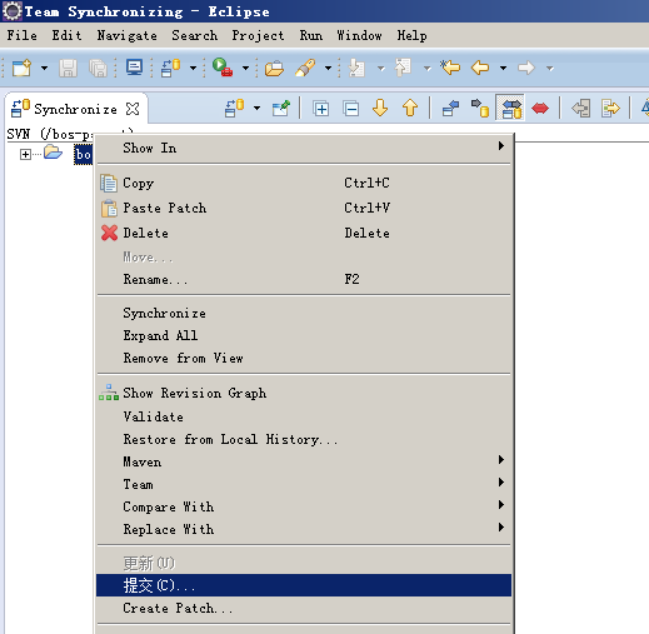
第四步:将本地代码共享到svn仓库


4 主页设计(jQuery EasyUI插件使用)
下载easyUI的开发包:
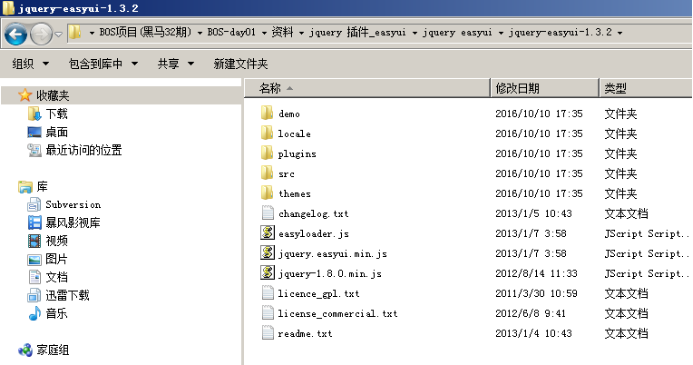
解压zip文件:
将easyUI的资源文件引入的页面中:
<link rel="stylesheet" type="text/css" href="${pageContext.request.contextPath }/js/easyui/themes/default/easyui.css">

<link rel="stylesheet" type="text/css" href="${pageContext.request.contextPath }/js/easyui/themes/icon.css">

<script type="text/javascript" src="${pageContext.request.contextPath }/js/jquery-1.8.3.js"></script>

<script type="text/javascript" src="${pageContext.request.contextPath }/js/easyui/jquery.easyui.min.js"></script>
4.1 layout页面布局
<body class="easyui-layout">

    <!-- 使用div元素描述每个区域 -->

    <div style="height: 100px" data-options="region:'north'">北部区域</div>

    <div style="width: 200px" data-options="region:'west'">西部区域</div>

    <div data-options="region:'center'">中心区域</div>

    <div style="width: 100px" data-options="region:'east'">东部区域</div>

    <div style="height: 50px" data-options="region:'south'">南部区域</div>

</body>
效果:

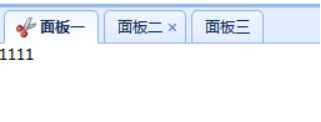
4.2 accordion折叠面板
        <!-- 制作accordion折叠面板

            fit:true----自适应(填充父容器)

        -->

        <div class="easyui-accordion" data-options="fit:true">

            <!-- 使用子div表示每个面板 -->

            <div data-options="iconCls:'icon-cut'" title="面板一">1111</div>

            <div title="面板二">2222</div>

            <div title="面板三">3333</div>

        </div>
效果:

4.3 tabs选项卡面板
        <!-- 制作一个tabs选项卡面板 -->

        <div class="easyui-tabs" data-options="fit:true">

            <!-- 使用子div表示每个面板 -->

            <div data-options="iconCls:'icon-cut'" title="面板一">1111</div>

            <div data-options="closable:true" title="面板二">2222</div>

            <div title="面板三">3333</div>

        </div>
效果:
JAVAEE——BOS物流项目01:学习计划、搭建环境、主页设计(jQuery EasyUI)的更多相关文章
- JAVAEE——BOS物流项目03:学习计划、messager、menubutton、登陆拦截器、信息校验和取派员添加功能
1 学习计划 1.jQuery easyUI messager使用方式 n alert方法 n confirm方法 n show方法 2.jQuery easyUI menubutton使用方式 3. ...
- JAVAEE——BOS物流项目02:学习计划、动态添加选项卡、ztree、项目底层代码构建
1 学习计划 1.jQuery easyUI中动态添加选项卡 2.jquery ztree插件使用 n 下载ztree n 基于标准json数据构造ztree n 基于简单json数据构造ztree( ...
- JAVAEE——BOS物流项目04:学习计划、datagrid、分页查询、批量删除、修改功能
1 学习计划 1.datagrid使用方法(重要) n 将静态HTML渲染为datagrid样式 n 发送ajax请求获取json数据创建datagrid n 使用easyUI提供的API创建data ...
- JAVAEE——BOS物流项目09:业务受理需求分析、创建表、实现自动分单、数据表格编辑功能使用方法和工作单快速录入
1 学习计划 1.业务受理需求分析 n 业务通知单 n 工单 n 工作单 2.创建业务受理环节的数据表 n 业务通知单 n 工单 n 工作单 3.实现业务受理自动分单 n 在CRM服务端扩展方法根据手 ...
- JAVAEE——BOS物流项目05:OCUpload、POI、pinyin4J、重构分页代码、分区添加、combobox
1 学习计划 1.实现区域导入功能 n OCUpload一键上传插件使用 n 将文件上传到Action n POI简介 n 使用POI解析Excel文件 n 完成数据库操作 n 使用pinyin4J生 ...
- JAVAEE——BOS物流项目07:WebService入门、apache CXF入门、基于CXF发布CRM服务
1 学习计划 1.WebService入门 n 什么是WebService n 调用网络上的WebService服务 n SOAP和WSDL概念 n 基于JDK1.7发布一个简单的WebService ...
- JAVAEE——BOS物流项目08:配置代理对象远程调用crm服务、查看定区中包含的分区、查看定区关联的客户
1 学习计划 1.定区关联客户 n 完善CRM服务中的客户查询方法 n 在BOS项目中配置代理对象远程调用crm服务 n 调整定区关联客户页面 n 实现定区关联客户 2.查看定区中包含的分区 n 页面 ...
- JAVAEE——BOS物流项目10:权限概述、常见的权限控制方式、apache shiro框架简介、基于shiro框架进行认证操作
1 学习计划 1.演示权限demo 2.权限概述 n 认证 n 授权 3.常见的权限控制方式 n url拦截权限控制 n 方法注解权限控制 4.创建权限数据模型 n 权限表 n 角色表 n 用户表 n ...
- JAVAEE——BOS物流项目13:Quartz概述、创建定时任务、使用JavaMail发送邮件、HighCharts概述、实现区域分区分布图
1 学习计划 1.Quartz概述 n Quartz介绍和下载 n 入门案例 n Quartz执行流程 n cron表达式 2.在BOS项目中使用Quartz创建定时任务 3.在BOS项目中使用Jav ...
随机推荐
- 浅谈 URI 及其转义
URI URI,全称是 Uniform Resource Identifiers,即统一资源标识符,用于在互联网上标识一个资源,比如 https://www.upyun.com/products/cd ...
- 读汤姆大叔《JavaScript变量对象》笔记
一段简单的JavaScript代码思考 先看一段简单的代码,打印结果是??为什么why?? 从上述打印结果不难看出,在打印基本变量num.函数表达式fn.函数声明fun时,就已经知道变量num.函数表 ...
- 简易安卓APP
简介 现在来分享期末做的安卓大作业--生活百科. 本项目只是单纯的一个大作业,没有考虑实际的需求,所以有设计不合理的地方,请见谅. 这个项目有三大功能(因为是使用了侧边栏所以是可以继续往里面添加功能的 ...
- 5.移植uboot-设置默认环境变量,裁剪,并分区
在上一章,我们使用网卡传输文件,每次启机时,环境变量都要变为默认值,需要重新设置ip,MAC地址才行,由于没有配置mtdparts命令,启动内核也不成功 所以本章主要学习: 1)修改环境变量默认值 2 ...
- uboot中 make xxx_config 的作用(以make smdk2410_config为例)
1.创建到目标板相关文件的链接 ln -s asm-arm asm ln -s arch-s3c24x0 asm-arm/arch ln -s proc-armv asm-arm/proc 2.创建i ...
- 微信小程序demo-环球小镇
微信小程序-环球小镇说明:实现了环球小镇(huanqiuxiaozhen.com)移动端商城客户端部分功能,包括首页,分类,购物车,帐户,品牌列表,商品详情等功能. 项目下载:http://bb ...
- js面向对象学习笔记(四):对象的混合写法
//对象的混合写法//1.构造函数function 构造函数() { this.属性}构造函数.原型.方法 = function () {};//调用var 对象1 = new 构造函数();对象1. ...
- B. Gerald is into Art
B. Gerald is into Art time limit per test 2 seconds memory limit per test 256 megabytes input standa ...
- bean的作用域 :singleton和prototype
- [国嵌笔记][027][ARM协处理器访问指令]
协处理器作用 协处理器用于执行特定的处理任务,如数学协处理器可以执行控制数字处理,以减轻处理器的负担.ARM处理器最多可以支持16个协处理器,其中CP15是最重要的一个协处理器 CP15的作用 CP1 ...