Vue自行封装常用组件-弹出框
<template>
<div>
<popUpBox ref="modal" @on-confirm="confirm">
<div slot="modal__bd">
<div class="modal_form">
<p class="txetTitle">待付款订单</p>
</div>
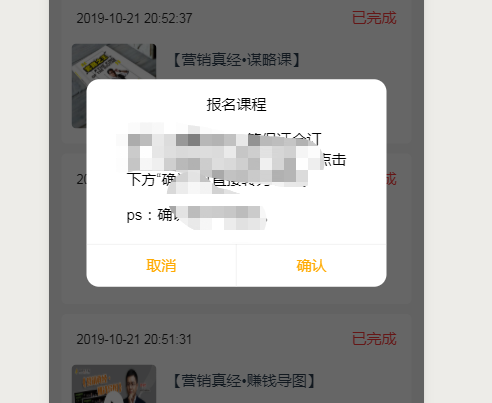
<p class="textFelid">您好,查看您有一笔待支付订单,可直接支付,点击下方“确认”可直接支付。</p>
</div>
</popUpBox>
</div>
</template> <script>
import popUpBox from "./box.vue"; export default {
data() {
return { };
},
components:{
//注册组件
popUpBox
},
created(){ //调用弹出层组件
this.geAlert(0) },
methods: {
geAlert(type) {
if (type === 1) this.$refs.modal.opens("alert", "南山下");
else if (type === 2)
this.$refs.modal.opens("alert", "Yan", "2407488005@qq.com");
else {
this.$refs.modal.opens("alert");
this.$refs.modal.setMaskClass("maskBack");
}
}
}
};
</script> <style lang="less" scoped>
.textFelid {
font-size: 0.6rem;
color: #000;
text-align: left;
}
.txetTitle {
font-size: 0.6rem;
color: #000;
}
.modal__bd {
padding: 0 1.6em 0.8em;
word-wrap: break-word;
word-break: break-all;
color: #999;
}
.modal__hd_text {
padding: 1.3em 1.6em 0.5em;
}
.modal__bd_text {
font-size: 0.3rem;
line-height: 1rem;
}
.modal__bd {
padding: 0 1.6em 0.8em;
word-wrap: break-word;
word-break: break-all;
color: #999;
}
</style>
box.vue
<template>

  <div>

    <div id="modal" v-show="showModal">

      <div class="modal-mask" :class="maskBack"></div>

      <div class="modal-body">

        <div class="modal__hd">

          <h3 class="modal__hd_text" v-if="title">{{title}}</h3>

          <slot v-else name="modal__hd"></slot>

        </div>

        <div class="modal__bd">

          <p class="modal__bd_text" v-if="msg&&type === 'alert'">{{msg}}</p>

          <div v-else-if="msg&&type === 'confirm'" class="input_box">

            <input type="text" :placeholder="msg" name="userid" ref="modalval" />

          </div>

          <slot v-else name="modal__bd"></slot>

        </div>

        <div v-if="type === 'confirm'" class="modal__ft flex">

          <button class="btn modal__btn modal__btn_primary" @click="confirm()">支付</button>

          <button class="btn modal__btn modal__btn_default" @click="closes();geAlert(0)">申请退款</button>

        </div>

        <div v-else-if="type === 'alert'" class="modal__ft">

          <div class="btna modal__btn modal__btn_default" @click="queren()">确认</div>

          <div class="btna border_right modal__btn modal__btn_default" @click="quxiao()">取消</div>

        </div>

      </div>

    </div>

  </div>

</template>

<script>

export default {

  data() {

    return {};

  },

  methods: {

    closes() {

      this.showModal = false;

      this.type = "alert";

      this.title = "add";

      this.msg = "";

      this.maskBack = "";

    },

    opens(type, title, msg) {

      this.showModal = true;

      this.type = type;

      this.title = title;

      this.msg = msg;

      this.$emit("oper");

    },

    confirm() {

      this.$emit("on-confirm");

      this.closes();

    },

    getVal() {

      if (this.$refs.modalval) {

        return this.$refs.modalval.value;

      }

    },

    setMaskClass(back) {

      this.maskBack = back || "maskBackNo";

    }

  }

};

</script>

<style lang="less" scoped>

.modal-mask {

  position: fixed;

  z-index: 1000;

  top: 0;

  right: 0;

  left: 0;

  bottom: 0;

  background: rgba(0, 0, 0, 0.6);

}

.maskBackNo {

  background: inherit;

}

.modal-body {

  position: fixed;

  z-index: 1000;

  width: 12rem;

  top: 10rem;

  height: 7.3rem;

  left: 50%;

  transform: translate(-50%, -50%);

  background-color: #fff;

  text-align: center;

  border-radius: 0.5rem;

  overflow: hidden;

}

.modal__bd {

  padding: 0 1.6em 0.8em;

  word-wrap: break-word;

  word-break: break-all;

  color: #999;

}

.modal__hd_text {

  padding: 1.3em 1.6em 0.5em;

}

.modal__bd_text {

  font-size: 0.3rem;

  line-height: 1rem;

}

.input_box input {

  height: 0.6rem;

  border: 1px solid #d9d9d9;

  border-radius: .1rem;

  padding: 0 0.3rem;

  width: 70%;

}

.modal__ft {

  position: fixed;

  left: 0;

  bottom: 0;

  line-height: 0.8rem;

  font-size: 0.35rem;

  width: 100%;

}

.modal__ft:after {

  content: " ";

  position: absolute;

  left: 0;

  top: 0;

  right: 0;

  height: 1px;

  border-top: 1px solid #ccc;

  color: #d5d5d6;

  transform-origin: 0 0;

  transform: scaleY(0.5);

}

.modal__btn {

    position: relative;

    /* display: block; */

    font-size: .3rem;

    color: #fff;

    width: 50%;

    height: 1.7rem;

    /* border-radius: 1rem; */

    /* margin: 0 auto; */

    line-height: 1.7rem;

}

.border_right{

      border-right: 1px solid #e5e5e5;

      box-sizing: border-box;

}

.modal__btn_primary,

.modal__btn_alert {

      background-color: #fff;

    /* color: #fa0; */

    font-size: .6rem;

    width: 50%;

}

.modal__btn_default {

  color: #ffaa00;

  font-size: 0.6rem;

  float: right;

}

.modal__btn_alert {

  width: 100%;

  height: 1rem;

}

.modal__btn:after {

  content: " ";

  width: 200%;

  height: 200%;

  position: absolute;

  top: 0;

  left: 0;

  -webkit-transform: scale(0.5);

  transform: scale(0.5);

  -webkit-transform-origin: 0 0;

  transform-origin: 0 0;

  box-sizing: border-box;

  border-radius: .2rem;

}

</style>
Vue自行封装常用组件-弹出框的更多相关文章
- Vue自行封装常用组件-文本提示
使用方法:1.在父组件中引入"toast.vue" //import toast from "./toast"; 2.在父组件中注册 toast //compo ...
- Vue自行封装常用组件-倒计时
倒计时组件,比较复杂一点,大神勿调侃,精确到毫秒,因为项目中多次出现倒计时,所以拿出来分享下 使用方法:1.在父组件中引入"uni-countdown" //import uniC ...
- 基于Vue.js PC桌面端弹出框组件|vue自定义弹层组件|vue模态框
vue.js构建的轻量级PC网页端交互式弹层组件VLayer. 前段时间有分享过一个vue移动端弹窗组件,今天给大家分享一个最近开发的vue pc端弹出层组件. VLayer 一款集Alert.Dia ...
- vue之element-ui设置全局弹出框
这样的需求,在主要功能完成后,需要进行交互效果的完善,需要给请求api的时候添加一个加载中的一个弹出框.但是每个页面每个页面过的话,会很费时间和精力,这里我们可以采用element-ui中的服务式弹出 ...
- vue在element-ui的dialog弹出框中加入百度地图
参考:https://blog.csdn.net/u012724595/article/details/82703579 <!-- gps弹窗 --> <el-dialog v-di ...
- JavaScript封装一个MyAlert弹出框
平时我们想要显示一些提示信息时会用到alert方法,alert是全局的一个方法,会短暂的中断程序,我们主要用来显示提示客户信息.但是这个方法有一定的局限性,而且本身样式也不够美观.于是我封装了一个实用 ...
- elementUI vue this.$confirm 和el-dialog 弹出框 移动
调试了好久, 还能凑合用, 请直接看DOME 示例,复制就能用: <!DOCTYPE html> <html lang="zh"> <head> ...
- 尝试用React写几个通用组件 - 带搜索功能的下拉列表,开关切换按钮,弹出框
尝试用React写几个通用组件 - 带搜索功能的下拉列表,开关切换按钮,弹出框 近期正在逐步摸索学习React的用法,尝试着写几个通用型的组件,整体项目还是根据webpack+react+css-me ...
- [ vue ] Quasar封装q-dialog组件,在外层实现弹出框的开启和关闭
场景描述: 见:https://www.cnblogs.com/remly/p/12981582.html 具体实现: <!-- 父组件 --> <template> < ...
随机推荐
- IPv4正则表达式
apache common-httpclient-4.5.2.jar package org.apache.http.conn.util; public class InetAddressUtils ...
- Python进阶学习之特殊方法实例详析
Python进阶学习之特殊方法实例详析 最近在学习python,学习到了一个之前没接触过的--特殊方法. 什么是特殊方法?当我们在设计一个类的时候,python中有一个用于初始化的方法$__init_ ...
- Python中sort和sorted函数代码解析
Python中sort和sorted函数代码解析 本文研究的主要是Python中sort和sorted函数的相关内容,具体如下. 一.sort函数 sort函数是序列的内部函数 函数原型: L.sor ...
- H3C 模拟器 防火墙开启Web功能
最近在搞运维的一些事情,由于缺少实体的机器来进行操作,先在模拟器里面进行 环境 windows 10,模拟器 HCL_V2.1.1 防火墙 1 在windows添加虚拟网卡 我的电脑--管理--设备管 ...
- 如何为根分区扩容(centos7为例)
linux系统所有的文件都是存放在根分区中的,如果根分区容量即将耗尽,我们就需要给根分区扩容,我们可以使用lsblk命令来查看,系统的根分区实际是逻辑卷,所以想要扩展根分区只要将逻辑卷扩容就可以了.此 ...
- ucloud相关
ucloud申请证书 https://docs.ucloud.cn/domain/ussl/operate/buy 云主机: https://docs.ucloud.cn/compute/uhost/ ...
- [转帖]PostgreSQL与MySQL比较 From 2010年
PostgreSQL与MySQL比较 [复制链接] http://bbs.chinaunix.net/thread-1688208-1-1.html osdba 稍有积蓄 好友 博客 消息 论坛徽章 ...
- 【转帖】Gitlab 从 12.1 版本开始将不再支持 MySQL !
Gitlab 从 12.1 版本开始将不再支持 MySQL ! Gitlab 官方宣布,将从 12.1 版本开始不再支持 MySQL 数据库. http://news.51cto.com/art/20 ...
- 小菜鸟之java JDBC编程
JDBC技术 百度简介 : JDBC(Java Data Base Connectivity,java数据库连接)是一种用于执行SQL语句的Java API,可以为多种关系数据库提供统一访问,它由一 ...
- Windows 系统安装 Docker
详细方法参见官方文档. Win10 家庭版 安装Toolbox Win10 家庭版由于功能限制,不能直接安装 Docker for Windows, 需要使用 Toolbox 的形式进行安装. 确认版 ...