搭建docker镜像仓库(二):使用harbor搭建本地镜像仓库
一.系统环境
| 服务器版本 | docker软件版本 | CPU架构 |
|---|---|---|
| CentOS Linux release 7.4.1708 (Core) | Docker version 20.10.12 | x86_64 |
二.前言
在使用Docker拉取镜像时,Docker首先默认从Docker Hub官方下载镜像,很多时候我们的镜像都是使用Dockerfile自定义私有镜像,不对外公开,而且为了安全起见,docker可能在内网环境下运行,所以我们有必要搭建一套docker本地私有镜像仓库,以供整个内网集群环境使用。
搭建镜像仓库主流的有两种方法,一种是使用docker官方提供的registry镜像搭建仓库,简单快捷,但是功能有限;另一种是使用harbor搭建本地镜像仓库,harbor功能更强,使用范围更广,这里介绍使用harbor搭建本地镜像仓库。
关于使用registry搭建本地镜像仓库请查看博客《搭建docker镜像仓库(一):使用registry搭建本地镜像仓库》https://www.cnblogs.com/renshengdezheli/p/16646969.html。
三.Harbor
Harbor是由VMware公司开源的企业级的Docker镜像仓库管理项目,它包括权限管理(RBAC)、LDAP、日志审核、管理界面、自我注册、镜像复制和中文支持等功能。Harbor官网地址:https://github.com/goharbor/harbor
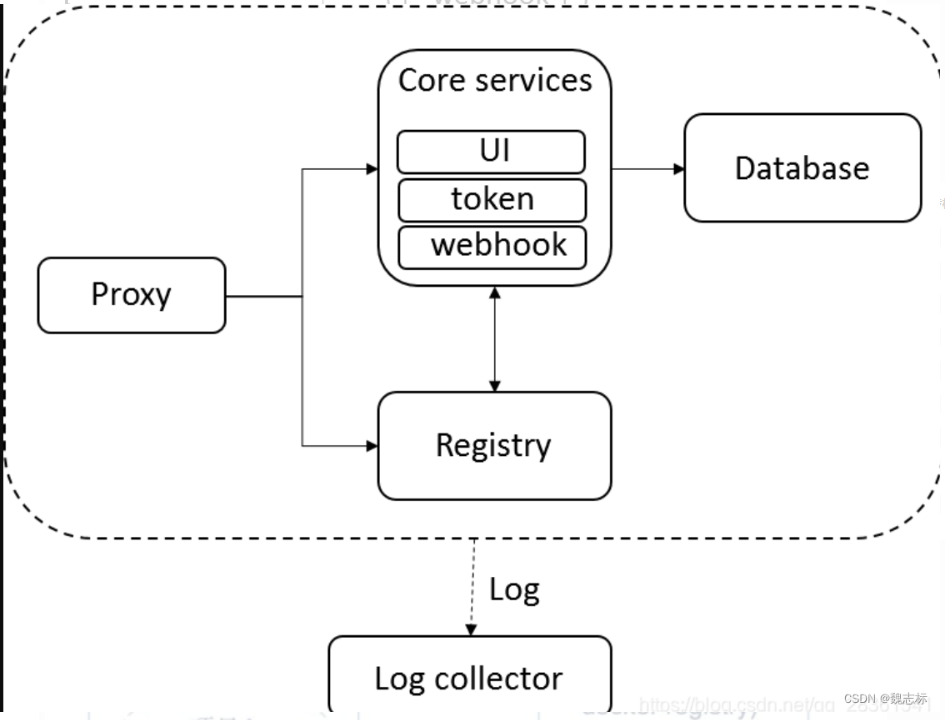
Harbor在架构上主要由6个组件构成:
Proxy:Harbor的registry, UI, token等服务,通过一个前置的反向代理统一接收浏览器、Docker客户端的请求,并将请求转发给后端不同的服务。
Registry: 负责储存Docker镜像,并处理docker push/pull 命令。由于我们要对用户进行访问控制,即不同用户对Docker image有不同的读写权限,Registry会指向一个token服务,强制用户的每次docker pull/push请求都要携带一个合法的token, Registry会通过公钥对token 进行解密验证。
Core services: 这是Harbor的核心功能,主要提供以下服务:
- UI:提供图形化界面,帮助用户管理registry上的镜像(image), 并对用户进行授权。
- webhook:为了及时获取registry 上image状态变化的情况, 在Registry上配置webhook,把状态变化传递给UI模块。
- token 服务:负责根据用户权限给每个docker push/pull命令签发token. Docker 客户端向Regiøstry服务发起的请求,如果不包含token,会被重定向到这里,获得token后再重新向Registry进行请求。
Database:为core services提供数据库服务,负责储存用户权限、审计日志、Docker image分组信息等数据。
Job Services:提供镜像远程复制功能,可以把本地镜像同步到其他Harbor实例中。
Log collector:为了帮助监控Harbor运行,负责收集其他组件的log,供日后进行分析。
各个组件之间的关系如下图所示:
四.使用harbor搭建私有镜像仓库
4.1 环境介绍
架构:k8smaster作为harbor镜像仓库,k8sworker1作为客户端
| 服务器 | 操作系统版本 | CPU架构 | 进程 | 功能描述 |
|---|---|---|---|---|
| k8smaster/192.168.110.137 | CentOS Linux release 7.4.1708 (Core) | x86_64 | harbor | harbor镜像仓库 |
| k8sworker1/192.168.110.138 | CentOS Linux release 7.4.1708 (Core) | x86_64 | docker | docker客户端 |
4.2 k8smaster节点安装配置harbor
4.2.1 安装harbor离线包
首先配置k8smaster节点,注释:harbor默认端口为80
由于harbor依赖于docker-compose,所以需要先安装docker-compose
[root@k8smaster ~]# yum -y install docker-compose

......

正在解决依赖关系

--> 正在检查事务

---> 软件包 docker-compose.noarch.0.1.18.0-4.el7 将被 安装

--> 正在处理依赖关系 python(abi) = 3.6,它被软件包 docker-compose-1.18.0-4.el7.noarch 需要

......

已安装:

  docker-compose.noarch 0:1.18.0-4.el7

......

完毕!
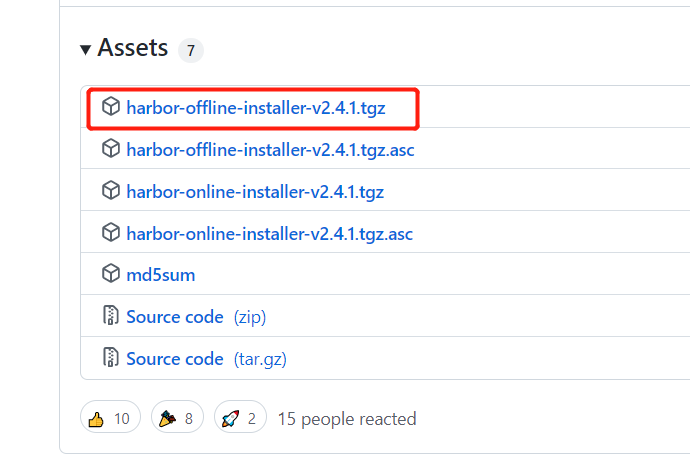
harbor下载:去网上https://github.com/goharbor/harbor/releases/tag/v2.4.1下载harbor离线包:harbor-offline-installer-v2.4.1.tgz
解压harbor离线包
[root@k8smaster ~]# ll -t

总用量 1137380

-rw-r--r--  1 root root 612698835 1月   5 11:39 harbor-offline-installer-v2.4.1.tgz

[root@k8smaster ~]# tar xf harbor-offline-installer-v2.4.1.tgz

[root@k8smaster ~]# cd harbor

#harbor.v2.4.1.tar.gz这个压缩包里包含harbor所需的镜像

#harbor.yml.tmpl是harbor配置文件范例

[root@k8smaster harbor]# ls

common.sh  harbor.v2.4.1.tar.gz  harbor.yml.tmpl  install.sh  LICENSE  prepare
harbor.v2.4.1.tar.gz这个压缩包里包含harbor所需的镜像,加载镜像harbor.v2.4.1.tar.gz
[root@k8smaster harbor]# docker load -i harbor.v2.4.1.tar.gz

1e3f0dc884e2: Loading layer [==================================================>]  39.45MB/39.45MB

3fd9ccd5eeaa: Loading layer [==================================================>]  5.275MB/5.275MB

......

Loaded image: goharbor/prepare:v2.4.1

eb57d0945b2e: Loading layer [==================================================>]  7.192MB/7.192MB

dd9069fd53a8: Loading layer [==================================================>]  7.355MB/7.355MB

e779dab1d180: Loading layer [==================================================>]  1.754MB/1.754MB

Loaded image: goharbor/harbor-portal:v2.4.1
harbor.yml.tmpl是harbor配置文件范例,复制一份配置文件
[root@k8smaster harbor]#  ls

common.sh  harbor.v2.4.1.tar.gz  harbor.yml.tmpl  install.sh  LICENSE  prepare

[root@k8smaster harbor]# cp harbor.yml.tmpl harbor.yml
修改配置文件harbor.yml
[root@k8smaster harbor]# vim harbor.yml
harbor配置文件harbor.yml修改内容如下:
#hostname修改为私有仓库所在的主机名
hostname: k8smaster
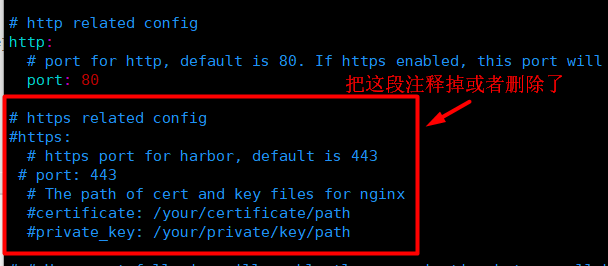
#https的配置直接删除或者注释掉
# https related config
#https:
# # https port for harbor, default is 443
# port: 443#
# The path of cert and key files for nginx
# certificate: /your/certificate/path
# private_key: /your/private/key/path
harbor的账号密码
#harbor的账号密码:

harbor_admin_password: Harbor12345
安装harbor
[root@k8smaster harbor]# ./prepare

prepare base dir is set to /root/harbor

WARNING:root:WARNING: HTTP protocol is insecure. Harbor will deprecate http protocol in the future. Please make sure to upgrade to https

Generated configuration file: /config/portal/nginx.conf

Generated configuration file: /config/log/logrotate.conf

Generated configuration file: /config/log/rsyslog_docker.conf

Generated configuration file: /config/nginx/nginx.conf

Generated configuration file: /config/core/env

Generated configuration file: /config/core/app.conf

Generated configuration file: /config/registry/config.yml

Generated configuration file: /config/registryctl/env

Generated configuration file: /config/registryctl/config.yml

Generated configuration file: /config/db/env

Generated configuration file: /config/jobservice/env

Generated configuration file: /config/jobservice/config.yml

Generated and saved secret to file: /data/secret/keys/secretkey

Successfully called func: create_root_cert

Generated configuration file: /compose_location/docker-compose.yml

Clean up the input dir

#安装

[root@k8smaster harbor]# ./install.sh

[Step 0]: checking if docker is installed ...

Note: docker version: 20.10.7

[Step 1]: checking docker-compose is installed ...

Note: docker-compose version: 1.18.0

[Step 2]: loading Harbor images ...

Loaded image: goharbor/registry-photon:v2.4.1

Loaded image: goharbor/notary-signer-photon:v2.4.1

......

Loaded image: goharbor/chartmuseum-photon:v2.4.1

Loaded image: goharbor/prepare:v2.4.1

Loaded image: goharbor/harbor-portal:v2.4.1

[Step 3]: preparing environment ...

[Step 4]: preparing harbor configs ...

prepare base dir is set to /root/harbor

WARNING:root:WARNING: HTTP protocol is insecure. Harbor will deprecate http protocol in the future. Please make sure to upgrade to https

Clearing the configuration file: /config/portal/nginx.conf

Clearing the configuration file: /config/log/logrotate.conf

Clearing the configuration file: /config/log/rsyslog_docker.conf

......

Creating harbor-jobservice ...

Creating nginx ...

 ----Harbor has been installed and started successfully.----
4.2.2 配置harbor用户信息,项目信息
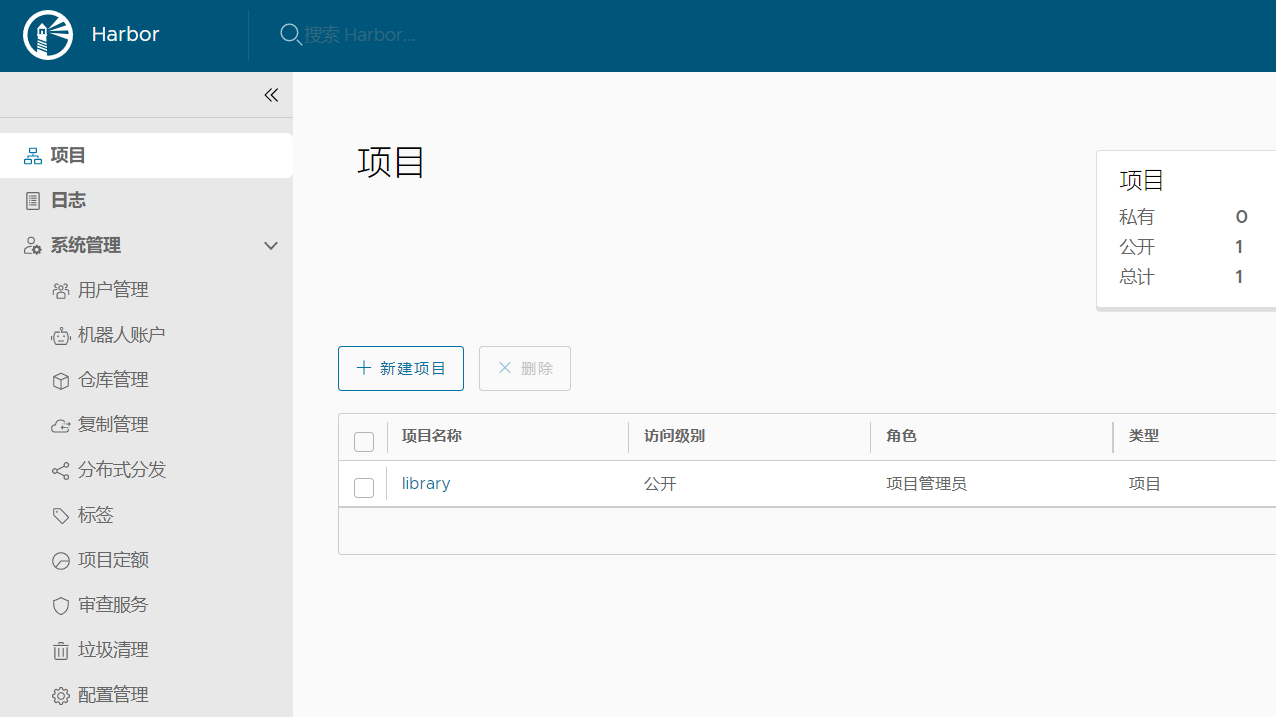
Harbor安装好之后在浏览器界面登录,直接在浏览器输入所在主机IP地址:http://192.168.110.137/,打开主页输入账号admin,密码:Harbor12345进行登录
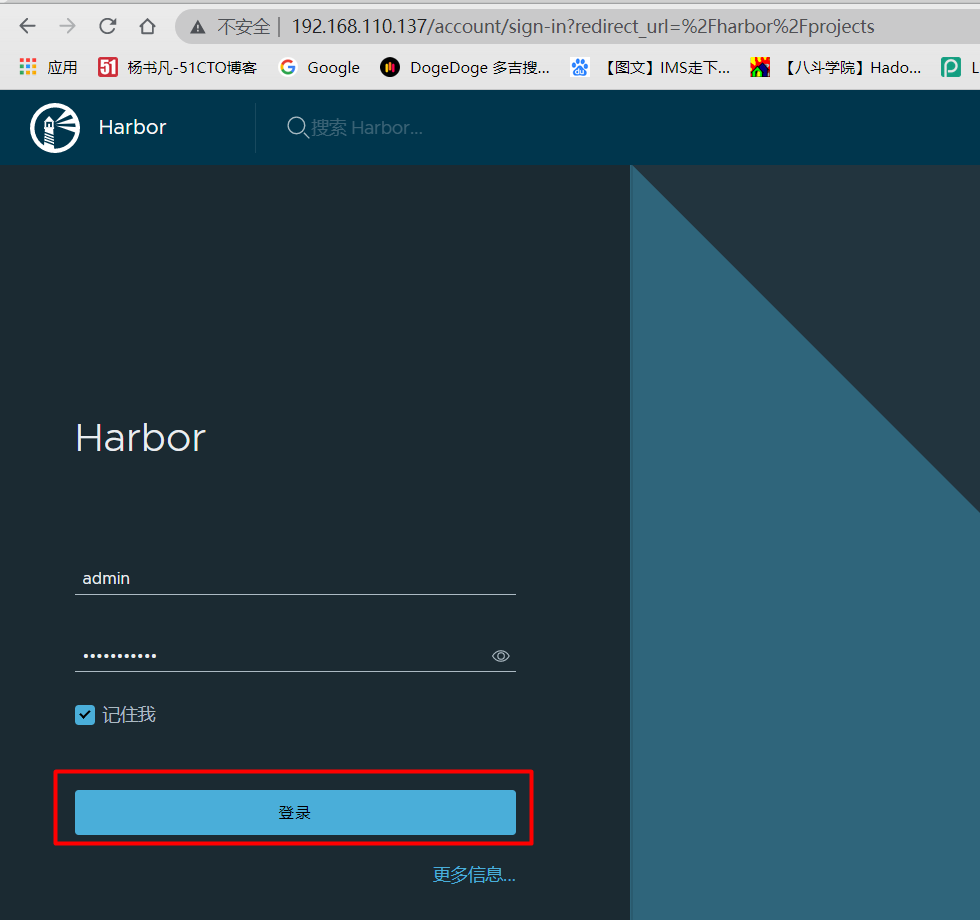
harbor登录之后,主界面如下:
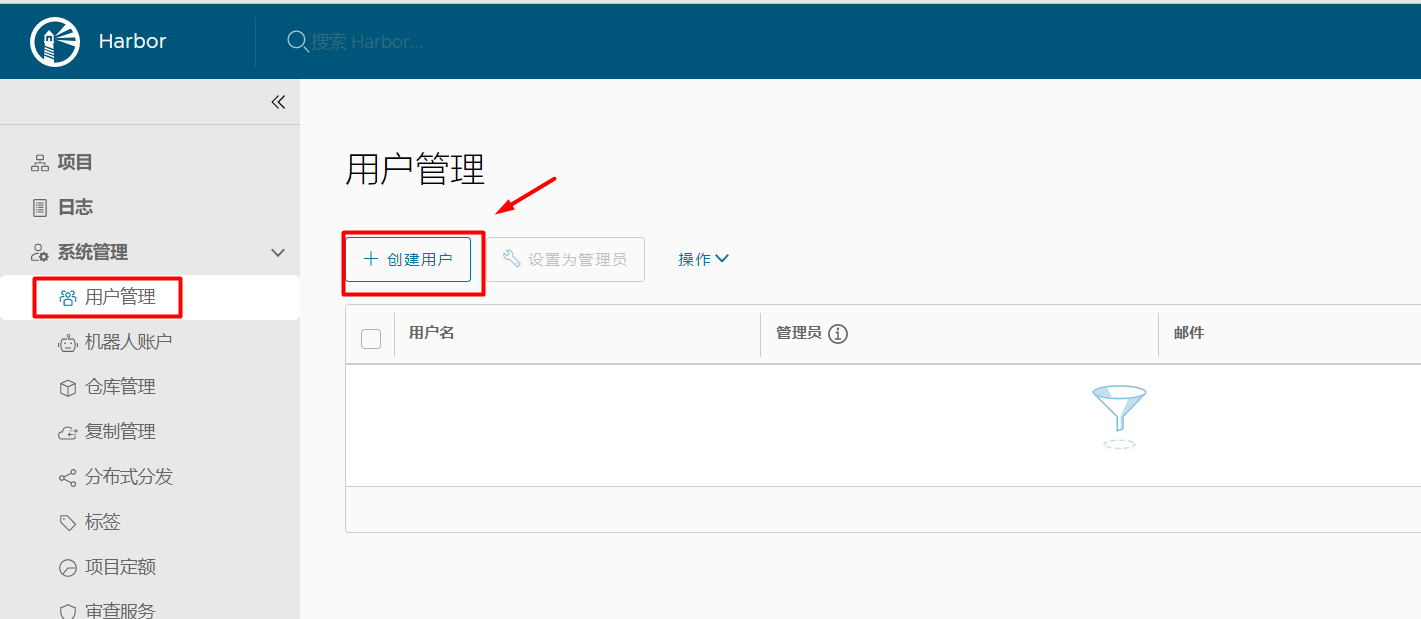
创建用户:点击用户管理-->创建用户
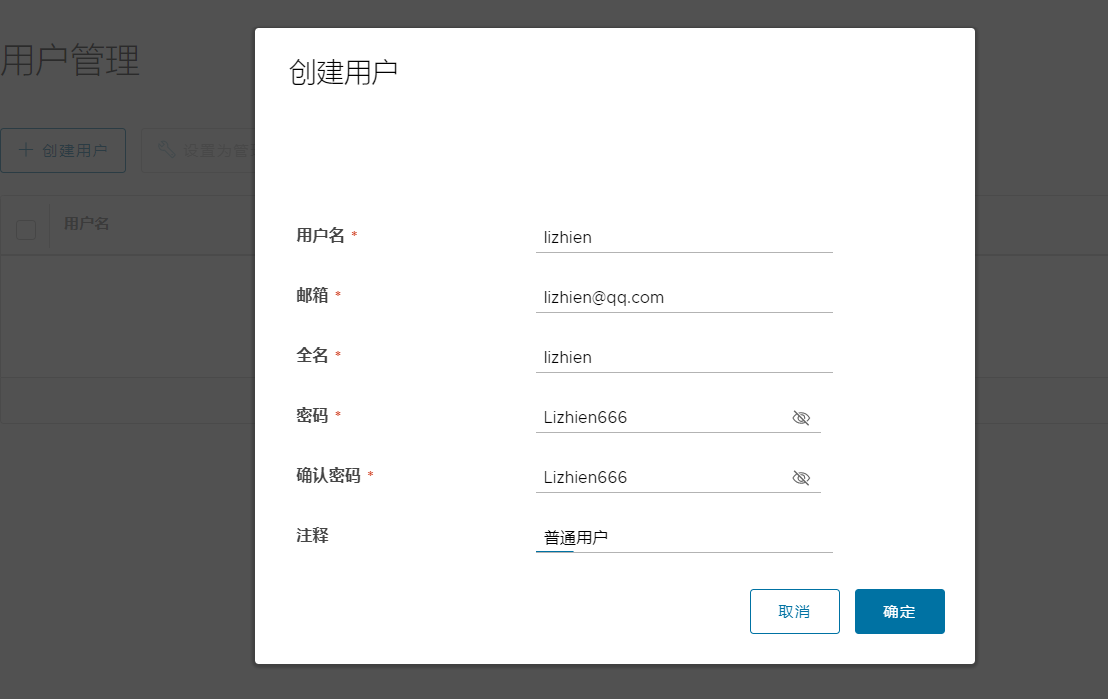
填写用户信息
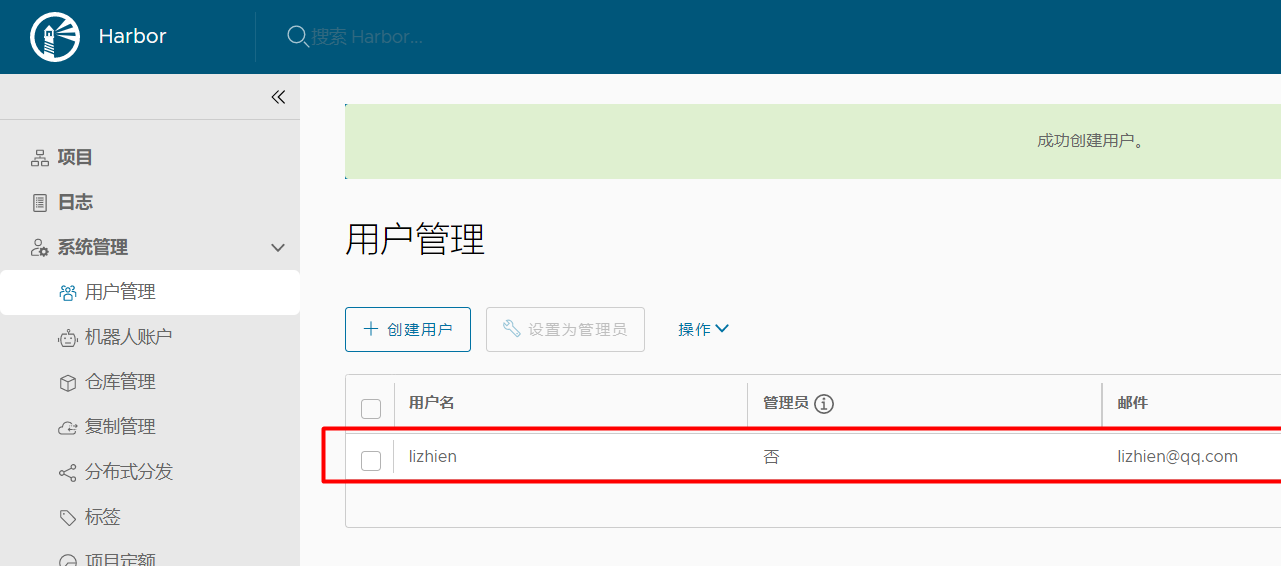
用户创建成功
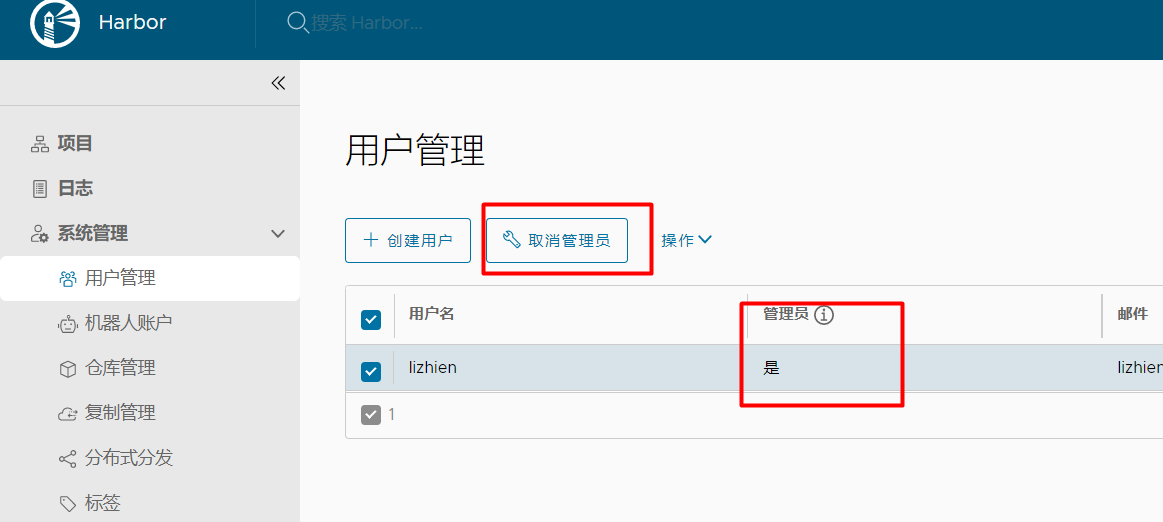
设置用户为管理员
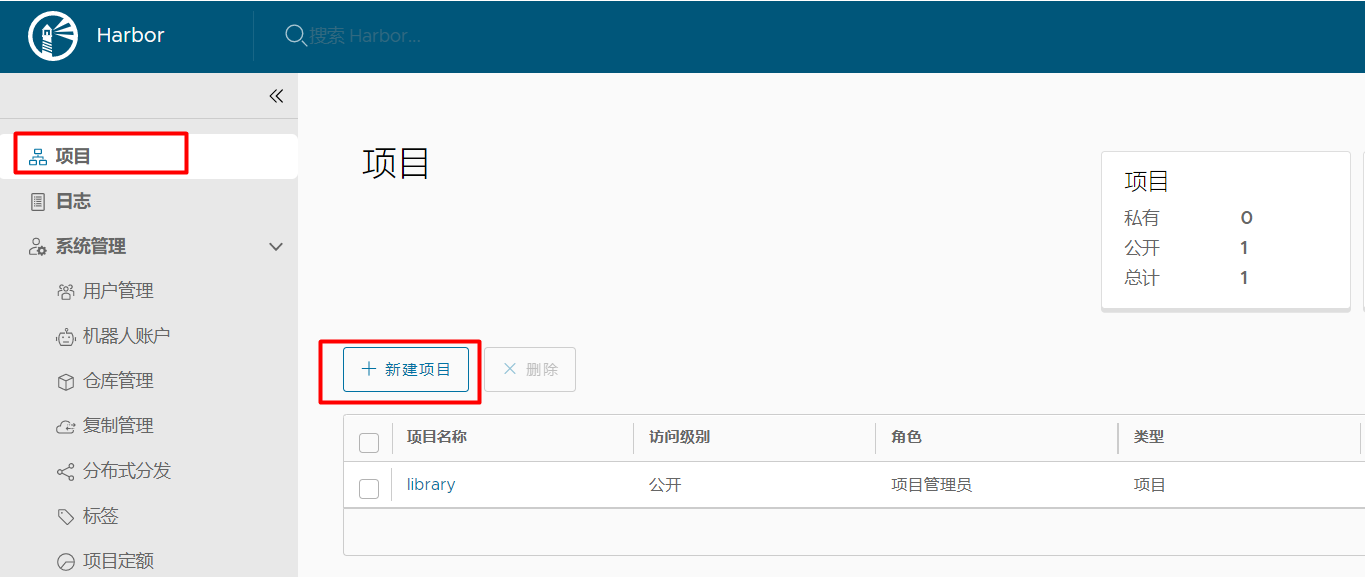
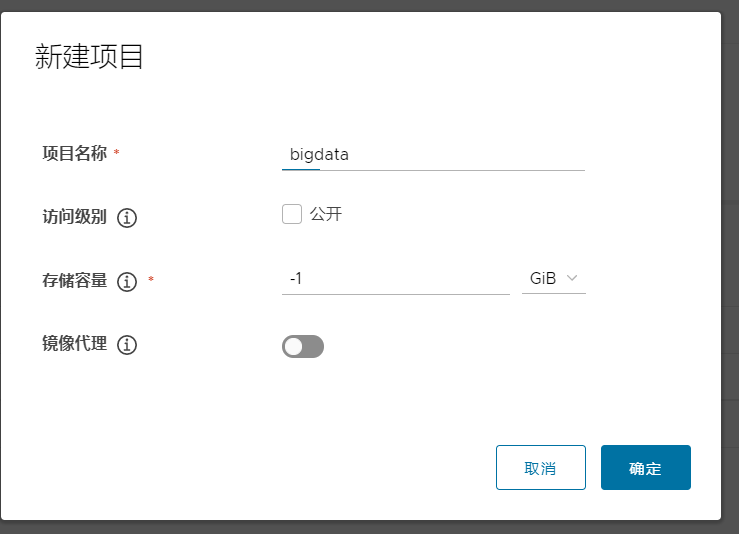
新建项目
填写项目信息:访问级别不勾选公开则是私有,存储容量-1表示没有容量限制
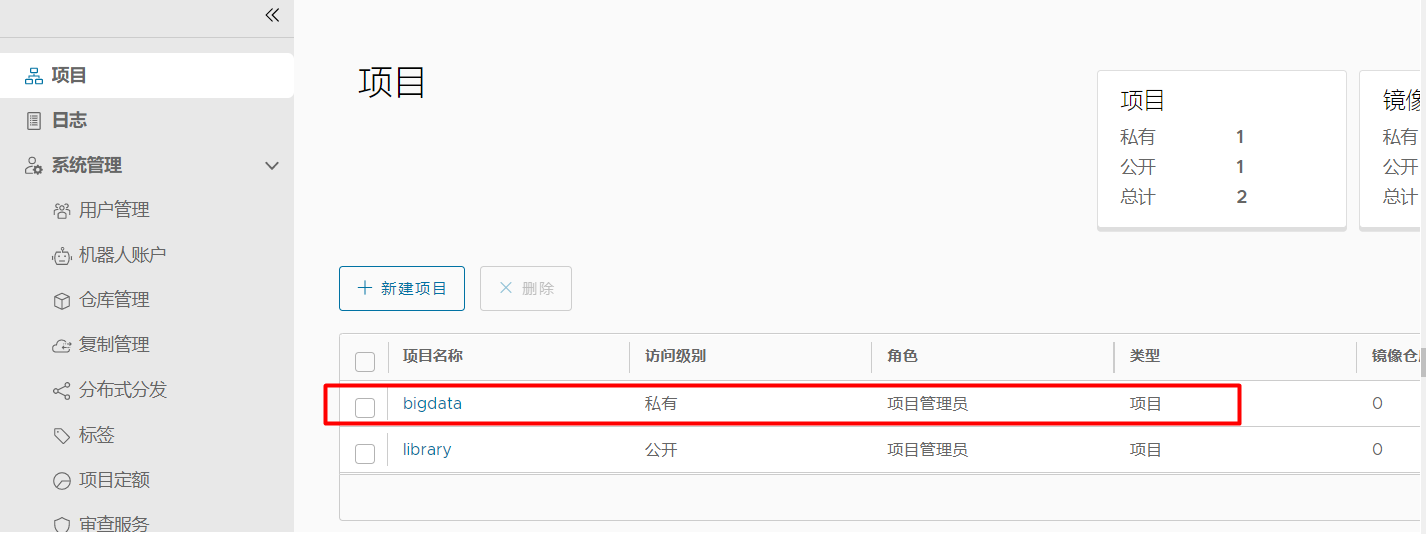
bigdata项目创建成功,点击bigdata进入项目
因为bigdata这个项目是私有的,需要把lizhien用户添加进来,不然lizhien没有权限拉取/推送镜像
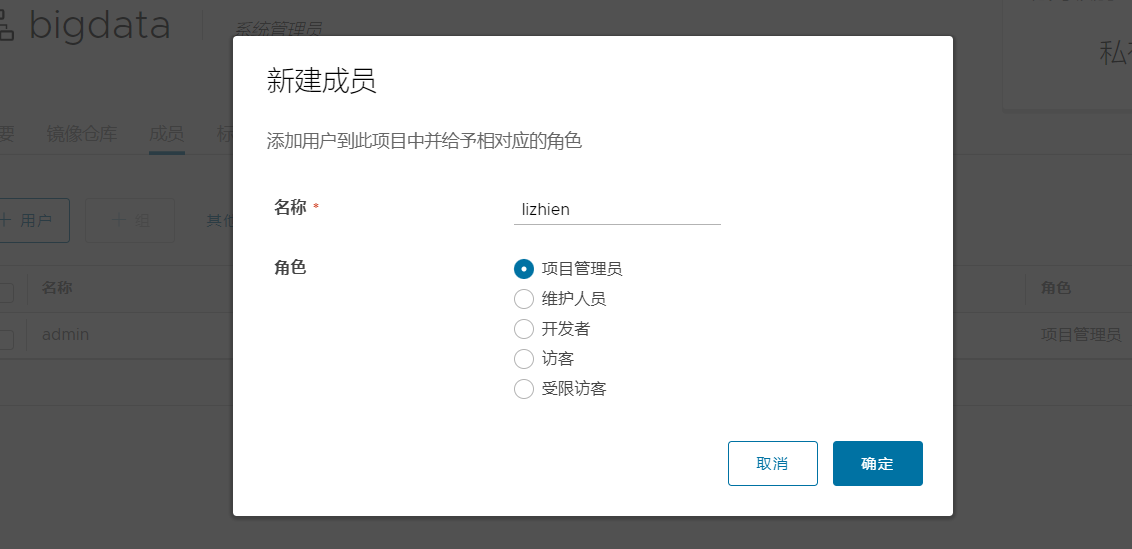
把lizhien这个用户添加到bigdata项目里:点击成员-->+用户
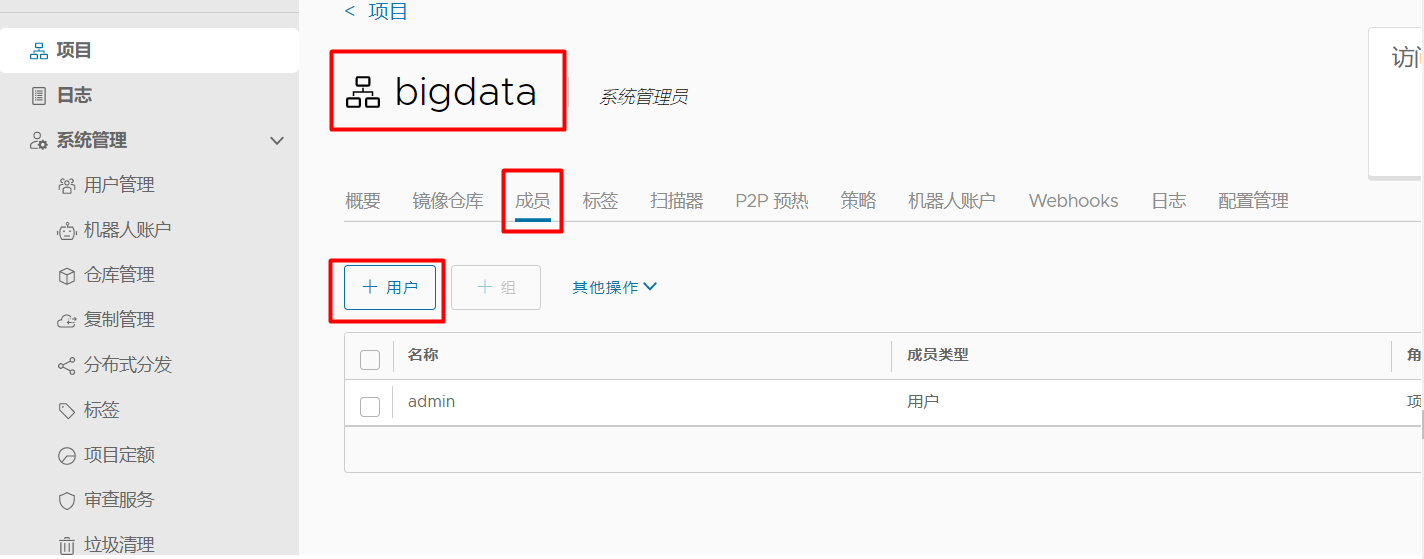
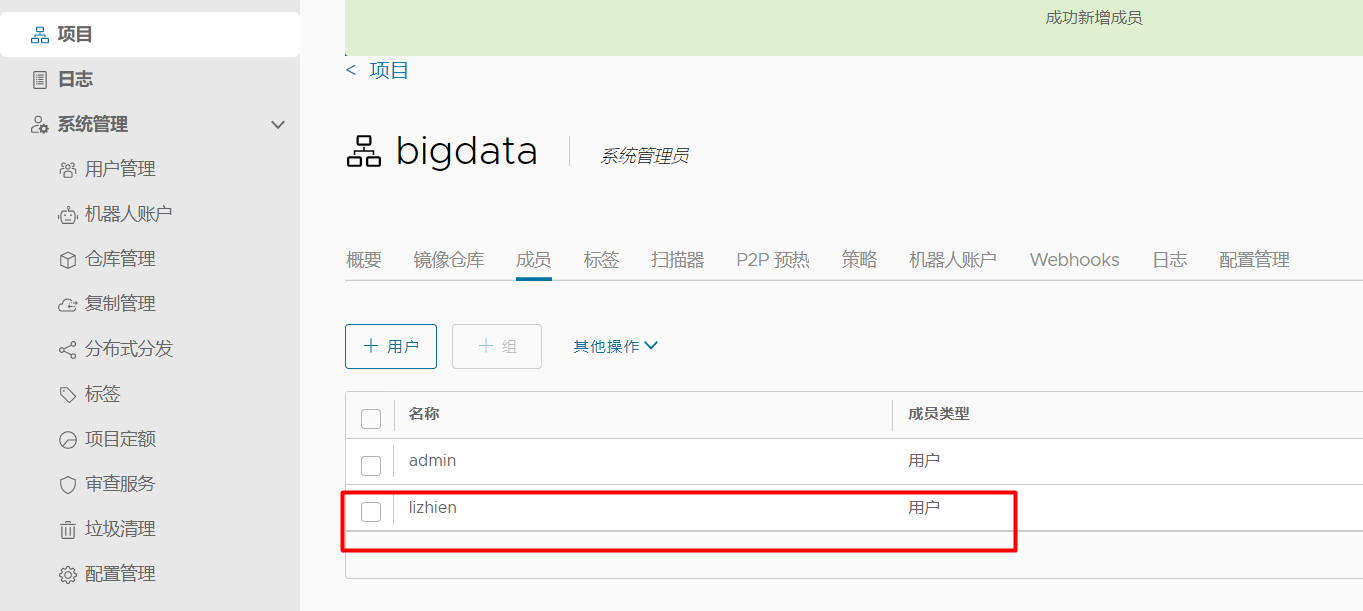
把lizhien添加进来
这时,用户lizhien就具有bigdata项目的权限了
4.3 k8sworker1节点配置从harbor私有仓库上传和拉取镜像
4.3.1 上传镜像到harbor私有仓库
配置docker客户端的harbor私有仓库地址
#由于harbor默认端口为80,所以修改/etc/docker/daemon.json的insecure-registries

[root@k8sworker1 ~]# cat /etc/docker/daemon.json

{

"registry-mirrors": ["https://frz7i079.mirror.aliyuncs.com"],

"insecure-registries":["192.168.110.137"]

}
重启docker使配置文件生效
[root@k8sworker1 ~]# systemctl restart docker

[root@k8sworker1 ~]# systemctl status docker

● docker.service - Docker Application Container Engine

   Loaded: loaded (/usr/lib/systemd/system/docker.service; enabled; vendor preset: disabled)

   Active: active (running) since 三 2022-01-05 11:28:02 CST; 8s ago

     Docs: https://docs.docker.com

 Main PID: 28037 (dockerd)

   Memory: 48.9M

   CGroup: /system.slice/docker.service

           └─28037 /usr/bin/dockerd -H fd:// --containerd=/run/containerd/containerd.sock
查看docker本地镜像,如果本地没有镜像,直接docker pull 拉取镜像即可
[root@k8sworker1 ~]# docker images

REPOSITORY                                                TAG       IMAGE ID       CREATED         SIZE

192.168.110.137:5000/boke/wordpress                       latest    dccaeccfba36   4 years ago     406MB

192.168.110.137:5000/web/tomcat                           v1        72d2be374029   4 years ago     292MB

nginx                                                     1.8       0d493297b409   5 years ago     133MB
修改镜像的别名
[root@k8sworker1 ~]# docker tag 192.168.110.137:5000/boke/wordpress:latest k8smaster/bigdata/wordpress:latest

[root@k8sworker1 ~]# docker tag 192.168.110.137:5000/web/tomcat:v1  k8smaster/bigdata/tomcat:v1

[root@k8sworker1 ~]# docker images

REPOSITORY                                                TAG       IMAGE ID       CREATED         SIZE

192.168.110.137:5000/boke/wordpress                       latest    dccaeccfba36   4 years ago     406MB

k8smaster/bigdata/wordpress                               latest    dccaeccfba36   4 years ago     406MB

192.168.110.137:5000/web/tomcat                           v1        72d2be374029   4 years ago     292MB

k8smaster/bigdata/tomcat                                  v1        72d2be374029   4 years ago     292MB

nginx                                                     1.8       0d493297b409   5 years ago     133MB
推送镜像到harbor仓库,发现推送到了docker.io/k8smaster/bigdata/wordpress,明显是不对的,推送失败
[root@k8sworker1 ~]# docker push k8smaster/bigdata/wordpress:latest

The push refers to repository [docker.io/k8smaster/bigdata/wordpress]

53e16fa1f104: Preparing

562dd11ed871: Preparing

6671cb9eb6b3: Preparing

4214911d5945: Preparing

fed26d7fe7b9: Preparing

c8c6d352c96e: Waiting

5a151fa4136e: Waiting

8747705a74d9: Waiting

adfd7c98cdf6: Waiting

354b4ef9664b: Waiting

2da371244fc1: Waiting

315db89f9acb: Waiting

3d2582fdede2: Waiting

53da01089a82: Waiting

0fd7a67d49b3: Waiting

f0c367fa8636: Waiting

ddd6dcab19ff: Waiting

2c40c66f7667: Waiting

^C
重新修改tag,把主机名修改为IP
[root@k8sworker1 ~]# docker tag 192.168.110.137:5000/boke/wordpress:latest 192.168.110.137/bigdata/wordpress:latest

[root@k8sworker1 ~]# docker tag 192.168.110.137:5000/web/tomcat:v1 192.168.110.137/bigdata/tomcat:v1

[root@k8sworker1 ~]# docker images

REPOSITORY                                                TAG       IMAGE ID       CREATED         SIZE

192.168.110.137/bigdata/wordpress                         latest    dccaeccfba36   4 years ago     406MB

192.168.110.137:5000/boke/wordpress                       latest    dccaeccfba36   4 years ago     406MB

k8smaster/bigdata/wordpress                               latest    dccaeccfba36   4 years ago     406MB

192.168.110.137/bigdata/tomcat                            v1        72d2be374029   4 years ago     292MB

192.168.110.137:5000/web/tomcat                           v1        72d2be374029   4 years ago     292MB

k8smaster/bigdata/tomcat                                  v1        72d2be374029   4 years ago     292MB

nginx                                                     1.8       0d493297b409   5 years ago     133MB
继续推送镜像,但是unauthorized,需要登录才能推送镜像
[root@k8sworker1 ~]# docker push 192.168.110.137/bigdata/wordpress:latest

The push refers to repository [192.168.110.137/bigdata/wordpress]

53e16fa1f104: Preparing

562dd11ed871: Preparing

6671cb9eb6b3: Preparing

4214911d5945: Preparing

fed26d7fe7b9: Waiting

c8c6d352c96e: Waiting

5a151fa4136e: Waiting

8747705a74d9: Waiting

adfd7c98cdf6: Waiting

354b4ef9664b: Waiting

2da371244fc1: Waiting

315db89f9acb: Waiting

3d2582fdede2: Waiting

53da01089a82: Waiting

0fd7a67d49b3: Waiting

f0c367fa8636: Waiting

ddd6dcab19ff: Waiting

2c40c66f7667: Waiting

unauthorized: unauthorized to access repository: bigdata/wordpress, action: push: unauthorized to access repository: bigdata/wordpress, action: push
登录harbor
#使用主机名登录失败

[root@k8sworker1 ~]# docker login k8smaster

Username: lizhien

Password:

Error response from daemon: Get https://k8smaster/v2/: dial tcp 192.168.110.137:443: connect: connection refused

#使用IP登录成功,使用刚才创建的lizhien用户登录

[root@k8sworker1 ~]# docker login 192.168.110.137

Username: lizhien

Password:

WARNING! Your password will be stored unencrypted in /root/.docker/config.json.

Configure a credential helper to remove this warning. See

https://docs.docker.com/engine/reference/commandline/login/#credentials-store

Login Succeeded

#此时家目录下会多了一个.docker/config.json 文件

[root@k8sworker1 ~]# ls .docker/

config.json

[root@k8sworker1 ~]# cat .docker/config.json

{

        "auths": {

                "192.168.110.137": {

                        "auth": "bGl6aGllbjpMaXpoaWVuNjY2"

                }

        }

}
再次推送镜像,此时推送镜像成功
[root@k8sworker1 ~]# docker push 192.168.110.137/bigdata/wordpress:latest

The push refers to repository [192.168.110.137/bigdata/wordpress]

53e16fa1f104: Pushed

562dd11ed871: Pushed

......

f0c367fa8636: Pushed

ddd6dcab19ff: Pushed

2c40c66f7667: Pushed

latest: digest: sha256:ca4cf4692b7bebd81f229942c996b1c4e6907d6733e977e93d671a54b8053a22 size: 4078

[root@k8sworker1 ~]# docker push 192.168.110.137/bigdata/tomcat:v1

The push refers to repository [192.168.110.137/bigdata/tomcat]

f79699072473: Pushed

8cb01d738d7e: Pushed

......

fe40be59465f: Pushed

cf4ecb492384: Pushed

v1: digest: sha256:6241d7435b5c4e9d54be7d61e834836a71b1934b5403e01eff8768f0e2bcf210 size: 3045
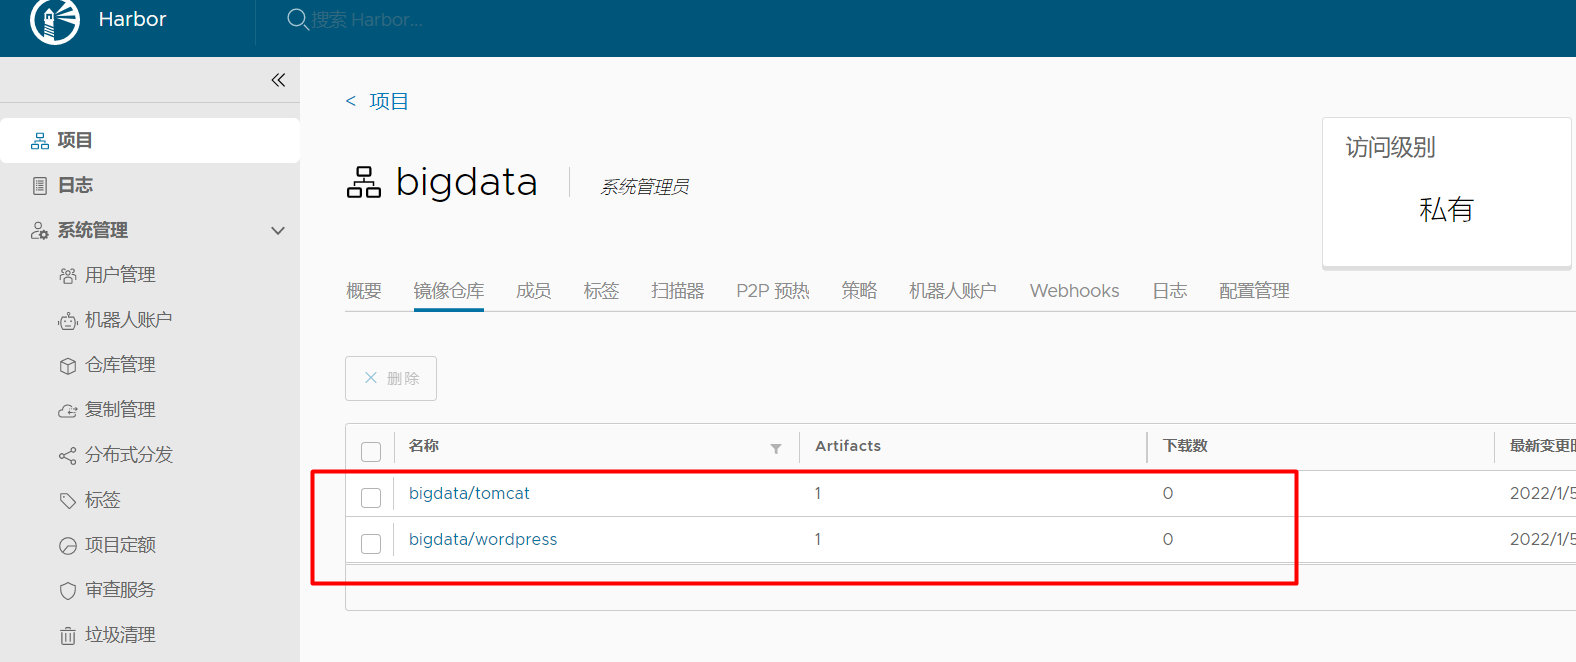
到harbor界面上查看,发现bigdata项目下已经存在镜像了
4.3.2 从harbor私有仓库里拉取镜像
首先删除本地镜像
[root@k8sworker1 ~]# docker rmi 192.168.110.137:5000/web/tomcat:v1 192.168.110.137:5000/boke/wordpress:latest 192.168.110.137/bigdata/wordpress:latest

[root@k8sworker1 ~]# docker images

REPOSITORY                                                TAG       IMAGE ID       CREATED         SIZE
从仓库拉取镜像,如果之前退出登录harbor了,则需要docker login 192.168.110.137登录仓库
[root@k8sworker1 ~]# docker pull 192.168.110.137/bigdata/tomcat:v1

v1: Pulling from bigdata/tomcat

a2149b3f2ac2: Pull complete

.....

321b0457f24e: Pull complete

0f83e948f35a: Pull complete

8dbb09972def: Pull complete

Digest: sha256:6241d7435b5c4e9d54be7d61e834836a71b1934b5403e01eff8768f0e2bcf210

Status: Downloaded newer image for 192.168.110.137/bigdata/tomcat:v1

192.168.110.137/bigdata/tomcat:v1

[root@k8sworker1 ~]# docker images

REPOSITORY                                                TAG       IMAGE ID       CREATED         SIZE

192.168.110.137/bigdata/wordpress                         latest    dccaeccfba36   4 years ago     406MB

192.168.110.137/bigdata/tomcat                            v1        72d2be374029   4 years ago     292MB
自此harbor仓库搭建完毕也可以正常上传和拉取镜像了
搭建docker镜像仓库(二):使用harbor搭建本地镜像仓库的更多相关文章
- 微服务架构 - 基于Harbor构建本地镜像仓库
之前写过<搭建docker本地镜像仓库并提供权限校验及UI界面>文章,然后有同仁评论道这样做太复杂了,如果Harbor来搭建会更简单同时功能也更强大.于是抽时间研究了基于Harbor构建本 ...
- Kubernetes集群搭建之企业级环境中基于Harbor搭建自己的私有仓库
搭建背景 企业环境中使用Docker环境,一般出于安全考虑,业务使用的镜像一般不会从第三方公共仓库下载.那么就要引出今天的主题 企业级环境中基于Harbor搭建自己的安全认证仓库 介绍 名称:Harb ...
- 【K8S】基于Docker+K8S+GitLab/SVN+Jenkins+Harbor搭建持续集成交付环境(环境搭建篇)
写在前面 最近在 K8S 1.18.2 版本的集群上搭建DevOps环境,期间遇到了各种坑.目前,搭建环境的过程中出现的各种坑均已被填平,特此记录,并分享给大家! 服务器规划 IP 主机名 节点 操作 ...
- Docker安装常见的应用与将本地镜像推送到阿里云
一.Docker安装常用的应用 1,docker安装mysql #拉取镜像mysql5.7 docker pull mysql:5.7 #启动容器(绑定对应的配置文件和日志,默认密码为123456) ...
- CentOS中用Nexus搭建maven私服,为Hadoop编译提供本地镜像
系统: CentOS release 6.6 (Final) Nexus:nexus-2.8.1-bundle.tar.gz,下载地址:https://sonatype-download.global ...
- 搭建docker镜像仓库(一):使用registry搭建本地镜像仓库
目录 一.系统环境 二.前言 三.使用registry搭建私有镜像仓库 3.1 环境介绍 3.2 k8smaster节点配置镜像仓库 3.3 k8sworker1节点配置从私有仓库上传和拉取镜像 3. ...
- Docker应用四:搭建docker镜像仓库(包括自生成https证书、登陆认证)
利用docker官网提供的registry镜像创建私有仓库 一.首先从docker官网拉取registry镜像: docker pull registry 二.然后运行该镜像: docker run ...
- 微服务架构 - 搭建docker本地镜像仓库并提供权限校验及UI界面
搭建docker本地镜像仓库并提供权限校验及UI界面 docker本地镜像仓库的作用跟maven私服差不多,特别是公司级或者是小组级开发好的docker仓库可以上传到本地镜像仓库中,需要用时,直接从本 ...
- Harbor搭建企业级docker仓库
一. Harbor简介 1.1 Harbor介绍 Harbor是一个用于存储和分发Docker镜像的企业级Registry服务器,通过添加一些企业必需的功能特性,例如安全.标识和管理等,扩展了开源Do ...
随机推荐
- 从位图到布隆过滤器,C#实现
前言 本文将以 C# 语言来实现一个简单的布隆过滤器,为简化说明,设计得很简单,仅供学习使用. 感谢@时总百忙之中的指导. 布隆过滤器简介 布隆过滤器(Bloom filter)是一种特殊的 Hash ...
- exe4j下载和使用
https://blog.csdn.net/weixin_44678104/article/details/101015065
- Docker容器搭建android编译环境
Docker容器搭建android编译环境 目录 1 部署容器 1.1 手动部署 1.1.1 配置docker 1.1.2 启动容器 1.1.3 配置环境 1.2 Dockerfile 2 镜像管理 ...
- 步态识别《GaitSet: Regarding Gait as a Set for Cross-View Gait Recognition》2018 CVPR
Motivation: 步态可被当作一种可用于识别的生物特征在刑侦或者安全场景发挥重要作用.但是现有的方法要么是使用步态模板(能量图与能量熵图等)导致时序信息丢失,要么是要求步态序列连续,导致灵活性差 ...
- Tapdata 与星环 KunDB 完成产品兼容互认证
近日, Tapdata 实时数据即服务平台(Tapdata Real Time DaaS)与星环 KunDB 完成产品兼容互认证.经深圳钛铂数据有限公司和星环信息科技(上海)股份有限公司共同严格测 ...
- labview从入门到出家7(进阶篇)--队列的使用
本节简单讲解队列在Labview中的使用,队列你可以认为就是一组先进先出的数据列表,在Labview中常用来缓存和传递数据.用了这么久的队列,个人认为有个方便的地方在于数据传递的把控,不管是局部变量还 ...
- MISC 2022/4/21 刷题记录-千字文
1.千字文 得到名为png的无类型文件,010 Editor查看,png,改后缀,得到二维码 QR扫描,得到一句话"这里只有二维码" 思路不对,binwalk一下,发现有错误信息 ...
- 2022-07-12 第六组 润土 JavaScript02学习笔记
1.循环语句 for循环: for(let i=0;i<10;i++){循环体} while循环: while(i<10){循环体}: do... while...循环: do{循环体}w ...
- 总结几个简单好用的Python人脸识别算法
原文连接:https://mp.weixin.qq.com/s/3BgDld9hILPLCIlyysZs6Q 哈喽,大家好. 今天给大家总结几个简单.好用的人脸识别算法. 人脸识别是计算机视觉中比较常 ...
- .NET 使用自带 DI 批量注入服务(Service)和 后台服务(BackgroundService)
今天教大家如何在asp .net core 和 .net 控制台程序中 批量注入服务和 BackgroundService 后台服务 在默认的 .net 项目中如果我们注入一个服务或者后台服务,常规的 ...